
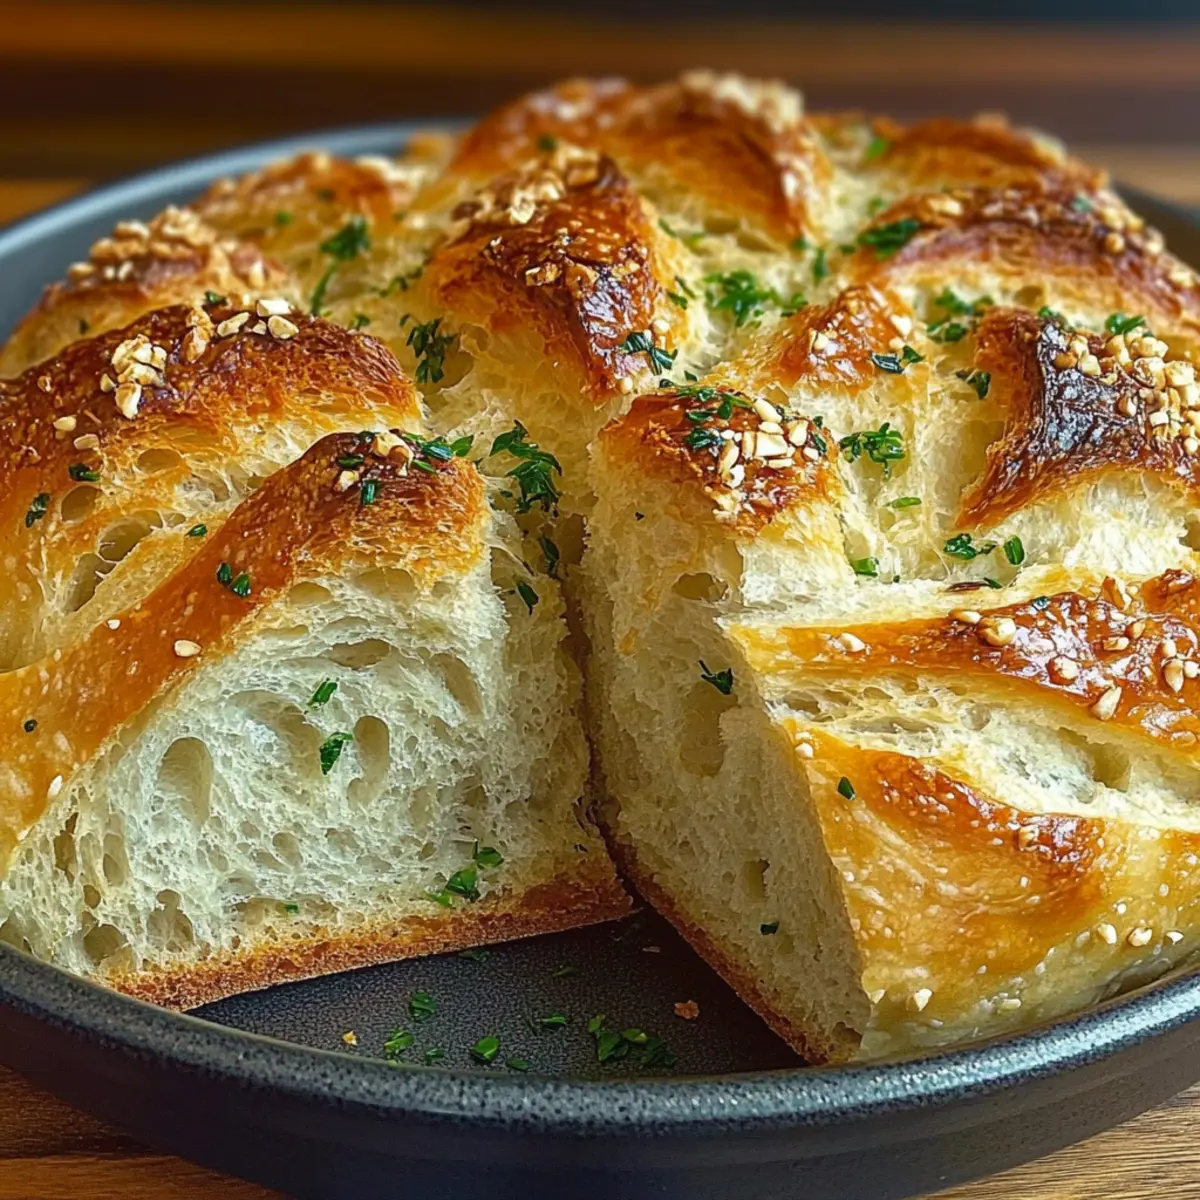
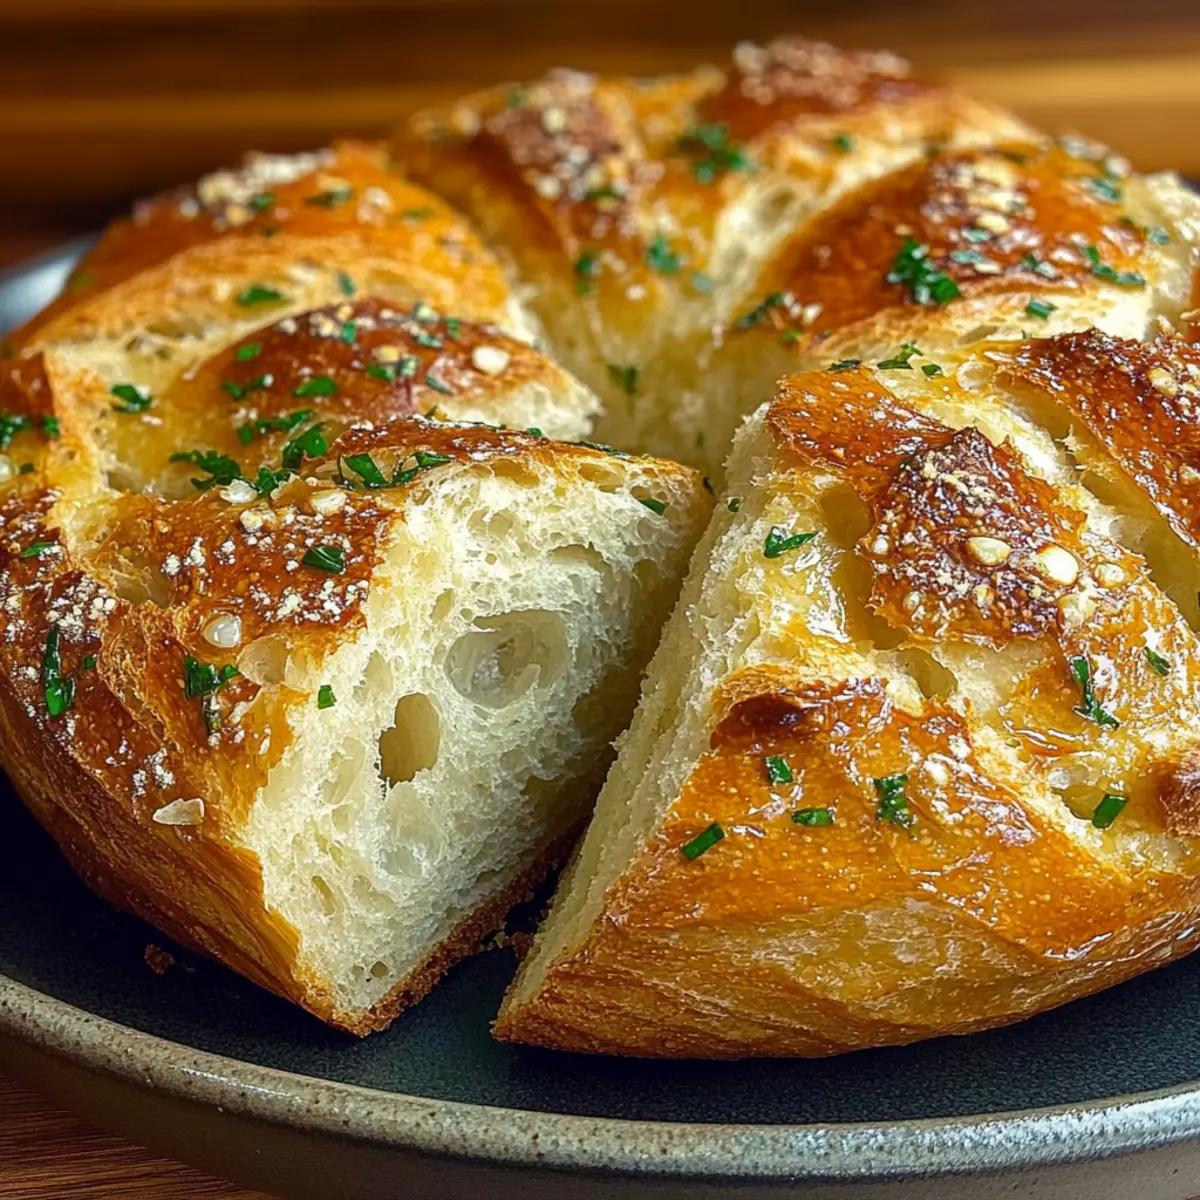
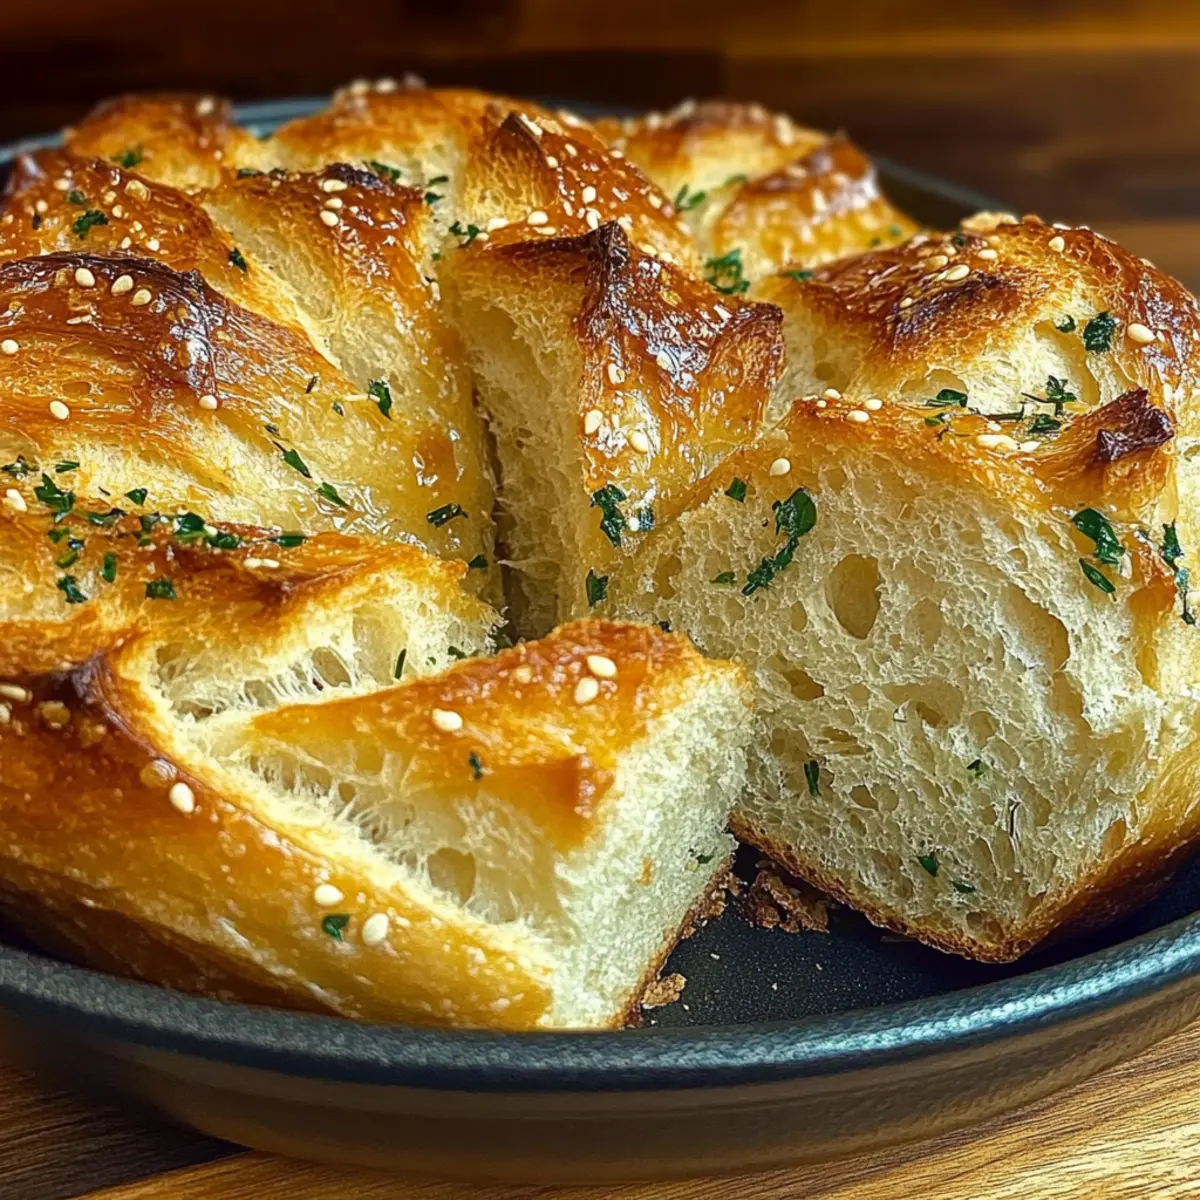
There's something magical about the wafting aroma of fresh herbs and garlic filling your kitchen, isn't there? It instantly transforms any day into a little celebration. Today, I’m thrilled to share my recipe for Garlic Herb Dutch Oven Bread, a simple yet rewarding bake that not only nourishes the body but also feeds your soul. This bread is incredibly forgiving—perfect for both seasoned bakers and those just starting their culinary journey. With just a handful of ingredients and a minimal time commitment, you’ll create a crusty, warm loaf that’s ideal for any meal or solitary snack. Plus, the slow fermentation process means it develops delightful flavor while you go about your day. Who can resist the comforting pull of homemade bread? Grab your apron and let’s make something special together! What will you pair with your warm bread slice?
Why Try Garlic Herb Dutch Oven Bread?
Comforting aroma: The enticing scent of garlic and fresh herbs fills your kitchen, creating an inviting experience that no fast food can match.
Effortless preparation: With minimal hands-on time, the slow fermentation does all the heavy lifting for you!
Golden crust: Baked in a Dutch oven, your bread will have a perfect, crispy exterior that contrasts beautifully with a soft, airy interior.
Versatile pairing: Serve it alongside soups, salads, or even spread with butter for an afternoon treat. You could also enjoy it with a delightful dipping oil, just like with my Cheesy Garlic Chicken!
Crowd-pleaser: Whether for family dinners or gatherings, this bread is sure to impress and satisfy everyone’s taste buds.
Get ready for your house to transform into a bakery, and enjoy the delicious results!
Garlic Herb Dutch Oven Bread Ingredients
For the Dough
- All-purpose flour – 3 cups; this is the foundation for a hearty loaf that's perfect for any occasion.
- Salt – 1 ¼ teaspoons; enhances flavor and helps strengthen the dough structure.
- Instant yeast – ½ teaspoon; ideal for giving your bread a nice, fluffy rise without long waiting times.
- Warm water – 1 ½ cups (about 110°F); activates the yeast and brings the dough together.
For Flavoring
- Olive oil – 3 tablespoons; adds moisture and richness to the bread, giving it a lovely texture.
- Garlic – 4 cloves, minced; infuses the bread with a savory depth that complements the herbs.
- Fresh rosemary – 1 tablespoon, chopped; provides an aromatic pine-like flavor that is irresistible.
- Fresh thyme – 1 tablespoon, chopped; adds a subtle earthiness that pairs beautifully with garlic.
- Fresh parsley – 1 tablespoon, chopped; brightens the flavor profile and adds a touch of color.
For Dusting
- Additional flour – A sprinkle for your work surface; helps prevent sticking while shaping your dough.
With these simple ingredients, you’re on your way to creating your very own Garlic Herb Dutch Oven Bread that will wow your tastebuds!
Step‑by‑Step Instructions for Garlic Herb Dutch Oven Bread
Step 1: Combine Dry Ingredients
In a large mixing bowl, whisk together 3 cups of all-purpose flour, 1 ¼ teaspoons of salt, and ½ teaspoon of instant yeast until well blended. This mixture is the foundation of your Garlic Herb Dutch Oven Bread, creating a robust structure for your loaf. Set it aside while you prepare the wet ingredients.
Step 2: Prepare Wet Ingredients
In a separate bowl, mix together 1 ½ cups of warm water (around 110°F), 4 minced garlic cloves, and 3 tablespoons of olive oil, along with 1 tablespoon each of chopped fresh rosemary, thyme, and parsley. Stir until all components are incorporated, releasing those aromatic herb-infused scents that will make your taste buds tingle in anticipation!
Step 3: Combine Mixtures
Pour the herb and garlic mixture into the dry ingredients, stirring with a wooden spoon or your hands. Continue mixing until a shaggy dough forms; it will appear sticky and wet. Don’t worry—this is normal! Ensure no dry flour remains, as all ingredients must be united to create your flavorful bread dough.
Step 4: Let the Dough Rest
Cover the bowl tightly with plastic wrap or a clean kitchen towel, allowing the dough to rest at room temperature for 12 to 18 hours. When it’s ready, the surface will be bubbly, and the volume will have increased significantly, indicating beautiful fermentation has occurred—a key step in making your Garlic Herb Dutch Oven Bread mildly tangy and delicious.
Step 5: Shape the Dough
After the resting period, lightly sprinkle flour on your work surface and gently turn the dough out. Using floured hands, shape the dough into a round loaf, being careful not to knead too much to maintain its airy texture. You should see those lovely air pockets that promise a light crumb when baked.
Step 6: Second Rise
Dust the top of the shaped loaf with a bit more flour and cover it with a kitchen towel. Let it rest for an additional 1 to 2 hours until it has puffed up slightly. This second rise allows the flavors to develop further and prepares your Garlic Herb Dutch Oven Bread for a delightful oven spring!
Step 7: Preheat the Oven
About 30 minutes before baking, place a Dutch oven—lid included—into your oven and preheat to 450°F (230°C). This step creates a steamy environment ideal for crust formation. While it heats, the anticipation builds, and the aroma of herbs and garlic will waft through your kitchen, heightening your excitement for the bake ahead!
Step 8: Bake the Bread
Carefully remove the Dutch oven from the oven after it has reached temperature. Remove the lid and gently place the loaf inside, then cover it again with the lid. Bake the bread for 30 minutes; it’s during this time that a mesmerizing crust begins to form, locking in all the delicious flavors from the garlic and herbs.
Step 9: Finish Baking
After 30 minutes, carefully remove the lid from the Dutch oven and continue to bake for an additional 15 to 20 minutes. Watch for the bread to turn golden brown with a beautifully crusty exterior. This step ensures your Garlic Herb Dutch Oven Bread has that irresistibly crunchy texture that perfectly contrasts the soft inside.
Step 10: Cool and Slice
Once it’s done baking, transfer your bread to a wire rack to cool before slicing. Allow it to sit for at least 10-15 minutes; this enhances the flavor and texture. As you slice through the crust, the warm aroma will invite everyone to the table for a taste of your freshly made Garlic Herb Dutch Oven Bread!
Variations & Substitutions for Garlic Herb Dutch Oven Bread
Feel free to let your creativity run wild and tailor this beautiful bread recipe to your taste!
-
Gluten-Free: Substitute all-purpose flour with a gluten-free flour blend for a celiac-friendly option. Make sure it’s a blend with xanthan gum for the best texture!
-
Herb Medley: Swap out rosemary, thyme, and parsley for your favorite herbs like basil and oregano. The resulting flavors will transport you to an Italian garden!
-
Cheesy Delight: Mix in 1 cup of shredded cheese (like cheddar or mozzarella) during the dough combining step. This will add a savory, gooey upgrade that cheese lovers will adore.
-
Olive Oil Infusion: Replace regular olive oil with garlic-infused olive oil for an extra burst of flavor. Your bread will carry that rich, aromatic essence throughout.
-
Spicy Kick: Add a teaspoon of red pepper flakes to the dry ingredients to give your bread a warming heat. It’s a fun surprise and lovely contrast to the savory garlic.
-
Sweet Twist: Want to try something different? Add a couple of tablespoons of honey to the warm water for a hint of sweetness that pairs beautifully with the savory garlic.
-
Whole Wheat: For a heartier and more nutritious loaf, swap half of the all-purpose flour with whole wheat flour. This will give your bread a rich, nutty flavor.
-
Roasted Garlic: Replace fresh minced garlic with roasted garlic for a sweeter, more mellow flavor that melts into the dough. Just mash and blend it into the wet ingredients.
No matter how you choose to customize this Garlic Herb Dutch Oven Bread, each variation opens the door to exciting new flavors and textures. Serve it warm as a side with a rich soup, much like my favorite Tomato Garlic Pasta, or enjoy it alongside your next family dinner for a delightful touch!
Make Ahead Options
These Garlic Herb Dutch Oven Bread loaves are perfect for meal prep enthusiasts! You can prepare the dough up to 24 hours in advance by following the initial steps and letting it rise in the refrigerator instead of at room temperature; this slow fermentation enhances the flavor and maintains quality. After the first rise, shape the dough and cover it with a kitchen towel before refrigerating it overnight. When you're ready to bake, simply allow the shaped loaf to come to room temperature for about 1 to 2 hours before placing it in your preheated Dutch oven. With these make ahead options, you'll have delicious homemade bread with minimal last-minute effort!
What to Serve with Garlic Herb Dutch Oven Bread
There's nothing like the smell of freshly baked bread to bring everyone to the table, right? Let’s explore delightful pairings that elevate your mealtime experience!
-
Creamy Tomato Soup: This classic combination is comforting and warm, perfect for dipping your crusty bread in every bright tomato bite.
-
Zesty Salad: A fresh salad with mixed greens, citrus dressing, and crunchy nuts provides a refreshing contrast to the rich flavors of the bread.
-
Savory Cheese Platter: An assortment of cheeses like aged cheddar, brie, and goat cheese adds layers of flavor that beautifully complement your Garlic Herb Dutch Oven Bread.
-
Roasted Vegetables: A medley of herb-roasted veggies brings a satisfying texture and earthy sweetness to the table, making each bite a balanced delight.
-
Garlic Butter Dipping Sauce: Melting garlic butter infused with herbs perfectly enhances the warmth of the bread, inviting you to savor each slice.
-
Aged Balsamic Vinegar: Drizzling a bit of high-quality balsamic over your bread creates a tangy contrast that harmonizes delightfully with the garlic and herbs.
-
Red Wine: A bold glass of red, like a Cabernet Sauvignon, pairs beautifully with the rustic flavors, enhancing the overall dining experience.
Let your imagination run wild, and don’t hesitate to mix and match these pairings for a truly memorable meal!
How to Store and Freeze Garlic Herb Dutch Oven Bread
Room Temperature: Store the bread in a paper bag at room temperature for up to 3 days to maintain its crusty exterior while allowing it to breathe.
Fridge: If you need to keep it longer, wrap it tightly in plastic wrap and store in the fridge for up to a week. However, this may soften the crust.
Freezer: For longer storage, wrap the bread in aluminum foil or a freezer-safe bag, making sure to remove as much air as possible. It can be frozen for up to 3 months.
Reheating: To enjoy your Garlic Herb Dutch Oven Bread again, simply reheat it in a preheated oven at 350°F (175°C) for about 10-15 minutes, until warmed through and crisp.
Expert Tips for Garlic Herb Dutch Oven Bread
-
Hydration is Key: Make sure your dough is sticky and wet when mixing. This high hydration helps create that airy crumb and crisp crust.
-
Patience Pays Off: Don’t rush the fermentation process; allow the dough to rest for 12 to 18 hours. This time builds incredible flavor in your Garlic Herb Dutch Oven Bread.
-
Flour Your Hands: When shaping the dough, ensure your hands are floured to prevent sticking. This minimizes handling, keeping the dough light and fluffy.
-
Preheat Properly: Always preheat your Dutch oven fully before adding the dough. This is crucial for that perfect steam effect that gives you a golden, crusty exterior.
-
Watch the Bake: Keep an eye on the bread during the final baking stage. Remove the lid when it’s golden to achieve a delightful crunch on the crust without overbaking.
Garlic Herb Dutch Oven Bread Recipe FAQs
How can I tell if my garlic is fresh?
Absolutely! Fresh garlic should be firm and plump, with no dark spots or soft areas. If garlic shows green shoots, it’s still usable, but not at its peak. Look for heads that are dry to the touch and free of mold for the best flavor in your Garlic Herb Dutch Oven Bread.
How do I store my Garlic Herb Dutch Oven Bread?
To maintain the delicious crust, store your bread in a paper bag at room temperature for up to 3 days. This allows it to breathe. If you need to keep it longer, wrap it tightly in plastic wrap and refrigerate for up to a week, though this may soften the crust.
Can I freeze my Garlic Herb Dutch Oven Bread?
Very! To freeze, tightly wrap the cooled bread in aluminum foil or place it in a freezer-safe bag, removing as much air as possible. It will stay fresh for up to 3 months. When you’re ready to enjoy it, just reheat in a preheated oven at 350°F (175°C) for about 10-15 minutes, achieving that perfect warmth and crispness!
What if my dough doesn’t rise properly?
If your dough isn’t rising, make sure your yeast is fresh! Instant yeast can lose its potency over time. Also, check that you used warm water (around 110°F) to activate the yeast. If your dough doesn’t bubble after 12-18 hours, it may need more time or warmer conditions. A warmer spot can encourage yeast activity!
Can pets eat garlic?
No, garlic is toxic to dogs and cats, so it’s essential to keep your Garlic Herb Dutch Oven Bread out of reach of your furry friends. While the bread is a delightful treat for humans, be sure to enjoy this flavor-packed loaf and keep it safe from your pets!
How can I enhance the flavor of my Garlic Herb Dutch Oven Bread?
To elevate the flavors, you can experiment with different herbs. Try adding fresh basil, oregano, or even a pinch of red pepper flakes for some heat. You might also consider incorporating grated cheese like Parmesan into the dough for an extra savory element. Enjoy the creativity!
Warm Garlic Herb Dutch Oven Bread That Will Wow Your Tastebuds
Equipment
- Dutch oven
Ingredients
For the Dough
- 3 cups all-purpose flour foundation for a hearty loaf
- 1.25 teaspoons salt enhances flavor
- 0.5 teaspoon instant yeast ideal for a fluffy rise
- 1.5 cups warm water about 110°F, activates yeast
For Flavoring
- 3 tablespoons olive oil adds moisture and richness
- 4 cloves garlic minced for flavor
- 1 tablespoon fresh rosemary chopped, aromatic flavor
- 1 tablespoon fresh thyme chopped, earthy flavor
- 1 tablespoon fresh parsley chopped for color
For Dusting
- additional flour a sprinkle for your work surface
Instructions
Step-by-Step Instructions
- In a large mixing bowl, whisk together the all-purpose flour, salt, and instant yeast until well blended.
- In a separate bowl, mix together the warm water, minced garlic, olive oil, chopped rosemary, thyme, and parsley.
- Pour the herb and garlic mixture into the dry ingredients, stirring until a shaggy dough forms.
- Cover the bowl tightly and allow the dough to rest at room temperature for 12 to 18 hours.
- Lightly sprinkle flour on your work surface and gently turn the dough out, shaping it into a round loaf.
- Dust the top of the loaf with flour and let it rest for an additional 1 to 2 hours.
- Preheat your oven to 450°F (230°C) with the Dutch oven inside.
- Carefully place the loaf into the hot Dutch oven, cover it, and bake for 30 minutes.
- Remove the lid and bake for an additional 15 to 20 minutes until golden brown.
- Transfer the bread to a wire rack to cool before slicing.


Leave a Reply