
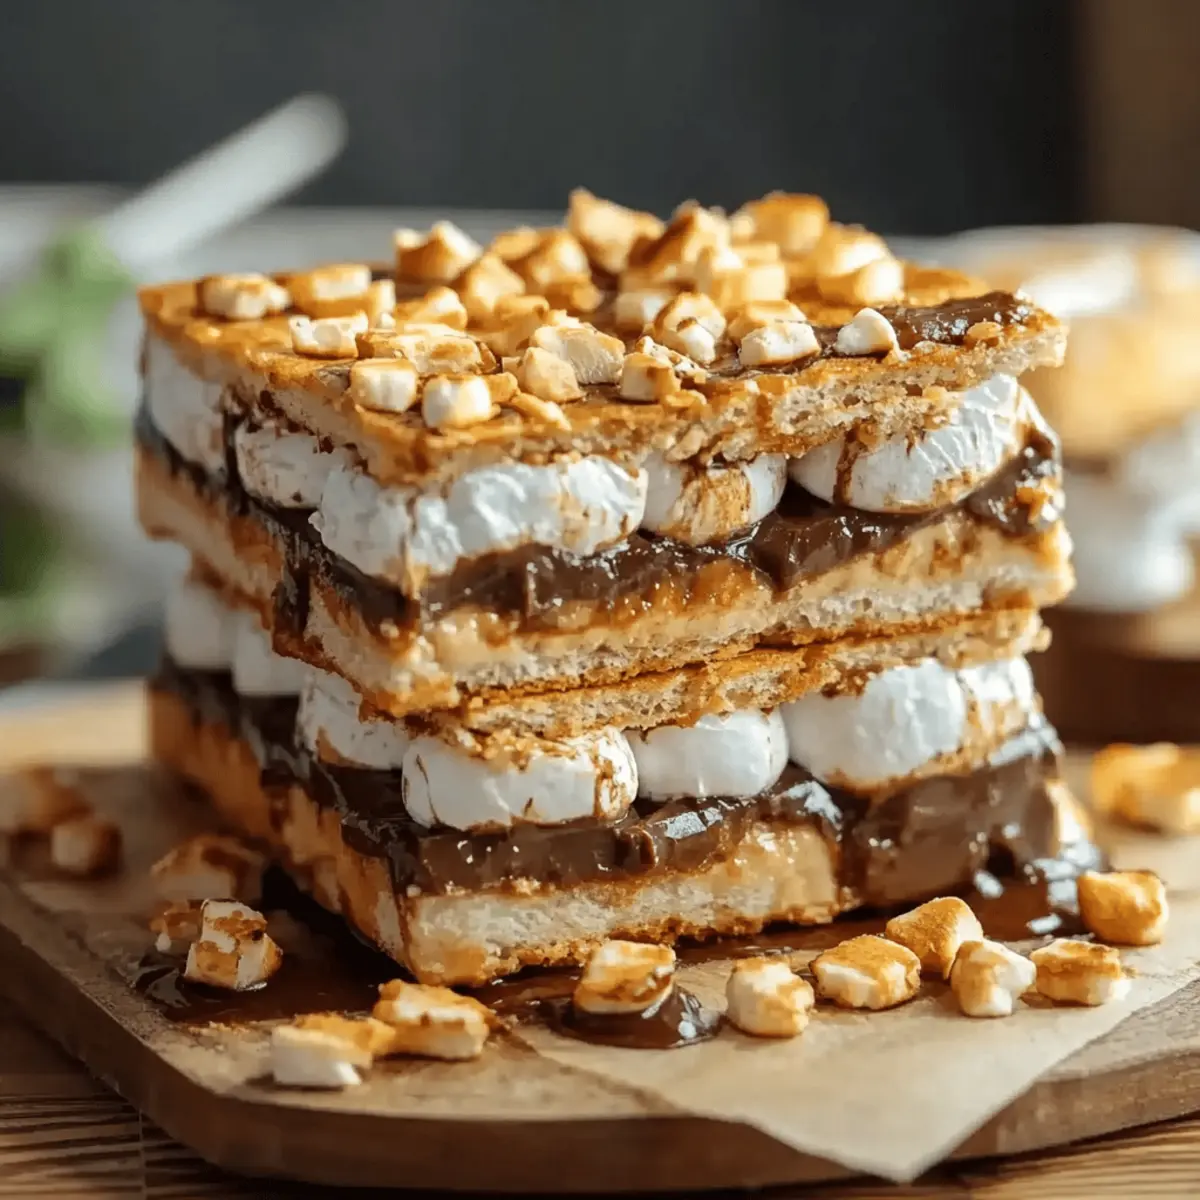
There’s something undeniably magical about the combination of graham crackers, chocolate, and marshmallows that transports me right back to my childhood campfire nights. These S’mores Bars are a delightful twist on the classic treat, allowing you to savor that nostalgic taste without ever leaving your kitchen. With just a handful of ingredients and minimal prep time, they’re perfect for satisfying your sweet tooth or impressing guests at your next gathering. Plus, they’re easily adaptable—whether you want to stack on more chocolate or add a hint of nutty flavor with some peanut butter, you can make these bars your own. Ready to create a gooey, indulgent experience that's just a few steps away? Let’s dive into making these irresistibly delicious S’mores Bars!
Why Try These S’mores Bars?
Nostalgic Flavors: Each bite whisks you back to summer campfires, where gooey marshmallows and melted chocolate truly shine.
Quick Preparation: With just 10 minutes in the oven, you’ll have a delicious dessert ready to serve and enjoy.
Endless Customization: Feel free to mix in your favorite toppings, like nuts or additional chocolate—your creativity knows no bounds!
Crowd-Pleaser: Perfect for parties, these bars are sure to impress family and friends alike.
Simple Ingredients: Using basic pantry staples, you'll whip up a delightful treat with ease. Whether you're treating yourself or entertaining guests, these S’mores Bars are the perfect indulgence!
S’mores Bars Ingredients
For the Base
• Graham cracker crumbs – The foundation of flavor and crunch, giving these bars their classic taste.
• Powdered sugar – Adds sweetness and a touch of smooth texture to the base.
• Unsalted butter – Brings richness and helps bind the ingredients together for a perfect crust.
For the Toppings
• Hershey bars – These melt wonderfully, creating that iconic chocolate layer over the crust.
• Mini marshmallows – Their fluffy texture gives the bars that gooey s'mores experience everyone loves!
With just these simple ingredients, you’re well on your way to making the most mouthwatering S’mores Bars that will have everyone reminiscing about campfire nights!
Step‑by‑Step Instructions for S’mores Bars
Step 1: Preheat the Oven
Begin by preheating your oven to 350°F (175°C). This ensures that your S’mores Bars will bake evenly and come out perfectly golden. While the oven warms up, gather your baking pan—a greased 9×13-inch pan works best for this recipe.
Step 2: Prepare the Crust Mixture
In a mixing bowl, combine 2 cups of graham cracker crumbs with ½ cup of powdered sugar. Gradually pour in ½ cup of melted unsalted butter, using a spatula to fold the mixture gently until it’s well blended. The consistency should be crumbly yet slightly sticky, ideal for pressing into the pan.
Step 3: Form the Base
Transfer the crumb mixture to your prepared baking pan. Using your fingers or the bottom of a measuring cup, press the mixture firmly into the bottom of the pan. Aim for an even layer, ensuring there are no gaps, which will create a stable foundation for your S’mores Bars.
Step 4: Bake the Base
Place the pan in the preheated oven and bake for 5–8 minutes. Keep a close eye on your crust; you’re looking for the edges to turn golden brown and the center to firm up slightly. This baking step sets the foundation for the layers to come.
Step 5: Add the Chocolate Layer
Once the crust is done baking, remove it from the oven and lay 4 Hershey bars evenly across the surface while it's still warm. The heat will cause the chocolate to melt slightly, which will create a luscious layer. Return the pan to the oven for an additional 3 minutes, allowing the chocolate to soften and become beautifully glossy.
Step 6: Top with Marshmallows
After letting the chocolate sit for about 1–2 minutes, evenly spread 2 cups of mini marshmallows over the melted chocolate layer. The marshmallows should cover the entire chocolate surface, ready to create that iconic s’mores experience when baked.
Step 7: Broil for a Toasty Finish
Switch your oven to broil and place the pan back inside. Broil for 1–2 minutes, keeping a watchful eye to ensure that the marshmallows toast to a beautiful golden brown. This step is crucial, as marshmallows can burn quickly—so don’t walk away!
Step 8: Cool and Slice
Once the marshmallows are perfectly toasted, remove the pan from the oven and let your S’mores Bars cool completely at room temperature. For easier slicing, refrigerate the pan for about 30 minutes. When ready, use a sharp knife dipped in hot water to slice through the bars cleanly. Enjoy your delicious homemade treat!
Make Ahead Options
These S’mores Bars are a perfect choice for meal prep, making them an ideal treat for busy weeknights or gatherings! You can prepare the crust (graham cracker mixture) up to 24 hours in advance; simply press it into the pan and store it covered in the refrigerator. The chocolate layer can be added right before baking for the freshest taste. When you're ready to serve, just layer the melted chocolate and marshmallows, broil until golden, and enjoy! For best results, refrigerate the bars after cooling completely for up to 3 days, ensuring they stay fresh and just as delicious. This way, you'll have a delightful dessert ready to impress with minimal effort!
Expert Tips for S’mores Bars
Ultimate Texture: Ensure your graham cracker crumbs are finely crushed for a smoother, more cohesive base that doesn’t crumble apart.
Watch the Broil: Stay close while broiling the marshmallows; they can go from perfectly golden to burnt in seconds!
Room Temperature Butter: If using butter directly from the fridge, let it sit out for a few minutes to soften—this makes mixing easier and your crust texture just right.
Even Chocolate Layer: Use a spatula to gently spread melted chocolate evenly to avoid any hot spots, ensuring every bite of your S’mores Bars is delicious.
Chill for Slicing: Don’t skip refrigerating before slicing! Cooling makes it easier to cut clean bars, helping maintain that gooey stacked look everyone loves.
Experiment with Flavors: Try adding different chocolates or mixing in nut butters for a unique twist on classic S’mores Bars that will delight your taste buds!
S’mores Bars Variations
Feeling adventurous? There are so many ways to put your unique spin on these classic S’mores Bars!
- Nutty Surprise: Add ½ cup of chopped nuts, like pecans or walnuts, to the crust for a delightful crunch.
- Peanut Butter Bliss: Swirl in ½ cup of creamy peanut butter into the chocolate layer for a rich, nutty flavor.
- Dark Chocolate Delight: Swap Hershey bars for dark chocolate bars for a sophisticated twist that chocolate lovers will adore.
- Coconut Crunch: Mix in ½ cup of sweetened shredded coconut to the crust for a tropical flavor explosion.
- Cinnamon Sugar Dust: Sprinkle a dash of cinnamon and sugar on top of the marshmallows before broiling for an extra flavorful kick.
- Spicy Kick: Add a pinch of cayenne pepper to the chocolate layer for a cheeky heat that balances the sweetness.
- Fruit Fusion: Top the marshmallows with sliced strawberries or bananas before broiling for a fruity freshness that brightens each bite.
- Caramel Drizzle: Drizzle warm caramel sauce over the top before serving to add a luscious layer of sweetness.
Let your creativity soar, and choose a variation or two to make these S’mores Bars your very own!
How to Store and Freeze S’mores Bars
Room Temperature: Allow S'mores Bars to cool completely before storing in an airtight container. They can stay fresh at room temperature for up to 3 days.
Fridge: For longer freshness, keep the bars in the refrigerator, where they will last about a week. Ensure they are well wrapped to avoid drying out.
Freezer: You can freeze S'mores Bars for up to 2 months. Wrap tightly in plastic wrap and then in aluminum foil. Thaw in the fridge overnight before enjoying.
Reheating: If you prefer warm bars, reheat in the microwave for about 10-15 seconds. Just be sure not to overheat, or the marshmallows may get too gooey!
What to Serve with S’mores Bars?
There's nothing quite like the joy of indulging in sweet, gooey treats while creating lasting memories with loved ones.
- Vanilla Ice Cream: The creamy coolness of vanilla ice cream balances perfectly with the warm, sticky S’mores Bars, creating a delightful contrast of temperatures.
- Fresh Berries: Juicy strawberries or raspberries add a refreshing burst of flavor that complements the sweetness of the bars and adds a vibrant color.
- Chocolate Milk: Rich, chocolatey milk provides an extra dose of chocolate indulgence, making every bite feel even more decadent.
- Peanut Butter Cups: For those who love a nutty flavor, offering mini peanut butter cups on the side elevates the S’mores experience into a delightful, unexpected treat.
- Coffee: A steaming cup of coffee enhances the sweetness of the bars while adding a sophisticated, warm flavor, perfect for adult gatherings.
- Marshmallow Fluff Dip: For the ultimate marshmallow experience, serve a fluff dip alongside the bars for guests to spread and indulge even more!
- Toasted Nuts: A sprinkle of toasted almonds or walnuts gives a crunchy texture that contrasts beautifully with the chewy bars, adding complexity to each bite.
- Salted Caramel Sauce: Drizzling warm, salted caramel over the bars enhances the flavors, bringing a sweet-savory harmony that’s hard to resist.
Every pair you choose will usher in a delightful, nostalgia-filled atmosphere sure to please your guests.
S’mores Bars Recipe FAQs
What type of graham crackers should I use?
Absolutely! For the best flavor and texture, I recommend using classic graham crackers. They provide the perfect balance of sweetness and crunch. If you prefer, you can use honey-flavored graham crackers for a hint of extra sweetness, but avoid flavored or sugary varieties that might overwhelm the classic s’mores taste.
How do I store my S’mores Bars for freshness?
To keep your delicious S’mores Bars fresh, allow them to cool completely before storing them in an airtight container. At room temperature, they can last up to 3 days. If you want to extend their freshness, simply pop them in the fridge where they will keep for about a week—just ensure they're wrapped well to keep them from drying out!
Can I freeze S’mores Bars, and how do I do it?
Yes, you can absolutely freeze your S’mores Bars for a delightful treat later! Wrap them individually in plastic wrap, then place them in a freezer-safe bag or container. They can be stored in the freezer for up to 2 months. When you're ready to enjoy, simply thaw them in the fridge overnight for the best texture.
What if my marshmallows burn while broiling?
Very good question! If you find that your marshmallows are burning during the broiling step, it might be due to your oven's heat being too high or having the pan placed too close to the broiler. To prevent this, keep a close watch while broiling and consider moving your pan to a lower rack in the oven for a more even heat distribution.
Are there any dietary considerations for S’mores Bars?
Indeed! If you're making these for a crowd, be mindful of allergies. Traditional S’mores Bars contain gluten (from graham crackers) and dairy (butter and chocolate), so those with gluten intolerance or lactose intolerance should seek gluten-free graham crackers and dairy-free chocolate alternatives. Always check ingredient labels to ensure they meet dietary needs.
Can I add other ingredients to customize my S’mores Bars?
Certainly! The more the merrier! You can mix in various ingredients like crushed nuts for a crunchy texture or even a swirl of peanut butter for a delightful twist. Just make sure not to overload the toppings—you want to maintain that classic s’mores experience while adding a personal touch to your S’mores Bars!
Melt-in-Your-Mouth S’mores Bars: Easy, Irresistible Delight
Equipment
- 9x13-inch baking pan
- mixing bowl
- spatula
- measuring cup
- sharp knife
Ingredients
For the Base
- 2 cups graham cracker crumbs
- ½ cup powdered sugar
- ½ cup unsalted butter melted
For the Toppings
- 4 bars Hershey bars
- 2 cups mini marshmallows
Instructions
Step-by-Step Instructions for S’mores Bars
- Preheat your oven to 350°F (175°C).
- In a mixing bowl, combine graham cracker crumbs and powdered sugar. Gradually add melted butter and mix until well blended.
- Transfer the crumb mixture to the baking pan and press firmly into the bottom to create an even layer.
- Bake for 5–8 minutes until edges are golden brown.
- Remove from oven, lay Hershey bars on top and return to oven for 3 minutes until soft.
- Spread mini marshmallows evenly over the chocolate layer.
- Switch to broil and broil for 1–2 minutes until marshmallows are golden brown.
- Cool completely, then refrigerate for 30 minutes before slicing.


Leave a Reply