
As I stirred the silky mixture in my saucepan, the scent of vanilla wafted through my kitchen, transporting me straight to an Italian café bustling with life. This simple yet elegant Panna Cotta recipe has become my go-to indulgence for dinner parties and cozy evenings alike. With just a few quality ingredients—including cream, milk, and that luxurious vanilla bean—this dessert offers a delightful way to impress guests without spending hours in the kitchen. Plus, it’s a fantastic crowd-pleaser and can be made in advance, freeing you up to enjoy precious moments with loved ones. Ready to elevate your dessert game and create something truly special? Let’s dive into this creamy Italian treat!
Why is Panna Cotta So Irresistible?
Silky Smoothness: The texture is simply divine, melting in your mouth with each delightful spoonful.
Exquisite Flavor: Infused with real vanilla bean, it offers a rich, aromatic touch that elevates your dessert experience.
Easy Elegance: You don’t need to be a pastry chef; this recipe requires only a few simple steps to achieve a stunning presentation.
Make Ahead Magic: Prepare it in advance for gatherings! You’ll have more time to relax with your guests instead of racing around the kitchen.
Customizable Delight: Top with fresh berries, caramel, or a drizzle of chocolate for a personalized twist—endless ways to enjoy!
Indulging in this classic treat is easier than you think, especially with my homemade dessert tips to guide you!
Panna Cotta Ingredients
Prepare to create a stunningly delicious Panna Cotta with these essential ingredients!
For the Base
- 500 ml heavy cream – this gives the dessert its luxurious texture.
- 100 ml whole milk – it balances the richness of the cream, making it lighter.
- 80 g granulated sugar – sweetens the mixture without overpowering the delicate flavor.
- 1 vanilla bean – provides a fragrant, natural flavor that elevates the dessert.
For the Gelatin
- 7 g powdered gelatin – essential for achieving that perfectly set, silky smooth texture.
- 2 tablespoon cold water – dissolves the gelatin so it can be evenly mixed into the cream.
For Serving
- Fresh berries – a lovely touch of freshness that pairs beautifully with the creaminess.
- Mint leaves – for garnish, adding a pop of color and refreshing aroma.
With these ingredients in hand, you're ready to whip up a decadent Panna Cotta that everyone will rave about!
Step‑by‑Step Instructions for Panna Cotta
Step 1: Bloom the Gelatin
Start by sprinkling the powdered gelatin evenly over the cold water in a small bowl. Let it bloom for about 5 minutes, during which time you should notice the gelatin absorbing the water and swelling. This step is crucial for ensuring your Panna Cotta sets beautifully.
Step 2: Prepare the Vanilla
While the gelatin blooms, split the vanilla bean lengthwise with a sharp knife. Use the knife to scrape out the fragrant seeds, which will add a lovely depth of flavor to your Panna Cotta. Keep the shells of the vanilla bean; you’ll use them in the next step.
Step 3: Combine Ingredients
In a medium saucepan over medium heat, combine the heavy cream, whole milk, granulated sugar, vanilla seeds, and the vanilla bean pod. Stir gently and continuously until the sugar is fully dissolved and the mixture just begins to simmer, ensuring you don’t allow it to boil. This gentle warming will bring out the vanilla's rich flavors.
Step 4: Dissolve the Gelatin
Remove the saucepan from heat as soon as you see steam rising, and carefully discard the vanilla pod. Whisk in the bloomed gelatin while the mixture is still warm, ensuring it dissolves completely. You should achieve a smooth, velvety texture for your Panna Cotta base, free of any lumps.
Step 5: Strain the Mixture
To ensure a silky final product, strain the warm mixture through a fine mesh sieve into a jug. This step will catch any undissolved bits from the gelatin or vanilla, leaving you with an impeccably smooth Panna Cotta. You can watch the creamy liquid flow easily through the sieve, revealing the beautiful consistency.
Step 6: Pour into Molds
Lightly oil your ramekins or molds with a neutral oil for effortless release later. Pour the strained mixture into each mold, filling them about to the top. Let the molds sit at room temperature until they cool down a bit, which will take around 20 minutes, preparing them for the refrigerator.
Step 7: Chill Until Set
Cover the molds with plastic wrap and refrigerate for at least 4 hours or until fully set. The Panna Cotta should be firm yet jiggly to the touch. This chilling time allows the flavors to meld and the texture to reach that irresistible silky smoothness you crave.
Step 8: Serve Your Panna Cotta
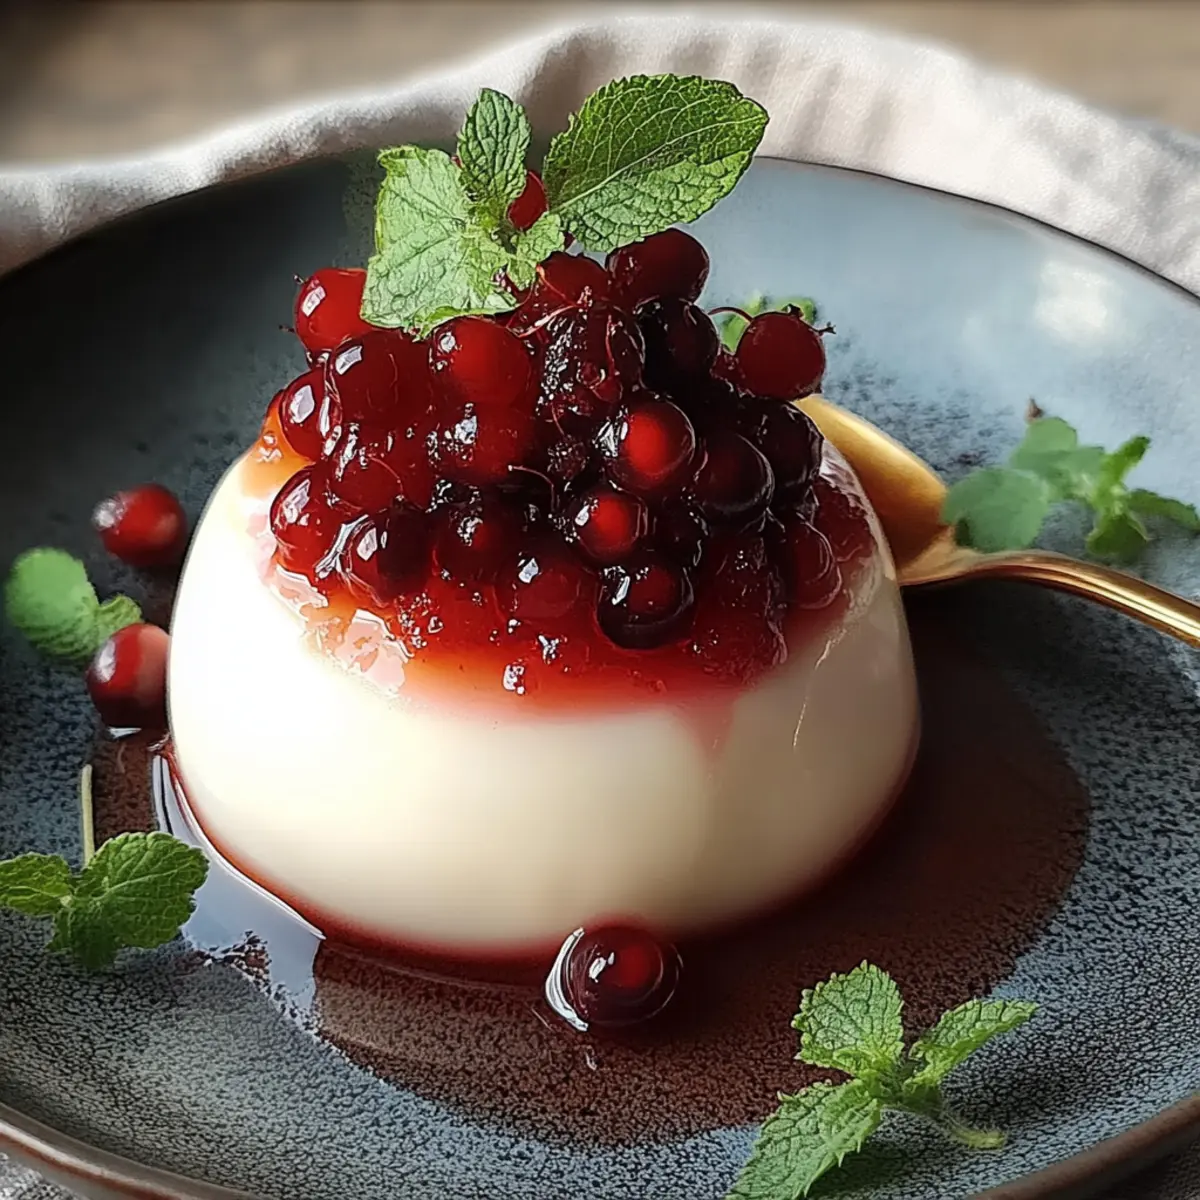
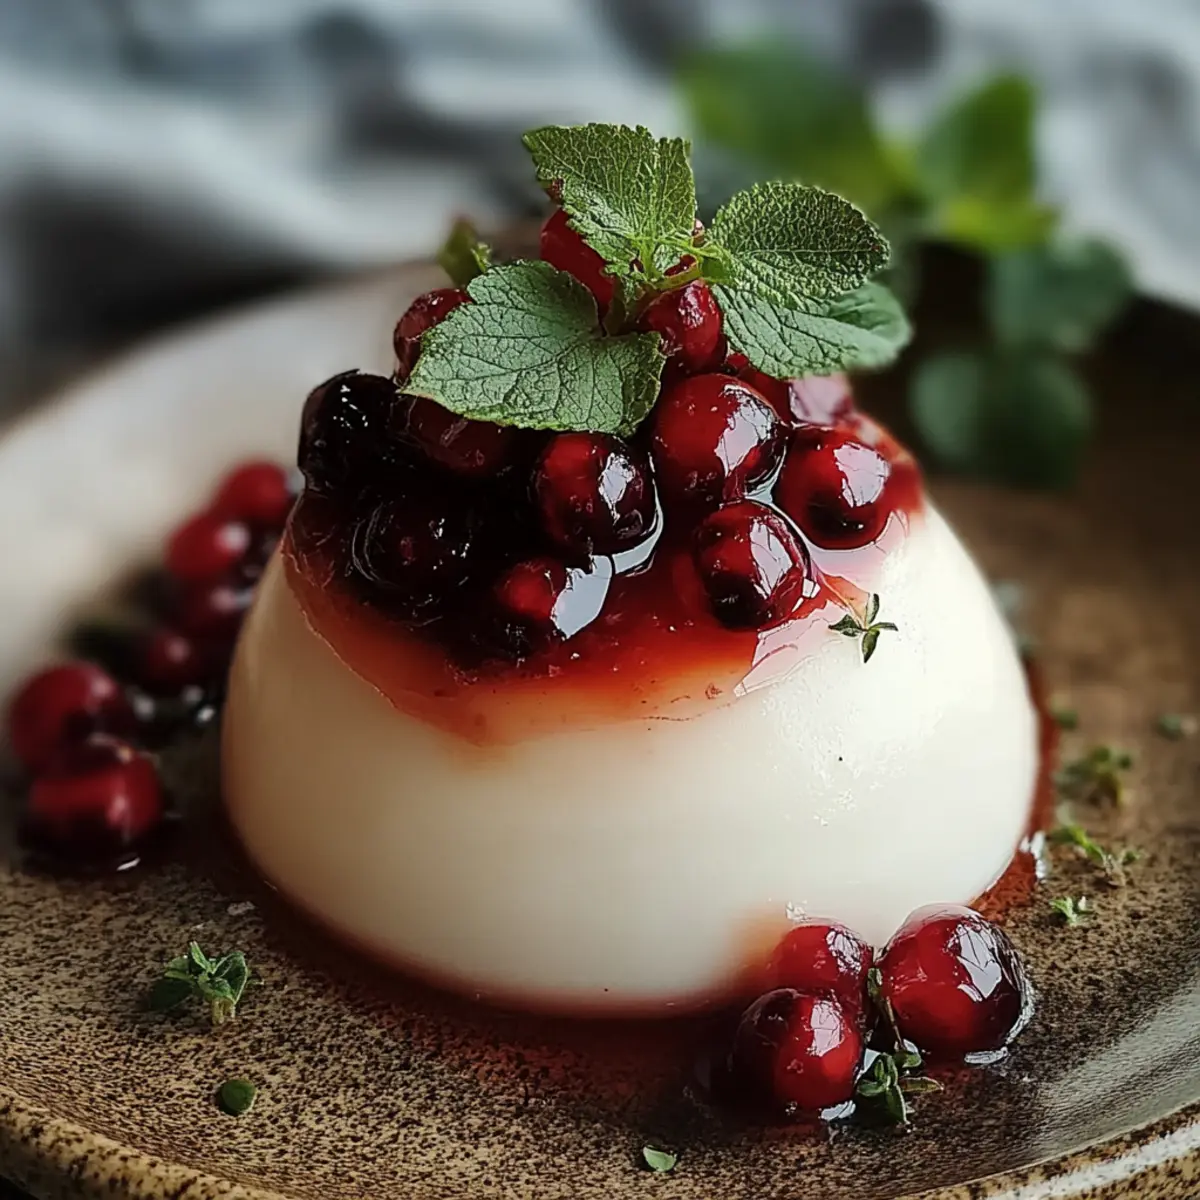
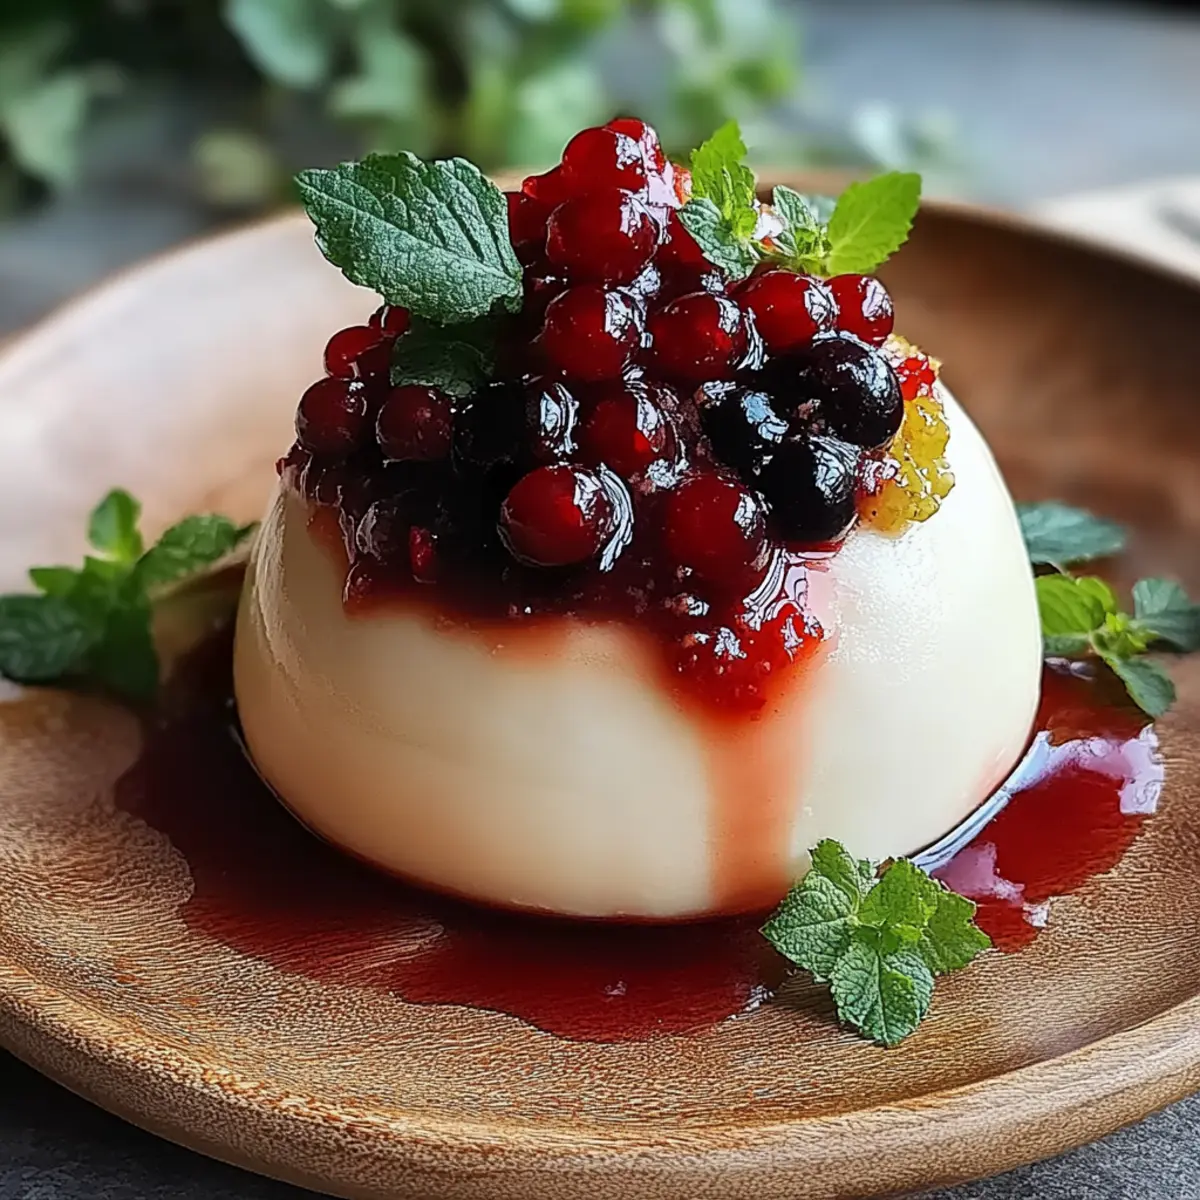
To serve, briefly dip the molds in warm water for about 10 seconds to loosen the edges. Carefully invert each mold onto a plate, gently tapping if needed to release the Panna Cotta. Garnish with fresh berries and mint leaves for a pop of color and flavor, transforming your dessert into a stunning presentation!
Expert Tips for Panna Cotta
Perfect Gelatin Bloom: Ensure the powdered gelatin sits in cold water for at least 5 minutes. This step is crucial for achieving a smooth Panna Cotta.
Gentle Heating: Heat the cream mixture slowly and avoid boiling. Boiling can cause your dessert to separate, compromising its silky texture.
Straining is Key: Don’t skip straining the mixture! It removes clumps and creates that signature smoothness essential for a great Panna Cotta.
Chill with Care: Cover your molds during refrigeration to prevent an undesirable skin forming on the surface, ensuring a perfect set without textures you don’t want.
Creative Toppings: Experiment with different toppings like caramel sauce or citrus zest to personalize your Panna Cotta and delight your guests!
Make Ahead Options
These Panna Cotta desserts are perfect for meal prep! You can prepare the creamy mixture up to 3 days in advance, just follow the steps until you refrigerate them to set. To maintain their silky smoothness, ensure you cover the molds tightly with plastic wrap to prevent any chilling odors. Once they’ve set, they can stay refrigerated for up to 3 days without losing their delectable quality. When it’s time to serve, simply dip the molds in warm water for about 10 seconds before inverting them onto plates. Garnish with fresh berries and mint leaves, and you’ll have a stunning dessert ready with minimal last-minute effort!
Panna Cotta Variations & Substitutions
Feel free to unleash your creativity and customize this Panna Cotta recipe to make it your own!
-
Dairy-Free: Swap heavy cream and milk with coconut milk for a rich, tropical twist that's still wonderfully creamy.
Consider adding a splash of vanilla extract to enhance the coconut flavor and create a delightful balance. -
Vegan: Use a plant-based gelatin alternative like agar-agar, plus almond or soy milk for a delicious vegan option.
This swap will still provide that wobbly texture, making it perfect for your plant-based friends. -
Sugar-Free: Substitute granulated sugar with your favorite sweetener, like stevia or erythritol, for a guilt-free version.
Just keep in mind that different sweeteners can vary in sweetness, so adjust to taste! -
Flavor Infusion: Infuse the cream with other flavors, like orange zest or espresso, for a unique take on this classic dessert.
Each infusion brings its own aromatic qualities, enticing your senses with every spoonful. -
Chocolate Lover’s Delight: Melt some dark chocolate into the cream mixture for a decadent chocolate Panna Cotta.
This version adds richness and a new level of indulgence to your dessert repertoire. -
Spice It Up: Add a pinch of cinnamon or a dash of nutmeg to your mixture for a warm, spiced flavor that’s comforting.
These spices can elevate your Panna Cotta, transforming it into a cozy dessert perfect for chilly evenings. -
Fruit-Filled: Layer some pureed fruit or berry coulis at the bottom of the ramekins before pouring in your Panna Cotta.
This surprise layer will add a refreshing burst of flavor and a beautiful contrast in texture when served! -
Nutty Aroma: Incorporate a spoonful of almond or hazelnut extract for a nutty flavor that complements the vanilla beautifully.
This swap can transport your Panna Cotta to deliciously different culinary destinations!
Feel encouraged to mix and match these variations; your personalized Panna Cotta awaits! Don’t forget to check out my homemade dessert tips for more inspiration on perfecting your creations!
What to Serve with Panna Cotta?
Creating a delightful dining experience is all about pairing your creamy dessert with complementary flavors and textures.
-
Fresh Berry Salad: A vibrant mix of strawberries, blueberries, and raspberries adds tartness and freshness, enhancing the rich creaminess of Panna Cotta. The burst of juice from the berries creates a beautiful contrast with every silky bite.
-
Caramel Sauce: Drizzling a warm, buttery caramel sauce over your Panna Cotta brings a heavenly sweetness that deepens the flavor. The soft texture creates a luscious mouthfeel, elevating your dessert into an indulgent delight.
-
Pistachio Crumble: This crunchy topping introduces a nutty element that enhances the velvety creaminess while adding a satisfying crunch. It also provides a pop of color that makes your Panna Cotta visually stunning.
-
Chocolate Ganache: A rich chocolate ganache adds a luxurious depth of flavor, perfectly balancing the sweetness of the Panna Cotta. The silky smooth ganache creates an exquisite harmony with the dessert.
-
Mint Tea: A refreshing cup of mint tea pairs beautifully with Panna Cotta, cleansing the palate and complementing the dessert's creamy richness. This warm beverage is soothing and elevates your dining experience to a new level.
-
Lemon Sorbet: For a light and refreshing contrast, serve a scoop of lemon sorbet alongside your Panna Cotta. Its tartness cuts through the richness and provides a zesty finish to the meal.
-
Espresso or Coffee: A bold cup of espresso or rich coffee enhances the flavors of Panna Cotta, satisfying both sweet and bitter cravings. The warmth of the drink contrasts nicely with the coolness of the dessert.
Each of these pairings brings a delightful twist, ensuring your Panna Cotta shines as the star of your meal!
How to Store and Freeze Panna Cotta
Fridge: Store your Panna Cotta in an airtight container in the refrigerator for up to 3 days. This will keep it fresh and the silky texture intact.
Freezer: If you need to freeze Panna Cotta, wrap it tightly in plastic wrap and then in aluminum foil. It can be frozen for up to 2 months; however, note that texture may slightly change upon thawing.
Reheating: Thaw frozen Panna Cotta in the refrigerator overnight before serving. For best results, avoid reheating since it’s traditionally enjoyed chilled.
Serving Tips: When ready to serve, garnish with fresh berries and mint. The flavors will be just as delightful and perfect for impressing guests!
Panna Cotta Recipe FAQs
What type of vanilla is best for Panna Cotta?
Absolutely! Using a real vanilla bean provides the richest, most fragrant flavor. If you don't have one on hand, you can substitute with pure vanilla extract—use about 1 to 2 teaspoons for the same aromatic result.
How long does Panna Cotta last in the fridge?
Panna Cotta can be stored in an airtight container in the refrigerator for up to 3 days. This allows the dessert to maintain its silky texture while still tasting delicious. Make sure to cover it well to prevent it from absorbing odors from other foods!
Can I freeze Panna Cotta?
Yes, you can freeze Panna Cotta! To do this, wrap it tightly in plastic wrap and then in aluminum foil to prevent freezer burn. It will last for up to 2 months. When you're ready to serve, thaw it in the refrigerator overnight. Note that the texture may slightly change, but it will still be tasty!
What should I do if my Panna Cotta doesn’t set?
Oh no! If your Panna Cotta hasn’t set after chilling for at least 4 hours, it may be due to insufficient gelatin. You can fix this by gently reheating the mixture (make sure it’s not boiling) and adding another 1 g of gelatin dissolved in 2 tablespoon of water. Mix well and allow it to cool and set again in the fridge.
Are there any dietary considerations I should keep in mind?
Yes! If you're preparing Panna Cotta for guests with dietary restrictions, it contains dairy and gelatin, which may not be suitable for vegetarians. For a vegetarian version, you can replace the powdered gelatin with agar-agar, following the packaging instructions for equivalent amounts. Always check for any allergies to dairy or specific toppings like nuts, if using them.
What’s the best way to serve Panna Cotta?
To serve your Panna Cotta, dip the molds briefly in warm water for about 10 seconds, then gently invert onto plates. Garnish with fresh berries and mint leaves for a delightful touch. This presentation makes the dessert look beautifully inviting, perfect for impressing friends and family!
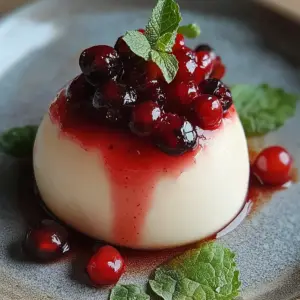
Silky Smooth Panna Cotta That’s Perfect for Any Occasion
Equipment
- Small Bowl
- Medium saucepan
- Fine mesh sieve
- Ramekins or molds
Ingredients
For the Base
- 500 ml heavy cream this gives the dessert its luxurious texture.
- 100 ml whole milk it balances the richness of the cream.
- 80 g granulated sugar sweetens the mixture without overpowering the delicate flavor.
- 1 unit vanilla bean provides a fragrant, natural flavor that elevates the dessert.
For the Gelatin
- 7 g powdered gelatin essential for achieving that perfectly set texture.
- 2 tablespoon cold water dissolves the gelatin for even mixing.
For Serving
- Fresh berries a lovely touch of freshness.
- Mint leaves for garnish, adding a pop of color.
Instructions
Step-by-Step Instructions
- Start by sprinkling the powdered gelatin evenly over the cold water in a small bowl. Let it bloom for about 5 minutes.
- While the gelatin blooms, split the vanilla bean lengthwise and scrape out the seeds.
- In a medium saucepan, combine heavy cream, whole milk, granulated sugar, vanilla seeds, and the vanilla pod. Stir until the sugar is dissolved and the mixture simmers.
- Remove from heat and discard the vanilla pod. Whisk in the bloomed gelatin until dissolved.
- Strain the warm mixture through a fine mesh sieve into a jug.
- Lightly oil your molds and pour the strained mixture into each mold. Let sit until cooled.
- Cover with plastic wrap and refrigerate for at least 4 hours or until fully set.
- To serve, dip the molds in warm water to loosen the edges and invert onto plates. Garnish with fresh berries and mint leaves.

Leave a Reply