
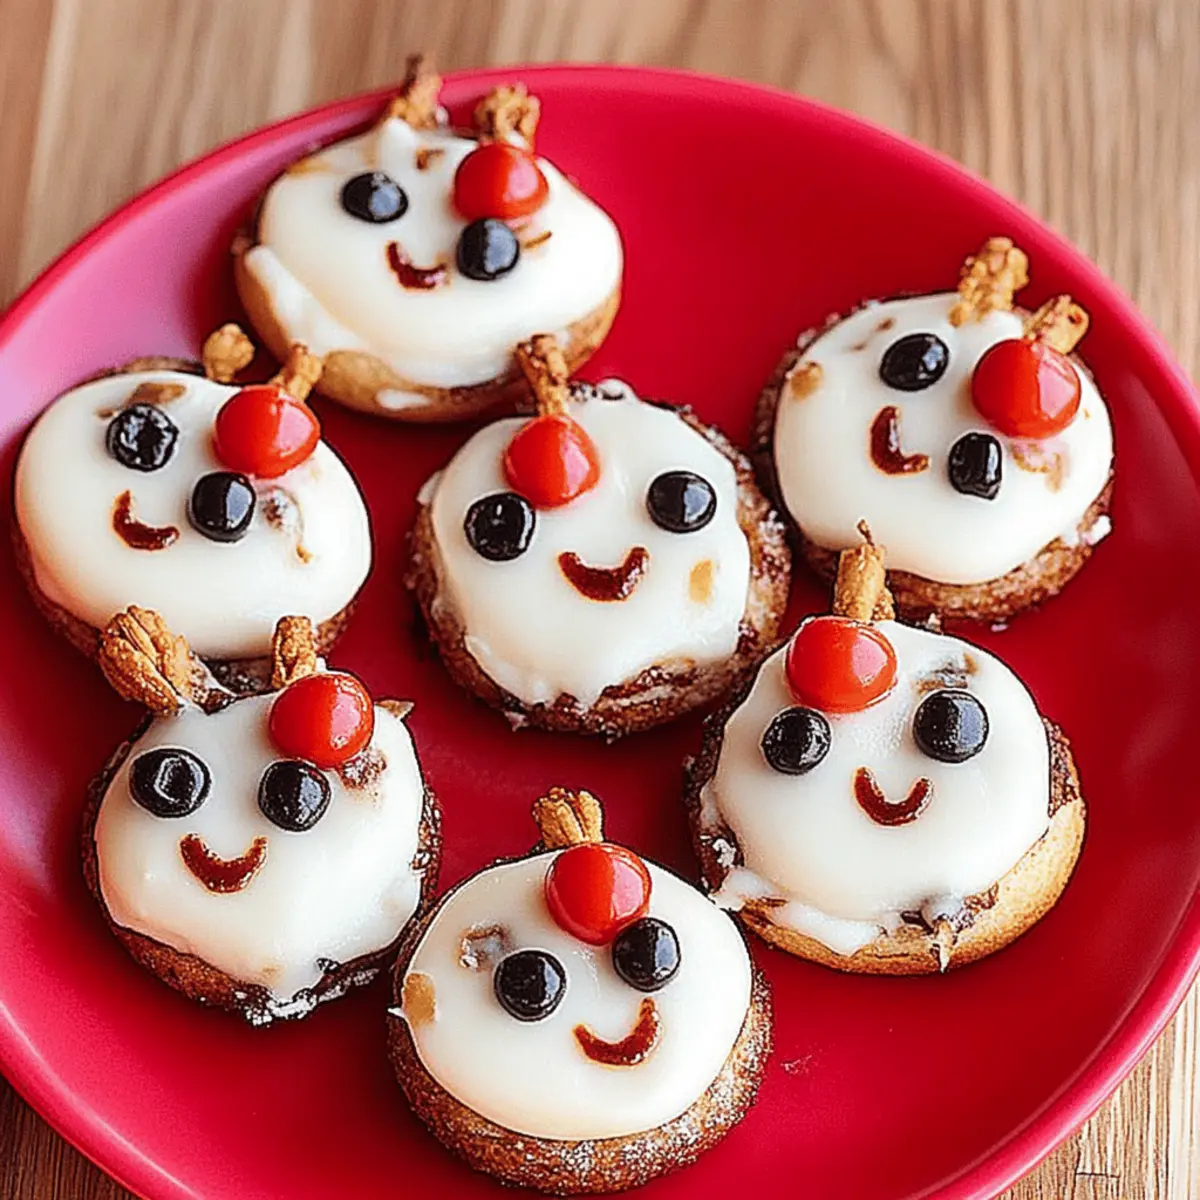
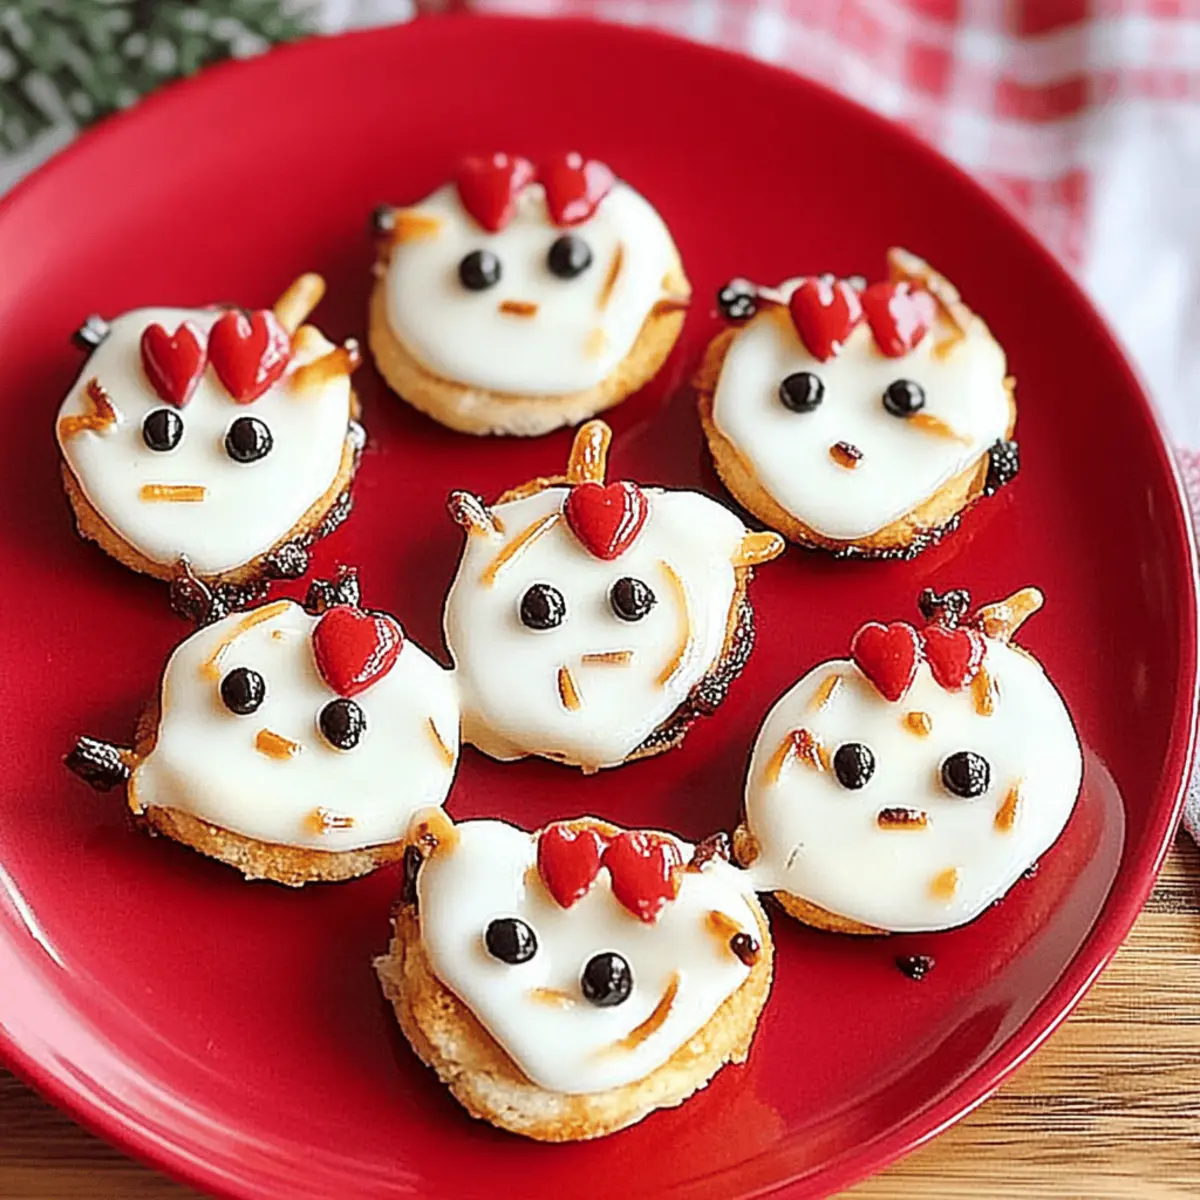
With the holiday season in full swing, the craving for delightful homemade treats becomes hard to resist. That’s why I’m thrilled to share my fun and festive Rudolph the Red-Nosed Reindeer Cookies! These adorable no-bake cookies not only bring a cheerful spirit to your holiday gatherings, but they also save you time in the kitchen, allowing you to focus on what truly matters—creating warm memories with loved ones. Plus, the convenience of no baking means you can whip them together in no time at all! As you gather around with family and friends, these whimsical cookies are sure to be the highlight of your dessert table. Are you ready to spread some holiday cheer? Let’s dive in and discover how to make these joyful treats!
Why Are These Cookies a Must-Make?
Joyful Festivity: These Rudolph the Red-Nosed Reindeer Cookies are designed to add a whimsical touch to your holiday celebrations.
No-Bake Convenience: With no baking required, you can spend more time with loved ones and less time in the kitchen.
Creative Fun: Get the kids involved! Decorating these adorable cookies is a fun, creative activity that everyone will enjoy.
Crowd-Pleasing Delight: Whether at a holiday gathering or as gifts, these treats are guaranteed to bring smiles to faces young and old.
Make-Ahead Magic: Whip them up in advance, and you’ll have a festive treat ready to go whenever you need it! Perfect for quick festive moments, these cookies are simply irresistible.
Rudolph the Red-Nosed Reindeer Cookies Ingredients
• Get ready to gather your goodies!
For the Cookie Base
- Chocolate Biscuits – These provide a rich flavor and sturdy base for your cookies.
- Cream Cheese – Adds a creamy texture and acts as the perfect glue for assembling your cookies.
- Powdered Sugar – Sweetens the mixture and helps achieve a delightful consistency.
For the Decorations
- Red Candy Melts – Use these for Rudolph's famous nose; they're a festive pop of color!
- Wilton Candy Eyes – Give your reindeer personality with these fun edible eyes.
- Mini Pretzels – These serve as antlers that make your cookies truly unique!
- Black Decorating Gel – A fun way to create little details like a smile or nostrils on your reindeer.
Feel free to get creative with the decorations—it's all about bringing joy to your holiday cookie-making! Now you’re all set to spread some festive cheer with your Rudolph the Red-Nosed Reindeer Cookies.
Step-by-Step Instructions for Rudolph the Red-Nosed Reindeer Cookies
Step 1: Prepare the Cookie Base
Start by crushing the chocolate biscuits into fine crumbs using a food processor or a rolling pin. In a mixing bowl, blend the biscuit crumbs with softened cream cheese and powdered sugar until the mixture is smooth and holds together well. This may take a few minutes; it should be moldable yet not sticky. Once ready, let the mixture sit for a few minutes to firm up.
Step 2: Shape the Cookies
Using your hands, take small portions of the mixture and roll them into round balls, about the size of a golf ball. Gently flatten each ball to create a cookie shape. Aim for even thickness so they hold together well and are easy to decorate. Place your cookie bases on a baking sheet lined with parchment paper, ensuring they are spaced apart for decorating later.
Step 3: Chill the Cookies
Transfer the cookie bases to the refrigerator and chill for at least 30 minutes. This will help them firm up, making the decorating process easier and preventing them from falling apart. While they chill, you can prepare your decorations, ensuring everything is within reach for when your cookies are ready for their festive makeover.
Step 4: Melt the Candy Coating
In a microwave-safe bowl, melt the red candy melts according to the package instructions, typically in 30-second intervals, stirring in between until smooth. Ensure the mixture is not too hot to touch, as you'll be dipping the cookies shortly. This vibrant coloring will become Rudolph's iconic red nose and will add a festive flair to your Rudolph the Red-Nosed Reindeer Cookies!
Step 5: Add the Red Noses
Once the candy melts are ready, take the chilled cookies out of the refrigerator. Dip the top of each cookie into the melted red candy, ensuring it’s well-coated. Allow the excess candy to drip off before placing them back on the parchment-lined baking sheet. This step is where your Rudolph the Red-Nosed Reindeer Cookies begin to come to life with that joyful splash of color!
Step 6: Decorate with Antlers and Eyes
Before the candy coating hardens, quickly attach two mini pretzels on top of each cookie for antlers. Follow by placing a pair of Wilton candy eyes just above the red noses, ensuring they stick well into the candy coating. Get creative and make each Rudolph unique by adjusting eye placement—this is where the fun truly begins!
Step 7: Add Final Touches
Using black decorating gel, draw little smiles or nostrils on each reindeer for a finishing touch. This step adds personality to your cookies and makes each one a charming individual. Allow the decorated cookies to set and dry completely at room temperature for about 15-20 minutes, or until the candy coating is firm and ready to impress.
Step 8: Serve and Share
Once dry, arrange your delightful Rudolph the Red-Nosed Reindeer Cookies on a festive platter. These cute treats are perfect for holiday gatherings, parties, or as gifts for loved ones. Enjoy the festive spirit they bring to your celebrations, and don’t forget to snap some pictures of your joyful creations!
What to Serve with Rudolph the Red-Nosed Reindeer Cookies
These delightful no-bake treats are perfect for spreading holiday cheer alongside charming accompaniments that enhance their whimsical appeal.
-
Festive Hot Cocoa: Warm and cozy, a cup of rich hot cocoa pairs perfectly, offering a deliciously sweet balance to the cookies.
-
Spiced Apple Cider: With its comforting spices, this seasonal drink adds a cozy touch that complements the festive spirit of the cookies.
-
Gingerbread Spritz: Light and buttery, these cookies bring an added layer of flavor, enhancing your dessert spread during the holidays.
-
Fruit Salad Medley: A light and refreshing side, the natural sweetness of fruits provides a delightful contrast to the sweet choco base.
-
Cheese Platter: Savory cheeses paired with nuts create a delightful balance, grounding the sweet flavors in the cookies and elevating your holiday gathering.
-
Chocolate-Dipped Strawberries: These luscious treats add an elegant touch and are a perfect indulgent pairing alongside the playful reindeer cookies.
-
Eggnog: Creamy and spiced, this classic holiday drink brings a festive cheer that matches the joyous spirit of your cookies.
-
Caramel Sauce: A small drizzle can intensify the sweetness, elevating the overall experience with a bit of gooey goodness.
Helpful Tricks for Rudolph the Red-Nosed Reindeer Cookies
-
Chill Time Matters: Make sure to chill your cookie base for at least 30 minutes. This helps them hold their shape when decorating and prevents messiness.
-
Crushing Biscuits: Crush the chocolate biscuits finely. Large chunks can lead to uneven texture and make it harder for your cookies to stay together.
-
Molding Wisely: When rolling your cookie balls, aim for uniform size. Uneven cookies may not set properly or could be difficult to decorate later.
-
Quick Decorating: Work swiftly when adding decorations after dipping in candy coating. The coating sets quickly, so have everything ready to go!
-
Storing Treats: If not enjoying immediately, store your Rudolph the Red-Nosed Reindeer Cookies in an airtight container in a cool, dry place to maintain freshness.
Storage Tips for Rudolph the Red-Nosed Reindeer Cookies
Room Temperature: Store your cookies in an airtight container at room temperature for up to 5 days to keep them fresh and delicious.
Fridge: If you prefer a firmer texture, you can refrigerate the cookies, where they will last for up to 1 week. Just ensure they're tightly sealed to prevent drying out.
Freezer: For longer storage, freeze the cookies in an airtight container or freezer bag for up to 3 months. To enjoy, simply thaw overnight in the fridge before serving.
Reheating: There's no need to reheat no-bake cookies, but if you want them slightly firmer, chill them for 30 minutes before serving. Enjoy your festive treats when you're ready!
Rudolph the Red-Nosed Reindeer Cookies Variations
Feel free to let your creativity shine by customizing these festive treats to your taste and preferences!
- Nut-Free: Substitute chocolate biscuits with graham crackers or gluten-free cookies to accommodate nut allergies without sacrificing flavor.
- Dairy-Free: Use dairy-free cream cheese and vegan chocolate biscuits for a deliciously inclusive option that everyone can enjoy.
- Chocolate Lovers: Add chocolate drizzle on top of the candy coating for an extra layer of decadence; it’s a delightful surprise!
- Fruit Twist: Incorporate dried cranberries or chopped almonds inside the cookie mixture for a sweet and crunchy twist—treats that taste even more festive!
- Spicy Kick: Add a sprinkle of cinnamon or ginger to the cookie base for a warm flavor boost that complements the holiday spirit.
- Mini Versions: Roll smaller dough balls for bite-sized cookies—perfect for parties and fun to pop into your mouth without the mess!
- Layered Delight: Create a layered treat by mixing in some crushed peppermint candies or sprinkles to the melted candy coating for a festive crunch.
- Accessorize: Use assorted candies for decoration, like M&M's or gummy bears, letting kids choose their favorite designs—making it a creative family activity!
These ideas will not only elevate your Rudolph the Red-Nosed Reindeer Cookies but also fill your holiday season with unique flavors and playful creativity. If you want more no-bake inspiration, be sure to check out my No-Bake Holiday Cheesecake or try adding some fun to your festive treats with Creative Cookie Decorating!
Make Ahead Options
The Rudolph the Red-Nosed Reindeer Cookies are perfect for those busy holiday schedules! You can prepare the cookie base (chocolate biscuits, cream cheese, and powdered sugar) up to 24 hours in advance and store it tightly wrapped in the refrigerator to maintain quality. This allows you to have the base ready for easy shaping when you’re ready to decorate. For even more convenience, you can roll the cookie balls and chill them, then refrigerate them for up to 3 days before dipping them in the candy melts. Just be sure to cover them well to prevent them from drying out. When you're ready to finish, simply melt the candy coating and decorate as outlined in the recipe! These prep-ahead tips not only save time but also ensure your holiday treats look just as delightful when it's time to share them.

Rudolph the Red-Nosed Reindeer Cookies Recipe FAQs
How do I choose the right chocolate biscuits for the cookie base?
Absolutely! Look for biscuits that are rich and chocolatey, as they build the flavor base of your cookies. A good option is classic chocolate sandwich cookies, which provide a solid consistency. If you're aiming for a gluten-free version, there are excellent gluten-free chocolate cookies available that work just as well!
How should I store the Rudolph the Red-Nosed Reindeer Cookies?
You can store your cookies at room temperature in an airtight container for up to 5 days. If you prefer a firmer texture, refrigerate them where they will last for up to a week. Just make sure they are tightly sealed to keep them from drying out.
Can I freeze the Rudolph the Red-Nosed Reindeer Cookies?
Yes, definitely! To freeze, place the cookies in a single layer in an airtight container or in a freezer bag. They can be frozen for up to 3 months. When you're ready to enjoy them, simply thaw them overnight in the fridge or at room temperature for a quick snack.
What should I do if my cookie mixture is too crumbly?
Very! If you find that your cookie mixture is crumbly and not holding together, it may need a bit more moisture. Consider adding a little more softened cream cheese or even a splash of milk. Mix well until you achieve a consistency that is moldable but not sticky.
Are these cookies safe for pets?
No, it’s best to keep these festive treats away from pets. The chocolate biscuits and any added chocolate decorations can be harmful to dogs and other pets. Always enjoy these cookies responsibly with human family and friends!
Can I use a different type of candy melt for decoration?
Absolutely! While red candy melts make them festive, you can use any color candy melts you like for a creative twist. Feel free to experiment with flavors as well, like white chocolate or peppermint-flavored melts.

Rudolph the Red-Nosed Reindeer Cookies for Festive Cheer
Equipment
- food processor
- mixing bowl
- parchment paper
- Microwave-safe bowl
Ingredients
Cookie Base
- 200 grams Chocolate Biscuits Crushed
- 100 grams Cream Cheese Softened
- 50 grams Powdered Sugar
Decorations
- 100 grams Red Candy Melts For noses
- 1 pack Wilton Candy Eyes
- 10 pieces Mini Pretzels For antlers
- 1 tube Black Decorating Gel For details
Instructions
Cookie Preparation
- Crush the chocolate biscuits into fine crumbs using a food processor or a rolling pin.
- Blend the biscuit crumbs with softened cream cheese and powdered sugar until smooth and moldable.
- Let the mixture sit for a few minutes to firm up.
Shaping Cookies
- Roll small portions of the mixture into round balls, then flatten each into a cookie shape.
- Place on a baking sheet lined with parchment paper, spaced apart.
Chilling
- Chill cookie bases in the refrigerator for at least 30 minutes.
Melting Candy Coating
- Melt the red candy melts in a microwave-safe bowl until smooth, using 30-second intervals.
Adding Noses
- Dip each cookie top into the melted candy, allowing excess to drip off.
Decorating
- Attach mini pretzels on top of each cookie for antlers before the candy hardens.
- Place candy eyes just above the red noses.
Final Touches
- Use black decorating gel to add smiles or nostrils on each cookie.
- Allow decorated cookies to set for 15-20 minutes at room temperature.
Serving
- Once dry, arrange cookies on a festive platter and enjoy!


Leave a Reply