
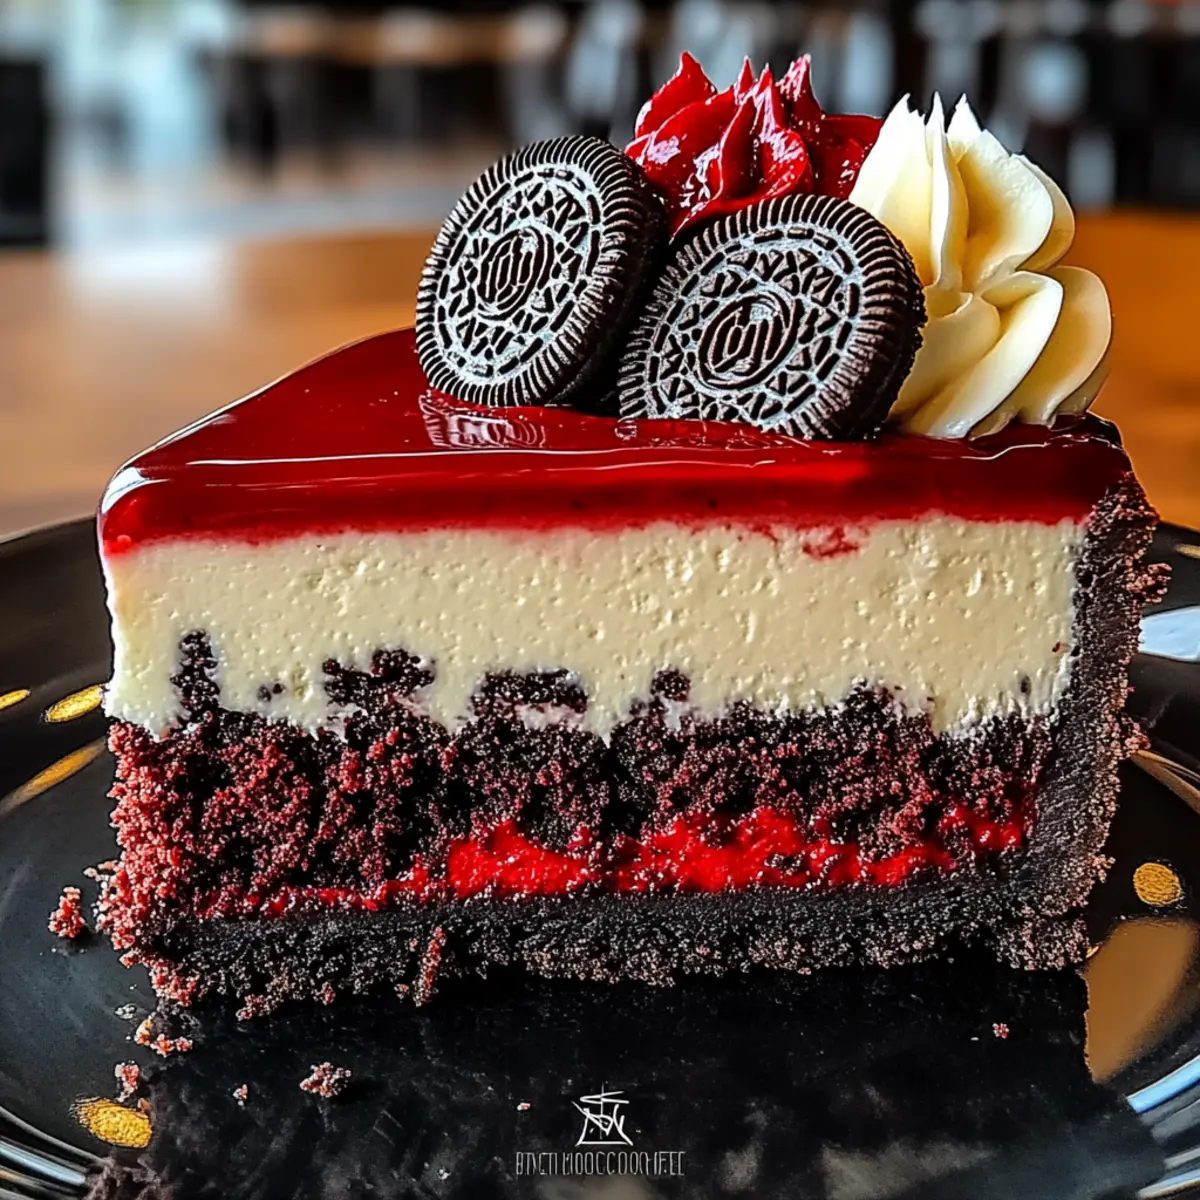
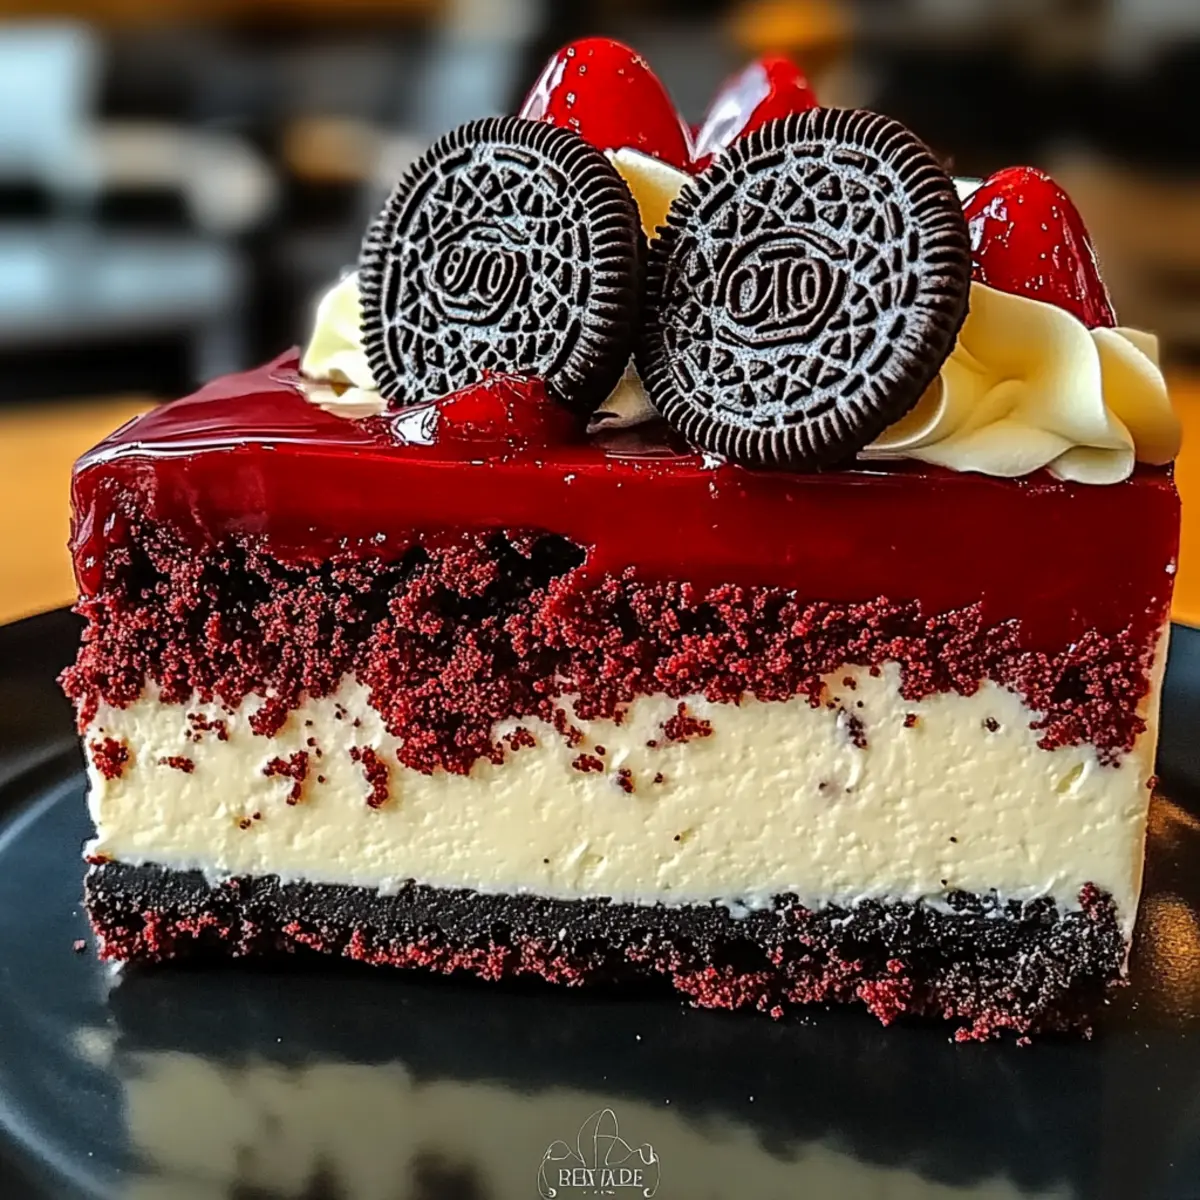
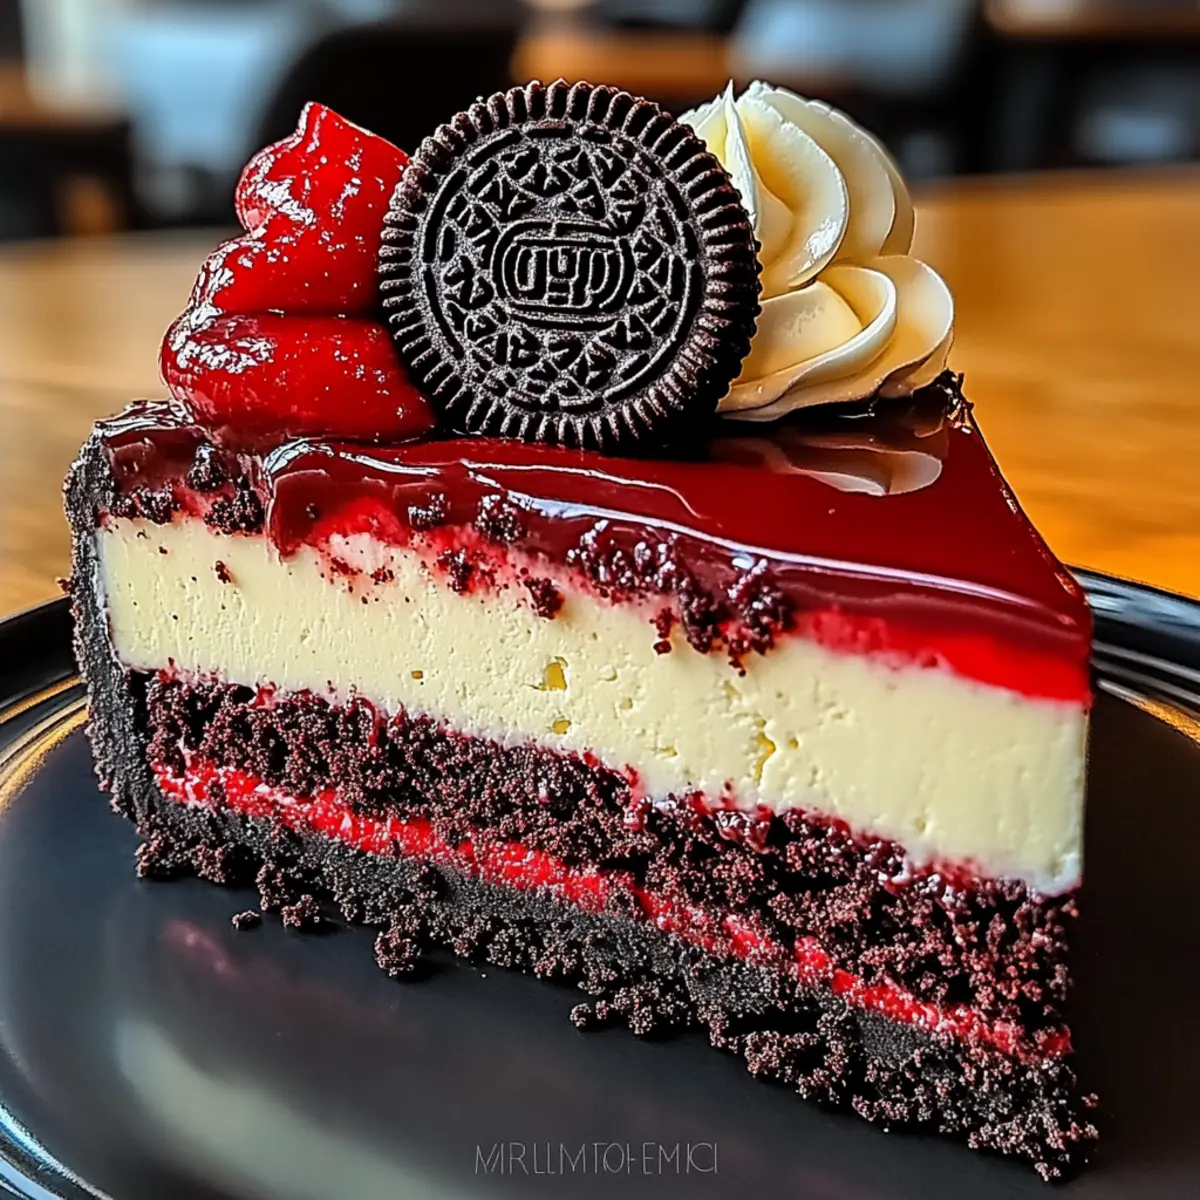
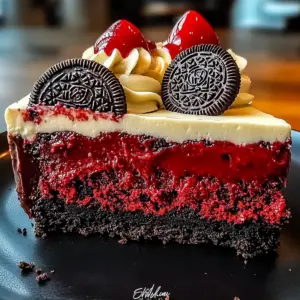
As I sifted through a vibrant crimson batter, I couldn’t help but feel a rush of excitement—today, I'm making my ultimate crowd-pleaser, Red Velvet Oreo Cheesecake! This visually striking dessert combines the rich flavors of red velvet with the smooth creaminess of cheesecake, all resting on a crunchy Oreo crust. Not only is it a stunning centerpiece for any gathering, but it's also incredibly easy to prepare, allowing you to impress your guests without spending all day in the kitchen. It's a customizable delight that can cater to various dietary needs, making it perfect for everyone. Ready to dive into a slice of indulgence that your taste buds won’t soon forget? Let’s whip up this decadent treat!
Why Is This Cheesecake So Irresistible?
Decadent flavors: The luscious blend of red velvet and cream cheese creates a harmonious balance that will wow your guests.
Customizable base: You can switch out the Oreo crust for chocolate graham crackers or even gluten-free options, ensuring everyone can indulge.
Make-ahead magic: Perfect for busy hosts, this cheesecake can be prepped in advance, allowing you to enjoy your gathering hassle-free.
Stunning presentation: Its vibrant colors make it a true showstopper, guaranteed to draw compliments at any gathering.
Rich yet light: Each slice delivers an indulgent punch without feeling overly heavy, making it a satisfying treat for any occasion.
Say goodbye to boring desserts and try this magnificent Caramel Cheesecake Brownie for an equally delightful twist!
Red Velvet Oreo Cheesecake Ingredients
• Get ready to gather your baking essentials!
For the Crust
- Oreo Cookies – Perfect for a crunchy, chocolatey base; swap with chocolate graham crackers for a different flavor.
- Unsalted Butter – Binds the crust together; ensure it’s melted for effortless mixing.
For the Cheesecake Layers
- Cream Cheese – Provides that signature creamy texture; always go for full-fat for the richest result.
- Granulated Sugar – Sweetens your cheesecake beautifully; feel free to adjust the quantity to suit your taste.
- Eggs – Vital for structure; using room-temperature eggs ensures a smooth batter.
- Red Velvet Cake Mix – The star of the show; consider using homemade red velvet cake batter for a personal touch.
- Vanilla Extract – Adds depth to the flavor; fresh vanilla or vanilla bean paste elevates the taste even further.
For the Ganache Topping
- Heavy Cream – Creates a luscious ganache; coconut cream is a fantastic substitute for a dairy-free option.
- Dark Chocolate – The key to a rich ganache; switch to milk chocolate if you prefer a sweeter finish.
With these ingredients on hand, you’re just a step away from baking a stunning Red Velvet Oreo Cheesecake that will definitely impress everyone at your gathering!
Step‑by‑Step Instructions for Red Velvet Oreo Cheesecake
Step 1: Preheat and Prepare the Crust
Begin by preheating your oven to 350°F (175°C). In a mixing bowl, combine crushed Oreo cookies and melted unsalted butter until well blended. The mixture should resemble wet sand. Press this mixture evenly into the bottom of a 9-inch springform pan, creating a firm crust. Make sure to pack it tightly for stability.
Step 2: Mix the Red Velvet Cheesecake Layer
In a large mixing bowl, beat the cream cheese and granulated sugar together until smooth and creamy, about 2-3 minutes. Add the room-temperature eggs one at a time, mixing thoroughly after each addition. Gradually incorporate the red velvet cake mix and vanilla extract until just combined and the batter is free of lumps, showcasing a vibrant red hue.
Step 3: Prepare the Vanilla Cheesecake Layer
In another bowl, beat together cream cheese, sugar, and vanilla extract until silky smooth. This mixture should be light and creamy; ensure no clumps remain. This vanilla layer will complement the rich red velvet, so take your time to achieve a uniform texture, about 2 minutes of mixing should suffice.
Step 4: Layer the Cheesecakes
Carefully pour the red velvet cheesecake batter into the prepared Oreo crust, smoothing the top with a spatula. Next, gently dollop the vanilla cheesecake layer on top of the red velvet while still in the springform pan. Use a knife or skewer to swirl the two batters together for a marbled effect, which not only looks stunning but enhances flavor.
Step 5: Bake the Cheesecake
Place your cheesecake in the preheated oven and bake for 45-50 minutes. Keep an eye on it; when the edges are set and the center jiggles slightly when shaken, it’s done. Remember not to open the oven door during baking, as this can cause cracks to form in your cheesecake.
Step 6: Cool Gradually
Once baked, turn off the oven and leave the cheesecake inside for an additional hour to cool gradually. This step helps prevent cracks from sudden temperature changes. After 60 minutes, remove the cheesecake and let it come to room temperature before refrigerating for at least 6 hours, or ideally overnight for the best flavor and texture.
Step 7: Make the Ganache Topping
When ready to serve, prepare your ganache by heating the heavy cream in a small saucepan until just boiling. Pour the hot cream over chopped dark chocolate in a bowl and let it sit for a minute. Stir until smooth. Allow the ganache to cool slightly until it thickens to a drizzling consistency.
Step 8: Assemble and Decorate
Once your cheesecake has chilled and the ganache is ready, drizzle the luscious chocolate ganache over the top of your Red Velvet Oreo Cheesecake. Feel free to get creative with the presentation! Top with whipped cream, crushed Oreos, or fresh berries for an elegant finish before slicing and serving.
How to Store and Freeze Red Velvet Oreo Cheesecake
Fridge: Store leftover slices in an airtight container for up to 5 days. This will keep your decadent Red Velvet Oreo Cheesecake fresh and flavorful.
Freezer: For longer storage, wrap individual slices tightly in plastic wrap and then place them in a freezer-safe container. They will stay good for up to 3 months.
Thawing: To enjoy frozen cheesecake, simply transfer slices to the refrigerator and let them thaw overnight before serving. This ensures they retain their rich, creamy texture.
Reheating: If you prefer warm cheesecake, briefly microwave a slice for about 10-15 seconds to gently heat it without compromising the quality.
What to Serve with Red Velvet Oreo Cheesecake
Transform your dessert experience into a delightful feast with these tasty pairings that will leave your guests smiling.
- Fresh Berries: Bursting with juicy sweetness, fresh strawberries or raspberries bring a refreshing contrast to the rich cheesecake's density.
- Whipped Cream: A light and airy dollop of homemade whipped cream enhances the creamy texture, adding a touch of elegance to each slice.
- Chocolate-Covered Strawberries: The delightful combination of chocolate and strawberries complements the decadent flavors, inviting indulgence with every bite.
- Coffee or Espresso: A warm cup of coffee or espresso balances the sweetness of the cheesecake, providing a comforting and satisfying finish to the meal.
- Dark Chocolate Ganache Dipping Sauce: Serve extra ganache on the side for those who want that extra chocolatey goodness, elevating the overall experience.
- Ice Cream: Pair with a scoop of vanilla or cream cheese ice cream for a play of temperatures that adds an extra layer of indulgence.
These pairings promise to elevate your Red Velvet Oreo Cheesecake into a truly unforgettable dessert experience!
Make Ahead Options
These Red Velvet Oreo Cheesecake preparations are a dream for busy home cooks looking to save time! You can make the cheesecake layers up to 24 hours in advance, storing them in the refrigerator until you're ready to bake. To maintain quality, prepare the crust and cheesecake batter separately, refrigerating both components—this helps to keep the crust crisp and prevents the batter from settling. When it's time to bake, simply layer the chilled cheesecake batters over the crust and follow the baking instructions. As a final tip, remember to let it cool before refrigerating overnight for optimal flavor—your guests will be amazed at how effortlessly delicious this make-ahead treat can be!
Tips for the Best Red Velvet Oreo Cheesecake
-
Room Temperature Ingredients: Always bring your cream cheese and eggs to room temperature to ensure a smooth, lump-free batter. Cold ingredients can lead to an uneven texture.
-
Crust Consistency: Make sure to pack your Oreo crust tightly into the pan. A loose crust can crumble when slicing and serving the cheesecake, ruining the perfect presentation.
-
Avoided Oven Cracks: Resist the urge to open the oven door during baking! This will help maintain a consistent temperature, preventing cracks from forming in your Red Velvet Oreo Cheesecake.
-
Chill Time Essential: For the best flavor and creamy texture, refrigerate your cheesecake overnight before serving. It allows the flavors to meld beautifully.
-
Decorative Touches: Don't hesitate to garnish with whipped cream or fresh berries! These add a beautiful touch and enhance the overall flavor experience.
Red Velvet Oreo Cheesecake Variations
Feel free to get creative with your Red Velvet Oreo Cheesecake by making these delightful substitutes and twists!
-
Different Crust: Swap out Oreo cookies for chocolate graham crackers or even gingersnap cookies for a spiced flavor that adds a unique dimension to the crust.
-
Dairy-Free Options: Use coconut cream instead of heavy cream for the ganache. This maintains the rich texture while making it suitable for lactose intolerant friends!
-
Fruit Infusion: Stir in fresh berries like raspberries or strawberries into the cheesecake batter for bursts of fruity freshness in every bite. Not only does this look gorgeous, but it also enhances the flavor profile beautifully.
-
Citrus Zest: Consider adding zest from an orange or lemon to the batter. The citrus brightens the cheesecake, perfectly balancing the richness of the red velvet.
-
Flavored Extract: Go beyond vanilla by integrating almond or hazelnut extract into your cheesecake mix. It introduces a delightful nutty note that will surprise and please the palate.
-
Chocolate Lovers: For an ultra-decadent twist, fold in mini chocolate chips within the batter. Each bite will be a sweet surprise with an added textural punch!
-
Nutty Crunch: Before serving, sprinkle chopped pecans or walnuts on top of the cheesecake for that extra crunch. It adds a nice contrast to the smoothness and enhances the flavor experience.
-
Spiced Version: Add a pinch of cinnamon or nutmeg to the cheesecake mixture for a cozy flavor twist reminiscent of holiday baking.
Take your cheesecake experience to the next level by trying out these variations! And if you're looking for more delectable options, don’t miss out on the wonderful Chocolate Caramel Cheesecake for another irresistible dessert!
Red Velvet Oreo Cheesecake Recipe FAQs
What type of Oreo cookies work best for the crust?
For the crust, classic Oreo cookies are perfect for that crunchy, chocolatey base. However, you can also experiment with Double Stuff Oreos for added creaminess or opt for gluten-free chocolate graham crackers if you're catering to dietary needs. The choice depends on your flavor preference!
How should I store leftover Red Velvet Oreo Cheesecake?
Leftover cheesecake can be stored in an airtight container in the refrigerator for up to 5 days. Make sure it's well-sealed to maintain its delicious flavor and texture. If you want to keep it longer, consider freezing slices for up to 3 months.
Can I freeze Red Velvet Oreo Cheesecake?
Absolutely! To freeze, wrap individual slices tightly in plastic wrap and then place them in a freezer-safe container. This double wrapping helps prevent freezer burn. When you're ready to indulge again, thaw them overnight in the fridge for the best texture and flavor retention.
What if the cheesecake cracks during baking?
If cracks appear in your Red Velvet Oreo Cheesecake, don’t worry! Cooling it gradually in the oven will help minimize this risk. Make sure to turn off the oven but leave the cheesecake inside for an hour after baking. Additionally, avoid opening the oven door during the baking process to maintain a consistent temperature.
Can I make this cheesecake gluten-free?
Certainly! To make a gluten-free version, all you need to do is substitute the Oreo cookies with gluten-free chocolate graham crackers. Additionally, ensure that your red velvet cake mix is gluten-free. This way, everyone can enjoy this decadent Red Velvet Oreo Cheesecake without any dietary concerns!
Is there a dairy-free option for this cheesecake?
Yes! For a dairy-free Red Velvet Oreo Cheesecake, you can use dairy-free cream cheese, coconut cream in the ganache, and almond milk in replacement of milk for the batter. Just be sure to check that your cookie base is dairy-free as well!
Indulgent Red Velvet Oreo Cheesecake to Dazzle Your Guests
Equipment
- 9-inch springform pan
- mixing bowls
- spatula
- Electric Mixer
- saucepan
Ingredients
For the Crust
- 24 cookies Oreo Cookies
- ½ cup Unsalted Butter melted
For the Cheesecake Layers
- 16 oz Cream Cheese full-fat
- 1 cup Granulated Sugar adjust to taste
- 3 large Eggs room temperature
- 1 cup Red Velvet Cake Mix
- 1 teaspoon Vanilla Extract fresh or vanilla bean paste
For the Ganache Topping
- 1 cup Heavy Cream or coconut cream for dairy-free
- 8 oz Dark Chocolate or milk chocolate for a sweeter finish
Instructions
Step-by-Step Instructions for Red Velvet Oreo Cheesecake
- Preheat your oven to 350°F (175°C) and prepare the crust by mixing crushed Oreo cookies and melted unsalted butter until well blended. Pack this mixture evenly into the bottom of a 9-inch springform pan.
- In a large mixing bowl, beat cream cheese and granulated sugar together until smooth. Add eggs one at a time, followed by the red velvet cake mix and vanilla extract until combined.
- In another bowl, beat cream cheese, sugar, and vanilla extract until silky smooth. This mixture should be light and creamy.
- Pour the red velvet cheesecake batter into the prepared crust and dollop the vanilla cheesecake layer on top. Use a knife to swirl the batters together.
- Bake for 45-50 minutes until the edges are set and the center jiggles slightly. Do not open the oven door during baking.
- Turn off the oven and leave the cheesecake inside for 1 hour to cool gradually. After cooling, let it reach room temperature before refrigerating for at least 6 hours.
- For the ganache, heat heavy cream until boiling, then pour over chopped chocolate. Stir until smooth and let cool slightly.
- Drizzle the ganache over the cheesecake and garnish as desired before slicing and serving.


Leave a Reply