
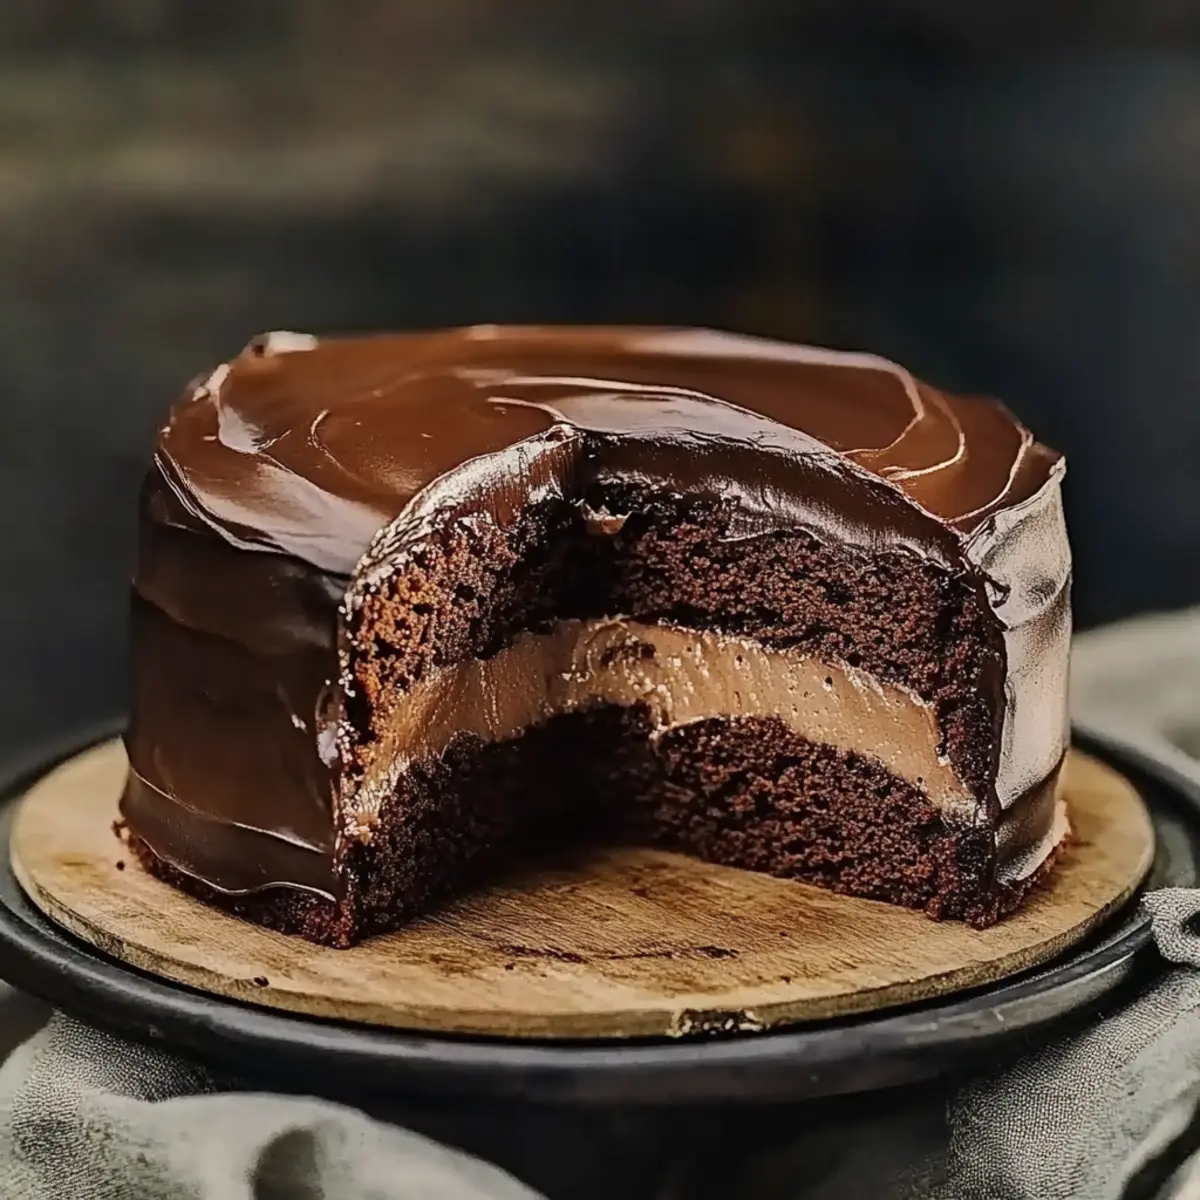
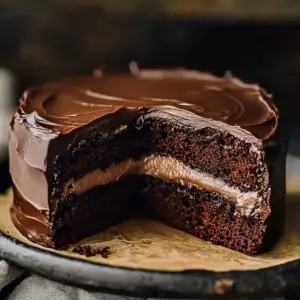
There's something magical about the smell of a freshly baked cake wafting through the kitchen, beckoning loved ones to gather around. Today, I’m sharing a timeless classic that always hits the spot: Matilda's Chocolate Cake. Packed with rich cocoa and simple ingredients, this cake proves that you don’t need to be a professional baker to create a showstopper dessert. Not only is this recipe quick to whip up and perfect for any occasion, but it also has that cozy, homemade charm that reminds me of sweet memories with family. Whether it’s for a birthday, a cozy gathering, or just because you deserve a treat, this cake never disappoints. Are you ready to dive into a slice of deliciousness that your friends and family will rave about? Let’s get baking!

Why is this cake a must-try?
Decadent, rich flavor: Each slice of Matilda's Chocolate Cake is loaded with chocolatey goodness, enveloping your taste buds in sheer delight.
Effortless preparation: Don’t worry if you’re short on time; this recipe magic comes together in just over an hour! Perfect for last-minute celebrations or cravings.
Versatile for any occasion: Whether it’s a festive holiday gathering or a cozy weeknight treat, this cake shines in every setting. Serve it plain, or elevate it with luscious chocolate frosting or whipped cream.
Crowd pleaser: Everyone loves chocolate, and this cake brings people together, making it a go-to dessert for gatherings.
Nostalgic charm: As simple as grandma's recipes, it’s sure to evoke sweet memories and smiles at your table. Enjoy a slice with your favorite coffee or tea!
If you're curious about how to customize your dessert, check out our baking tips and tricks.
Matilda's Chocolate Cake Ingredients
For the Batter
- All-purpose flour – Creates the cake's structure and fluffy texture.
- Granulated sugar – Sweetens the cake, helping to balance the rich cocoa flavor.
- Unsweetened cocoa powder – Adds the deep chocolate flavor that makes this cake irresistible.
- Baking powder – A leavening agent that gives the cake a light, airy rise.
- Baking soda – Reacts with the acid in the recipe, contributing to the cake's lift.
- Salt – Enhances the flavors, making the chocolate taste even richer.
- Whole milk – Brings moisture and richness for a tender crumb.
- Vegetable oil – Ensures the cake stays moist and adds a slight richness.
- Large eggs – Bind the ingredients together and help in the leavening process.
- Vanilla extract – Infuses a warm, aromatic flavor that complements the chocolate.
- Boiling water – Intensifies the chocolate flavor and yields a smooth batter.
Feel free to explore how you can enhance your Matilda's Chocolate Cake with delightful additions or alternate ingredients!
Step‑by‑Step Instructions for Matilda's Chocolate Cake
Step 1: Preheat the Oven
Begin by preheating your oven to 350°F (175°C) while you prepare the batter. Grease and flour two 9-inch round cake pans, ensuring even coverage to prevent sticking. This initial step is crucial for achieving a perfectly baked Matilda’s Chocolate Cake that will rise beautifully and come out easily later.
Step 2: Combine Dry Ingredients
In a large mixing bowl, sift together 2 cups of all-purpose flour, 2 cups of granulated sugar, ¾ cup of unsweetened cocoa powder, 1½ teaspoons of baking powder, 1½ teaspoons of baking soda, and 1 teaspoon of salt. Whisk these dry ingredients thoroughly for about 1 minute until blended, creating a uniform mixture that serves as the foundation of your rich chocolate cake.
Step 3: Add Wet Ingredients
To the bowl of dry ingredients, pour in 1 cup of whole milk, ½ cup of vegetable oil, 2 large eggs, and 2 teaspoons of vanilla extract. Using an electric mixer, beat the mixture on medium speed for about 2 minutes until the batter is smooth and well combined. This step helps to activate the leavening agents for a light texture in your Matilda's Chocolate Cake.
Step 4: Incorporate Boiling Water
Next, carefully stir in 1 cup of boiling water to the cake batter. The mixture will be quite thin, which is perfectly normal! This addition not only enhances the chocolate flavor but also ensures a moist final result. Mix until fully incorporated, ensuring no lumps remain for an ultimate silky batter.
Step 5: Pour Into Pans
Divide the batter evenly between the two prepared cake pans, filling each to about halfway. Give each pan a gentle tap on the counter to release any air bubbles, which will help the cakes rise evenly. This careful pouring ensures that both layers of Matilda’s Chocolate Cake are of equal height and bake beautifully!
Step 6: Bake the Cake
Place the cake pans in your preheated oven and bake for 30 to 35 minutes, or until a toothpick inserted into the center comes out clean. Keep an eye on your cakes towards the end of the baking time, as you want them firm to the touch but still springy. The aroma of chocolate drifting through your kitchen during this time is truly delightful!
Step 7: Cool and Settle
Once the cakes are baked, remove them from the oven and let them cool in the pans for 10 minutes. After this time, gently take them out and transfer to a wire rack to cool completely. This cooling period is vital as it makes it easier to frost and decorate your Matilda's Chocolate Cake without it crumbling or breaking.
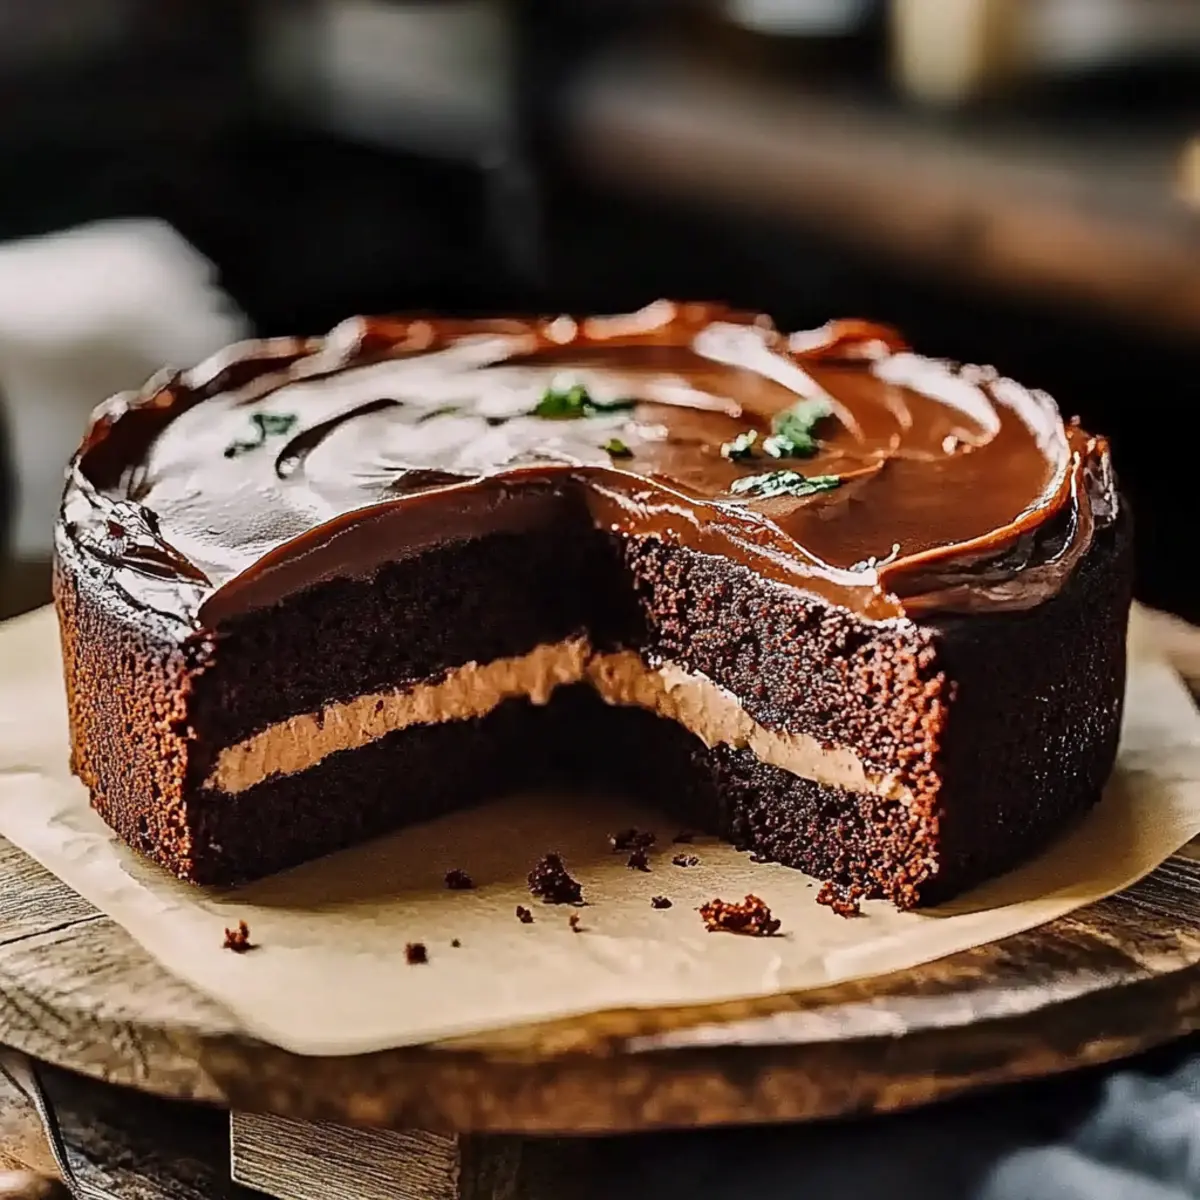
Matilda's Chocolate Cake Variations
Feel free to let your creativity shine as you explore these delightful twists on this classic chocolate cake!
- Gluten-Free: Substitute all-purpose flour with a gluten-free flour blend for a delightful alternative that everyone can enjoy.
- Vegan: Use almond or soy milk, replace the eggs with flaxseed meal, and switch to coconut oil for a completely plant-based version. Your vegan friends will be thrilled!
- Coffee Infusion: Add 1 cup of brewed coffee instead of boiling water for an intensified chocolate flavor that coffee lovers will adore. This small change can truly elevate your cake's depth.
- Nutty Addition: Fold in 1 cup of finely chopped walnuts or pecans into the batter for a delightful crunch and rich flavor accent.
- Minty Twist: Stir in 1 teaspoon of mint extract into the batter or add crushed mint candies to the frosting for a refreshing take on chocolate.
- Spicy Kick: Mix in 1 teaspoon of cinnamon and a pinch of cayenne pepper for a subtle warmth and depth that adds an unexpected and exciting flavor profile.
- Layered Delight: Make a three-layer version by baking an additional cake and stacking them high, combining flavors with different fillings.
- Fruity Version: Incorporate 1 cup of blended raspberries or sliced strawberries to add a fruity surprise beneath that luscious chocolate layer.
Explore these variations to make Matilda's Chocolate Cake uniquely yours, and share your delicious creations with family and friends! And if you're looking for ways to elevate your baking game, don’t forget to check out our baking tips and tricks and expert ingredient swaps.
Expert Tips for Matilda's Chocolate Cake
Perfectly Measure Ingredients: Ensure you measure your flour correctly; too much can lead to a dense cake. Use the spoon-and-level method for best results.
Boiling Water Essential: Don’t skip the boiling water step; it intensifies the chocolate flavor and keeps your cake wonderfully moist.
Avoid Over-Mixing: Once you add the wet ingredients, mix just until combined. Over-mixing can lead to a tough texture in your Matilda's Chocolate Cake.
Check for Doneness: Insert a toothpick in the center; if it comes out clean, it's ready. If not, give it a few extra minutes.
Cooling Time Matters: Allow the cakes to cool fully before frosting. This prevents the frosting from melting and ensures a beautiful presentation.
Storing Made Simple: If making ahead, store wrapped cakes in the fridge for freshness. They can be kept for up to 3 days.
Make Ahead Options
Matilda's Chocolate Cake is perfect for meal prep, allowing you to enjoy delicious homemade dessert without the last-minute rush! You can prepare the batter up to 24 hours in advance; simply mix all the wet and dry ingredients together but omit the boiling water until just before baking. To maintain quality, store the prepared batter tightly covered in the refrigerator. When you’re ready to bake, stir in the boiling water, pour the batter into the pans, and proceed with baking as instructed. This way, you’ll have freshly baked cakes with minimal effort on busy weeknights or special occasions!
What to Serve with Matilda's Chocolate Cake?
There's nothing quite like concluding a delightful meal with a slice of warm, decadent chocolate cake to enchant your senses.
-
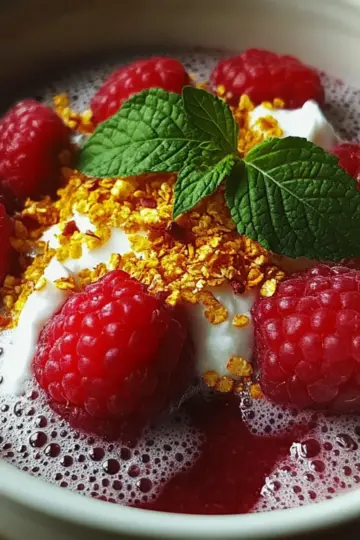
Fresh Berries: Juicy strawberries or raspberries add a bright, tangy contrast that balances the rich chocolate.
-
Whipped Cream: Light and airy, a dollop of fresh whipped cream provides a creamy texture that elevates each bite. This simple addition makes every slice feel like a dessert from a fine restaurant.
-
Coffee or Espresso: A warm cup of coffee enhances the chocolate flavors, creating a cozy atmosphere perfect for sharing stories and laughter.
-
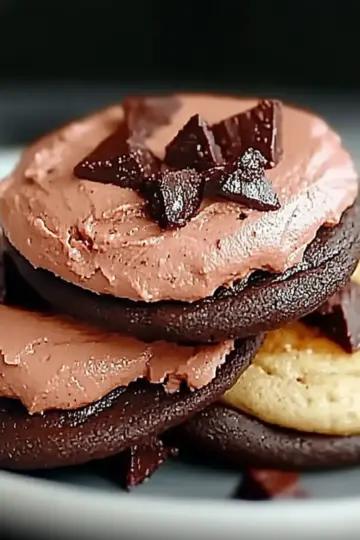
Chocolate Frosting: For the ultimate chocolate experience, drizzle a rich chocolate frosting on top. It amps up the indulgence and takes your cake to the next level.
-
Vanilla Ice Cream: A scoop of vanilla ice cream pairs beautifully, providing a creamy and cool contrast to the warm cake. The melting ice cream envelops the chocolate, offering a satisfying treat.
-
Coconut Flakes: Toasted coconut adds a subtle sweetness and chewy texture, making each bite even more interesting.
-
Mint Leaves: A sprinkle of fresh mint leaves not only looks gorgeous but brings a refreshing note that lifts the decadent richness of the cake.
-
Chocolate Sauce: Drizzle some warm chocolate sauce over the cake to intensify the chocolate experience, inviting everyone to indulge a little more.
-
Red Wine: A glass of full-bodied red wine can enhance the flavors, making it a sophisticated pairing for special occasions.
This collection of flavors and textures can turn your dessert course into a culinary celebration!
How to Store and Freeze Matilda's Chocolate Cake
Room Temperature: Allow the cake to cool completely, then store it in an airtight container at room temperature for up to 3 days to maintain its freshness.
Fridge: If you want to keep your Matilda's Chocolate Cake a bit longer, wrap it tightly in plastic wrap and store it in the refrigerator for up to 5 days.
Freezer: For extended storage, slice the cake and freeze individual pieces in a freezer-safe container or wrap them in plastic wrap for up to 3 months.
Reheating: To enjoy a slice at its best, simply thaw the cake in the fridge overnight and let it come to room temperature before serving. A quick slight reheat in the microwave can also enhance the chocolatey richness!
Matilda's Chocolate Cake Recipe FAQs
How do I select ripe ingredients for this cake?
Absolutely! For the best results, use fresh eggs, whole milk that’s close to expiry, and high-quality cocoa powder to enhance flavor. For the vegetable oil, a neutral oil works best; avoid older oils that may have gone rancid.
How should I store leftovers of Matilda's Chocolate Cake?
To keep your cake fresh, allow it to cool completely. Then, store it in an airtight container at room temperature for up to 3 days. If you're using whipped cream or frosting, it’s better to refrigerate it. Just wrap it well in plastic wrap; it will stay good in the fridge for up to 5 days!
Can I freeze Matilda's Chocolate Cake?
Very! To freeze, first slice the cake into individual pieces. Wrap each slice tightly in plastic wrap, then place them in a freezer-safe container. You can enjoy your cake for up to 3 months. When you're ready to indulge, thaw the slices overnight in the fridge and let them sit at room temperature for about 30 minutes for the best taste.
What should I do if my cake is dry?
No worries! A dry cake can happen if it's overbaked or if the ingredients were measured incorrectly. To counteract dryness, brush the cakes lightly with a simple syrup (equal parts sugar and water heated until dissolved). This adds moisture back into the cake. Next time, ensure you check the cake for doneness 5 minutes earlier to prevent overcooking.
Are there any dietary considerations for Matilda's Chocolate Cake?
Certainly! If you are concerned about allergies, remember this recipe contains gluten and dairy. For gluten-free substitutes, consider using almond or gluten-free flour blends. If someone has an egg allergy, you can replace each egg with ¼ cup of unsweetened applesauce for a similar texture.
Can I make this cake ahead of time?
The more the merrier! You can bake the cake one day in advance. Simply wrap the cooled cakes tightly in plastic wrap and keep them in the fridge. This will not only help with flavor development, but also make frosting easier the next day since the cake will be firmer. Just be sure to let it come to room temperature before serving!
Matilda's Chocolate Cake: A Decadent Delight for All Occasions
Equipment
- Electric Mixer
- mixing bowls
- Measuring cups
- Measuring Spoons
- 9-inch round cake pans
- wire rack
Ingredients
For the Batter
- 2 cups All-purpose flour Creates the cake's structure and fluffy texture.
- 2 cups Granulated sugar Sweetens the cake, helping to balance the rich cocoa flavor.
- ¾ cup Unsweetened cocoa powder Adds the deep chocolate flavor that makes this cake irresistible.
- 1 ½ teaspoons Baking powder A leavening agent that gives the cake a light, airy rise.
- 1 ½ teaspoons Baking soda Reacts with the acid in the recipe, contributing to the cake's lift.
- 1 teaspoon Salt Enhances the flavors, making the chocolate taste even richer.
- 1 cup Whole milk Brings moisture and richness for a tender crumb.
- ½ cup Vegetable oil Ensures the cake stays moist and adds a slight richness.
- 2 large Eggs Bind the ingredients together and help in the leavening process.
- 2 teaspoons Vanilla extract Infuses a warm, aromatic flavor that complements the chocolate.
- 1 cup Boiling water Intensifies the chocolate flavor and yields a smooth batter.
Instructions
Step-by-Step Instructions
- Preheat the oven to 350°F (175°C) and grease two 9-inch round cake pans.
- In a large mixing bowl, sift together all-purpose flour, granulated sugar, cocoa powder, baking powder, baking soda, and salt.
- Add whole milk, vegetable oil, eggs, and vanilla extract to the dry ingredients; mix until smooth.
- Carefully stir in boiling water to the batter until fully incorporated.
- Divide the batter evenly between prepared cake pans and tap gently to release air bubbles.
- Bake for 30 to 35 minutes, checking for doneness with a toothpick.
- Cool in pans for 10 minutes, then transfer to a wire rack to cool completely.

Leave a Reply