
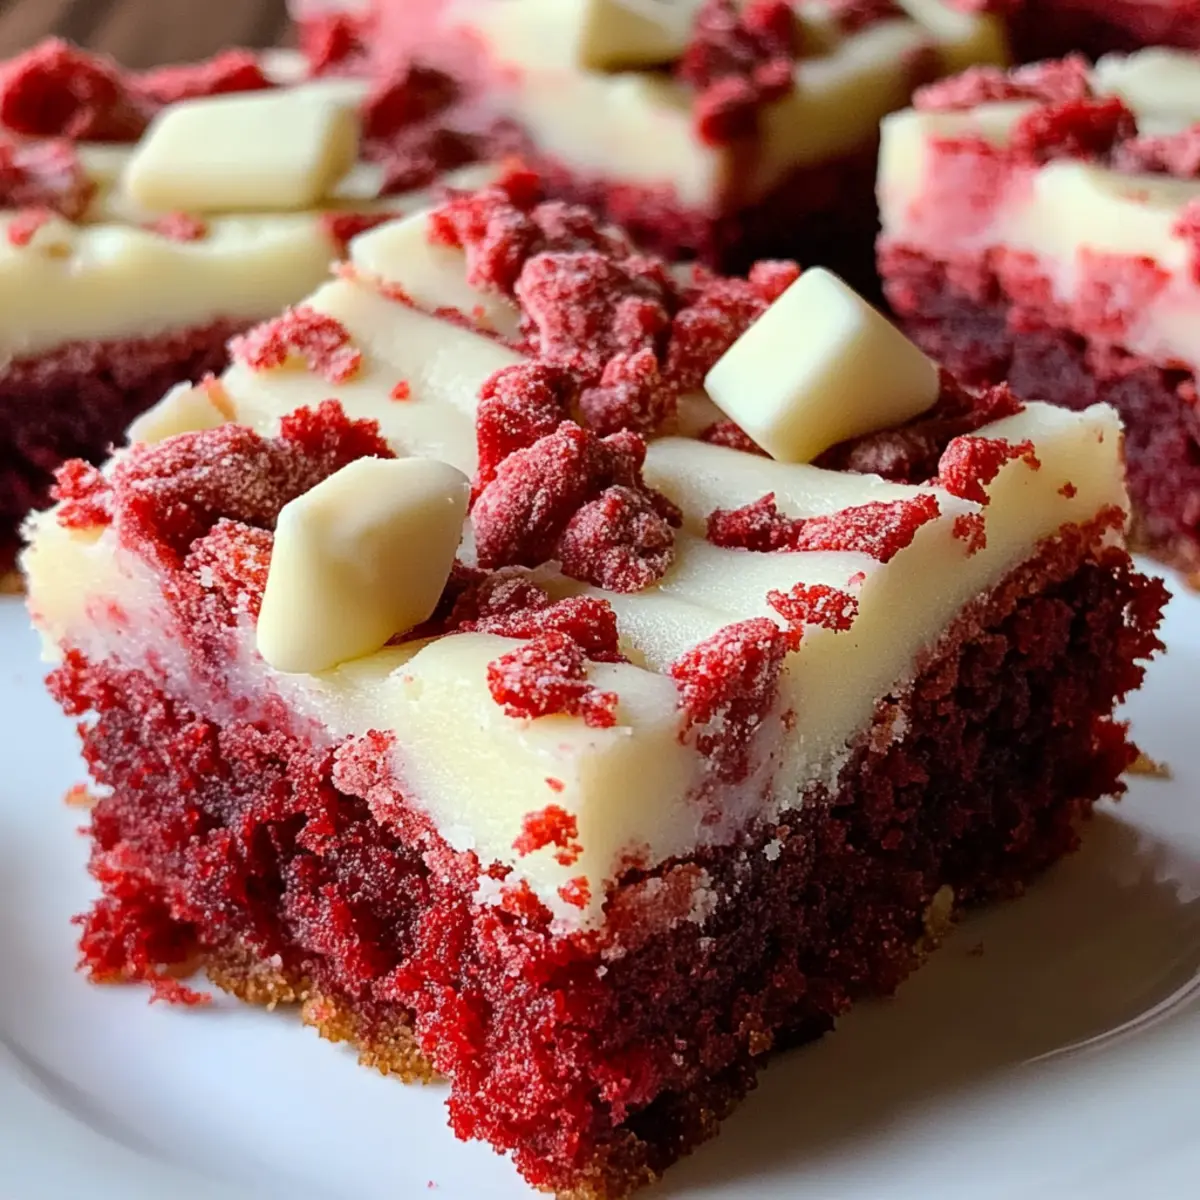
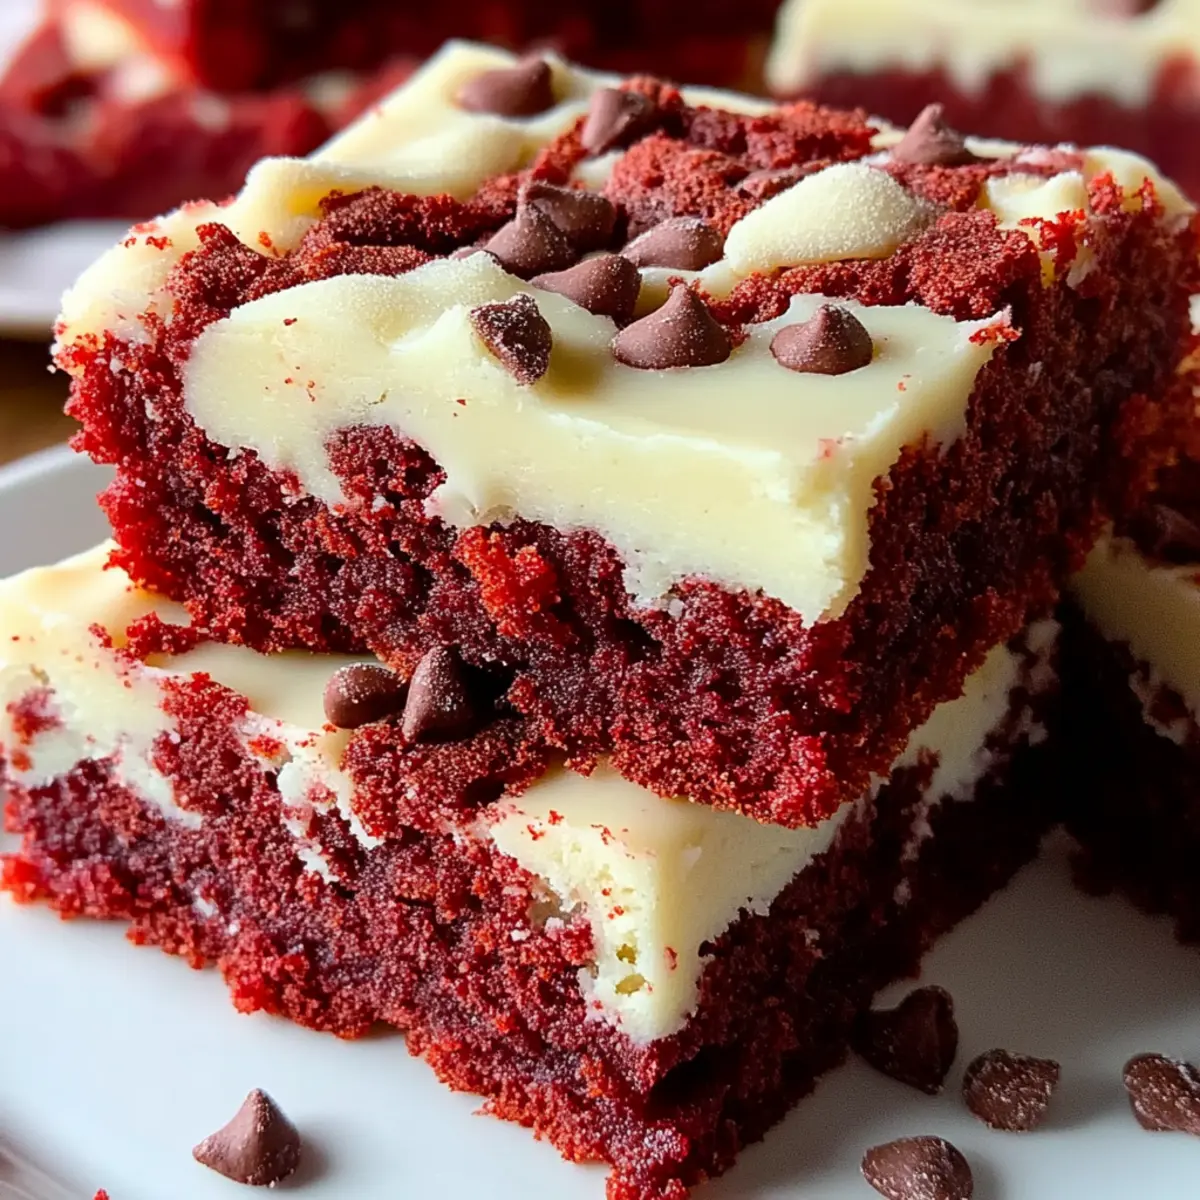
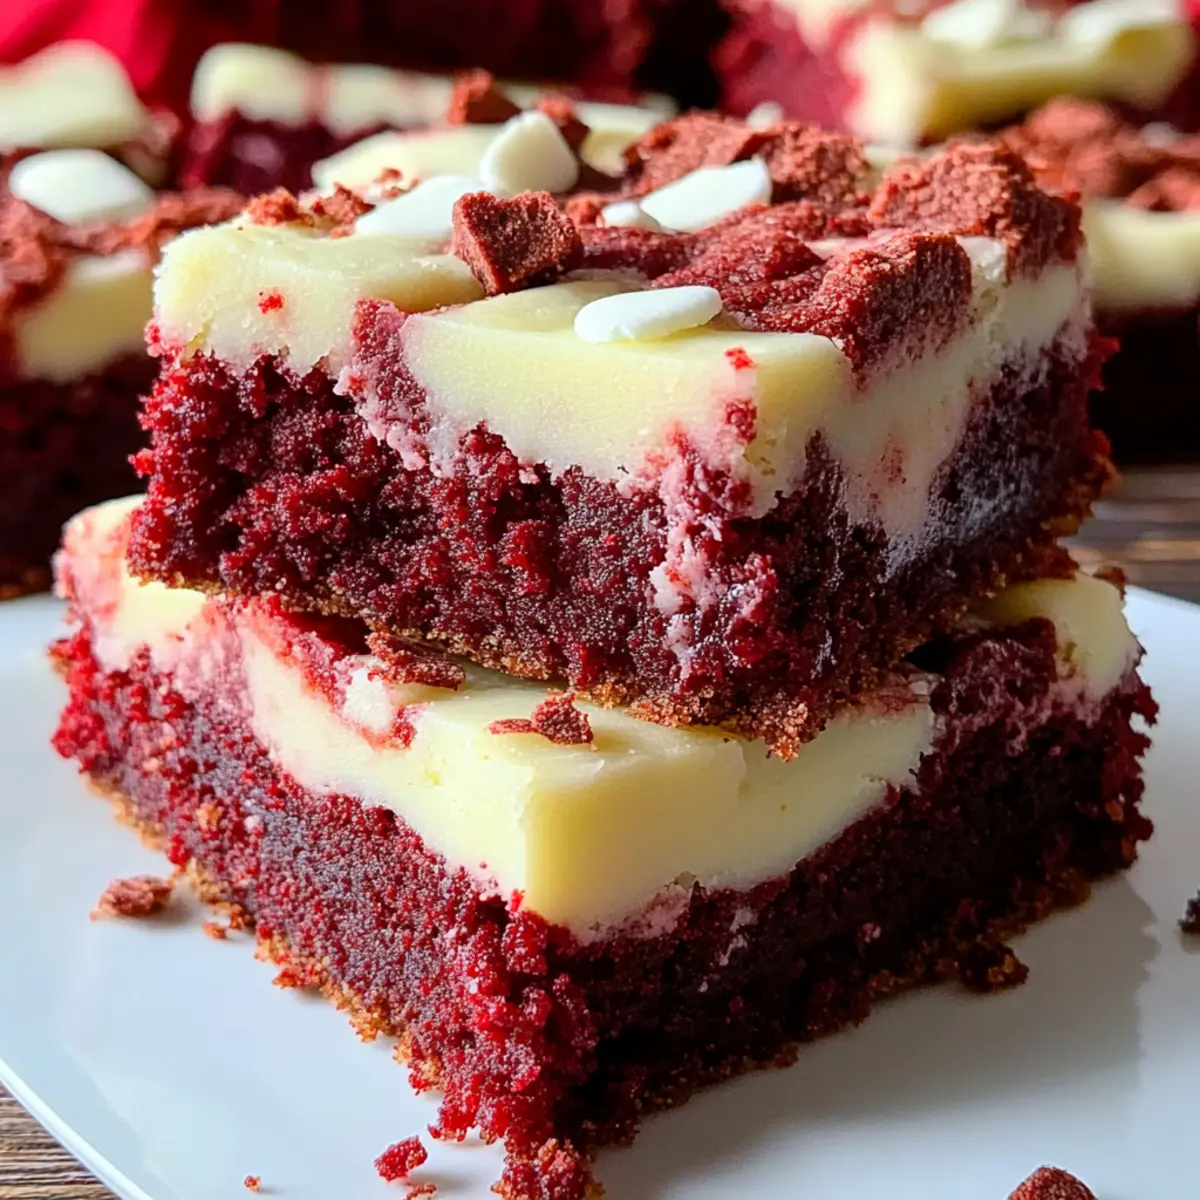
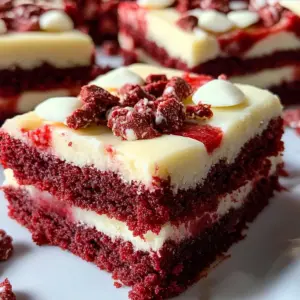
As I stood in my kitchen, the vibrant red of the food coloring caught my eye, immediately reminding me of festive celebrations and cozy gatherings. Today, I’m excited to share my cherished recipe for Red Velvet Cookie Bars—a delightful spin on a classic favorite that’s perfect for anything from casual snacking to a special dessert. Not only do these bars boast a stunning hue that’s sure to impress, but they also come together quickly, making them a fantastic option for busy home chefs. With a rich, soft texture and a generous layer of cream cheese frosting on top, these treats are guaranteed to bring joy to anyone with a sweet tooth. So, are you ready to indulge in a treat that’s as easy to make as it is delicious? Let’s dive into the fun of baking!
Why are these cookie bars a must-try?
Irresistible flavors combine in these Red Velvet Cookie Bars, making them the perfect dessert for any occasion. Quick and easy to whip up, they require minimal prep time—ideal for those busy evenings! Each bar is ultra-soft and features a delightful cream cheese frosting that seals in the moisture. Plus, they’re a great way to get creative if you want to try variations, perhaps inspired by my delicious Cinnamon Roll Bliss Bars or even Pistachio Cream Cookies. Whether for a party or a treat at home, these cookie bars are sure to impress!
Red Velvet Cookie Bars Ingredients
Indulge in the magic of baking with these delightfully rich Red Velvet Cookie Bars!
For the Cookie Base
- 2 ½ cups all-purpose flour – a key ingredient to give structure to your cookie bars.
- 2 tablespoons cocoa powder – this adds a touch of chocolate flavor, enhancing the red velvet experience.
- 1 teaspoon baking soda – helps the bars rise, ensuring a light and fluffy texture.
- ½ teaspoon salt – balances the sweetness, bringing all the flavors together.
- 1 cup unsalted butter, softened – this creates a rich, buttery base that's essential for moisture.
- 1 ½ cups granulated sugar – lends sweetness and contributes to that beautiful soft texture.
- ½ cup brown sugar, packed – adds depth of flavor with its caramel notes, making these bars irresistible.
- 2 large eggs – provide moisture and act as a binding agent, giving the bars their delightful chew.
- 2 teaspoons vanilla extract – enhances the overall flavor profile, making it warm and inviting.
- 1 tablespoon red food coloring – gives the bars their signature vibrant hue that dazzles the eyes.
For the Mix-Ins
- 1 cup white chocolate chips – these melt beautifully, adding a creamy sweetness that pairs perfectly with the red velvet.
For the Topping
- 1 cup cream cheese frosting – either store-bought or homemade, it adds a luscious finish that makes these cookie bars truly special.
Step‑by‑Step Instructions for Red Velvet Cookie Bars
Step 1: Preheat the Oven
Start by preheating your oven to 350°F (175°C). While the oven heats up, grab a 9x13 inch baking pan and grease it with butter or line it with parchment paper. This will ensure your delicious Red Velvet Cookie Bars come out effortlessly after baking.
Step 2: Mix Dry Ingredients
In a medium bowl, whisk together 2 ½ cups of all-purpose flour, 2 tablespoons of cocoa powder, 1 teaspoon of baking soda, and ½ teaspoon of salt. Make sure the mixture is well-combined, then set it aside as you prepare the wet ingredients. This step helps play a vital role in achieving the perfect texture for your cookie bars.
Step 3: Cream Butter and Sugars
In a large mixing bowl, cream together 1 cup of softened unsalted butter, 1 ½ cups of granulated sugar, and ½ cup of packed brown sugar. Use an electric mixer on medium speed for about 3-4 minutes until the mixture is light and fluffy. This crucial step will create a rich base for the Red Velvet Cookie Bars.
Step 4: Incorporate Eggs and Flavorings
Beat in 2 large eggs, one at a time, mixing well after each addition. Then, add 2 teaspoons of vanilla extract and 1 tablespoon of red food coloring to the bowl, mixing until the color is vibrant and everything is well combined. The warm, inviting aroma should start to fill your kitchen at this point.
Step 5: Combine Wet and Dry Mixtures
Gradually add the dry ingredients into your wet mixture, mixing on low speed until just combined. Be careful not to overmix; the dough should be soft and slightly sticky, perfect for your Red Velvet Cookie Bars. Scrape down the sides of the bowl to ensure all ingredients are incorporated.
Step 6: Add White Chocolate Chips
Gently fold in 1 cup of white chocolate chips using a spatula, ensuring they are evenly distributed throughout the dough. This adds a delightful creamy sweetness that enhances the flavor of your cookie bars, making them even more irresistible.
Step 7: Spread the Dough
Pour the cookie dough into your prepared baking pan and use a spatula to spread it out evenly. Make sure the surface is smooth and level, allowing for even baking. The anticipation should be building as you prepare your delicious Red Velvet Cookie Bars for the oven.
Step 8: Bake to Perfection
Place the baking pan in the preheated oven and bake for 25-30 minutes. Keep an eye out for a toothpick inserted into the center; it should come out clean when they’re ready. The edges will be set, and the center will look soft and slightly puffed when done.
Step 9: Cool the Bars
Once baked, remove the pan from the oven and let the bars cool in the pan for about 10-15 minutes. After that, carefully transfer them to a wire rack to cool completely. This cooling step is essential for achieving the perfect texture for your Red Velvet Cookie Bars.
Step 10: Frost the Cookie Bars
When the cookie bars are completely cooled, it’s time to add the finishing touch! Spread 1 cup of cream cheese frosting evenly on top of the bars, ensuring a generous layer that makes each bite indulgent. The frosting will add a luscious sweetness that complements the red velvet flavor beautifully.
Step 11: Cut and Serve
Now that your Red Velvet Cookie Bars are frosted, cut them into squares for serving. You can enjoy them right away or store them in an airtight container at room temperature. These treats are perfect for any occasion and are guaranteed to please everyone's sweet tooth!
What to Serve with Red Velvet Cookie Bars
Imagine a cozy gathering where the sweetness of dessert complements the warmth of friendship and laughter.
-
Vanilla Ice Cream: The creamy, cool texture of vanilla ice cream balances the richness of the cookie bars perfectly, creating a delightful contrast. A scoop on the side offers a classic combo that’s hard to resist.
-
Fresh Berries: A mix of tart raspberries and sweet strawberries brings a refreshing burst of flavor that cuts through the richness of the frosting. Their vibrant color pairs beautifully with the red velvet, adding a pop of brightness.
-
Chocolate Milkshake: Indulge your sweet tooth further with a thick chocolate milkshake. The creamy texture is an ultimate treat that complements the cookie bars, making dessert time even more decadent.
-
Coffee or Espresso: The rich, bold flavors of coffee or a shot of espresso enhance the sweet notes of the cookie bars. This pairing creates a perfect harmony of flavors, especially for those craving a cozy afternoon pick-me-up.
-
Cream Cheese Brownies: If you're in the mood for chocolate, serve these alongside. Their fudgy texture and slight tang from the cream cheese frosting echo the cookie bars' creamy topping beautifully.
-
Caramel Sauce Drizzle: A warm drizzle of caramel sauce over the bars adds an extra layer of sweetness, making each bite even more indulgent. The gooey texture pairs wonderfully with the softness of the cookie.
Indulge in these pairings for a delightful treat that elevates any occasion!
Make Ahead Options
These Red Velvet Cookie Bars are a fantastic option for busy home cooks looking to save time without sacrificing flavor! You can prepare the cookie dough up to 24 hours in advance. Simply follow the recipe up to Step 6 and then cover the bowl tightly with plastic wrap. Refrigerate until you're ready to bake. This not only deepens the flavors but also makes it easier to whip up fresh bars at a moment’s notice. When you’re ready to enjoy, spread the dough in the prepared pan and bake as directed. These bars will turn out just as delicious, allowing you to savor more moments with your loved ones!
Expert Tips for Red Velvet Cookie Bars
-
Measure Accurately: Use precise measurements for your ingredients. Too much flour can make the cookie bars dry, while too little might make them too soggy.
-
Butter Temperature: Ensure your butter is softened, not melted. This creates the perfect texture in your bars and helps incorporate air, making them light and fluffy.
-
Don’t Overmix: When combining wet and dry ingredients, mix until just combined. Overmixing can lead to tough cookie bars instead of the soft, tender treat you desire.
-
Cool Completely: Allow the cookie bars to cool completely before frosting. This ensures the frosting doesn’t melt and creates a beautifully rich topping for your Red Velvet Cookie Bars.
-
Storage Tips: Store your cookie bars in an airtight container to maintain their freshness. They're best enjoyed within a few days!
Red Velvet Cookie Bars Variations
Feel free to get creative and personalize your Red Velvet Cookie Bars with these fun and delightful ideas!
- Gluten-Free: Substitute all-purpose flour with a gluten-free blend to make this recipe celiac-friendly without sacrificing taste.
- Nutty Crunch: Add ½ cup of chopped pecans or walnuts for a delightful crunch and depth of flavor. This adds a wonderful texture contrast to the soft bars while bringing in a lovely nutty aroma.
- Minty Fresh: Stir in a few drops of peppermint extract for a festive twist that complements the red velvet beautifully. Imagine enjoying a slice with a refreshing minty finish!
- Spicy Kick: Incorporate 1 teaspoon of cinnamon or nutmeg for a warm, aromatic flavor that elevates these cookie bars, especially during the cooler months.
- Chocolate Lovers: Swap white chocolate chips for semi-sweet chocolate chips to give a deep, rich chocolate flavor that pairs beautifully with the red velvet base.
- Cream Cheese Swirl: For added creaminess, swirl the cream cheese frosting into the cookie dough before baking, creating beautiful marbled designs. Each bite will be a surprise of flavors!
- Fruitful Delight: Top the bars with a handful of fresh raspberries or strawberries before serving for a pop of color and tartness that balances all that sweetness.
- Spicy Sweet Heat: For a unique twist, sprinkle in a pinch of cayenne pepper or chili powder for a surprising spicy kick that pairs wonderfully with the sweetness of the bars.
Whether you’re looking to satisfy dietary needs or simply wish to explore new flavors, these variations will elevate your baking experience. If you’re in the mood for something else sweet, check out my delectable Black Raspberry Cookies for another delightful treat!
How to Store and Freeze Red Velvet Cookie Bars
Room Temperature: Store your Red Velvet Cookie Bars in an airtight container at room temperature for up to 3 days to maintain their softness and flavor.
Fridge: For longer freshness, refrigerate the bars in an airtight container for up to 1 week. Allow them to come to room temperature before serving for the best taste.
Freezer: Freeze the unfrosted cookie bars by wrapping them tightly in plastic wrap and then in aluminum foil. They can be kept in the freezer for up to 3 months. Thaw in the fridge before frosting.
Reheating: If you prefer a warm treat, microwave the bars for 10-15 seconds before serving. This will enhance the gooeyness of the white chocolate chips!
Red Velvet Cookie Bars Recipe FAQs
How do I select the perfect red food coloring for my cookie bars?
Absolutely! Look for a gel or paste food coloring instead of liquid, as it produces a more vibrant color without adding extra moisture to your batter. Brands like Wilton or AmeriColor provide great options. Ensure the food coloring is fresh for the best results.
What’s the best way to store leftover Red Velvet Cookie Bars?
To keep your cookie bars soft and delicious, store them in an airtight container at room temperature for up to 3 days. If you want them to last longer, refrigerate in an airtight container for about a week. Just let them warm up to room temperature before enjoying!
Can I freeze Red Velvet Cookie Bars, and if so, how?
Absolutely! To freeze, let the unfrosted bars cool completely, then wrap them tightly in plastic wrap and aluminum foil to prevent freezer burn. They can be stored in the freezer for up to 3 months. When you're ready to enjoy, simply thaw them in the refrigerator overnight before frosting and serving.
What should I do if the cookie bars are too dry?
If your bars turn out dry, consider a couple of fixes: ensure your butter was softened correctly (not melted) and avoid overmixing the dough. You can also add a small amount of milk into the batter next time, about 1 tablespoon, to help keep them moist. And remember, the baking time can vary based on your oven.
Are these Red Velvet Cookie Bars suitable for those with nut allergies?
Yes! This recipe is nut-free as it uses basic baking ingredients. However, always double-check that your chocolate chips and any additional toppings are also nut-free, especially if you’re sharing with someone sensitive to allergies.
Is there a way to make these cookie bars vegan?
Indeed! To convert this recipe into a vegan-friendly option, substitute the eggs with flaxseed meal (1 tablespoon of flaxseed meal mixed with 3 tablespoons of water equals 1 egg) and choose a vegan butter alternative. For the frosting, consider using a vegan cream cheese or a simple vegan frosting made with powdered sugar and coconut cream.
Irresistibly Soft Red Velvet Cookie Bars with Cream Cheese Frosting
Equipment
- Oven
- mixing bowls
- Electric Mixer
- 9x13-inch baking pan
- spatula
Ingredients
For the Cookie Base
- 2 ½ cups all-purpose flour a key ingredient for structure
- 2 tablespoons cocoa powder adds chocolate flavor
- 1 teaspoon baking soda helps the bars rise
- ½ teaspoon salt balances sweetness
- 1 cup unsalted butter, softened creates a rich, buttery base
- 1 ½ cups granulated sugar adds sweetness
- ½ cup brown sugar, packed adds depth of flavor
- 2 large eggs provide moisture and binding
- 2 teaspoons vanilla extract enhances flavor profile
- 1 tablespoon red food coloring gives vibrant hue
For the Mix-Ins
- 1 cup white chocolate chips adds creamy sweetness
For the Topping
- 1 cup cream cheese frosting for a luscious finish
Instructions
Step-by-Step Instructions
- Preheat your oven to 350°F (175°C) and grease a 9x13 inch baking pan.
- In a medium bowl, whisk together flour, cocoa powder, baking soda, and salt. Set aside.
- In a large bowl, cream butter, granulated sugar, and brown sugar until light and fluffy.
- Beat in eggs one at a time, then add vanilla extract and red food coloring.
- Gradually mix in the dry ingredients until just combined.
- Fold in white chocolate chips.
- Pour dough into the prepared baking pan and spread evenly.
- Bake for 25-30 minutes. A toothpick should come out clean when done.
- Cool in the pan for 10-15 minutes, then transfer to a wire rack to cool completely.
- Spread cream cheese frosting evenly on cooled bars.
- Cut into squares and serve.


Leave a Reply