
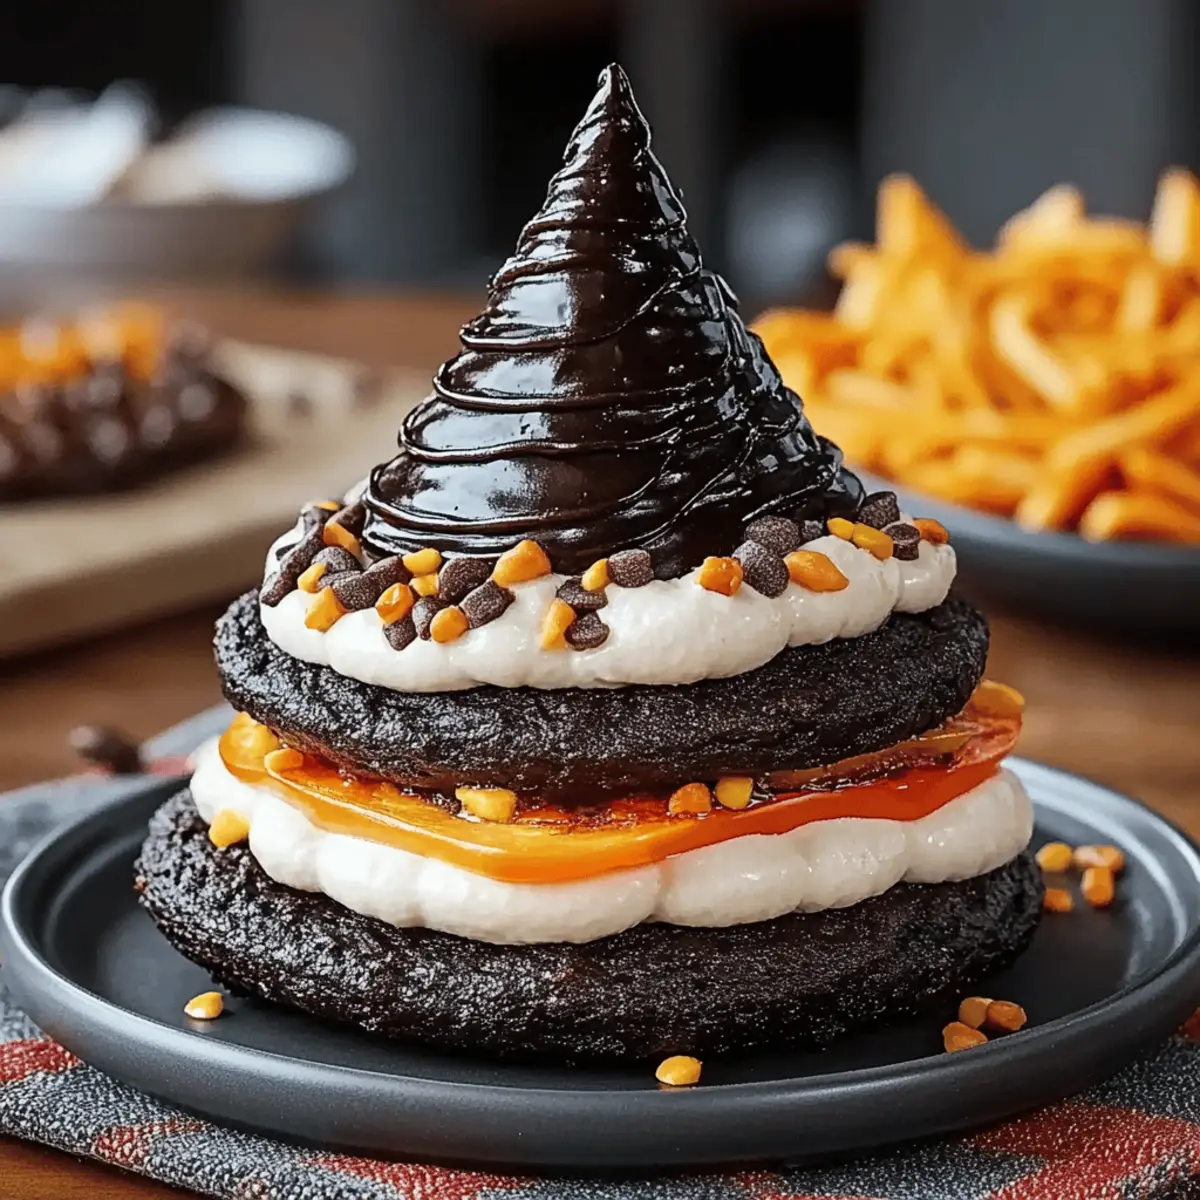
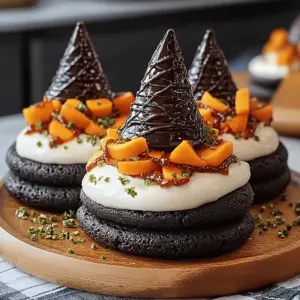
As I rummaged through my pantry for a sweet treat, I stumbled upon a stack of Oreo cookies, and just like that, my imagination took flight. Today, I’m excited to share my recipe for Oreo Witch Hat Cookies, a quick and delightful dessert that blends holiday whimsy with deliciously creamy flavors. These cookies are not only a crowd-pleaser, but they’re also incredibly simple to whip up, making them perfect for those last-minute gatherings or a cozy night at home. With just a handful of ingredients, you can create a show-stopping treat that will have everyone asking for seconds. Are you ready to conjure up some tasty fun in your kitchen?
What makes these Oreo Witch Hat Cookies special?
**Unforgettable ** Flavors: The sweet, chocolatey layers of Oreo cookies and chocolate kisses offer a delightful burst of flavor in every bite.
**Quick and Easy ** Prep: With just 20 minutes from start to finish, you can create a batch of these whimsical cookies without spending hours in the kitchen.
**Perfect for Occasions **: Whether it's Halloween, a birthday party, or a cozy gathering, these cookies are sure to impress guests of all ages.
**Versatile ** Design: Feel free to customize them with colored sprinkles or other toppings to match your event theme!
**No-Bake Magic **: With no actual baking involved, this recipe is perfect for those who want a sweet treat that doesn’t require an oven.
If you’re looking for more quick dessert ideas, check out my tips for other delicious no-bake recipes that will leave your friends and family craving more!
Oreo Witch Hat Cookies Ingredients
For the Cookie Base
• Oreo cookies – use a package of 15.6 oz for the perfect chocolate crunch.
• Chocolate kisses – 12 oz are ideal for creating the iconic witch hat shape.
For the Creamy Filling
• Butter (softened) – ½ cup gives the filling a rich, creamy texture.
• Powdered sugar – 1 cup sweetens your cookie sandwich and balances flavors.
For the Decoration
• White chocolate chips – ½ cup makes a delicious drizzle that complements the chocolate.
• Colorful sprinkles – ¼ cup adds a magical touch to your Oreo Witch Hat Cookies, making them festive and fun.
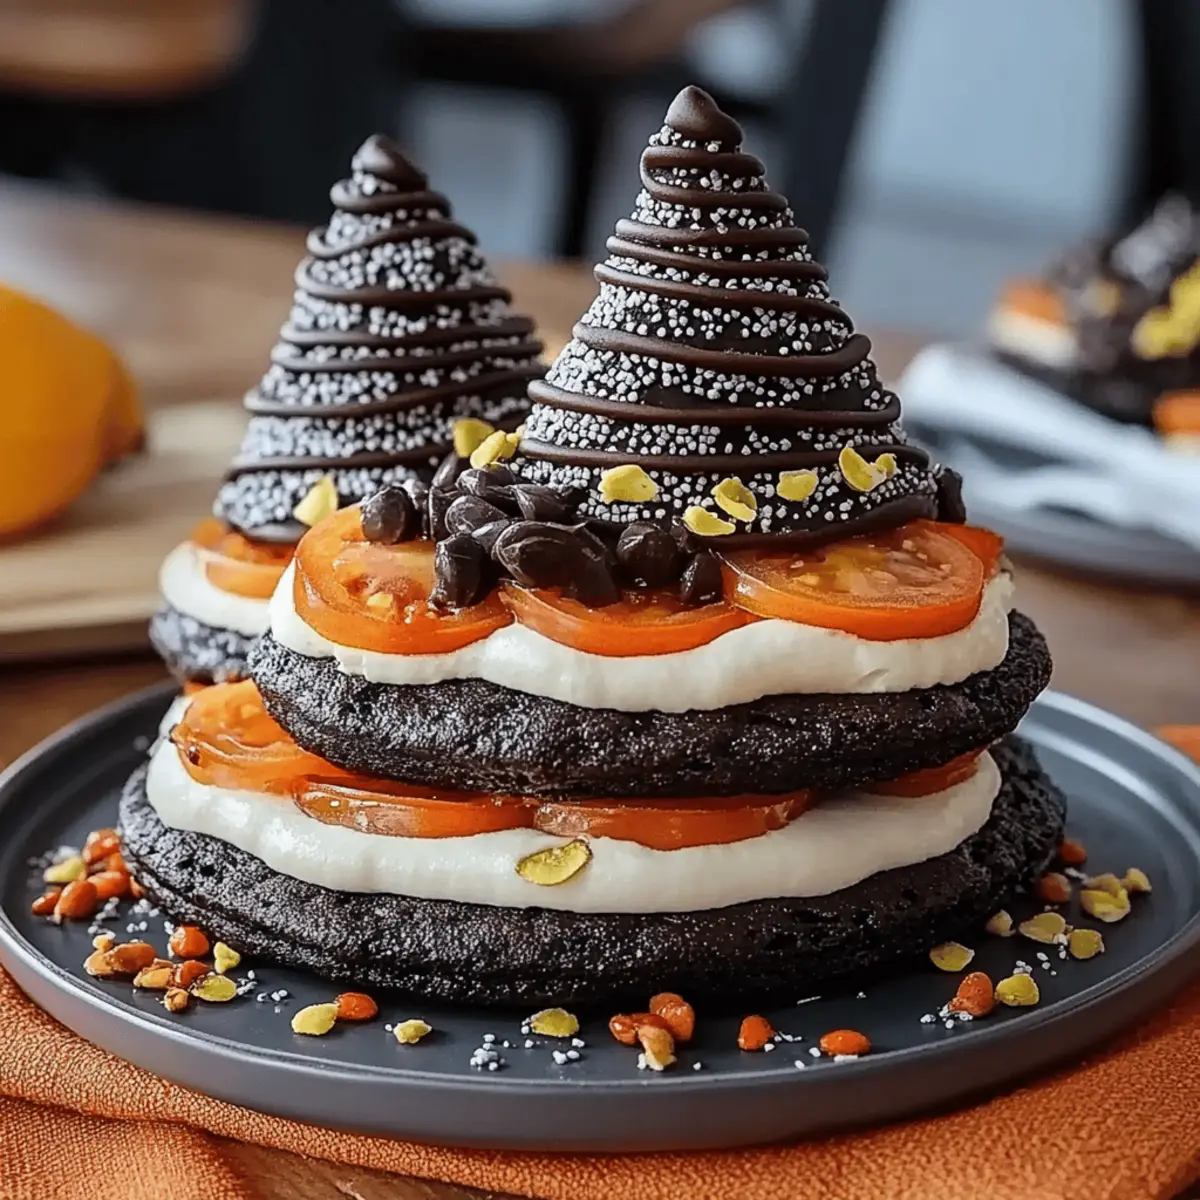
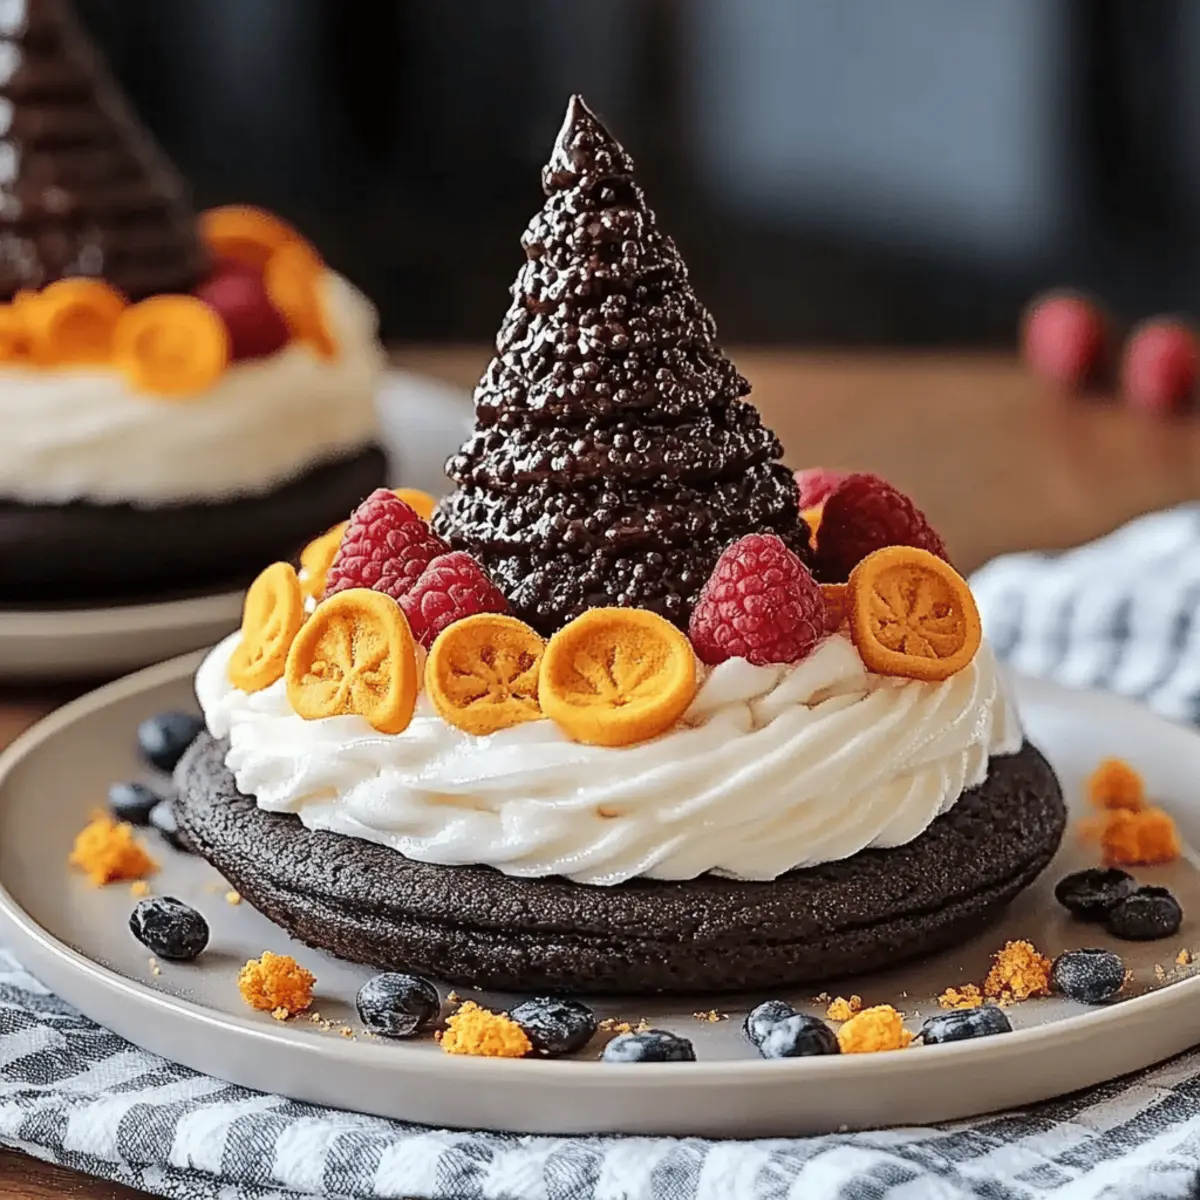
These Oreo Witch Hat Cookies are not just visually delightful, but they are packed with flavors sure to enchant your taste buds!
Step‑by‑Step Instructions for Oreo Witch Hat Cookies
Step 1: Preheat Your Oven
Begin by preheating your oven to 350°F (175°C). While the oven warms up, gather all your ingredients on the countertop. This step creates the perfect workspace for whipping up your Oreo Witch Hat Cookies. Make sure to have a baking sheet ready to eventually cool your cookies.
Step 2: Separate the Oreo Cookies
Carefully open the package of Oreo cookies, selecting halves without any cream for each cookie. You will need about 24 halves, which will serve as the base for your witch hats. Place the cream-less halves on a plate, ensuring they’re ready to be filled.
Step 3: Make the Creamy Filling
In a mixing bowl, combine the softened butter and powdered sugar. Using an electric mixer, beat the mixture until it becomes light and fluffy, about 2-3 minutes. This creamy filling will hold your cookie halves together, adding a delightful sweetness to your Oreo Witch Hat Cookies.
Step 4: Assemble the Cookie Sandwiches
Spread a generous layer of the creamy filling on the cream-less side of an Oreo half. Top it with another half to create a sandwich. Ensure the sides with filling are facing each other, pushing lightly to bind them. Repeat this process until all your Oreo halves are transformed into charming little sandwiches.
Step 5: Melt the Chocolate Kisses
Place your chocolate kisses in a microwave-safe bowl. Microwave them in 30-second intervals, stirring in between, until they are soft but not completely melted, about 1-2 minutes total. This chocolate will act as the pointy tip of your Oreo Witch Hat Cookies.
Step 6: Top the Cookie Sandwiches
Once your chocolate kisses are melted, gently place one on top of each cookie sandwich. The soft chocolate will act as glue, adhering the kiss to your delicious creation. Keep an eye on the cookies as you work, ensuring that the chocolate doesn’t harden too quickly.
Step 7: Drizzle with White Chocolate
In another bowl, melt the white chocolate chips using the same microwave method. Once melted, use a fork to drizzle the white chocolate over the tops of your cookies. This adds a lovely decoration and extra sweetness, enhancing the visual appeal of your Oreo Witch Hat Cookies.
Step 8: Add the Colorful Sprinkles
While the white chocolate is still wet, sprinkle colorful sprinkles generously on top. This fun and festive touch will bring your Oreo Witch Hat Cookies to life, making them perfect for any occasion. Let the cookies sit for a moment so the toppings can adhere.
Step 9: Cool the Cookies
Carefully transfer your completed Oreo Witch Hat Cookies to a wire cooling rack. Allow them to cool for at least 10 minutes, giving the chocolate a chance to set properly. This cooling process helps retain their shape and makes them easier to handle before serving.
Tips for the Best Oreo Witch Hat Cookies
Use Fresh Ingredients: Always check the expiration dates on your Oreos and chocolate. Fresh ingredients enhance the flavors in your Oreo Witch Hat Cookies.
Chill Before Serving: Let your cookies chill in the fridge for a bit after cooling to help the chocolate set perfectly and improve their texture.
Watch the Chocolate: Keep a close eye while melting your chocolate kisses. Overheating can ruin the smooth consistency, making assembly challenging.
Customize Toppings: Feel free to mix and match sprinkles or even add edible glitter on your Oreo Witch Hat Cookies for an extra festive touch!
Don’t Rush the Cooling: Patience is key! Allow your cookies to cool completely on the wire rack before serving to ensure they maintain their delicious shape.
Make Ahead Options
These Oreo Witch Hat Cookies are perfect for meal prep enthusiasts! You can assemble the cookie sandwiches (steps 2-4) up to 24 hours in advance and store them in an airtight container in the refrigerator to maintain their freshness. The melted chocolate kisses can also be prepared early—just keep them covered at room temperature. When you're ready to serve, simply drizzle with melted white chocolate (step 7) and add colorful sprinkles. This quick finishing touch will make your cookies just as delightful as if you made them from scratch that day, saving you valuable time while impressing your guests!
Oreo Witch Hat Cookies Variations
Feel free to make this delightful recipe your own with these fun twist ideas that will elevate your cookie game!
- Gluten-Free: Use gluten-free Oreo cookies for a tasty alternative that everyone can enjoy without worry.
- Nut Butter Surprise: Swap the creamy filling with peanut or almond butter for a nutty twist that adds richness and flavor.
- Dark Chocolate: Replace chocolate kisses with dark chocolate ones for a richer taste; this is a perfect pairing with the sweet filling!
- Flavored White Chocolate: Try flavored white chocolate (like raspberry or mint) for an unexpected burst of flavor in the drizzle.
- Extravagant Sprinkles: Instead of colorful sprinkles, coat the cookies in chopped nuts or coconut flakes for an extra crunch that adds delightful texture.
Adding variety to this recipe makes it even more fun and delicious. You might also enjoy exploring other creative ideas like using unique toppings or checking out my guide on easy no-bake dessert recipes to keep your family satisfied!
How to Store and Freeze Oreo Witch Hat Cookies
Room Temperature: Keep your Oreo Witch Hat Cookies in an airtight container at room temperature for up to 3 days to maintain their texture and flavor.
Fridge: For longer freshness, store in the fridge in an airtight container for up to a week. This will help keep the chocolate from melting and preserve the creaminess.
Freezer: You can freeze these cookies for up to 2 months; just ensure they are fully cooled and wrapped tightly in plastic wrap or placed in a freezer bag to prevent freezer burn.
Reheating: If you want to enjoy them warm, take them out of the freezer and let them thaw at room temperature for a few hours. Enjoy a quick microwave heat-up of 10-15 seconds for a delightful treat!
What to Serve with Oreo Witch Hat Cookies
As you gather around the table for a delightful dessert, these whimsical cookies can be paired with treats that complement their sweetness and charm.
- Coffee or Hot Chocolate: The warm, rich flavors of coffee or creamy hot chocolate create a cozy contrast to the sweet cookies. Perfect for chilly evenings!
- Vanilla Ice Cream: A scoop of vanilla ice cream adds a creamy coolness paired with the crunchy chocolate layers. A mouthwatering combination!
- Fruit Salad: Bright fruits like strawberries and oranges offer a refreshing, tangy contrast, balancing the sugary sweetness of the cookies beautifully.
- Chocolate Dipping Sauce: For a double chocolate treat, serve with a homemade or store-bought chocolate sauce for dipping. It's simply irresistible!
- Pumpkin Spice Cake: Embrace the fall vibes with a slice of moist pumpkin spice cake, enhancing the whimsical theme of these cookies.
- Milkshake: A thick chocolate or cookies-and-cream milkshake will thrill the taste buds and echo the Oreo flavors in each sip.
- Sparkling Cider: A bubbly, fruity sparkling cider makes for a festive drink option that pairs wonderfully with the playful nature of these cookies.
- Gingerbread Cookies: For additional holiday charm, serve alongside spicy gingerbread cookies for a delightful gastronomic adventure.
Oreo Witch Hat Cookies Recipe FAQs
How should I select the best Oreos for this recipe?
Absolutely! Look for Oreo cookies that are intact and without any visible damage or dark spots. The best Oreos will have a fresh, creamy filling – you want them to be soft enough to bite into, but firm enough to hold their shape when you assemble your cookies.
How long can I store my Oreo Witch Hat Cookies?
You can keep your Oreo Witch Hat Cookies in an airtight container at room temperature for up to 3 days. If you’d like them to last a bit longer, I recommend storing them in the fridge where they can stay fresh for up to one week. They’re best enjoyed chilled as the flavors meld beautifully!
Can I freeze Oreo Witch Hat Cookies?
Absolutely! To freeze your delicious treats, allow your cookies to cool completely first. Then, wrap each cookie tightly in plastic wrap or place them in a freezer-safe bag to prevent freezer burn. They’ll keep in the freezer for up to 2 months. When you're ready to enjoy them, just let them thaw at room temperature for a few hours, and if you want a warm treat, give them a quick microwave spin for about 10-15 seconds.
What if my melted chocolate kisses are too thick to use?
Very! If you find that your melted chocolate kisses are too thick after microwaving, simply add a teaspoon of vegetable oil to the bowl and stir until you achieve a smoother consistency. This will help the chocolate drizzle nicely over your cookies without clumping.
Are there any allergies I should consider when making these cookies?
Definitely keep an eye on dietary restrictions! The primary ingredients in Oreo Witch Hat Cookies are dairy-related (butter and chocolate), so if someone has a dairy allergy, you can substitute with vegan butter and dairy-free chocolate kisses. Additionally, always verify that the sprinkles you choose are allergen-free. If you're unsure, there are plenty of options available that cater to various dietary needs.
Can kids help make Oreo Witch Hat Cookies?
Oh, the more the merrier! This recipe is perfect for a family cooking activity. Kids can help with the assembly, spreading the filling, and decorating with sprinkles. Just supervise them while melting the chocolate, as it can get hot in the microwave. Enjoy the bonding time!
Irresistible Oreo Witch Hat Cookies That Wow Every Bite
Equipment
- mixing bowl
- Electric Mixer
- Microwave-safe bowl
- baking sheet
- Wire cooling rack
Ingredients
For the Cookie Base
- 15.6 oz Oreo cookies use a package for the perfect chocolate crunch
- 12 oz Chocolate kisses ideal for creating the iconic witch hat shape
For the Creamy Filling
- 0.5 cup Butter (softened) gives the filling a rich, creamy texture
- 1 cup Powdered sugar sweetens your cookie sandwich
For the Decoration
- 0.5 cup White chocolate chips makes a delicious drizzle
- 0.25 cup Colorful sprinkles adds a magical touch
Instructions
Step-by-Step Instructions for Oreo Witch Hat Cookies
- Preheat your oven to 350°F (175°C) and gather all your ingredients.
- Separate the Oreo cookies, selecting about 24 halves without any cream.
- In a bowl, combine softened butter and powdered sugar, and beat until light and fluffy.
- Spread filling on one side of an Oreo half and top with another half to create a sandwich.
- Melt chocolate kisses in the microwave until soft but not completely melted.
- Top each cookie sandwich with a melted chocolate kiss, allowing it to adhere.
- Melt white chocolate chips and drizzle over the tops of your cookies.
- Sprinkle colorful sprinkles on top while the white chocolate is still wet.
- Transfer cookies to a wire cooling rack and cool for at least 10 minutes.


Leave a Reply