
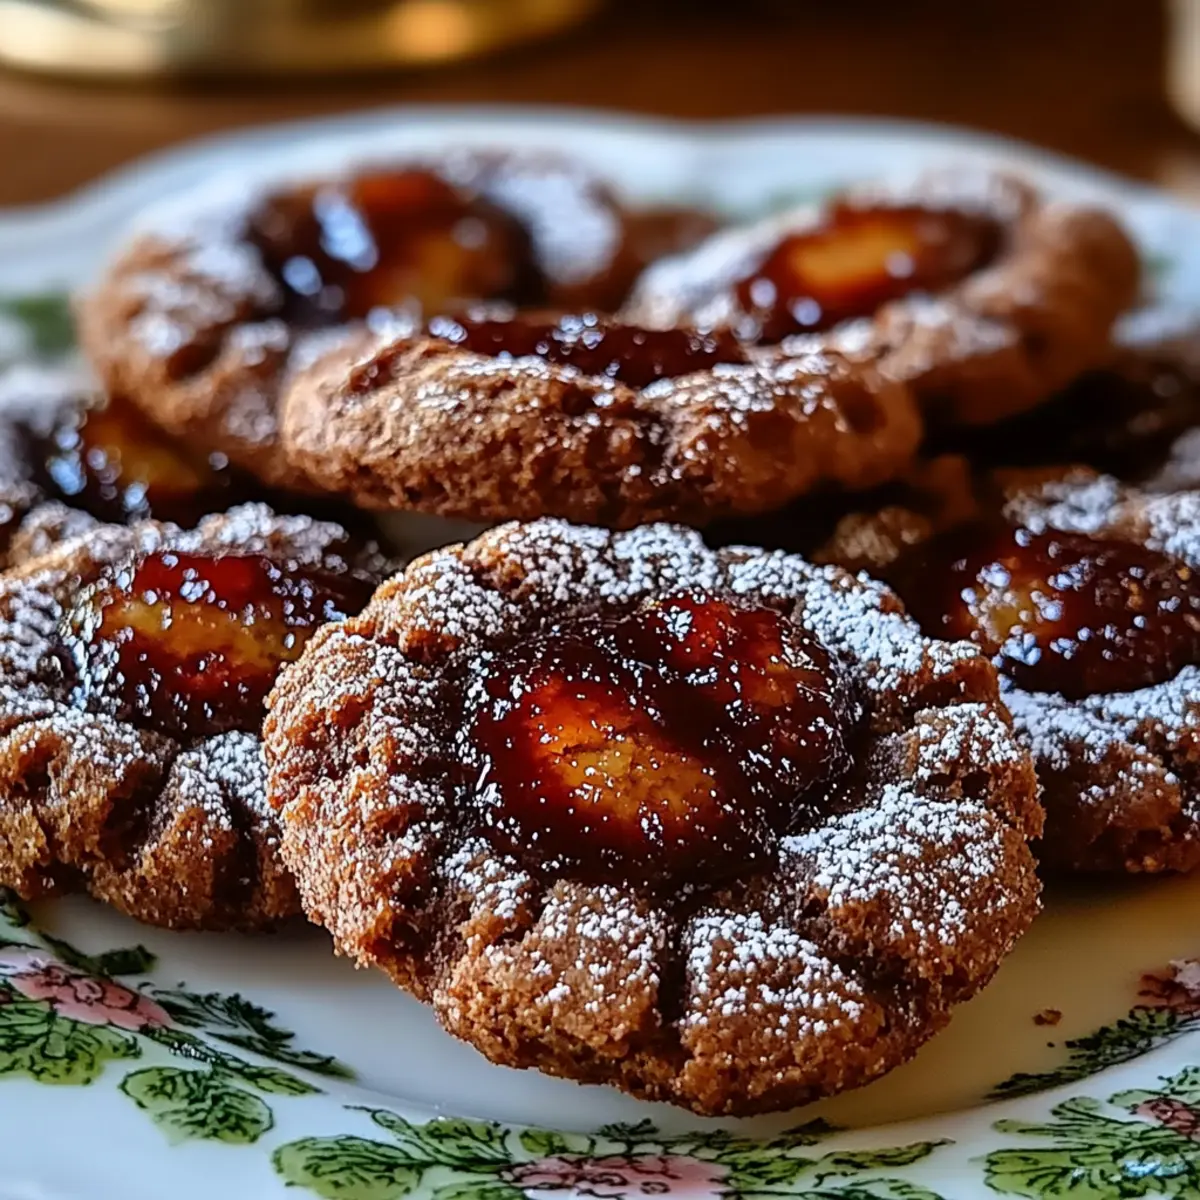
As I stood in my kitchen, the warm, inviting aroma of chocolate wafted through the air, igniting a wave of nostalgia. Those moments spent baking Chocolate Thumbprint Cookies always felt like home, wrapping me in a sweet embrace I never wanted to leave. What makes these delightful cookies even more special is their versatility: you can fill the centers with smooth chocolate chips for a rich treat or your favorite jam for a fruitier twist. With just 15 minutes of prep time, you’ll have freshly baked cookies that are sure to impress family and friends. Plus, they’re the perfect pick-me-up for those busy days when you need a little indulgence. Ready to dive into a cookie experience that’s as heartwarming as it is delicious? Let’s get baking!

Why are Chocolate Thumbprint Cookies so special?
Irresistible flavor: The rich combination of cocoa and sweet fillings like chocolate chips or jam offers a taste explosion in every bite.
Quick and easy: With just 15 minutes of prep time, you’ll have homemade cookies ready to enjoy in no time.
Perfect for sharing: Whether it's a cozy family gathering or a fun get-together with friends, these cookies are sure to please everyone.
Customization: Fill them with your favorite flavors – from chocolate to fruity jams – you can create a variety of treats tailored to your taste.
Create a memory-filled moment with these delightful Chocolate Thumbprint Cookies, and treat yourself to the joy of baking!
Chocolate Thumbprint Cookies Ingredients
Get ready to bake these mouthwatering cookies!
For the Dough
• 1 cup unsalted butter, softened – Essential for a rich, creamy texture.
• ⅔ cup granulated sugar – Adds sweetness to balance the cocoa.
• ⅓ cup packed brown sugar – Contributes moisture and a hint of caramel flavor.
• 1 teaspoon vanilla extract – Enhances the overall flavor profile beautifully.
• 2 cups all-purpose flour – The base that gives structure to your cookies.
• ¼ cup unsweetened cocoa powder – Provides that irresistible chocolate depth.
• ½ teaspoon salt – Balances sweetness and enhances flavors.
• ½ teaspoon baking powder – Helps the cookies rise slightly for a soft texture.
For the Filling
• ½ cup chocolate chips or your favorite jam – Choose chocolate for a decadent treat or jam for a fruity contrast!
For Dusting (optional)
• Additional powdered sugar – A lovely finishing touch for a beautiful presentation.
Now, you have everything you need to dive into making your delicious Chocolate Thumbprint Cookies!
Step‑by‑Step Instructions for Chocolate Thumbprint Cookies
Step 1: Preheat the Oven
Start by preheating your oven to 350°F (175°C). This ensures your Chocolate Thumbprint Cookies bake evenly and achieve that perfect soft texture. While the oven warms, line a cookie sheet with parchment paper to prevent sticking and make cleanup a breeze.
Step 2: Cream the Butters and Sugars
In a large mixing bowl, combine 1 cup of softened unsalted butter, ⅔ cup granulated sugar, and ⅓ cup packed brown sugar. Use an electric mixer on medium speed to cream these ingredients together for about 2–3 minutes, or until the mixture is light and fluffy, signaling it's ready for the next step.
Step 3: Add Vanilla Extract
Once the butter and sugars are creamed, add 1 teaspoon of vanilla extract to the mixture. Mix on low speed until the vanilla is well incorporated, enhancing the flavor of your cookie dough. This step helps create that delicious aroma that fills your kitchen as you bake.
Step 4: Combine Dry Ingredients
In a separate bowl, whisk together 2 cups of all-purpose flour, ¼ cup of unsweetened cocoa powder, ½ teaspoon salt, and ½ teaspoon baking powder. Ensure these dry ingredients are evenly blended; this mix will give your Chocolate Thumbprint Cookies their structure and rich chocolate flavor.
Step 5: Mix Wet and Dry Ingredients
Gradually add the dry flour mixture to the creamed butter mixture, mixing on low speed until just combined. The dough should appear slightly crumbly but should easily hold together when pressed, indicating that it's perfect for shaping.
Step 6: Shape the Dough
Scoop out tablespoon-sized portions of the dough and roll them into balls using your hands. Place each ball on the prepared baking sheet, ensuring they are spaced about 2 inches apart, allowing room for spreading. This will help your Chocolate Thumbprint Cookies achieve that lovely round shape during baking.
Step 7: Create Indentations
Using your thumb or the back of a teaspoon, gently press into the center of each dough ball to create a small indentation. This space is key for holding your filling later, so make sure it's deep enough, but be careful not to press all the way through!
Step 8: Add the Fillings
Now it's time to fill those indentations! If you’re using chocolate chips, place a few in each center. Alternatively, spoon your favorite jam into the dips. This step adds a burst of flavor to your Chocolate Thumbprint Cookies, making them even more delightful.
Step 9: Bake the Cookies
Place the baking sheet in your preheated oven and bake the cookies for 12–15 minutes. Keep an eye on them; the edges should appear slightly firm while the centers remain soft, ensuring a perfect texture.
Step 10: Cool and Dust
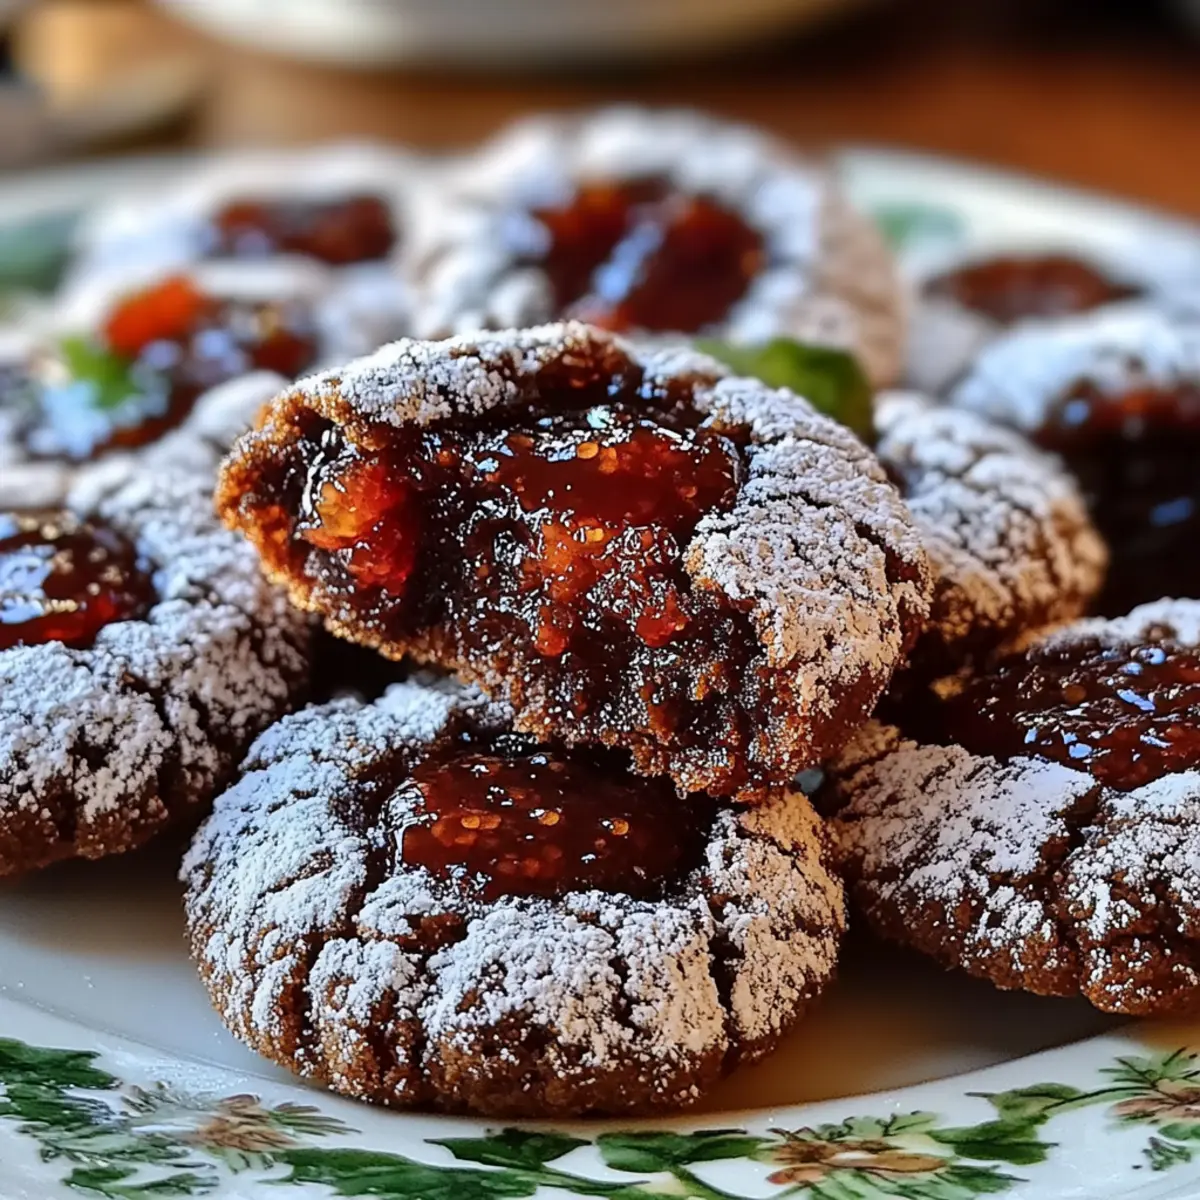
Once baked, remove the cookies from the oven and let them cool on the baking sheet for a few minutes. When they are easy to handle, transfer them to a wire rack to cool completely. If desired, lightly dust with powdered sugar before serving for a beautiful finishing touch to your Chocolate Thumbprint Cookies.
Make Ahead Options
These Chocolate Thumbprint Cookies are perfect for meal prep enthusiasts! You can prepare the cookie dough up to 24 hours in advance; simply cover it tightly with plastic wrap and refrigerate to maintain freshness. If you want to take it a step further, you can also shape the dough balls and store them in an airtight container for up to 3 days. When you’re ready to bake, create the indentations and add your fillings right before placing them in the oven for that freshly baked taste. This approach not only saves you time but also ensures you have warm, delicious cookies at your fingertips whenever you need a sweet pick-me-up!
What to Serve with Chocolate Thumbprint Cookies?
Indulge your senses with the perfect pairing for these scrumptious cookies, creating a meal filled with love and warmth.
-
Creamy Vanilla Ice Cream: The smooth, cold ice cream balances the rich chocolate, making every bite a delightful contrast.
-
Fresh Berries Medley: A vibrant mix of strawberries, raspberries, and blueberries adds a burst of freshness that complements the cookie's sweetness beautifully.
-
Chocolate Dipped Strawberries: Enhance the chocolate experience with these elegant bites; they add a touch of luxury while mirroring the cookie's flavors.
-
Rich Hot Chocolate: A warm, decadent drink that will wrap you in comfort; its deep chocolate notes echo those of your cookies.
-
Classic Milk: The simplicity of chilled milk is the perfect companion for these cookies, balancing their sweetness with creamy goodness.
-
Nutty Coffee: A cup of freshly brewed coffee with hints of nuttiness creates a lovely contrast to the sweet flavors of the cookies.
-
Caramel Drizzle: Drizzle some warm caramel over the cookies for an extra indulgent touch; it adds an irresistible sweetness that will have everyone coming back for more.
-
Chocolate Mousse: The rich, velvety texture of mousse provides a delightful contrast, making for an elevated dessert experience.
-
Almond Biscotti: Serve these crunchy treats alongside your cookies for a delightful textural contrast, providing a lovely crunch with each bite.
Tips for the Best Chocolate Thumbprint Cookies
Use Softened Butter: Ensure your butter is at room temperature for easier creaming, which helps achieve that light and fluffy texture.
Don’t Overmix: When combining the wet and dry ingredients, mix just until combined to prevent tough cookies. Your Chocolate Thumbprint Cookies should be soft and tender!
Indentation Depth: Make sure your thumbprint indentations are deep enough to hold the filling but not so deep that they go through the dough.
Watch the Baking Time: Keep an eye on your cookies; pulling them out when the edges are set and the centers are still soft is key to achieving that perfect fudgy texture.
Chill if Needed: If the dough feels too soft to shape, refrigerate it for about 15-30 minutes. This can make rolling easier and lead to better-formed cookies.
How to Store and Freeze Chocolate Thumbprint Cookies
Room Temperature: Keep baked Chocolate Thumbprint Cookies in an airtight container at room temperature for up to 3 days to maintain their soft texture.
Fridge: For longer freshness, store the cookies in the fridge for up to 1 week. Ensure they are in a sealed container to prevent them from drying out.
Freezer: Freeze unbaked cookie dough balls for up to 3 months. When ready to bake, simply bake from frozen, adding an extra minute or two to the cooking time.
Reheating: If they lose some softness, gently reheat the cookies in the microwave for 10-15 seconds. This will bring back that freshly baked warmth!
Chocolate Thumbprint Cookies Variations
Feel the joy of customization as you explore different twists on these delightful treats!
- Nutty Delight: Add ½ cup of finely chopped nuts like walnuts or pecans for added crunch and flavor.
- Spicy Chocolate: Incorporate a pinch of cayenne pepper or cinnamon into the dough for a warm, spicy kick that surprises the palate.
- Gluten-Free: Substitute 2 cups of all-purpose flour with a gluten-free flour blend for a suitable alternative without losing the cookie's charm.
- Vegan Twist: Swap butter for coconut oil and use flaxseed eggs for a plant-based version that everyone will love.
- Fruit-Filled Indulgence: Experiment with unique fillings like pistachio or hazelnut spreads, or seasonally inspired jams like peach or raspberry for a fruity burst.
- Choco-Matcha: Replace ¼ cup of cocoa powder with matcha green tea powder for a vibrant and healthful alternative.
- S’mores Style: Use chocolate like your favorite Graham cracker crumbs along with marshmallow fluff for a scrumptious campfire-inspired treat.
- Salted Caramel: Add a drizzle of homemade salted caramel sauce over the top after baking for a sweet and salty combination.
These indulgent variations can take your cookies on a delightful journey—try them out and discover your family’s favorite! And don’t forget to pair these heavenly cookies with a warm Chai Latte or a scoop of Vanilla Ice Cream for the ultimate dessert experience.
Chocolate Thumbprint Cookies Recipe FAQs
What’s the best way to select ripe ingredients for my Chocolate Thumbprint Cookies?
Absolutely! When selecting ingredients, particularly butter, choose unsalted butter that's soft but not melted; this provides a creamy texture. For cocoa powder, opt for unsweetened varieties without lumps. Fresh vanilla extract enhances flavor, while flour should be unbleached and without any dark spots. If using jam for filling, look for fruit spreads that are both flavorful and brightly colored – they signal freshness!
How should I store Chocolate Thumbprint Cookies to keep them fresh?
To store your baked Chocolate Thumbprint Cookies, place them in an airtight container at room temperature for up to 3 days. For optimal freshness, you can refrigerate them for up to a week; just make sure they’re sealed tightly. I often line the container with parchment paper to absorb moisture, helping to keep the cookies soft and enjoyable.
Can I freeze Chocolate Thumbprint Cookies?
Yes! You can freeze unbaked cookie dough balls for up to 3 months. To do this, scoop the dough, roll it into balls, and lay them out on a baking sheet lined with parchment paper. Freeze until solid, then transfer the dough balls to a freezer-safe bag. When you’re ready to bake, simply preheat your oven and bake from frozen, adding an extra 1 to 2 minutes to the cooking time.
What should I do if my cookie dough is too crumbly?
If your Chocolate Thumbprint Cookies dough feels too crumbly and won’t hold together, don’t worry! Start by adding 1 tablespoon of milk or water to the mixture; mix gently until the dough comes together. If it’s still too dry, continue adding liquid gradually until the dough holds together without being wet. If you prefer a richer flavor, some also add an extra drizzle of vanilla extract!
Are there any dietary considerations I should know for my Chocolate Thumbprint Cookies?
Very! If you have allergies, be cautious with the fillings; chocolate chips often contain dairy, and certain jams may include preservatives or added sugars. If you're making these cookies for guests, consider using dairy-free chocolate chips or fruit spreads that are organic. Also, if you're making these cookies for pets (like dogs), skip the chocolate and use a pet-safe fruit filling!
How can I keep my filled cookies from leaking during baking?
To prevent leaking from the filling while baking, ensure you've made the indentations deep enough to hold the filling snugly but not so deep that they penetrate the bottom of the dough. Also, keep an eye on the baking time! Removing them from the oven when the edges are set but the centers remain soft helps maintain the shape and prevents overflow.
Irresistible Chocolate Thumbprint Cookies for Sweet Moments
Equipment
- mixing bowl
- Electric Mixer
- Cookie sheet
- parchment paper
- wire rack
Ingredients
For the Dough
- 1 cup unsalted butter, softened Essential for a rich, creamy texture.
- ⅔ cup granulated sugar Adds sweetness to balance the cocoa.
- ⅓ cup packed brown sugar Contributes moisture and a hint of caramel flavor.
- 1 teaspoon vanilla extract Enhances the overall flavor profile beautifully.
- 2 cups all-purpose flour The base that gives structure to your cookies.
- ¼ cup unsweetened cocoa powder Provides that irresistible chocolate depth.
- ½ teaspoon salt Balances sweetness and enhances flavors.
- ½ teaspoon baking powder Helps the cookies rise slightly for a soft texture.
For the Filling
- ½ cup chocolate chips or your favorite jam Choose chocolate for a decadent treat or jam for a fruity contrast!
For Dusting (optional)
- additional powdered sugar A lovely finishing touch for a beautiful presentation.
Instructions
Step‑by‑Step Instructions
- Preheat your oven to 350°F (175°C) and line a cookie sheet with parchment paper.
- In a large mixing bowl, cream together the butter, granulated sugar, and brown sugar for about 2-3 minutes until fluffy.
- Add the vanilla extract and mix on low speed until incorporated.
- In a separate bowl, whisk together the flour, cocoa powder, salt, and baking powder.
- Gradually combine the dry ingredients with the creamed mixture until just combined.
- Scoop tablespoon-sized portions of the dough, roll into balls, and place on the baking sheet with space in between.
- Press your thumb or a teaspoon into each ball to create indentations.
- Fill the indentations with chocolate chips or jam.
- Bake for 12-15 minutes until the edges are set and the centers are soft.
- Let cool on the baking sheet for a few minutes before transferring to a wire rack. Dust with powdered sugar if desired.


Leave a Reply