
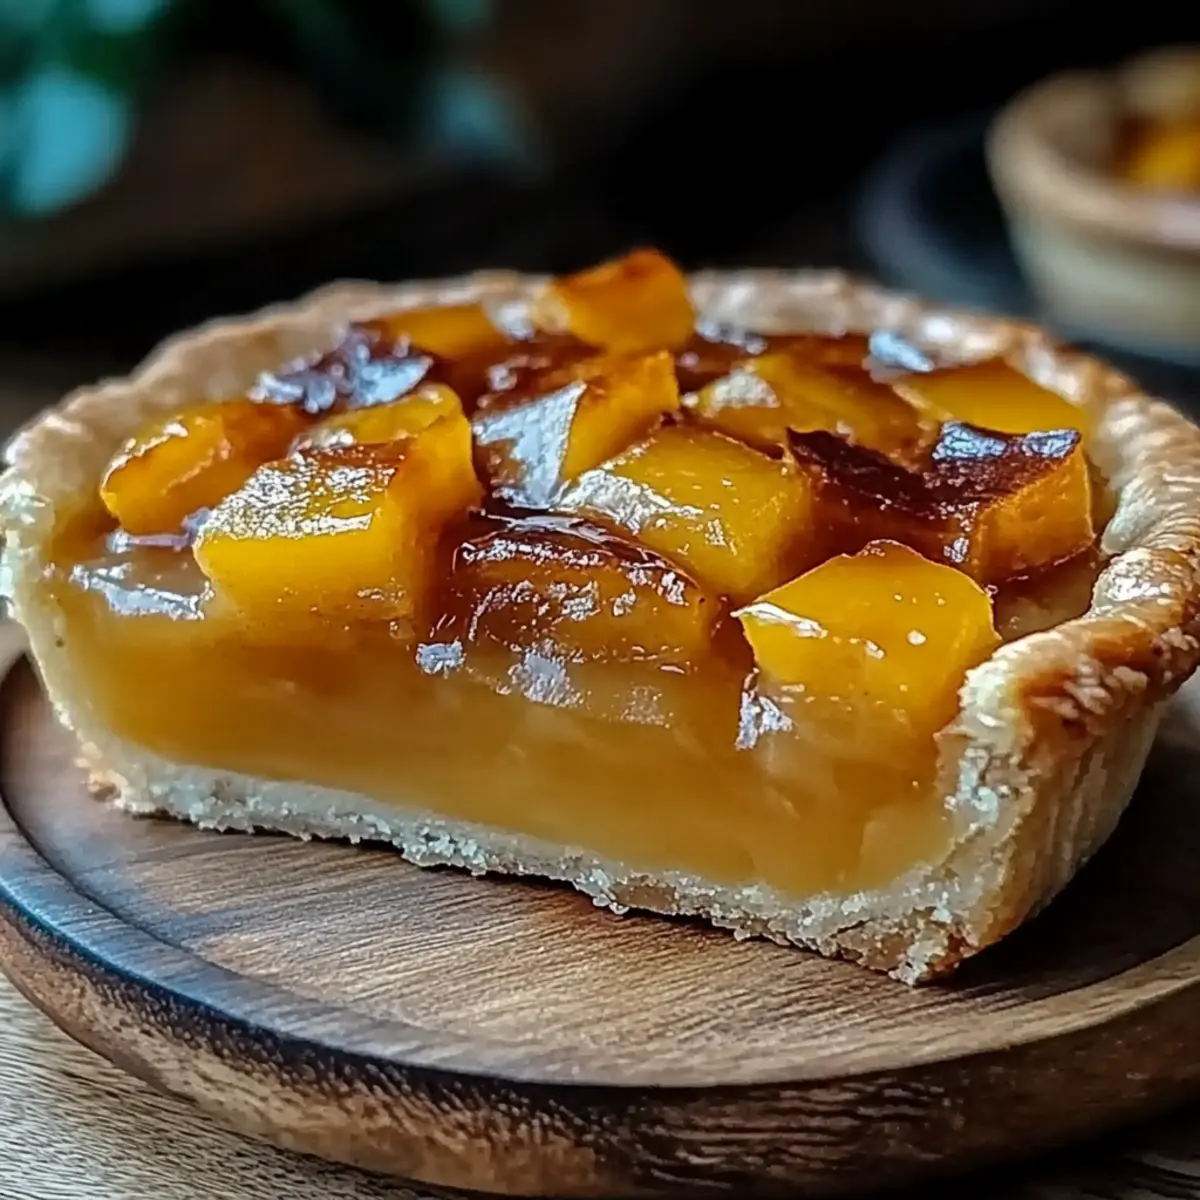
As I watched the golden honey bubble and transform into a rich, dark amber elixir, I couldn’t help but feel a wave of nostalgia wash over me. This Burnt Honey Pie combines deep, caramelized sweetness with a creamy filling that’s both comforting and sophisticated—a perfect way to impress guests or elevate a simple dinner at home. With just 15 minutes of prep and a few simple ingredients like heavy cream and eggs, this dessert is surprisingly easy to whip up, even on a weeknight. Plus, it’s freezer-friendly, making it an ideal option for when you need a last-minute treat. What could be better than a slice of this delectable pie, garnished with a scoop of vanilla ice cream? Trust me, your taste buds are in for a delightful surprise—are you ready to dive into this sweet adventure?
Why is Burnt Honey Pie a Must-Try?
Irresistible, the seductive allure of caramelized honey creates a flavor that's truly unique and unforgettable. Simplicity, with just 15 minutes of prep, you can have this sophisticated dessert ready to impress. Versatile, serve it on its own or elevate it with a scoop of ice cream for a comforting finish. Crowd-pleaser, this pie is sure to steal the spotlight at any gathering. Time-saving, make it a day in advance and simply reheat before serving for stress-free entertaining. The Burnt Honey Pie is your ticket to a sweet experience that will leave everyone craving more!
Burnt Honey Pie Ingredients
For the Filling
- Honey – 1 cup of this liquid gold adds a deep, caramelized sweetness that defines your Burnt Honey Pie.
- Heavy cream – 1 cup creates a rich and silky texture that balances the flavors beautifully.
- Milk – ½ cup complements the heavy cream and helps to achieve a smooth filling consistency.
- Large eggs – 3 help bind the ingredients together, giving the pie its creamy structure.
- Salt – ½ teaspoon enhances the sweetness and rounds out the flavors perfectly.
- Cinnamon – ¼ teaspoon provides a warm, comforting aroma that complements the honey.
- Cornstarch – 1 tablespoon acts as a thickening agent to achieve the right texture for the filling.
- Unsalted butter – 2 tablespoons, melted, adds richness and a glossy finish to the pie.
- Pre-made pie crust (optional) – Choose this for convenience or use homemade for an extra special touch!
Optional Toppings
- Vanilla ice cream – A scoop on top adds creaminess and contrasts beautifully against the pie's texture.
- Fresh berries – They provide a burst of freshness that perfectly balances the pie's sweetness.
Step‑by‑Step Instructions for Burnt Honey Pie
Step 1: Preheat the Oven
Begin your journey to crafting the perfect Burnt Honey Pie by preheating your oven to 375°F (190°C). This step is crucial as it ensures your pie bakes evenly and achieves that desired slightly burnt top. While the oven warms up, gather your ingredients and equipment to ensure a smooth cooking process.
Step 2: Prepare the Honey
In a medium saucepan over medium heat, pour in 1 cup of honey. Stir occasionally as the honey slowly bubbles and transforms into a rich, dark amber color, about 6-8 minutes. Keep a close eye on it to avoid burning. This caramelization process intensifies the flavor, providing that signature touch for your Burnt Honey Pie.
Step 3: Combine Dairy Ingredients
Once the honey reaches that deep amber hue, remove it from the heat and gradually whisk in 1 cup of heavy cream and ½ cup of milk. The mixture will bubble gently, creating a creamy texture. Stir consistently until fully combined and smooth, ensuring all the flavors meld beautifully. Set this aside to cool slightly.
Step 4: Mix the Egg Mixture
In a separate bowl, whisk together 3 large eggs, ½ teaspoon of salt, ¼ teaspoon of cinnamon, and 1 tablespoon of cornstarch. Whisk until completely smooth and well combined. This mixture will help create the rich, custard-like filling for your Burnt Honey Pie. It’s essential to ensure no lumps remain for a silky texture.
Step 5: Combine Mixtures
Slowly pour the cooled honey mixture into the egg mixture while whisking continuously. This gradual incorporation prevents the eggs from scrambling in the heat. Keep whisking until you achieve a uniform consistency without any visible lumps. Your filling is now ready to bring sweetness to your Burnt Honey Pie.
Step 6: Prepare the Pie Crust
If you're using a pre-made pie crust, place it in a 9-inch pie dish and ensure it's neatly fitted. If you prefer homemade, roll out your dough and fit it into the dish, crimping the edges for a lovely presentation. Once your crust is ready, you can confidently fill it with the luscious honey custard.
Step 7: Bake the Pie
Pour the prepared filling into the pie crust, smoothing it out with a spatula. Carefully place the pie in the preheated oven and bake for 40-45 minutes. The filling should be set with a slightly burnt top, indicating a perfect bake. The aroma wafting through your kitchen will be nothing short of delightful.
Step 8: Cool Before Serving
Once baked, remove your Burnt Honey Pie from the oven and allow it to cool on a wire rack. This cooling process lets the filling set further, making it easier to slice. Wait at least 30 minutes before serving, allowing the pie to reach room temperature or chill in the fridge for a refreshing treat.
Make Ahead Options
These Burnt Honey Pie are perfect for meal prep enthusiasts! You can make the pie filling up to 24 hours in advance, storing it in the refrigerator to maintain its creamy texture. To do this, simply prepare the filling as directed, let it cool, then cover it tightly to prevent any absorption of odors. Additionally, you can prepare the pie crust (if homemade) a couple of days ahead and freeze it, keeping it fresh until you’re ready. When it’s time to serve, just pour the chilled filling into the crust and bake according to the recipe instructions. This way, you'll have a stunning dessert with minimal effort, perfect for impressing guests without sacrificing your precious time!
How to Store and Freeze Burnt Honey Pie
- Fridge: Store leftover Burnt Honey Pie in an airtight container in the refrigerator for up to 3 days. This will keep the pie fresh and delicious while maintaining its creamy texture.
- Freezer: If you want to store the pie for a longer period, you can freeze it for up to 2 months. Wrap it tightly in plastic wrap and then in aluminum foil to prevent freezer burn.
- Reheating: To enjoy your pie again, allow it to thaw in the fridge overnight. Reheat the slices gently in the microwave for about 20-30 seconds, or in a preheated oven at 350°F (175°C) until warmed through.
- Serving Tip: For the best taste and texture, serve the pie chilled or at room temperature after reheating, adding a scoop of vanilla ice cream for a delightful contrast.
What to Serve with Burnt Honey Pie?
Indulging in a slice of this creamy delight can be even more enjoyable when paired with complementary flavors and textures.
-
Vanilla Ice Cream: A classic choice, its creamy richness enhances the pie's caramel notes while adding a cool contrast.
-
Fresh Berries: Juicy raspberries or tart blackberries brighten the plate and cut through the sweetness, adding a refreshing touch.
-
Whipped Cream: Light and airy, whipped cream provides a cloud-like contrast to the dense filling, making each bite delightful.
-
Coffee or Tea: A warm cup of brewed coffee or herbal tea balances the sweetness with rich, earthy notes, perfect for an after-dinner treat.
-
Nutty Shortbread Cookies: Their buttery crunch offers a delightful textural contrast to the smooth pie, ideal for those who crave a little crunch.
-
Candied Nuts: Toasted walnuts or pecans sprinkled on top add a sweet and savory crunch, beautifully complementing the flavors of the pie.
Each of these pairings elevates your dessert experience, creating a feast of flavors that is both comforting and sophisticated.
Burnt Honey Pie Variations & Substitutions
Feel free to let your creativity flow with these easy variations and personal touches to enhance your Burnt Honey Pie experience!
- Dairy-Free: Substitute coconut cream and almond milk for a rich, non-dairy alternative that pairs beautifully with honey.
- Gluten-Free: Use a gluten-free pie crust or almond flour crust to make this dessert accessible for gluten-sensitive friends. It maintains its delightful texture without compromising flavor.
- Spiced Twist: Add a pinch of nutmeg or ginger in addition to the cinnamon for a warm and inviting spice profile. Everyone will appreciate the added depth of flavor.
- Heavier Creaminess: Swap half the heavy cream with additional milk for a lighter version, perfect for those who appreciate a less rich pie without losing its comforting essence.
- Flavor Infusion: Introduce a splash of vanilla extract for an aromatic hint that complements the honey perfectly and adds another layer of sweetness.
- Fruit Addition: Fold in fresh berries or sliced peaches into the filling before baking. They will create a delightful fruity surprise in each slice!
- Nutty Crust: Replace regular pie crust with a pecan or almond meal crust for an added nutty crunch that pairs so well with the smooth filling.
- Spicy Heat: Add a few dashes of cayenne pepper to the filling for a warm kick that creates an unexpected yet delightful contrast with the sweet honey.
To maintain balance and keep things exciting in the kitchen, don't forget to pair your pie with a scoop of ice cream or some fresh berries. This is your perfect chance to explore options like a creamy vanilla bean ice cream or even a dollop of whipped cream that takes your dessert to the next level of indulgence!
Expert Tips for Burnt Honey Pie
-
Perfect Honey Color: Aim for a dark amber hue when caramelizing the honey. If it turns too dark, it may burn and taste bitter.
-
Whisking Technique: When mixing the honey with the eggs, pour gradually and whisk continuously to avoid scrambling. This is crucial for a smooth filling.
-
Crust Choice: Use a pre-made pie crust for convenience, but if you're up for it, a homemade crust enhances the flavor of your Burnt Honey Pie.
-
Baking Time Caution: Keep an eye on the pie towards the end of baking; all ovens vary, and slightly burnt edges are ideal, but you want to avoid overbaking.
-
Cooling Patience: Allow the pie to cool completely before slicing. This helps achieve clean cuts and prevents the filling from spilling out.
-
Storage Reminder: If you have leftovers, remember to store your Burnt Honey Pie in the refrigerator for up to 3 days to keep it fresh and delicious.
Burnt Honey Pie Recipe FAQs
What type of honey should I use for Burnt Honey Pie?
Absolutely! For the best results, choose a quality honey with a rich and complex flavor. Raw honey or wildflower honey work beautifully, as they can bring out unique notes in the pie. Avoid overly processed honey, as it may lack the depth you want.
How should I store leftovers of Burnt Honey Pie?
To keep your Burnt Honey Pie fresh, store it in an airtight container in the refrigerator for up to 3 days. This helps maintain its creamy texture and delightful flavors. Just give it a moment out of the fridge to come to room temperature before slicing for optimal taste!
Can I freeze Burnt Honey Pie? How?
Yes, you can freeze your Burnt Honey Pie! Wrap individual slices or the whole pie tightly in plastic wrap, then wrap again in aluminum foil to protect it from freezer burn. It should last for up to 2 months. To enjoy it later, thaw it in the fridge overnight and reheat gently. Preheat your oven to 350°F (175°C) and warm for about 15-20 minutes for a delightful revival!
Why did my pie filling turn out runny?
If your Burnt Honey Pie filling is runny, it may not have cooked long enough, or the honey mixture was too hot when added to the eggs. Always add the honey gradually and whisk continuously to prevent scrambling, ensuring a smooth texture. Keep an eye on baking time, and if necessary, bake a bit longer while checking for doneness—look for a set filling with a slightly burnt top!
Is Burnt Honey Pie suitable for those with allergies?
While Burnt Honey Pie is delicious, be cautious if you have allergies. This recipe contains eggs and dairy, so it’s not suitable for vegans or those with egg or milk allergies. If you need alternatives, consider using flaxseed eggs and non-dairy milk substitutes, but the texture and flavor may vary.
Can I use a homemade pie crust instead of a pre-made one?
Very! Using a homemade pie crust adds a personal touch and can enhance the flavor of your Burnt Honey Pie. If you decide to go this route, I recommend using a buttery or flaky crust for that perfect balance against the creamy filling. Just make sure to bake the crust fully if it's a blind bake to prevent sogginess!

Indulge in Decadent Burnt Honey Pie for Sweet Comfort
Equipment
- Medium saucepan
- 9-inch pie dish
- whisk
- mixing bowl
Ingredients
For the Filling
- 1 cup honey adds deep, caramelized sweetness
- 1 cup heavy cream creates a rich and silky texture
- ½ cup milk complements heavy cream
- 3 large eggs binds ingredients together
- ½ teaspoon salt enhances sweetness
- ¼ teaspoon cinnamon provides a warm aroma
- 1 tablespoon cornstarch thickening agent
- 2 tablespoons unsalted butter adds richness, melted
- 1 pie crust pre-made pie crust optional for convenience
Optional Toppings
- 1 scoop vanilla ice cream adds creaminess
- fresh berries provides a burst of freshness
Instructions
Instructions
- Preheat your oven to 375°F (190°C).
- In a medium saucepan over medium heat, pour in 1 cup of honey. Stir occasionally until it reaches a rich, dark amber color, about 6-8 minutes.
- Remove from heat and gradually whisk in 1 cup of heavy cream and ½ cup of milk until smooth.
- In a separate bowl, whisk together 3 large eggs, ½ teaspoon of salt, ¼ teaspoon of cinnamon, and 1 tablespoon of cornstarch until smooth.
- Slowly pour the cooled honey mixture into the egg mixture while whisking continuously to combine.
- Place your pre-made pie crust in a 9-inch pie dish, then pour the filling into the crust.
- Bake for 40-45 minutes until the filling is set and the top is slightly burnt.
- Remove from the oven and cool on a wire rack for at least 30 minutes before serving.


Leave a Reply