
As I strolled through the colorful aisles of the local bakery, a whimsical thought danced through my mind: why not bring that joy home? Enter Halloween Cake Pops—a delightful treat that transforms the fun of cake into a pop of sweetness your family will adore. This charming recipe makes it easy to create these festive bites using either a boxed mix or your own homemade cake. Not only are they a hit for any spooky gathering, but they also offer a fantastic way to engage little ones in the kitchen. With simple ingredients and a touch of creativity, you’ll fill your kitchen with laughter and delicious aromas, making these cake pops a perfect blend of fun and flavor. Ready to dive into a treat that will enchant your family and friends? What spooky decorations will you choose for your Halloween Cake Pops?
Why Make Halloween Cake Pops?
Creative fun: Halloween Cake Pops are a fantastic way to unleash your creativity with festive decorations that will thrill everyone.
Easy to customize: You can easily adapt the flavors or toppings based on your preferences, making each pop a unique creation.
Perfect for gatherings: These delightful treats are crowd-pleasers, perfect for parties, school events, or family get-togethers.
Engaging for kids: Get the little ones involved in decorating—imagine their excitement as they design their spooky masterpieces!
Time-saving treat: With a quick chill time, these pops are a great last-minute dessert option that doesn't skimp on fun or flavor!
Transform your baking with these delightful Halloween treats, and don't forget to check out our tips for making cake pops with other flavors for even more inspiration!
Halloween Cake Pops Ingredients
For the Cake
• Boxed cake mix or homemade cake – A pre-made mix saves time, but a homemade cake adds a personal touch.
For the Frosting
• Frosting – Using store-bought frosting is a great shortcut, while homemade frosting can elevate the flavor profile.
For the Coating
• Chocolate or candy melts – Choose vibrant colors for fun Halloween themes; these will coat the cake pops beautifully.
For the Decorations
• Edible decorations – Get creative with sprinkles, candy eyeballs, or gel icing to make your Halloween Cake Pops look spooktacular!
Step‑by‑Step Instructions for Halloween Cake Pops
Step 1: Bake the Cake
Preheat your oven as instructed on the cake mix box, usually around 350°F (175°C). Prepare your baking pan with non-stick spray or parchment paper. Pour the batter in and bake for about 25-30 minutes, or until a toothpick inserted comes out clean. Allow the cake to cool completely on a wire rack before moving to the next step.
Step 2: Crumble the Cake
Once your cake has cooled, transfer it to a large mixing bowl and crumble it using your hands or a fork. The consistency should be that of fine crumbs. Add about 1 cup of frosting to the crumbled cake mixture. Mix until thoroughly combined—aim for a moist texture that holds together when rolled into balls.
Step 3: Form Cake Balls
With your hands, scoop out portions of the mixture and roll them into small balls, roughly 1 inch in diameter. This step is crucial for shaping your Halloween Cake Pops. Place the formed cake balls on a baking sheet lined with parchment paper, ensuring they are spaced apart to avoid sticking together.
Step 4: Insert Lollipop Sticks
Take the lollipop sticks and gently insert them into each cake ball, pushing them about halfway through. This will help anchor the stick once you dip the cake pops later. Be careful not to push too hard, as you want to keep the integrity of each cake ball intact.
Step 5: Chill the Cake Pops
Once all the sticks are in place, place the baking sheet with the cake pops in the refrigerator for about 30 minutes. This chilling period helps firm them up, making it easier to dip them in chocolate without losing their shape.
Step 6: Melt the Coating
While waiting, melt your chocolate or candy melts according to the package instructions. You can use a microwave, heating in short bursts and stirring frequently, or a double boiler technique for even melting. The coating should be smooth and pourable, ready to envelop your Halloween Cake Pops.
Step 7: Dip the Cake Pops
Carefully dip each chilled cake pop into the melted chocolate, ensuring it's completely covered. Allow excess coating to drip back into the bowl. This step is key to achieving a smooth finish on your Halloween Cake Pops. If desired, you can tilt the cake pop slightly to help remove excess chocolate.
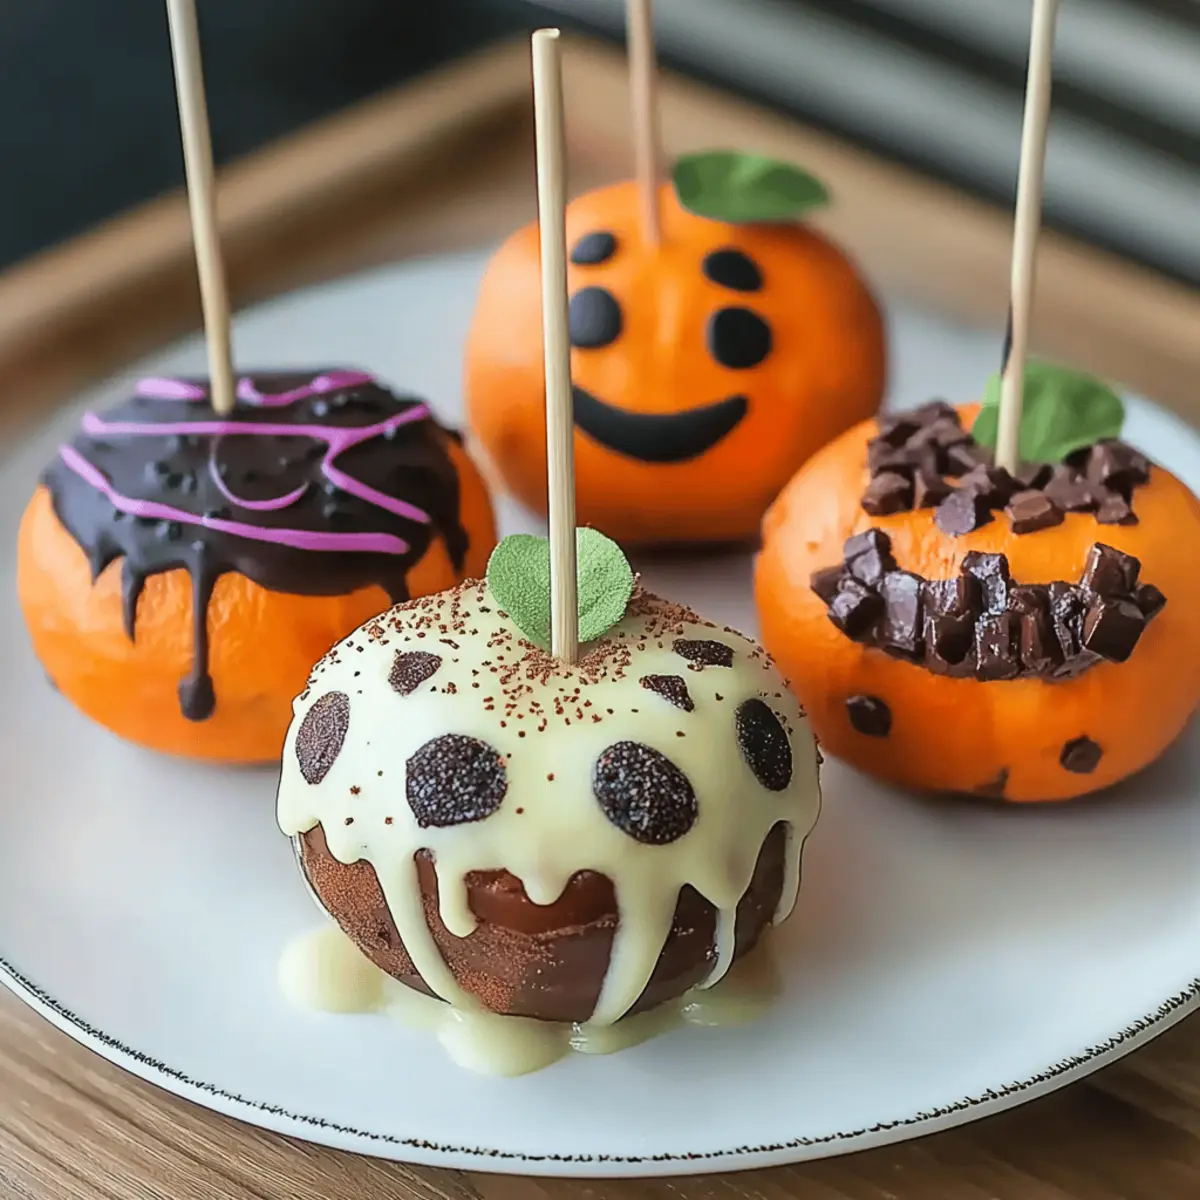
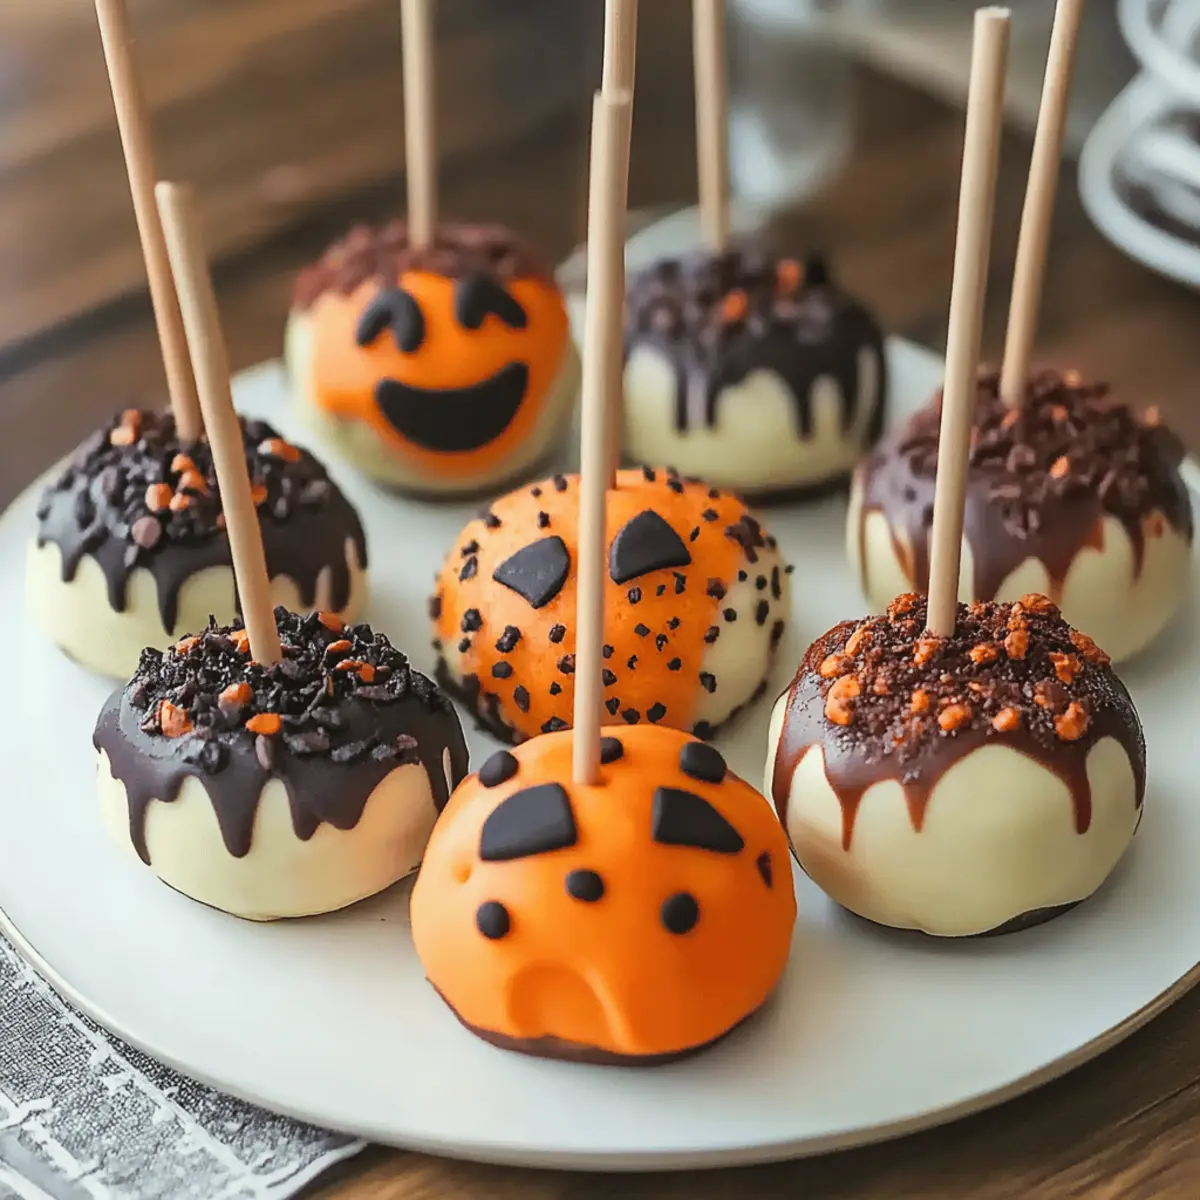
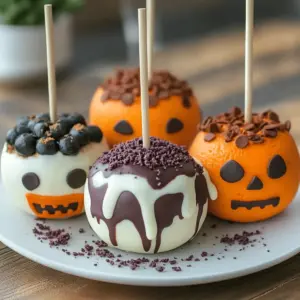
Step 8: Decorate the Pops
Before the coating sets, sprinkle your favorite edible decorations like sprinkles, candy eyeballs, or gel icing for extra flair. Be creative here—your Halloween Cake Pops can be as spooky or colorful as you like! Make sure to work quickly, as the coating will harden.
Step 9: Set the Cake Pops
To set your decorated treats, place the cake pops upright in a styrofoam block or a dedicated cake pop stand. Allow them to sit at room temperature until the chocolate coating hardens fully, which may take about 15-20 minutes. Your delicious Halloween Cake Pops are now ready to be enjoyed!

How to Store and Freeze Halloween Cake Pops
Room Temperature: Keep your Halloween Cake Pops in an airtight container at room temperature for up to 2 days to maintain their freshness.
Fridge: For longer storage, place cake pops in the fridge in a single layer inside an airtight container. They will stay good for up to one week, but may taste best fresh.
Freezer: To freeze, wrap each cake pop individually in plastic wrap and place them in a freezer-safe container. They can be stored for up to 2 months.
Reheating: If you’ve stored them in the freezer, allow the Halloween Cake Pops to thaw in the fridge overnight before enjoying them. Do not microwave, as it can ruin the coating.
Expert Tips for Halloween Cake Pops
-
Choose Quality Ingredients: Use good quality chocolate and fresh frosting for the best flavor. Don't skimp here—it's essential for delightful Halloween Cake Pops.
-
Crumble Effectively: Ensure the cake is fully cooled before crumbling; warm cake can lead to a mushy texture. Aim for fine crumbs for easy mixing and rolling.
-
Stick Stability: Insert lollipop sticks gently to avoid breaking the cake balls. A light touch will keep them intact when dipped in chocolate.
-
Dip Technique: Rotate the cake pop as you dip to coat evenly. Allow excess chocolate to drip off before decorating for a clean finish.
-
Chill Time Matters: Don’t skip the refrigeration step; chilling helps the cake pops hold their shape for perfect dipping.
-
Be Creative: Let your imagination run wild with decorations! This is a fun way to personalize each Halloween Cake Pop, so enjoy the process!
Make Ahead Options
These Halloween Cake Pops are a fantastic choice for busy home cooks looking to save time while still bringing joy to the table! You can prepare the cake and crumble it up to 3 days in advance; just keep it stored in an airtight container in the refrigerator to maintain freshness. You can also roll the cake and frosting mixture into balls and refrigerate them for up to 24 hours before dipping. This not only makes the assembly quicker but also ensures that your cake pops are just as delicious. When ready to serve, simply melt the chocolate, dip your chilled cake pops, and add your spooky decorations before setting them upright to harden. Enjoy making these fun treats hassle-free!
Halloween Cake Pops Variations & Substitutions
Feel free to mix things up and make these delightful treats your own with these creative ideas!
-
Gluten-Free: Substitute traditional cake mix with a gluten-free variety to cater to dietary restrictions without sacrificing taste.
-
Vegan-Friendly: Use a vegan cake mix and substitute frosting with coconut cream; these pops will still be rich and luscious.
-
Flavor Boost: Add vanilla or almond extract to the cake batter for an extra layer of flavor that tantalizes the taste buds.
-
Nutty Delight: Incorporate finely chopped nuts like almonds or pecans into the cake mixture for a delightful crunch! This adds texture and a lovely contrast to the sweetness.
-
Different Coatings: Experiment with white chocolate or colored candy melts for different visual effects and taste variations. You could even sprinkle some sea salt for a sweet-salty twist!
-
Fruity Fun: Fold in mini chocolate chips or dried fruit like cranberries into your cake pop batter for unexpected bursts of flavor. It's an easy way to elevate the rustic charm of your treats.
-
Spicy Kick: Add a pinch of cinnamon or cayenne pepper to your cake mix for a surprising heat that will delight adventurous eaters!
-
Mini Pops: Create bite-sized versions by making smaller balls for adorable mini cake pops—perfect for party platters or for little hands.
Embrace the joy of creativity in the kitchen, and don’t hesitate to explore unique combinations! For more fabulous ideas, check out our tips for making cake pops with other flavors or discover the charm of seasonal decorations for added flair!
What to Serve with Halloween Cake Pops
Imagine a spooky gathering, the room alive with laughter and haunting decor, paired harmoniously with festive delights to make your Halloween celebration truly memorable.
-
Ghoulish Fruit Platter: A colorful assortment of fruits like orange tangerines and blackberries adds freshness and balances the sweetness of the cake pops.
-
Witch's Brew Chocolate Fondue: Rich, melted chocolate served with skewered fruits and marshmallows invites creative dipping, enhancing the sweet experience of your cake pops.
-
Zombie Punch: A fizzy, fruit-flavored punch brings fun and festivity, tying your themed treats together and providing a delightful contrast to the sugary delights.
-
Mummy Dogs: These savory delights add a touch of whimsy next to the sugary treats, providing a delicious balance of flavors that keeps everyone satisfied.
-
Spooky Cheese Platter: A mix of cheeses and crackers, served with themed toppings, offers a variety of textures and complements the sweetness of Halloween Cake Pops perfectly.
-
Haunted Halloween Cookies: Sugar cookies decorated like ghosts or pumpkins add another sweet layer to your party, creating a buffet of delightful treats for kids and adults alike.
-
Pumpkin Spice Latte: Embrace the fall spirit with this warm, spiced drink that pairs beautifully with cake pops, enhancing the whole Halloween experience.
-
Caramel Apple Slices: These treats bring a crunchy texture and a touch of tartness, balancing the sweetness of the cake pops while celebrating classic fall flavors.
-
Ghostly Edible Eyeball Treats: Add an extra spooky element to your dessert table, inviting guests to indulge in playful presentations that complement your Halloween Cake Pops beautifully.
Halloween Cake Pops Recipe FAQs
How do I know if my ingredients are ripe or suitable for use?
Absolutely! When selecting a cake mix or homemade cake, ensure the ingredients are within their expiration dates. If using eggs, check for freshness by placing them in a bowl of water — if they sink, they’re good to go! For frosting, look for any separation or an off smell.
How do I store leftover Halloween Cake Pops?
You can keep your Halloween Cake Pops in an airtight container at room temperature for up to 2 days for the best taste. If you want to store them longer, place them in the refrigerator in a single layer. They’ll stay fresh for up to one week, but are best enjoyed when fresh!
Can I freeze my Halloween Cake Pops? What’s the process?
Absolutely! To freeze your Halloween Cake Pops, individually wrap each one in plastic wrap to prevent freezer burn. Then, place them in a freezer-safe container. They will remain good for up to 2 months. When you're ready to enjoy them, thaw them in the fridge overnight instead of microwaving, which could ruin that lovely chocolate coating.
What if my cake pops are falling off the sticks?
Very! If you’re finding that the cake pops are toppling off their sticks, this can often be due to the mixture being too moist. Ensure you’ve mixed the cake and frosting until fully combined and not overly wet. Additionally, chilling them properly for about 30 minutes helps firm them up before dipping.
Are Halloween Cake Pops safe for kids with allergies?
When making Halloween Cake Pops, always check the labels of your ingredients, especially cake mix and frosting, as they can contain allergens like gluten, dairy, or nuts. If you're dealing with food allergies, consider opting for gluten-free cake mix and dairy-free chocolate to accommodate your little ones' needs!
What types of decorations can I use that's pet-friendly?
While decorating your Halloween Cake Pops, keep in mind that many common cake decorations (like chocolate and certain sprinkles) are not safe for pets. Opt for pet-friendly decorations such as colored sugar or even coconut shavings as an alternative. Always double-check any items you use to ensure they’re safe for your furry friends!
Deliciously Fun Halloween Cake Pops You'll Love to Make
Equipment
- Baking pan
- mixing bowl
- parchment paper
- refrigerator
- Microwave or double boiler
- Styrofoam block or cake pop stand
Ingredients
For the Cake
- 1 box Boxed cake mix or homemade cake A pre-made mix saves time, but a homemade cake adds a personal touch.
For the Frosting
- 1 cup Frosting Using store-bought frosting is a great shortcut, while homemade frosting can elevate the flavor profile.
For the Coating
- 1 package Chocolate or candy melts Choose vibrant colors for fun Halloween themes; these will coat the cake pops beautifully.
For the Decorations
- to taste Edible decorations Get creative with sprinkles, candy eyeballs, or gel icing to make your Halloween Cake Pops look spooktacular!
Instructions
Step-by-Step Instructions
- Preheat your oven to 350°F (175°C) and prepare your baking pan with non-stick spray or parchment paper. Pour the batter in and bake for about 25-30 minutes, or until a toothpick inserted comes out clean.
- Once your cake has cooled, crumble it in a large mixing bowl. Add about 1 cup of frosting and mix until thoroughly combined—aim for a moist texture that holds together when rolled into balls.
- Scoop out portions of the mixture and roll them into small balls, roughly 1 inch in diameter. Place the formed cake balls on a baking sheet lined with parchment paper.
- Insert lollipop sticks into each cake ball, pushing them halfway through. Be careful not to push too hard.
- Chill the cake pops in the refrigerator for about 30 minutes to firm them up for dipping.
- Melt your chocolate or candy melts according to the package instructions until smooth and pourable.
- Dip each chilled cake pop into the melted chocolate, ensuring it's completely covered. Allow excess coating to drip back into the bowl.
- Before the coating sets, sprinkle your favorite edible decorations for extra flair. Work quickly to achieve the best results!
- Place the decorated cake pops upright in a styrofoam block or cake pop stand until the coating hardens fully, about 15-20 minutes.


Leave a Reply