
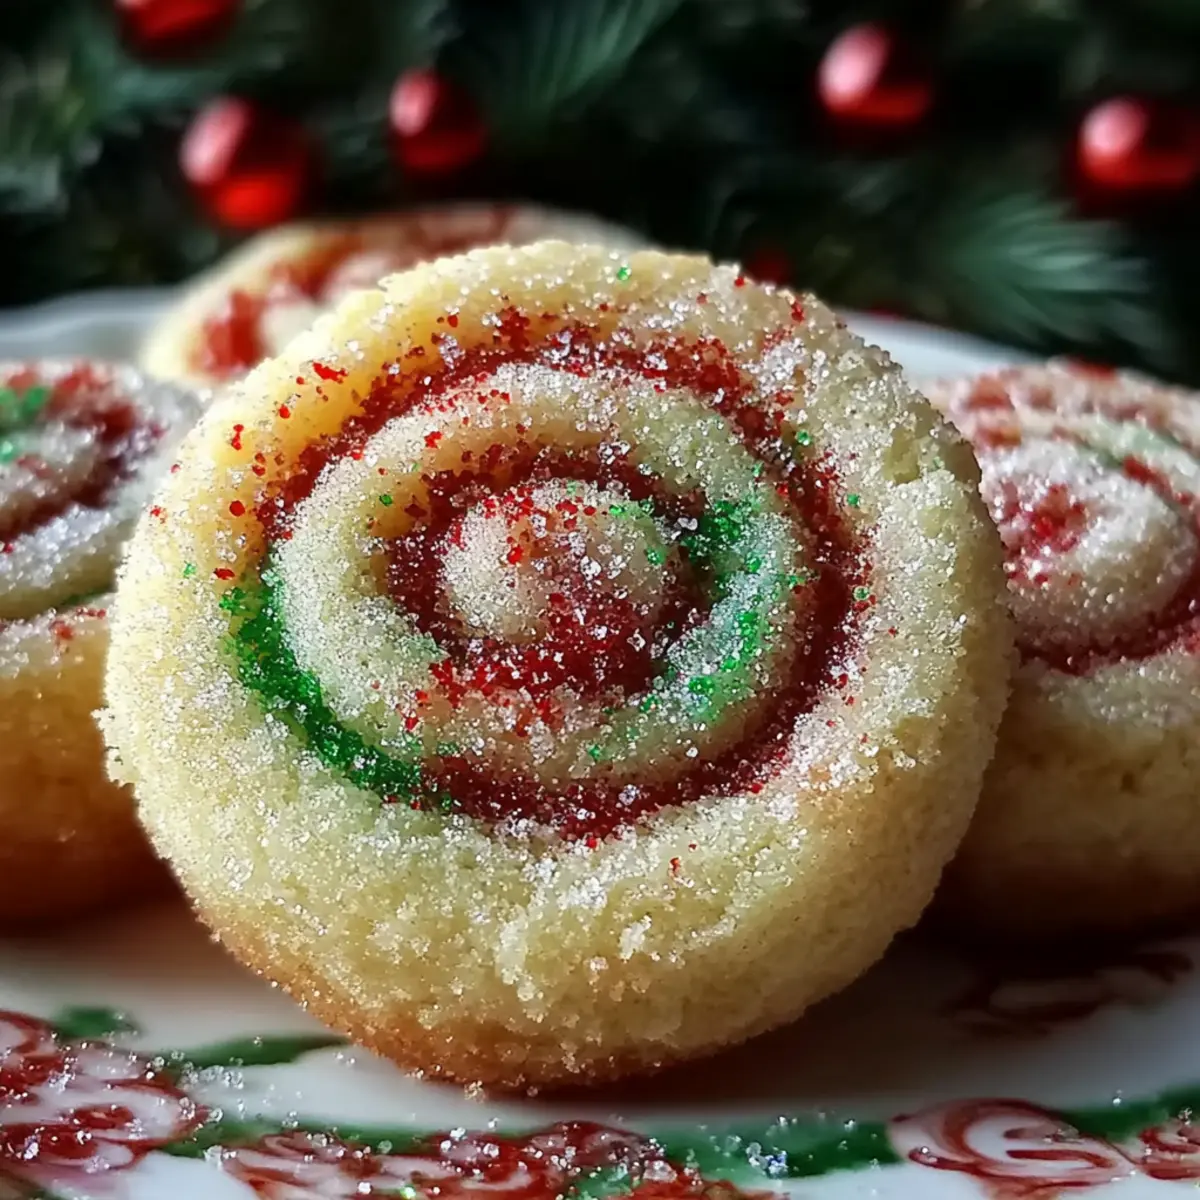
As I sift through the festive aroma filling my kitchen, it hits me—nothing quite says “holiday cheer” like the delightful swirl of Christmas Pinwheel Cookies. These chocolate and vanilla beauties not only brighten up any dessert table but are also a wonderful way to engage your inner child with their eye-catching layers. The best part? They come together effortlessly, making them a must-have addition to any busy holiday baking list. Whether you’re looking to impress guests or simply treat yourself, these cookies are a heartwarming blend of nostalgia and creativity. Plus, they’re perfect for sharing, and who wouldn’t love a delicious treat adorned with bright sprinkles? Ready to roll up your sleeves and create some festive magic in your kitchen?
Why Are Christmas Pinwheel Cookies Special?
Visual Delight: These cookies are a stunning sight, showcasing a beautiful swirl of chocolate and vanilla that adds a festive flair to your holiday table.
Effortless Preparation: With straightforward steps that don’t require advanced baking skills, everyone can join in on the fun.
Perfect for Sharing: Their vibrant colors and delightful taste make them ideal for holiday parties, and they’re sure to bring smiles to friends and family.
Endless Variations: You can swap the sprinkles for crushed peppermint candies for a minty twist, allowing for a personal touch.
Time-Saving Treat: Quick to prepare, chill, and bake—these cookies fit perfectly into your busy holiday schedule.
Baking these Christmas Pinwheel Cookies is not just a treat for the taste buds, but also an invitation to create cheerful memories!
Christmas Pinwheel Cookies Ingredients
Discover the delicious components you'll need!
For the Cookie Dough
- 1 cup unsalted butter – ensures a rich, creamy texture that enhances flavor.
- 1 ½ cups granulated sugar – sweetens the dough and helps achieve a tender crumb.
- 1 large egg – binds the mixture together and adds moisture.
- 1 teaspoon vanilla extract – infuses the cookies with a warm, inviting aroma.
- 2 ½ cups all-purpose flour – provides the structure needed for perfect cookies.
- 1 teaspoon baking powder – helps the cookies rise for a delightful texture.
- ¼ teaspoon salt – balances the sweetness, enhancing overall flavor.
For the Chocolate Layer
- ⅓ cup unsweetened cocoa powder – adds a rich, deep chocolate flavor, perfect for the festive season.
For the Decoration
- ½ cup red and green sprinkles – these colors will brighten up your cookies and bring holiday cheer!
- ¼ cup crushed peppermint candies – a delightful variation that adds a refreshing crunch to the mix.
Gather these ingredients, and you’ll be well on your way to crafting irresistible Christmas Pinwheel Cookies that are sure to spread joy this holiday season!
Step‑by‑Step Instructions for Christmas Pinwheel Cookies
Step 1: Preheat and Prep
Begin by preheating your oven to 350°F (175°C) and prepare your baking sheets by lining them with parchment paper. This ensures your Christmas Pinwheel Cookies will bake evenly and won’t stick. While your oven heats, gather all your ingredients, creating a cozy workspace that’s ready for some festive baking magic!
Step 2: Cream the Butter and Sugar
In a large mixing bowl, use an electric mixer to cream together 1 cup of softened unsalted butter and 1 ½ cups of granulated sugar until the mixture is light and fluffy—about 3-4 minutes. You’ll notice a delightful change in texture as air incorporates into the mix, setting a lovely foundation for your cookies' flavor and tenderness.
Step 3: Add Egg and Vanilla
Next, beat in 1 large egg and 1 teaspoon of vanilla extract into the butter-sugar blend. Continue mixing until everything is fully incorporated and the mixture appears smooth. The vanilla will fill your kitchen with a warm scent, enhancing the joyful holiday spirit as you create your Christmas Pinwheel Cookies.
Step 4: Whisk Dry Ingredients
In a separate bowl, whisk together 2 ½ cups of all-purpose flour, 1 teaspoon of baking powder, and ¼ teaspoon of salt. This step will ensure that your dry ingredients are well combined, helping to create a uniform dough later. Once whisked, gradually add this mixture to the wet ingredients and mix until just combined to avoid overworking the dough.
Step 5: Divide the Dough
Carefully divide the dough into two equal portions, keeping one portion plain and setting it aside. In the second portion, add ⅓ cup of unsweetened cocoa powder and mix until completely integrated. This creates the chocolate layer of your Christmas Pinwheel Cookies, showcasing a beautiful contrast.
Step 6: Roll Out the Dough
On a clean surface, roll out the plain dough between two sheets of parchment paper into a rectangle approximately ¼ inch thick. Repeat this rolling process with the chocolate dough, ensuring both layers are uniform in size and thickness. This will help you achieve perfectly swirled cookies when you layer them.
Step 7: Layer the Doughs
Once rolled, carefully peel back the top parchment from the chocolate layer and place it over the plain dough, sticky side down. Gently press the layers together to adhere them, creating a stunning base for your Christmas Pinwheel Cookies. Make sure to line everything up neatly for the perfect swirl.
Step 8: Roll into a Log
Starting from one long side, gently roll the layered dough into a tight, even log shape. As you roll, be careful to maintain consistent pressure, ensuring the layers stay intact and the swirl pattern develops beautifully. This process will be key in creating those eye-catching pinwheels when sliced.
Step 9: Chill the Dough
Wrap the rolled log tightly in plastic wrap and refrigerate for at least 30 minutes. Chilling the dough solidifies the shape and makes it easier to slice evenly later. While you wait, clean up your workspace—a tidy kitchen is the first step to happy baking!
Step 10: Slice the Cookies
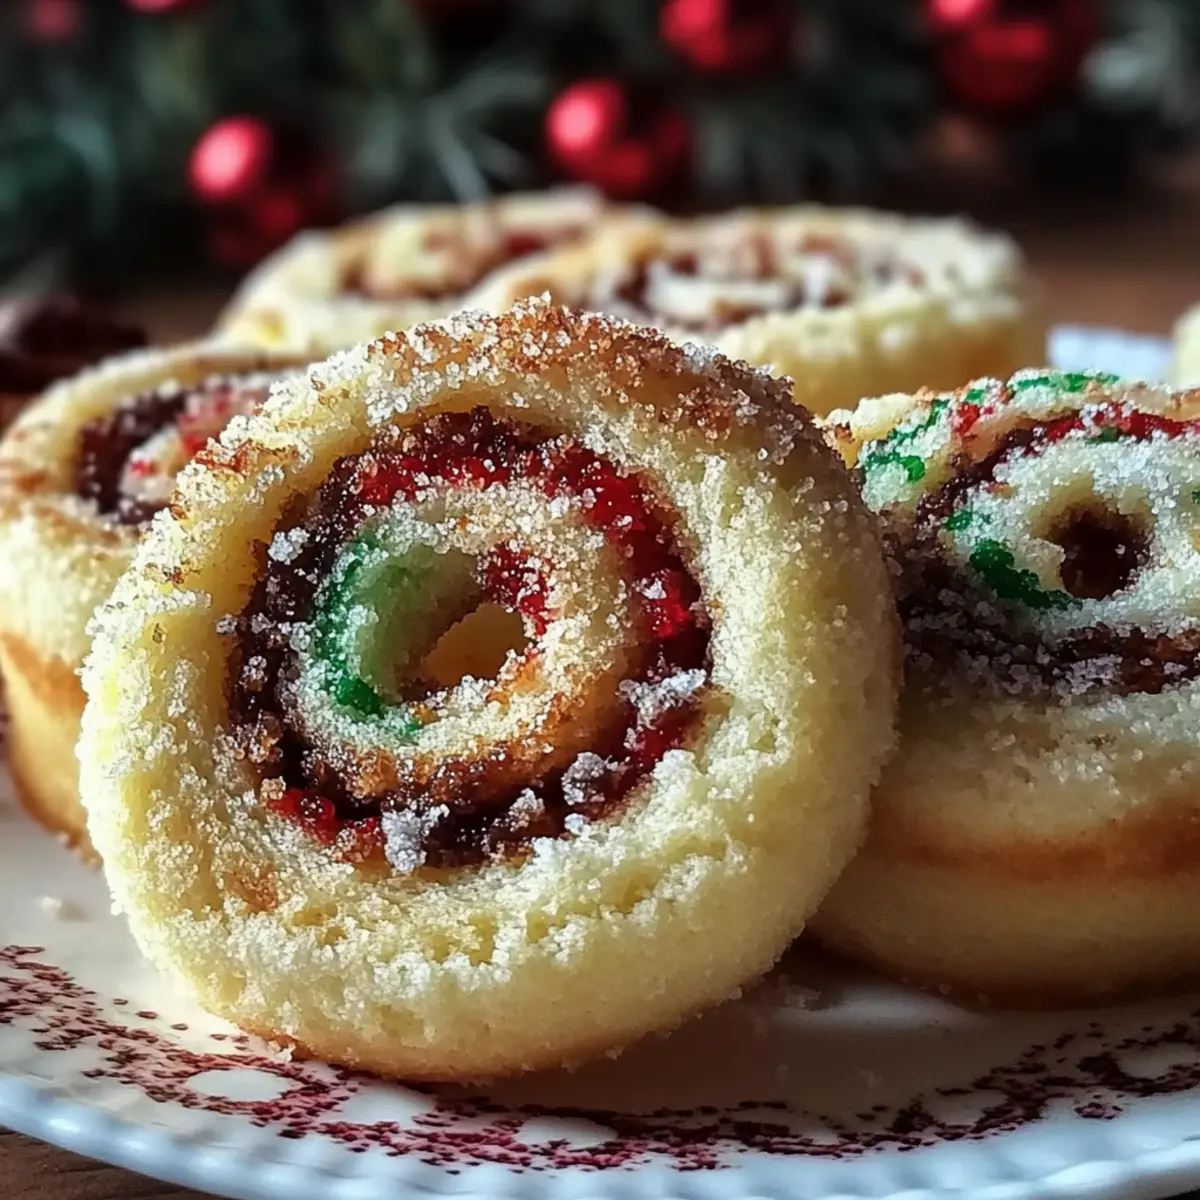
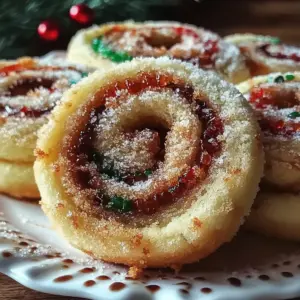
Once chilled, carefully remove the log from the refrigerator and unwrap it. Using a sharp knife, slice the log into ¼ inch thick rounds. You should see the beautiful swirl of chocolate and vanilla in each slice, showcasing the festive charm of your Christmas Pinwheel Cookies.
Step 11: Arrange on Baking Sheets
Place the cookie rounds onto the prepared baking sheets, spacing them a couple of inches apart to allow for spreading during baking. If desired, sprinkle the tops with red and green sprinkles or crushed peppermint candies, adding an extra layer of holiday cheer to your festive cookies.
Step 12: Bake to Perfection
Bake the cookies in your preheated oven for 10-12 minutes, or until the edges are lightly golden. Keep an eye on them towards the end, as you want them to be just firm enough but still soft in the center. The warm aroma of baking Christmas Pinwheel Cookies will fill your home with delightful holiday joy.
Step 13: Cool and Enjoy
Once baked, let the cookies cool on the baking sheet for a few minutes before transferring them to a wire rack to cool completely. This allows them to set properly. As they cool, take a moment to admire your colorful creations—these Christmas Pinwheel Cookies are sure to bring smiles all around!
Tips for the Best Christmas Pinwheel Cookies
- Chill Properly: Ensure the rolled dough is chilled for at least 30 minutes; this step is essential for clean, even slicing and prevents the cookies from spreading too much.
- Layer Evenly: When rolling out the dough, keep both layers at the same thickness to ensure a balanced swirl in your Christmas Pinwheel Cookies.
- Watch the Bake Time: Keep an eye on cookies as they bake; overbaking can lead to dry cookies. Aim for lightly golden edges for the best texture.
- Customize Toppings: Get creative with decorative toppings! Mix crushed nuts or different colored sprinkles for a personalized touch on your Christmas Pinwheel Cookies.
- Measure Carefully: Accurate measurements are key to achieving the right dough consistency; use a kitchen scale if you have one for best results.
Christmas Pinwheel Cookies: Variations & Substitutions
Feel free to unleash your culinary creativity and make these cookies your own!
- Gluten-Free: Substitute all-purpose flour with a 1:1 gluten-free blend for a celiac-friendly treat.
- Dairy-Free: Use coconut oil or vegan butter instead of unsalted butter for a delightful dairy-free version.
- Minty Fresh: Add 1 teaspoon of peppermint extract to the dough along with the vanilla for an extra holiday twist.
- Nutty Delight: Fold in ½ cup of finely chopped nuts like walnuts or pecans to add a lovely crunch to your cookies.
- Chocolate Chips: Stir in 1 cup of mini chocolate chips into the plain dough for gooey, decadent bites.
- Coconut Flakes: Sprinkle ½ cup of sweetened shredded coconut into one layer for a tropical flavor surprise, combining beautifully with the festive look.
- Spicy Kick: Add a pinch of ground cinnamon or nutmeg to the chocolate dough for a warm spice that complements the sweetness.
- Different Colors: Swap sprinkles for colored sugars or edible glitter to match your holiday theme and create a dazzling display.
Let your imagination run wild with these variations, and don't forget to check out our suggestions for the best Christmas Baking Essentials to elevate your festive creations!
How to Store and Freeze Christmas Pinwheel Cookies
Room Temperature: Store cooled cookies in an airtight container at room temperature for up to 3 days to maintain their softness and freshness.
Fridge: If you'd like to keep your Christmas Pinwheel Cookies longer, place them in the fridge in a sealed container for up to a week. Allow them to come to room temperature before serving for the best flavor.
Freezer: For long-term storage, freeze the sliced cookies in a single layer on a baking sheet until firm, then transfer them to a freezer-safe bag. They can be frozen for up to 3 months.
Reheating: To enjoy frozen cookies, simply thaw them in the fridge overnight, then pop them in a warm oven for a few minutes to regain their soft texture.
What to Serve with Christmas Pinwheel Cookies?
As you savor each delightful swirl of these festive treats, elevate your holiday spread with complementary flavors and textures.
- Creamy Hot Chocolate: A rich, velvety drink that warms the soul and balances the sweetness of the cookies, perfect for cozy gatherings.
- Peppermint Bark: This crunchy, minty treat mirrors the refreshing notes in the cookies and adds a delightful crunch, enhancing the festive spirit.
- Vanilla Ice Cream: The creamy simplicity of vanilla ice cream melds wonderfully with the flavors of the cookies, creating a delightful contrast and indulgent treat.
- Fruit Salad: A refreshing medley of seasonal fruits brightens up your dessert table, providing a fresh, juicy balance to the rich cookies.
- Seasonal Chai Latte: Spiced and comforting, this aromatic drink offers a warm hug that beautifully complements the sweetness of your pinwheel cookies.
- Chewy Gingerbread Cookies: Why not double down on the holiday cheer? These spiced delights create a comforting and delicious cookie platter when paired together.
- Chocolate-dipped Strawberries: Their fresh juiciness and rich chocolate coating are an elegant addition, blending beautifully without overpowering the festive cookies.
- Eggnog: This classic holiday drink provides a creamy, spiced flavor that pairs wonderfully with the cookies, making each bite holiday magic.
- Sugar Cookie Bars: Dense, soft, and topped with festive frosting, these bars add a worthwhile variety to your dessert offerings.
- Pecan Pie Bites: Their nutty richness complements the cookies' flavors well while adding a delightful texture to your holiday spread.
Make Ahead Options
These Christmas Pinwheel Cookies are perfect for busy home cooks looking to save time during the bustling holiday season! You can prepare the cookie dough up to 24 hours in advance by following steps 1 through 8, allowing you to roll the dough into a log, wrap it tightly in plastic wrap, and refrigerate. For even quicker assembly on baking day, consider slicing the log into rounds and storing them in an airtight container for up to 3 days before baking. This way, you’ll have fresh cookies with minimal effort! When you’re ready to enjoy, simply arrange the frozen rounds on your baking sheets, add your festive toppings, and bake as instructed. Rest assured, they’ll turn out just as delicious!

Christmas Pinwheel Cookies Recipe FAQs
What is the best way to choose ripe ingredients for cookies?
Absolutely! When selecting ingredients, especially butter and eggs, ensure the butter is softened to room temperature. This usually means leaving it out for about 30 minutes; you want it to be creamy, not melted. For eggs, choose ones that are uncracked and have a clean shell for optimum freshness.
How should I store my Christmas Pinwheel Cookies?
Very! Keep your cooled cookies in an airtight container at room temperature for up to 3 days. If you live in a humid climate, storing them in the fridge will help maintain their texture for up to a week. They must be covered well to prevent them from drying out.
Can I freeze Christmas Pinwheel Cookies?
Absolutely! To freeze your cookies, slice them and freeze the rounds in a single layer on a baking sheet until they're firm. Then transfer them to a freezer-safe bag or container. They're perfect for keeping in the freezer for up to 3 months! When you're ready to enjoy, thaw them in the fridge overnight, and if you desire, warm them in the oven for a few minutes to bring back their delightful softness.
What should I do if my cookies spread too much during baking?
If you find that your Christmas Pinwheel Cookies spread too much, it may be a sign that your dough wasn't chilled long enough before baking. Make sure to chill the log for at least 30 minutes and cut the cookies thick enough—¼ inch should do the trick. Also, check the oven temperature for accuracy, as overshooting can lead to those cookie mishaps!
Are there any dietary considerations for these cookies?
Very! For those with allergies, the Christmas Pinwheel Cookies contain gluten and dairy due to the all-purpose flour and butter. You can use gluten-free flour blends and dairy alternatives to modify the recipe. Just be aware that texture and flavor may vary slightly. And for pet safety, keep chocolate products away from pets, as cocoa can be toxic to them.
Can I customize the sprinkles or toppings on my cookies?
The more the merrier! Yes, feel free to substitute the red and green sprinkles with other fun toppings like crushed nuts, colored sugars, or even seasonal-themed sprinkles. These variations will add a personal touch to your Christmas Pinwheel Cookies while still keeping that festive spirit alive!
Deliciously Festive Christmas Pinwheel Cookies You’ll Love
Equipment
- Electric Mixer
- mixing bowls
- parchment paper
- baking sheets
- plastic wrap
- sharp knife
Ingredients
For the Cookie Dough
- 1 cup unsalted butter ensures a rich, creamy texture that enhances flavor.
- 1.5 cups granulated sugar sweetens the dough and helps achieve a tender crumb.
- 1 large egg binds the mixture together and adds moisture.
- 1 teaspoon vanilla extract infuses the cookies with a warm, inviting aroma.
- 2.5 cups all-purpose flour provides the structure needed for perfect cookies.
- 1 teaspoon baking powder helps the cookies rise for a delightful texture.
- 0.25 teaspoon salt balances the sweetness, enhancing overall flavor.
For the Chocolate Layer
- 0.33 cup unsweetened cocoa powder adds a rich, deep chocolate flavor, perfect for the festive season.
For the Decoration
- 0.5 cup red and green sprinkles these colors will brighten up your cookies and bring holiday cheer!
- 0.25 cup crushed peppermint candies a delightful variation that adds a refreshing crunch to the mix.
Instructions
Step‑by‑Step Instructions
- Preheat your oven to 350°F (175°C) and prepare your baking sheets by lining them with parchment paper.
- In a large mixing bowl, cream together the butter and granulated sugar until light and fluffy—about 3-4 minutes.
- Beat in the egg and vanilla extract until fully incorporated and the mixture is smooth.
- Whisk together the flour, baking powder, and salt in a separate bowl, then gradually add to the wet mixture until just combined.
- Divide the dough into two portions, keeping one plain and adding cocoa powder to the second portion.
- Roll out the plain dough and chocolate dough into rectangles about ¼ inch thick between parchment paper.
- Layer the chocolate dough over the plain dough, sticky side down, and press them together.
- Roll the layered dough into a tight log shape, then wrap tightly in plastic wrap and refrigerate for at least 30 minutes.
- Once chilled, slice the log into ¼ inch thick rounds and place on prepared baking sheets.
- Bake for 10-12 minutes or until edges are lightly golden.
- Cool the cookies on the baking sheet before transferring them to a wire rack to cool completely.


Leave a Reply