
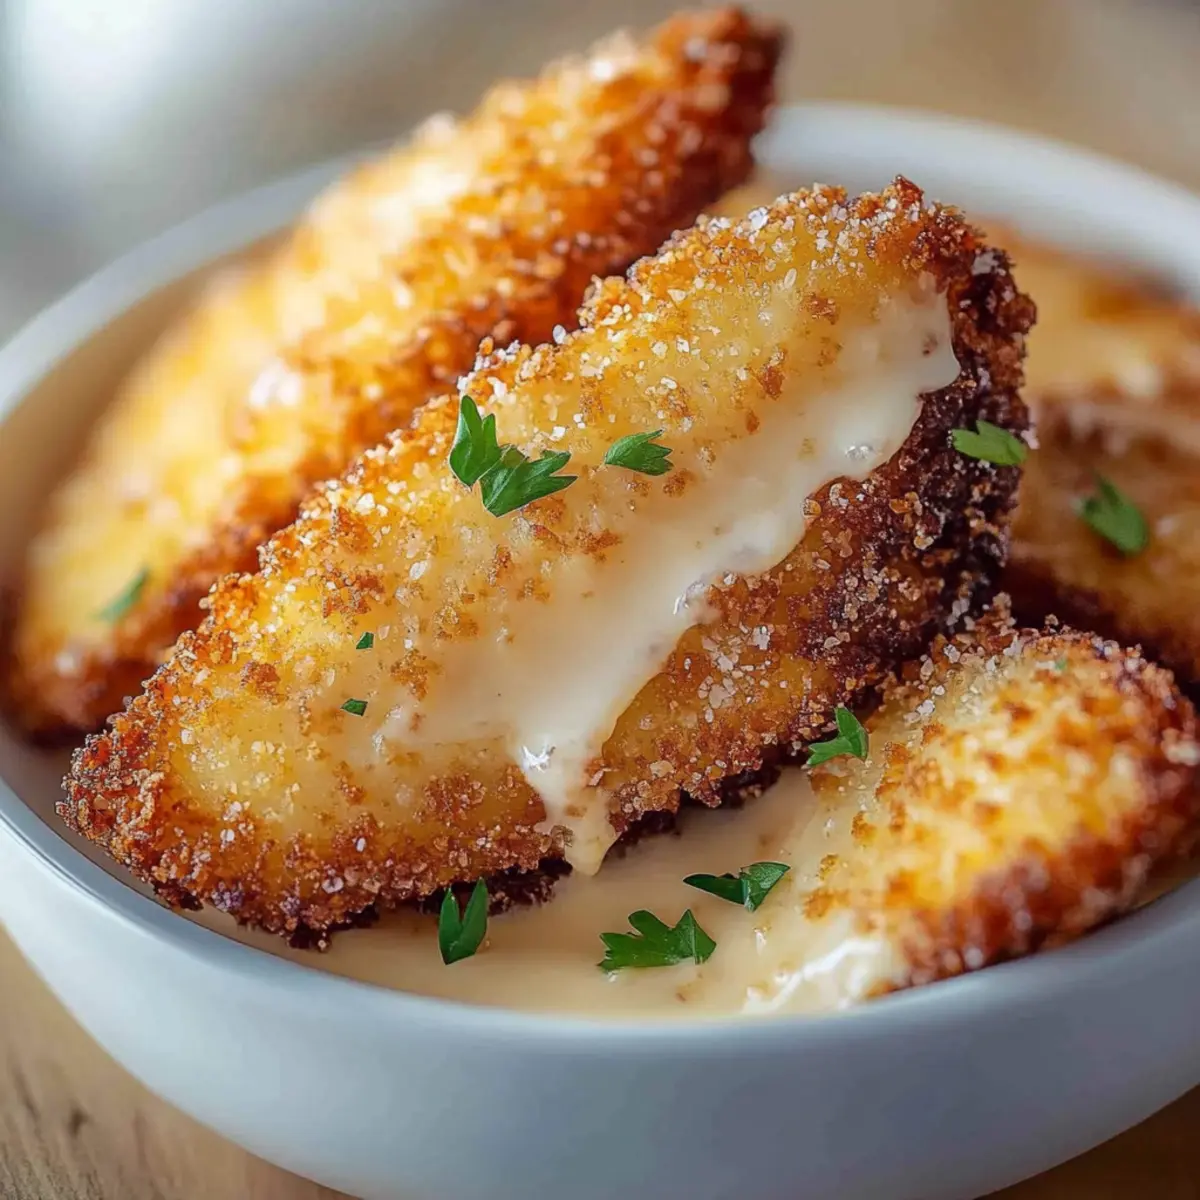
As I pulled the chicken tenders from the oven, the savory aroma of Parmesan and garlic filled my kitchen, making it impossible to resist. These Parmesan Chicken Tenders are the ultimate solution to weeknight meal dilemmas, delivering crispy satisfaction a world away from fast food. With just 40 minutes of your time, they transform chicken into a crunchy, cheesy delight that kids and adults alike can't help but love. Plus, they’re easy to whip up and can be paired with your favorite dipping sauce for an extra fun twist at dinner. Are you ready to savor a homemade experience that’s both delicious and fulfilling? Let’s dive into this simple recipe!

Why are Parmesan Chicken Tenders irresistible?
Crispy, Crunchy Texture: The panko breadcrumbs give these tenders a delightful crunch that’s hard to resist.
Savory, Cheesy Goodness: With Parmesan cheese elevating the flavor, every bite bursts with deliciousness!
Quick to Prepare: In just 40 minutes, you can have a homemade meal that's quicker than fast food.
Kid-Friendly: These tenders are a hit with kids and adults alike, making dinner easier and more enjoyable.
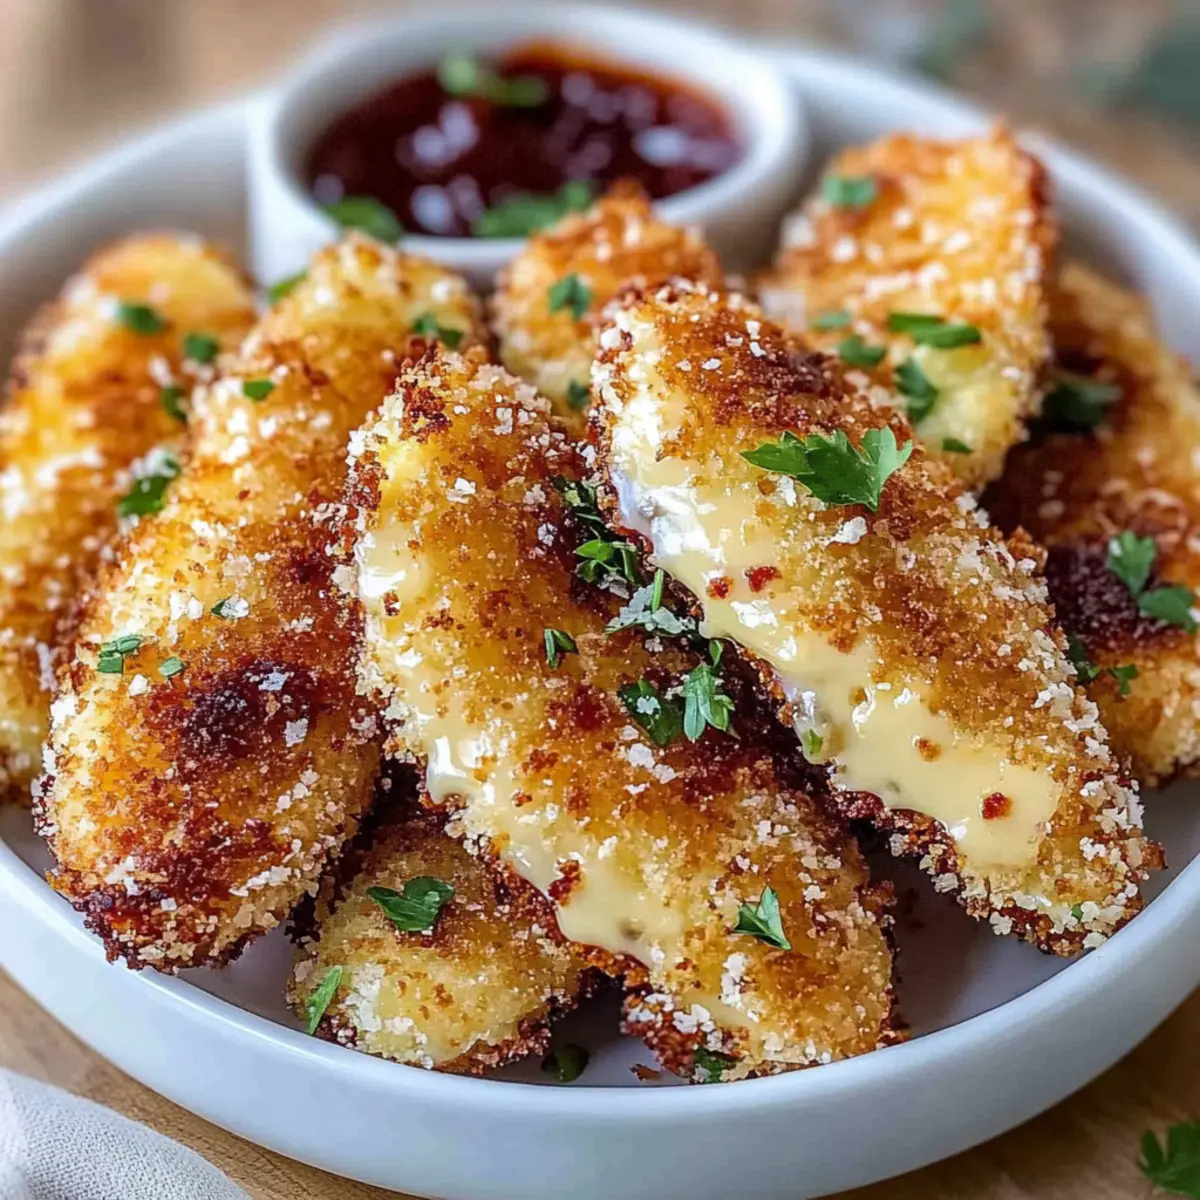
Versatile Serving Options: Pair them with your favorite dipping sauce or salad for a complete meal. Enjoy a new twist on dinner with these Parmesan Chicken Tenders!
Parmesan Chicken Tenders Ingredients
Discover the magic behind these crispy delights!
For the Coating
• 1 cup all-purpose flour – a key step for that golden crust.
• 2 large eggs – these help the coating stick for ultimate crunch.
• 1 cup breadcrumbs – preferably panko for an extra crunchy texture.
• ½ cup grated Parmesan cheese – enhances flavor and adds cheesiness to the tenders.
• 1 teaspoon garlic powder – infuses a savory flavor with every bite.
• 1 teaspoon onion powder – complements the garlic for a deeper taste.
• 1 teaspoon Italian seasoning – brings a blend of herbs to the party.
• Salt and pepper, to taste – don't skip this for a well-seasoned dish!
For Cooking
• ¼ cup olive oil – perfect for baking or frying, giving that crispy finish.
Get ready to appreciate the scrumptious joy of homemade Parmesan Chicken Tenders!
Step‑by‑Step Instructions for Parmesan Chicken Tenders
Step 1: Preheat the Oven
Begin by preheating your oven to 400°F (200°C). This high temperature ensures that your Parmesan Chicken Tenders will bake up beautifully crisp and golden. While your oven heats up, gather your baking sheets and prepare them with parchment paper or a light coat of cooking spray to prevent sticking.
Step 2: Prepare the Coating
In a large bowl, mix together the panko breadcrumbs, grated Parmesan cheese, garlic powder, onion powder, Italian seasoning, salt, and pepper. This flavorful coating will make your chicken tenders irresistible! Take a moment to ensure the dry ingredients are well combined, giving you an even distribution of flavors in every bite.
Step 3: Dredge the Chicken Tenders
Take your chicken tenders (or strips) and begin the dredging process. First, coat each tender evenly in all-purpose flour, shaking off any excess. Next, dip them in the beaten eggs—this will act as the glue for your coating. Finally, roll them into the breadcrumb mixture, pressing gently to ensure an even layer sticks for an extra crunchy texture.
Step 4: Arrange for Cooking
Carefully place the coated chicken tenders onto the prepared baking sheet. Ensure they are spaced apart to allow for air circulation, which helps achieve that perfect crispiness. If you're opting for frying instead, preheat your olive oil in a frying pan over medium heat, then add your tenders once hot.
Step 5: Bake or Fry
Now it's time to cook your Parmesan Chicken Tenders! If baking, slide the tray into the preheated oven and let them bake for about 20-25 minutes, or until they are golden brown and cooked through. If frying, cook the tenders for about 5-7 minutes on each side, until they are crispy and the chicken is thoroughly cooked.
Step 6: Serve and Enjoy
Once cooked, remove the tender chicken from the oven or frying pan and let them rest for a couple of minutes. Serve your delicious Parmesan Chicken Tenders with your favorite dipping sauce, such as marinara or honey mustard, to elevate the experience. Enjoy the crunch and flavorful goodness of your homemade creation!
Parmesan Chicken Tenders Variations
Feel free to get creative and customize these tenders to suit your cravings and dietary needs!
-
Gluten-Free: Use almond flour or gluten-free breadcrumbs to make a crisp coating everyone can enjoy.
-
Herb-Infused: Add fresh herbs like parsley or basil to the breadcrumb mix for a refreshing twist.
-
Spicy Kick: Toss in some cayenne pepper or crushed red pepper flakes for an added layer of heat that brings excitement to every bite.
-
Baked Parmesan Zucchini: Substitute chicken with zucchini sticks for a delightful, veggie-packed version that’s just as crunchy and satisfying.
-
Sweet & Spicy: Drizzle some sriracha honey glaze on top right before serving for a delicious balance of sweet and spicy.
-
Lemon Zest: Grate some lemon peel into the breadcrumb mixture to infuse a bright, zesty flavor that pairs exquisitely with the Parmesan.
-
Air-Fryer Magic: For an even quicker option, cook the tenders in an air fryer at 375°F for 10-12 minutes for perfectly crispy results without the added oil.
If you're feeling adventurous, you can pair these tenders with a homemade dipping sauce or serve them over a bed of fresh salad for a delightful meal!
How to Store and Freeze Parmesan Chicken Tenders
Fridge: Store leftover Parmesan Chicken Tenders in an airtight container for up to 3 days. Reheat in the oven at 350°F (175°C) for about 10-15 minutes to regain their crispiness.
Freezer: Freeze the tenders in a single layer on a baking sheet for about an hour, then transfer them to a freezer-safe bag. They’ll stay fresh for up to 3 months.
Reheating: To reheat frozen tenders, no need to thaw! Bake directly from the freezer at 400°F (200°C) for about 20-25 minutes until thoroughly heated.
Room Temperature: If serving at parties, keep out for no longer than 2 hours to maintain safety and freshness.
What to Serve with Parmesan Chicken Tenders?
As you savor the crispy goodness of these tenders, the right sides can elevate your meal to new heights.
- Creamy Mashed Potatoes: The velvety texture and rich flavor of mashed potatoes balance the crunch of the tenders beautifully.
- Garden Salad: A mix of fresh greens and vibrant veggies adds a refreshing contrast that brightens each bite.
- Honey Mustard Dipping Sauce: This sweet and tangy sauce enhances the savory notes of the chicken, creating a delightful flavor explosion.
- Garlic Breadsticks: Warm, buttery breadsticks offer a comforting addition and perfect vehicle for any stray sauce.
- Steamed Broccoli: Crisp-tender broccoli adds a nutritious touch and a burst of color on your plate.
- Coleslaw: The crunchy, creamy profile of coleslaw brings together flavors and textures, making each mouthful exciting.
- Apple Sauce: A touch of sweetness from apple sauce pairs wonderfully, offering a palate-cleansing contrast to the savory tenders.
- Lemonade: This refreshing drink is a perfect companion for the crispy chicken, enhancing the meal’s overall enjoyment.
- Chocolate Chip Cookies: End your meal on a sweet note with warm cookies that appeal to both kids and adults alike!
Make Ahead Options
These Parmesan Chicken Tenders are a fantastic choice for meal prep, saving you valuable time on busy weeknights! You can coat the chicken tenders up to 24 hours in advance; simply follow the dredging process and cover them tightly in the refrigerator to keep them fresh and prevent moisture. If you’d like, you can also assemble them without baking, storing them in an airtight container for up to 3 days before cooking. When you’re ready to serve, just pop them in the oven or fry them as instructed until they are golden brown and crispy. This way, you'll enjoy the same delicious crunch with minimal effort!
Expert Tips for Parmesan Chicken Tenders
-
Perfect Coating Technique: Use one hand for the wet ingredients and the other for the dry to avoid a messy breading process. This keeps your hands clean and helps evenly coat the chicken tenders.
-
Space It Out: Ensure the chicken tenders are well-spaced on the baking sheet to maximize crispiness. Overcrowding can lead to steaming instead of baking, resulting in soggy tenders.
-
Check for Doneness: Always ensure chicken tenders reach an internal temperature of 165°F (75°C). This ensures they’re fully cooked and safe to enjoy without risk.
-
Experiment with Dips: While tangy marinara or sweet honey mustard are classic choices, try pairing with aioli or buffalo sauce for a fun twist on these Parmesan Chicken Tenders.
-
Extra Crunch Tip: For an even crunchier coating, toast the breadcrumbs lightly in a pan before mixing them with the other dry ingredients. This enhances flavor and texture.
Parmesan Chicken Tenders Recipe FAQs
How do I know if my chicken tenders are fresh?
Absolutely! Look for chicken tenders that are pink in color and feel firm to the touch. Avoid any that have a grayish tint or a slimy texture. Fresh chicken should also never have an off-putting smell.
How should I store leftover Parmesan Chicken Tenders?
I recommend placing your leftover chicken tenders in an airtight container and storing them in the refrigerator for up to 3 days. To maintain their crispiness when reheating, pop them in the oven at 350°F for about 10-15 minutes until heated through.
Can I freeze Parmesan Chicken Tenders?
Absolutely! To freeze, first lay your cooked chicken tenders in a single layer on a baking sheet and freeze them for about an hour. Once they’re firm, transfer them to a freezer-safe bag or container. They'll keep well for up to 3 months.
What should I do if my coating doesn’t stick?
Very commonly, this can happen if the chicken is too wet after the egg dip. Make sure to shake off any excess liquid before coating in breadcrumbs. If you find that it still doesn’t stick, you can try refrigerating the breaded tenders for 30 minutes before baking, which helps the coating adhere better during cooking.
Can I make these Parmesan Chicken Tenders gluten-free?
Yes, indeed! You can substitute the all-purpose flour with a gluten-free flour blend and use gluten-free breadcrumbs instead of panko. This way, you can enjoy the same delightful crunch and flavor without the gluten!
Are these chicken tenders safe for my pet?
While the chicken itself is safe for pets, avoid giving them any of the seasoned coating, especially if it contains garlic or onion powder, as these can be harmful to dogs. If you want to share, offer plain, cooked chicken without the seasoning!

Crispy Parmesan Chicken Tenders Everyone Will Love
Equipment
- Oven
- baking sheet
- parchment paper
- Large bowl
- frying pan
Ingredients
For the Coating
- 1 cup all-purpose flour a key step for that golden crust.
- 2 large eggs these help the coating stick for ultimate crunch.
- 1 cup breadcrumbs preferably panko for an extra crunchy texture.
- ½ cup grated Parmesan cheese enhances flavor and adds cheesiness to the tenders.
- 1 teaspoon garlic powder infuses a savory flavor with every bite.
- 1 teaspoon onion powder complements the garlic for a deeper taste.
- 1 teaspoon Italian seasoning brings a blend of herbs to the party.
- to taste salt don't skip this for a well-seasoned dish!
- to taste pepper don't skip this for a well-seasoned dish!
For Cooking
- ¼ cup olive oil perfect for baking or frying, giving that crispy finish.
Instructions
Step‑by‑Step Instructions
- Preheat your oven to 400°F (200°C). Prepare baking sheets with parchment paper or cooking spray to prevent sticking.
- In a large bowl, mix together the panko breadcrumbs, grated Parmesan cheese, garlic powder, onion powder, Italian seasoning, salt, and pepper.
- Coat each chicken tender in all-purpose flour, dip in beaten eggs, and roll into the breadcrumb mixture, pressing gently.
- Place the coated chicken tenders onto the baking sheet, ensuring they are spaced apart for crispiness.
- If baking, bake for about 20-25 minutes until golden brown. If frying, cook on each side for about 5-7 minutes until crispy.
- Remove tenders from the oven or pan, let them rest for a couple of minutes, and serve with your favorite dipping sauce.

Leave a Reply