
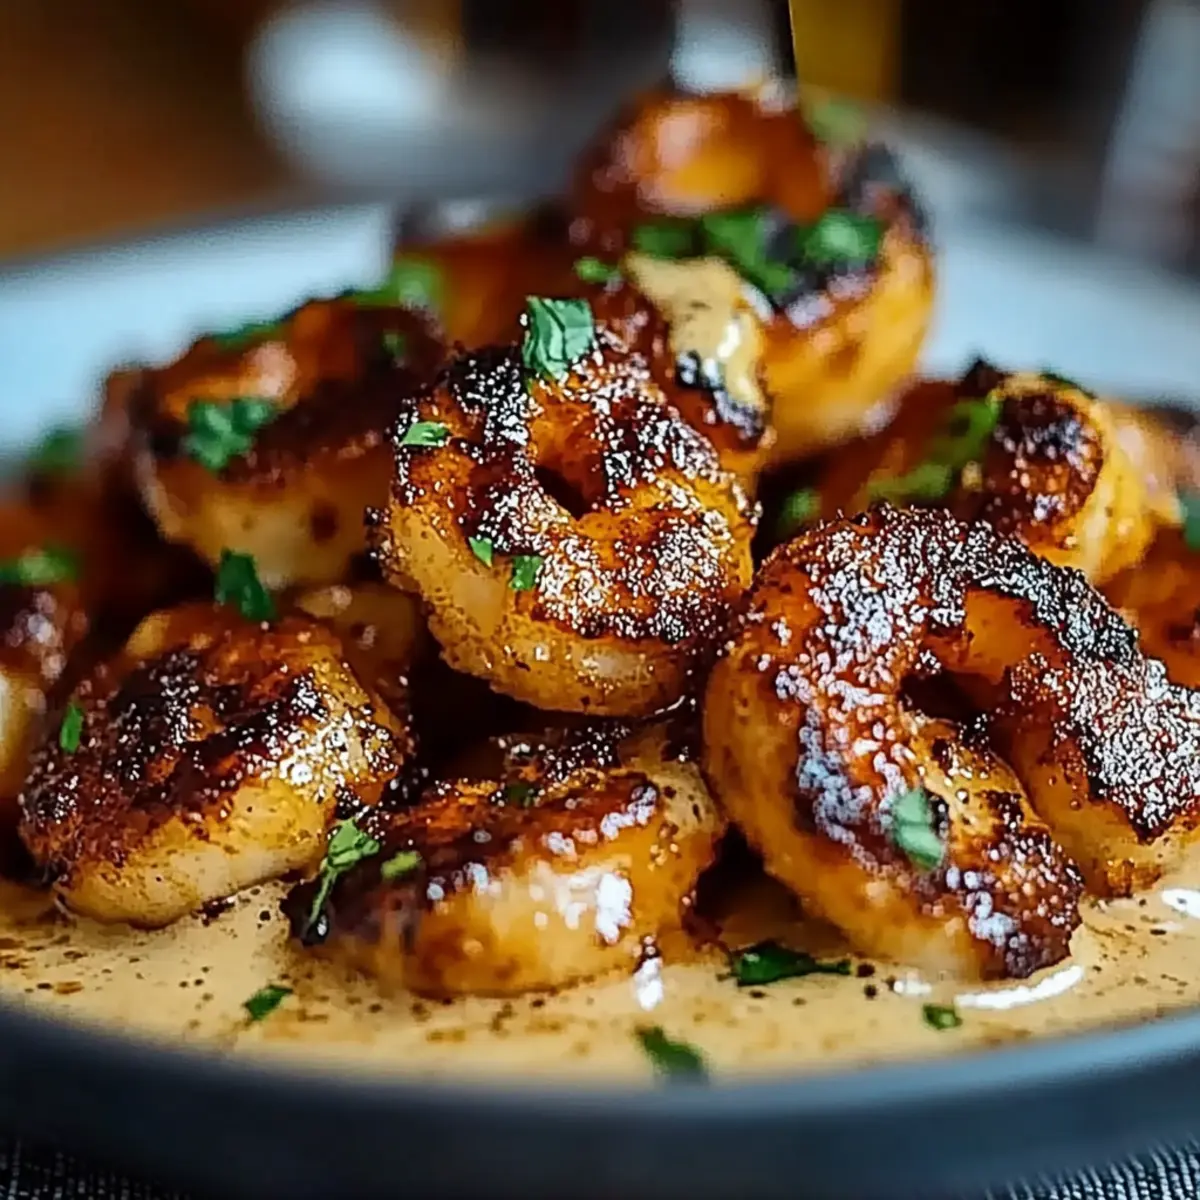
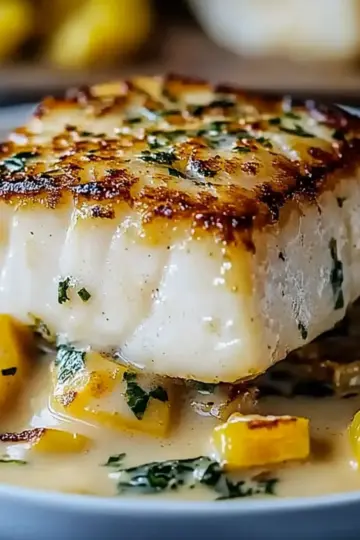
As I pulled the warm aroma of baked coconut shrimp from the oven, I was instantly transported to a sun-soaked beach, the gentle sound of waves lapping at the shore. This delightful recipe combines the satisfying crunch of panko breadcrumbs and the sweet chew of coconut to create a mouthwatering experience that's perfect for any occasion. With just 35 minutes from start to finish, this Baked Coconut Shrimp not only elevates your dinner table but is also a fun and healthier twist on traditional fried shrimp, minus the mess. Whether you’re hosting friends or simply treating yourself, this dish will have everyone reaching for more. Are you ready to dive into tropical flavors with the creamy kick of sweet chili mayo?
Why Bake Coconut Shrimp?
Deliciously Unique: This Baked Coconut Shrimp brings a tropical twist to your table with its crunchy coconut exterior that makes it truly standout.
Easy to Make: With just three simple steps, even novice cooks will feel like pros in the kitchen.
Perfect for Any Event: Whether it's a casual weeknight dinner or a festive gathering, this dish always impresses guests.
Healthier Alternative: Enjoy the crispy goodness without the guilt—baked instead of fried, it's a lighter yet satisfying choice.
Quick Prep: Ready in just 35 minutes, you won't have to wait long to indulge in this flavorful treat.
Pair it with a tangy dip like sweet chili sauce for an extra burst of flavor! If you're looking for more easy seafood recipes, check out my delicious shrimp scampi and fun fish tacos.
Baked Coconut Shrimp Ingredients
For the Breading
• All-purpose flour – a light coating that helps the shrimp adhere to the other layers.
• Panko breadcrumbs – these create an irresistible crunch that is both light and flaky.
• Salt – enhances the overall flavor profile of the dish.
• Pepper – adds a subtle depth of flavor without overpowering the shrimp.
• Cayenne pepper – for a little kick, balancing the sweetness of the coconut.
For the Shrimp
• Medium or jumbo shrimp – choose fresh shrimp for the best texture and flavor; they should be peeled and deveined for convenience.
• Eggs – beaten until frothy, they help bind the breadcrumbs and coconut to the shrimp.
For the Coating
• Shredded coconut – provides the signature tropical flavor and a chewy texture that pairs beautifully with the crunchy coating.
For Serving
• Sweet chili sauce – this is the perfect dipping companion, delivering a balance of sweetness and spice to your crispy baked coconut shrimp.
Step‑by‑Step Instructions for Baked Coconut Shrimp
Step 1: Prepare the Oven and Baking Sheet
Begin by preheating your oven to 400°F (200°C). While the oven heats, take a baking sheet and line it with parchment paper to prevent the shrimp from sticking. This preparation will ensure that your Baked Coconut Shrimp cooks evenly and gets that lovely golden brown finish.
Step 2: Mix the Dry Ingredients
In a shallow bowl, combine 1 cup of all-purpose flour, 1 teaspoon of salt, ½ teaspoon of pepper, and ¼ teaspoon of cayenne pepper. Stir together the ingredients until well mixed. This flavorful blend will create a savory base coating for the shrimp, enhancing the overall taste of your dish.
Step 3: Beat the Eggs
Now, take another shallow bowl and beat 2 large eggs until they are frothy and well-combined. This egg wash will help the panko breadcrumbs and coconut adhere perfectly to the shrimp. The beaten eggs create a luscious layer that binds the crispy toppings to the Baked Coconut Shrimp while baking.
Step 4: Get the Coconut Ready
In a third shallow bowl, place 1 cup of shredded coconut. This will be the final coating for your shrimp, giving them a deliciously tropical essence and a delightful chewiness. Set this bowl aside, prepared for the last step in the coating process.
Step 5: Coat the Shrimp
Take each peeled and deveined shrimp and dip it first into the flour mixture, ensuring it is evenly coated. Next, transfer the shrimp into the beaten eggs, allowing any excess to drip off. Finally, roll each shrimp in the shredded coconut, pressing gently to ensure a good coating. This triple-layer process is key for achieving the perfect texture and flavor in your Baked Coconut Shrimp.
Step 6: Arrange on Baking Sheet
Once all the shrimp are fully coated, arrange them in a single layer on the prepared baking sheet. Make sure they are spaced out to allow for even cooking and crisping. You’ll want to see that beautiful coconut coating glistening; this is a sign that your dish is on the right track to becoming a crunchy delight.
Step 7: Bake the Shrimp
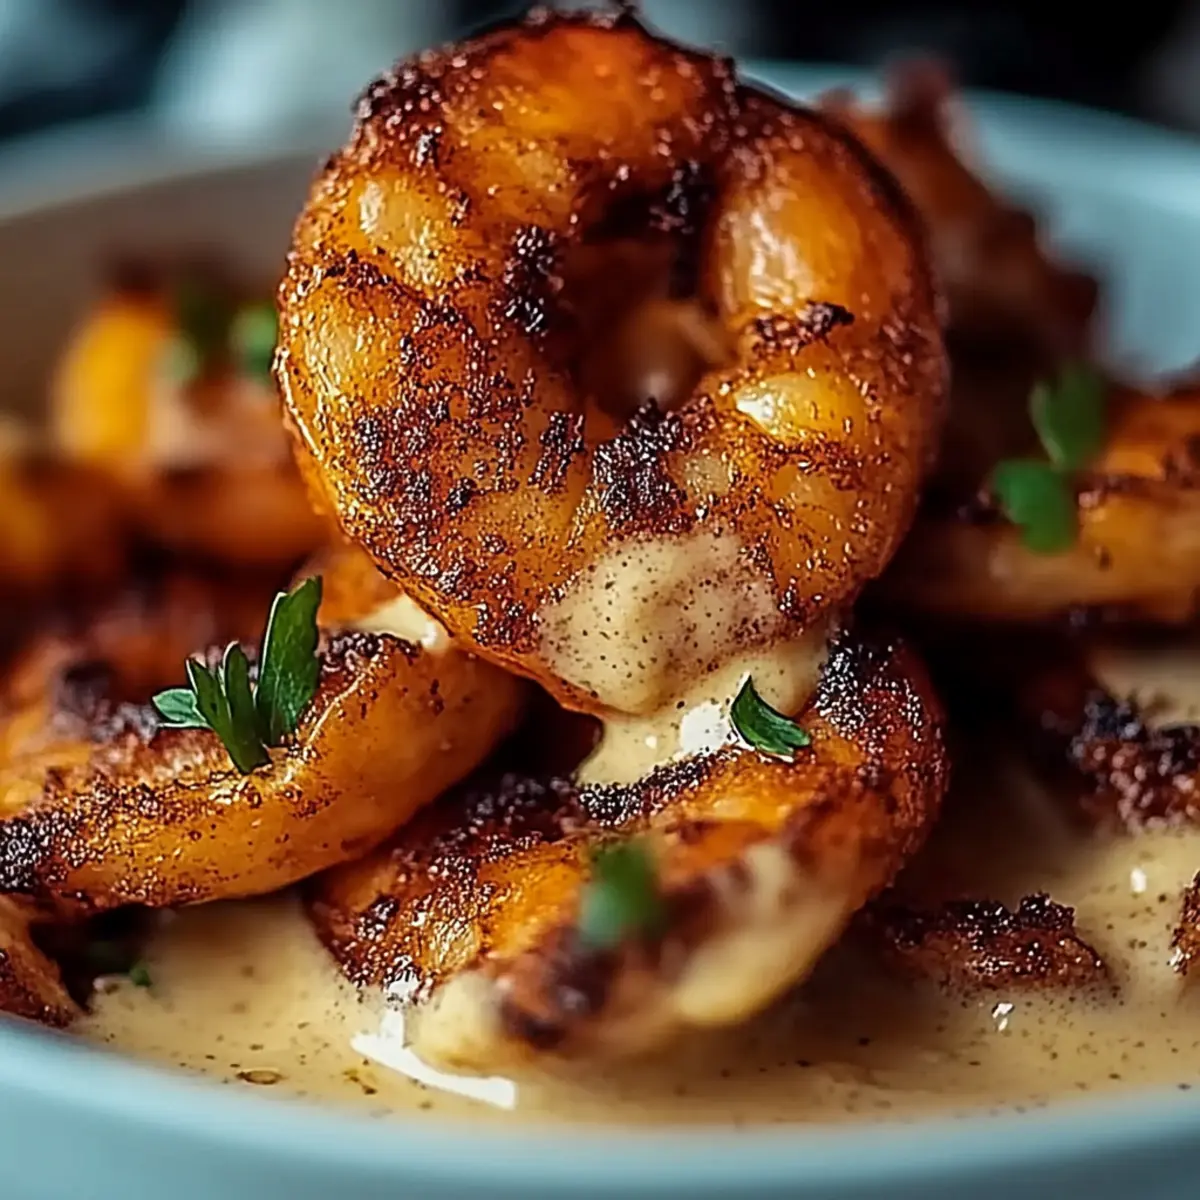
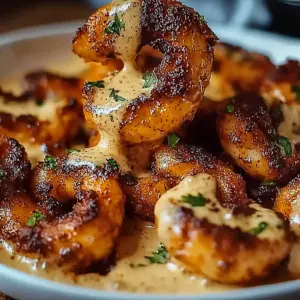
Place the baking sheet in the oven and bake your coconut shrimp for 15-20 minutes. Keep an eye on them as they cook; you’ll know they’re ready when the shrimp turn pink, are thoroughly cooked, and the coconut is golden brown. The aroma filling your kitchen will let you know you’re in for a treat with this Baked Coconut Shrimp.
Step 8: Serve and Enjoy
Once baked, remove the Baked Coconut Shrimp from the oven and allow them to cool for a minute. Serve them warm, accompanied by a small bowl of sweet chili sauce for dipping. This delightful combination enhances the tropical flavors, making every bite a moment of bliss.
How to Store and Freeze Baked Coconut Shrimp
Fridge: Store any leftover Baked Coconut Shrimp in an airtight container in the refrigerator for up to 3 days. Reheat in the oven to maintain crispiness.
Freezer: For longer storage, freeze the uncooked, coated shrimp on a baking sheet until solid. Then transfer them to a freezer-safe bag for up to 2 months.
Reheating: When ready to enjoy, bake from frozen at 400°F (200°C) for 20-25 minutes, until heated through and crispy. Enjoy the tropical flavors anytime!
Serving Tip: Pair your reheated shrimp again with sweet chili sauce for that delightful zing and to elevate your dining experience.
What to Serve with Baked Coconut Shrimp?
Create a vibrant feast that transports you to the tropics with every delightful bite.
- Tropical Fruit Salad: A refreshing blend of pineapple, mango, and kiwi adds a burst of sweetness that complements the shrimp perfectly.
- Crispy Coleslaw: This crunchy side brings a creamy element, balancing the flavors and textures beautifully while adding a satisfying crunch.
- Zesty Quinoa Salad: Loaded with fresh herbs and a citrus dressing, this nutty salad brings a bright contrast to the richness of the shrimp.
- Garlic Rice: Fluffy rice infused with garlic offers a comforting base that soaks up dips, making each mouthful a flavor explosion.
- Coconut Water: Quench your thirst with this naturally sweet drink, enhancing the coconut theme and refreshing your palate between bites.
- Key Lime Pie: A tangy dessert with a buttery crust, it pairs exquisitely with the shrimp, creating a sweet-tart finish to your meal.
- Mojito Cocktail: This minty drink, with its refreshing lime and subtle sweetness, perfectly complements the tropical flavors of the baked coconut shrimp.
Baked Coconut Shrimp Variations
Feel free to take your creativity to the next level by customizing this delightful recipe to suit your taste!
-
Gluten-Free: Substitute all-purpose flour with a gluten-free blend and use gluten-free panko breadcrumbs for a versatile option.
-
Coconut Milk Dip: Instead of sweet chili sauce, try mixing coconut milk with a hint of lime juice for a tropical twist. This refreshing dip will elevate the flavors wonderfully!
-
Spicy Kick: Add chopped jalapeños to the panko before coating for an extra layer of heat. The heat pairs beautifully with the sweetness of the coconut, creating a delightful contrast.
-
Parmesan Boost: Mix grated Parmesan cheese into the panko for a savory twist. The nutty flavor adds a rich depth that complements the shrimp's sweetness perfectly.
-
Herb Infusion: Incorporate dried herbs, such as dill or cilantro, into the flour mixture for a refreshing flavor twist. This adds an unexpected and vibrant note to your shrimp.
-
Different Proteins: Try this method with fish fillets or even chicken strips if you’re looking for an alternative to shrimp. Each offers a delightful bite with the coconut coating!
-
Crispy Garnish: Top with crushed macadamia nuts along with the shredded coconut for an irresistible crunchy texture. The nuts add a delightful richness that complements the tropical vibe.
-
Asian Flair: Serve with a tangy soy dipping sauce infused with sesame oil to bring a different flavor to the party. The earthy tones and brightness from the sauce will enhance your shrimp immensely!
These variations provide a fun way to explore new flavors and make this dish your own. If you'd like more seafood inspiration, don't forget to check out my vibrant shrimp scampi and mouthwatering fish tacos. Enjoy the journey of delicious discovery!
Make Ahead Options
Baked Coconut Shrimp is a fantastic choice for meal prep, perfect for busy weeknights! You can prepare the coating (flour mixture, beaten eggs, and shredded coconut) and bread your shrimp up to 24 hours in advance. Simply arrange the coated shrimp on the baking sheet, cover with plastic wrap, and refrigerate. To maintain the quality and crispiness, be sure not to overcrowd the shrimp. When you're ready to bake, just pop them in a preheated oven at 400°F (200°C) for 15-20 minutes until they are golden brown and cooked through. Serving them fresh ensures that they retain their delightful crunch and flavor!
Expert Tips for Baked Coconut Shrimp
-
Choose Fresh Shrimp: Use fresh or high-quality frozen shrimp that are peeled and deveined for best results. Fresh shrimp will enhance the flavor of your Baked Coconut Shrimp.
-
Flour Coating: Make sure to coat the shrimp evenly with the flour mixture before dipping it in egg. This will help the coconut and panko adhere better, preventing any pesky coating from falling off during baking.
-
Crispy Panko: Toast the panko breadcrumbs for a few minutes before using them as a coating. This gives your Baked Coconut Shrimp an extra crunch that elevates the texture delightfully.
-
Space Them Out: When placing the shrimp on the baking sheet, make sure they're spaced out well. This allows hot air to circulate around each shrimp, ensuring they bake evenly and get that lovely golden brown color.
-
Watch the Oven Time: Keep an eye on your shrimp as they bake. Cooking time may vary, so check for that perfect pink color and golden coconut. Overbaking can result in tough shrimp, so 15-20 minutes should be just right.

Baked Coconut Shrimp Recipe FAQs
How do I know if my shrimp are fresh?
Absolutely! When selecting shrimp, look for those with a mild ocean scent, firm texture, and a translucent appearance. Avoid shrimp that have a strong fishy odor, any discoloration, or dark spots. Fresh shrimp should be slightly moist but not slimy. Choosing the right shrimp ensures a delightful and flavorful dish.
What’s the best way to store leftover Baked Coconut Shrimp?
To keep your Baked Coconut Shrimp fresh, store any leftovers in an airtight container in the refrigerator for up to 3 days. When you're ready to enjoy them again, reheat them in the oven at 375°F (190°C) for about 10 minutes to restore their crispiness. Avoid microwaving, as this can make them soggy.
Can I freeze the Baked Coconut Shrimp?
Yes! For a quick, future meal, you can freeze the uncooked, coated shrimp. Arrange them in a single layer on a baking sheet, freeze until solid, then transfer to a freezer-safe bag or container. They will keep for up to 2 months. When you're ready to cook, preheat the oven to 400°F (200°C) and bake from frozen for 20-25 minutes until cooked through and crispy.
What can I do if the coconut mixture doesn’t stick to the shrimp?
Very! If you find that the coconut isn’t sticking well, it may be that the shrimp didn’t have enough of the flour mixture or egg coating. Here’s a step-by-step fix: Ensure each shrimp is well-coated in the flour mix, letting any excess fall off before dipping it into the beaten eggs. Then, take your time pressing the shrimp into the coconut, ensuring it adheres properly. This may help achieve that delicious crunchy layer.
Are there any dietary considerations for this recipe?
Yes, absolutely! If you or someone you're serving has a shellfish allergy, this recipe obviously isn't suitable. If you're looking to make it gluten-free, use a gluten-free flour and gluten-free breadcrumbs. Always double-check ingredient labels to ensure they meet your dietary needs. This way, everyone can enjoy the scrumptious flavors of Baked Coconut Shrimp!
Crispy Baked Coconut Shrimp with Sweet Chili Dipping Sauce
Equipment
- Oven
- baking sheet
- parchment paper
- Shallow bowls
Ingredients
For the Breading
- 1 cup all-purpose flour a light coating that helps the shrimp adhere to the other layers.
- 1 teaspoon salt enhances the overall flavor profile of the dish.
- ½ teaspoon pepper adds a subtle depth of flavor.
- ¼ teaspoon cayenne pepper for a little kick.
For the Shrimp
- 1 pound medium or jumbo shrimp peeled and deveined for convenience.
- 2 large eggs beaten until frothy.
For the Coating
- 1 cup shredded coconut provides the signature tropical flavor.
For Serving
- 1 cup sweet chili sauce the perfect dipping companion.
Instructions
Step-by-Step Instructions
- Preheat your oven to 400°F (200°C) and line a baking sheet with parchment paper.
- In a shallow bowl, combine flour, salt, pepper, and cayenne pepper.
- In another bowl, beat the eggs until frothy.
- Place shredded coconut in a third bowl for coating the shrimp.
- Dip each shrimp into flour, then egg, and finally roll in shredded coconut.
- Arrange coated shrimp in a single layer on the baking sheet.
- Bake for 15-20 minutes until shrimp turn pink and coconut is golden brown.
- Serve warm with sweet chili sauce for dipping.

Leave a Reply