
As I stood in my warm kitchen, the sweet aroma of melting sugar wafted through the air, instantly transporting me to the festive spirit of Christmas past. There's something magical about making your own Christmas Peppermint Sticks that blends nostalgia with creativity. This homemade treat is not only a delightful addition to your holiday gatherings, but it’s also a fantastic way to impress family and friends with your culinary skills. With just a handful of ingredients and a bit of patience, you’ll create a visually stunning and delicious sweet that’s perfect for gifting or enjoying yourself. Plus, unlike store-bought versions, these peppermint sticks can be customized to your taste, making them a unique festive treat! Are you ready to bring some homemade sweetness to your holiday season?

What makes these peppermint sticks special?
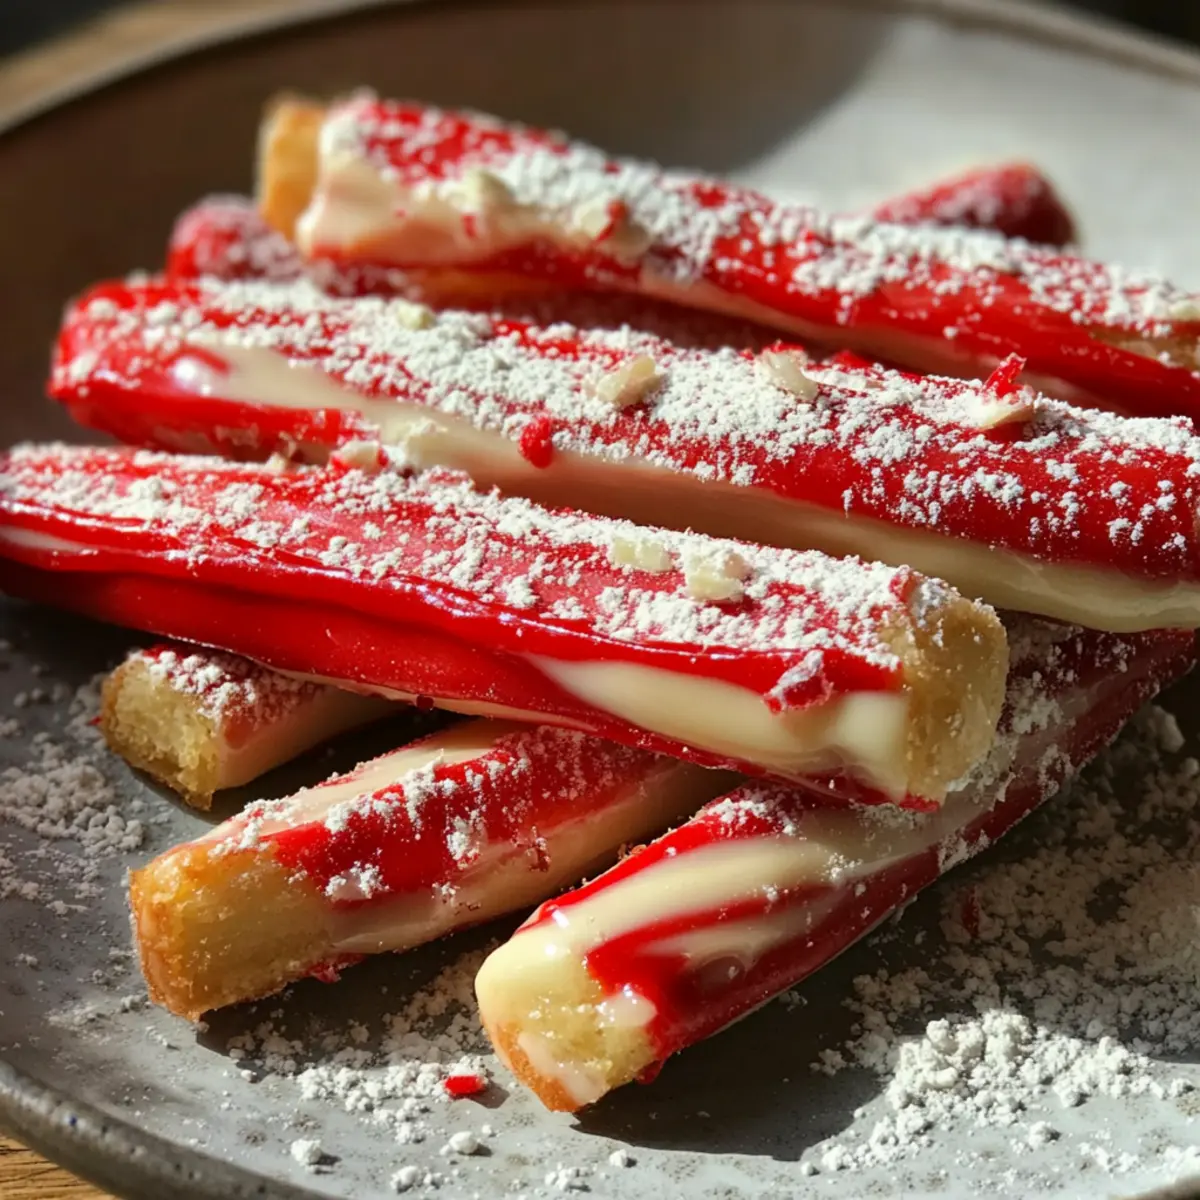
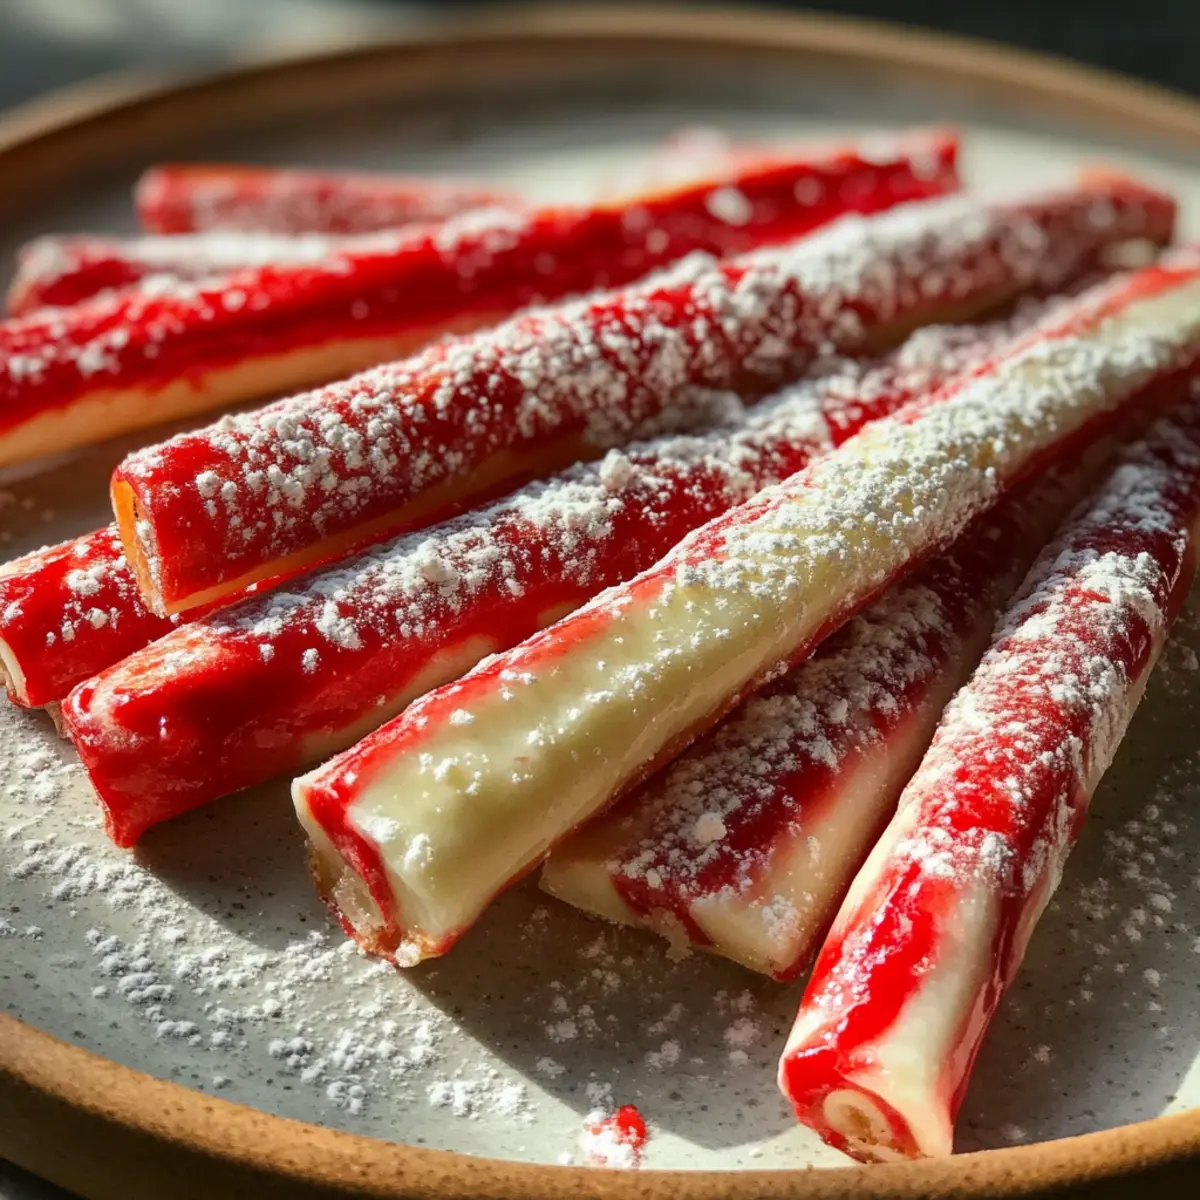
Homemade Christmas Peppermint Sticks shine in their freshness, bringing a nostalgic twist to holiday traditions. Easy to make, this treat requires minimal cooking skills, perfect for both novice and seasoned bakers. Customize their look and flavor by experimenting with different colors and extracts, adding your unique spin. Festive and fun, they double as charming decorations or thoughtful gifts. Discover how creating these delightful candies can uplift your holiday spirit and create lasting memories!
Christmas Peppermint Sticks Ingredients
For the Candy Mixture
• 2 cups granulated sugar – this is the foundation for your sweet treat, so measure accurately!
• ½ cup light corn syrup – it adds smoothness and helps prevent crystallization.
• ½ cup water – necessary for dissolving the sugar evenly.
For Flavoring and Color
• 1 teaspoon peppermint extract – this will infuse your candy with that classic holiday flavor.
• ¼ teaspoon red food coloring – brings a festive pop of color to your peppermint sticks.
• ¼ teaspoon white food coloring – use this to enhance the bright appearance of your sticks.
For Dusting
• Powdered sugar – sprinkle this on your work surface and finished sticks to prevent sticking and add a touch of sweetness.
Step‑by‑Step Instructions for Homemade Christmas Peppermint Sticks
Step 1: Prepare Your Workspace
Start by preparing a clean surface for cooling your Christmas Peppermint Sticks. Lightly dust the area with powdered sugar to prevent the candy from sticking. This crucial step will also make cleanup easier later on, ensuring your homemade treats maintain their beautiful shape and appearance.
Step 2: Combine Ingredients
In a medium-sized saucepan, combine 2 cups of granulated sugar, ½ cup of light corn syrup, and ½ cup of water. Stir the mixture over medium heat until the sugar is completely dissolved, which usually takes about 3-5 minutes. Keep an eye on it to avoid burning, and be ready to move on once it turns clear.
Step 3: Bring to a Boil
Once the sugar has dissolved, stop stirring and allow the mixture to come to a vigorous boil. Using a candy thermometer, monitor the temperature carefully, aiming for 260°F, which is the hard-ball stage. This process will take about 10 minutes. Pay close attention to the bubbling, as it indicates you’re on the right track.
Step 4: Cool Slightly
After reaching the desired temperature, remove the saucepan from the heat and let the mixture sit undisturbed for about 5 minutes. This step is essential as it allows the candy to cool slightly before adding flavoring, ensuring a safer and smoother blending of ingredients.
Step 5: Add Flavoring
Carefully stir in 1 teaspoon of peppermint extract into the cooled mixture. Be cautious during this step, as the mixture may bubble up due to the temperature difference. This aromatic addition gives your Christmas Peppermint Sticks that signature minty flavor that everyone loves during the holidays.
Step 6: Divide the Mixture
Next, divide the peppermint candy mixture evenly into two bowls. Add ¼ teaspoon of red food coloring to one bowl and ¼ teaspoon of white food coloring to the other. Stir each bowl until the color is uniformly blended, creating a beautiful, festive appearance for your homemade Christmas Peppermint Sticks.
Step 7: Cool for Handling
Allow the candy mixtures to cool for about 10-15 minutes until they’re safe to handle. You want the candy to be pliable but not so hot that it burns your fingers. This is a key moment, as properly cooling the candy will ensure you can shape it effectively without any mishaps.
Step 8: Prepare to Shape
Lightly grease your hands with vegetable oil to prevent sticking while you shape the candy. Start with one color, stretching and pulling it until it becomes glossy and smooth. This process of kneading will activate the sugars, resulting in a more pliable texture for your Christmas Peppermint Sticks.
Step 9: Twist and Create
Once both colors are smooth, roll each color into long ropes. Place the ropes side by side and gently twist them together to create a lovely spiral effect. This step is both fun and visually appealing, making your homemade peppermint sticks a charming addition to any holiday display.
Step 10: Cut and Shape
Using a sharp knife, cut the twisted ropes into 6-inch pieces. If desired, pinch the ends of the sticks to create a classic hook shape, reminiscent of traditional candy canes. This finishing touch enhances the festive feel of your Christmas Peppermint Sticks, making them perfect for gifting or decorating.
Step 11: Cool Completely
Transfer the shaped peppermint sticks onto your prepared, powdered sugar-dusted surface. Allow them to cool completely for about 30 minutes. This final cooling phase is important to ensure they harden properly, maintaining their shape and making them enjoyable to eat.
Step 12: Dust and Store
Once cooled, sprinkle additional powdered sugar over the peppermint sticks to prevent them from sticking together. This last step not only enhances their appearance but also adds a little extra sweetness. Now your delightful Homemade Christmas Peppermint Sticks are ready to be enjoyed or gifted!
Christmas Peppermint Sticks Variations
Feel free to get creative and personalize your Christmas Peppermint Sticks with these exciting adaptations!
- Sugar-Free: Substitute sugar with a sugar replacement like erythritol, and adjust the syrup accordingly for a guilt-free treat.
- Spicy Peppermint: Add a pinch of cayenne pepper to the candy mixture for a surprising kick that enhances the peppermint flavor.
- Essential Oils: Swap out the peppermint extract for a few drops of peppermint essential oil for a more intense aroma.
- Chocolate Drizzle: Once the sticks are cooled, drizzle melted dark or white chocolate over them for an indulgent twist.
- Coconut Flavor: Replace peppermint extract with coconut extract for a tropical version that’s perfect for warm holidays.
- Nutty Surprise: Add crushed nuts like almonds or pecans into the mixture for a delightful crunch in your candy.
- Color Explosion: Use multiple colors like green, blue, or even rainbow hues for a vibrant assortment that delights both kids and adults alike.
- Dipped in Sprinkles: Before they cool completely, roll or dip the ends of your sticks in festive sprinkles for an extra crunch and festive flair.
No matter which variation you choose, remember that these customized delights can be beautifully wrapped for gifts, perfect alongside a cozy cup of homemade hot cocoa. If you're looking for other homemade treats to pair with these festive sticks, be sure to check out my recipes for Holiday Truffles or Classic Hot Chocolate. Happy candy-making!
Make Ahead Options
These delightful Christmas Peppermint Sticks are perfect for meal prep enthusiasts! You can prepare the candy mixture up to 24 hours in advance by combining the sugar, corn syrup, and water, and then simply storing it in an airtight container in a cool place. When ready to finish, heat it back up gently and proceed with the remaining steps, adding the peppermint extract and colors. The shaped sticks can also be made up to 3 days ahead; just ensure they are stored in a single layer with powdered sugar between pieces to prevent sticking. This way, you’ll enjoy the deliciousness of homemade peppermint sticks without the last-minute rush!
What to Serve with Homemade Christmas Peppermint Sticks
This festive treat is perfect for enhancing your holiday gatherings and offers a delightful balance of flavors and textures.
-
Rich Hot Chocolate: Indulge in a creamy, warm mug of hot chocolate, perfect for dipping your peppermint sticks. The combination elevates both sweetness and coziness.
-
Gingerbread Cookies: The spiced flavors of gingerbread cookies contrast beautifully with the refreshing mint. These delightful pairings will bring nostalgia and joy to your holiday table.
-
Peppermint Bark: For a double dose of minty goodness, serve your peppermint sticks alongside a rich chocolate peppermint bark. It's a perfect visual and taste match that chocolate lovers will adore.
-
Sugar Cookies: Soft sugar cookies topped with colorful frosting create a festive contrast to your Homemade Christmas Peppermint Sticks. Their sweetness complements the minty flavors beautifully.
-
Festive Fruit Salad: Brighten the sweet experience with a refreshing fruit salad. Fresh fruits add a burst of color and a light contrast to the sugary sticks.
-
Spiced Tea or Eggnog: Warm spiced tea or creamy eggnog opens a warm holiday atmosphere that pairs perfectly with the invigorating peppermint taste and garnishes your festive celebrations.
Expert Tips for Making Christmas Peppermint Sticks
-
Candy Thermometer Essential: Always use a candy thermometer to ensure your syrup reaches the proper hard-ball stage at 260°F for perfect consistency in your Christmas Peppermint Sticks.
-
Cooling Time Matters: Allow the mixture to cool adequately before shaping. If it's too hot, it can burn your hands, while too cool can make it difficult to mold.
-
Oil Your Hands: Lightly grease your hands with vegetable oil before handling the candy. This prevents sticking and allows for easier manipulation of the warm, pliable mixture.
-
Color Mixing Fun: Feel free to experiment with different colors and flavors beyond just red and white! Create unique holiday Peppermint Sticks that stand out and reflect your personal style.
-
Avoid Overworking: When stretching and pulling the candy, avoid overworking it. This will maintain a smooth texture; overworking can lead to a grainy finish.
-
Dust Generously: Don’t skip the powdered sugar dusting on your cooling surface and finished sticks. It helps keep them from sticking together, ensuring a delightful presentation!
How to Store and Freeze Christmas Peppermint Sticks
Room Temperature: Store your Christmas Peppermint Sticks in an airtight container at room temperature for up to 2 weeks to maintain freshness and flavor.
Fridge: If you prefer, you can also refrigerate them; however, make sure they're sealed well to prevent moisture loss. They should stay fresh for about 3 weeks in the fridge.
Freezer: For long-term storage, place the peppermint sticks in a freezer-safe container, separated by parchment paper, and freeze for up to 3 months.
Reheating: When ready to enjoy, simply let them thaw at room temperature. Avoid microwaving to prevent melting and losing their shape.
Christmas Peppermint Sticks Recipe FAQs
How do I choose the best peppermint extract?
Selecting a high-quality peppermint extract enhances the flavor of your Christmas Peppermint Sticks significantly. Look for pure extracts with minimal additives—this ensures a stronger, more authentic peppermint flavor. A reputable brand will list "peppermint oil" as a key ingredient, giving your candy that refreshing wintery bite.
What’s the best way to store the peppermint sticks?
Absolutely! To keep your Christmas Peppermint Sticks fresh, store them in an airtight container at room temperature for up to 2 weeks. If you prefer, refrigerate them in a well-sealed container for about 3 weeks. Just be sure to check that they are completely cooled to prevent condensation, which could make them sticky.
Can I freeze the peppermint sticks? How?
Yes, you can! To freeze your Christmas Peppermint Sticks, place them in a freezer-safe container, separating layers with parchment paper to prevent sticking. It’s best to keep them at a consistent freezing temperature for up to 3 months. When ready to enjoy, simply transfer them to the fridge to thaw for a few hours or leave them at room temperature for about 30 minutes.
My peppermint sticks are too sticky to handle. What should I do?
This can happen if the candy hasn't cooled enough before handling, or it may not have reached the right temperature during cooking. If the mixture is too sticky, allow it to cool a bit longer, and try greasing your hands more thoroughly with vegetable oil. You can also sprinkle a bit of powdered sugar on your hands and the surface to help manage stickiness while shaping the candy.
Are these peppermint sticks suitable for people with allergies?
Great question! The basic ingredients in these Christmas Peppermint Sticks are generally safe for most people, but make sure to check for common allergies. For example, those who are sensitive to corn shouldn't use light corn syrup; you can substitute with simple syrup made from sugar and water. Always double-check your flavoring and coloring for any potential allergens, especially if you're gifting them!
Homemade Christmas Peppermint Sticks to Sweeten Your Holidays
Equipment
- medium-sized saucepan
- Candy thermometer
- sharp knife
Ingredients
For the Candy Mixture
- 2 cups granulated sugar this is the foundation for your sweet treat, so measure accurately!
- ½ cup light corn syrup it adds smoothness and helps prevent crystallization.
- ½ cup water necessary for dissolving the sugar evenly.
For Flavoring and Color
- 1 teaspoon peppermint extract this will infuse your candy with that classic holiday flavor.
- ¼ teaspoon red food coloring brings a festive pop of color to your peppermint sticks.
- ¼ teaspoon white food coloring use this to enhance the bright appearance of your sticks.
For Dusting
- Powdered sugar sprinkle this on your work surface and finished sticks to prevent sticking and add a touch of sweetness.
Instructions
Step-by-Step Instructions for Homemade Christmas Peppermint Sticks
- Prepare a clean surface for cooling your Christmas Peppermint Sticks. Lightly dust the area with powdered sugar to prevent sticking.
- In a medium-sized saucepan, combine 2 cups of granulated sugar, ½ cup of light corn syrup, and ½ cup of water. Stir over medium heat until dissolved, about 3-5 minutes.
- Once dissolved, stop stirring and let it come to a boil. Monitor with a candy thermometer, aiming for 260°F.
- Remove from heat and let sit undisturbed for about 5 minutes.
- Carefully stir in 1 teaspoon of peppermint extract into the cooled mixture.
- Divide the mixture into two bowls; add ¼ teaspoon of red food coloring to one and white to the other, mixing well.
- Cool mixtures for about 10-15 minutes to handle safely.
- Lightly grease hands with vegetable oil and start shaping each color into a glossy and smooth texture.
- Roll both colors into long ropes and twist them together to create a spiral effect.
- Cut the twisted ropes into 6-inch pieces and pinch the ends for a hook shape.
- Transfer the shaped sticks onto a powdered sugar-dusted surface and allow them to cool completely for about 30 minutes.
- Once cooled, sprinkle additional powdered sugar over the sticks to prevent sticking.

Leave a Reply