
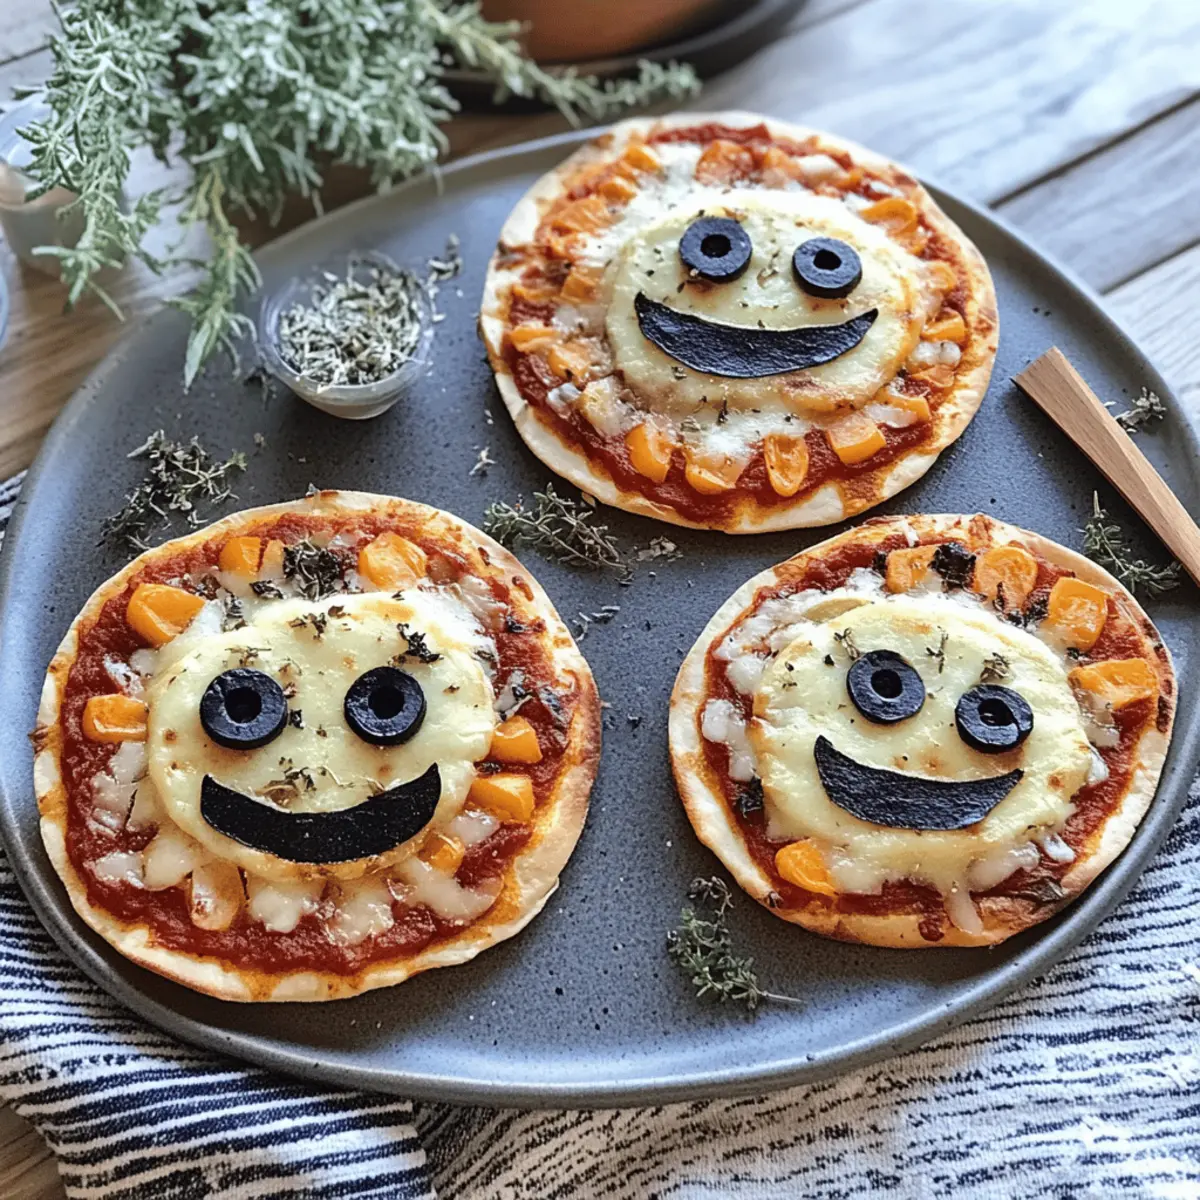
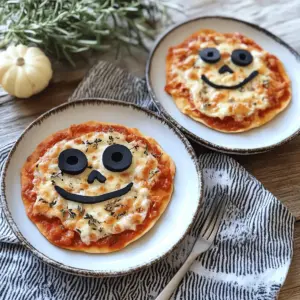
As I glanced at the calendar, it hit me—Halloween is just around the corner! There's something magical about this time of year, and what better way to celebrate than with fun Halloween Mini Pizzas? These delightful little bites not only take just 15 minutes to prep, but they also bring a touch of creativity and excitement to any gathering, making them a guaranteed crowd-pleaser. Picture everyone at your table sporting grins as they dig into these spooky creations, decked out with colorful bell pepper jack-o’-lantern faces and creepy olive spiders. Whether you're hosting a monster mash or simply enjoying a cozy family night, these mini pizzas are the perfect way to marry homemade goodness with festive fun. What ingredient will you surprise everyone with in your own Halloween Pizza masterpieces?

What makes these mini pizzas a must-try?
Quick Preparation: With only 15 minutes of prep time, these Halloween Mini Pizzas are perfect for stressed parents and busy hosts.
Endless Creativity: Use your favorite toppings to explore custom designs—from spooky mummies to cheerful jack-o’-lanterns, the possibilities are limitless!
Fun for All: Everyone, from kids to adults, will love joining in on the fun of decorating their own pizzas.
Crowd-Pleasing Flavor: Topped with gooey mozzarella and your choice of toppings, these pizzas are sure to be a hit at any gathering.
Versatile & Easy: They’re easily adaptable to fit any diet, making them a fantastic option for diverse palates. Whether it’s a Halloween party or a cozy movie night, you can’t go wrong with these festive bites.
Halloween Mini Pizzas Ingredients
• Get ready to create spooky bites that everyone will love!
For the Crust
- Mini Pizza Crusts – These small bases are perfect for crafting personal-sized delights.
For the Sauce
- Pizza Sauce – The magic begins with this flavorful layer that keeps your pizzas moist and tasty.
For the Toppings
- Mozzarella Cheese – This melty goodness creates a gooey texture that binds all toppings beautifully.
- Black Olives – Slice these up for creepy spider eyes or bodies—perfect for your Halloween theme!
- Mini Pepperoni – An optional, classic topping that adds a delicious kick to your pizzas.
- Orange & Green Bell Peppers – Create festive jack-o’-lantern designs with these colorful strips.
For the Decorations
- Part-Skim String Cheese – String them apart to craft funny mummy faces on your mini pizzas.
- Fresh Basil – This fragrant herb adds a burst of freshness and color before serving.
For Baking
- Olive Oil Spray – A light misting prevents sticking, ensuring your mini pizzas come out perfectly crisp.
Step‑by‑Step Instructions for Halloween Mini Pizzas
Step 1: Preheat the Oven
Begin by preheating your oven to 425°F (220°C). While it warms up, grab a baking sheet and lightly mist it with olive oil spray to ensure the crusts don’t stick during baking. You want it ready for your delightful Halloween Mini Pizzas, so make sure the oven reaches the correct temperature before proceeding.
Step 2: Sauce the Crusts
Once the oven is preheated, spread 1 to 2 tablespoons of pizza sauce on each mini pizza crust, leaving a small border around the edges. Use a spoon to evenly coat each crust, ensuring that the sauce is spread all the way to the edges for delicious flavor in every bite. This layering will create a solid foundation for your toppings.
Step 3: Add the Cheese
Sprinkle shredded mozzarella cheese generously over half of your mini pizzas, creating a gooey base for your toppings. For the other half, take apart the string cheese sticks and arrange them artistically to form mummy faces. The melted cheese will lend a comforting richness that melds perfectly with the creativity of each mini creation.
Step 4: Decorate with Toppings
It's time to get creative! Decorate your pizzas using sliced black olives for spooky spider bodies or eyes, and add thin strips of orange and green bell peppers to create festive jack-o’-lantern smiles. If you're feeling adventurous, sprinkle optional mini pepperoni on top for an extra touch of flavor that complements the Halloween Mini Pizzas beautifully.
Step 5: Bake the Mini Pizzas
Carefully place the baking sheet with your decorated mini pizzas in the preheated oven. Bake them for 10 to 12 minutes or until the crusts turn golden brown and the cheese is bubbly and melted. Make sure to rotate the pan halfway through baking to achieve that perfect even browning, making your pizzas not only delicious but also visually appealing.
Step 6: Garnish and Serve
After baking, let your Halloween Mini Pizzas cool for about 2 minutes—this will help prevent anyone from burning their mouths! Finally, sprinkle fresh basil chiffonade over the top for a fragrant touch. Serve them warm and watch as smiles light up the faces of your family and friends—these spooky bites are ready to be devoured!

Storage Tips for Halloween Mini Pizzas
Room Temperature: Enjoy these delightful bites fresh out of the oven for the best flavor. If you have leftovers, they can sit out for up to 2 hours before needing to be stored.
Fridge: Store any leftover Halloween Mini Pizzas in an airtight container in the fridge for up to 3 days. Reheat in the oven or microwave before enjoying again.
Freezer: For longer storage, wrap the mini pizzas tightly in plastic wrap and then place them in a freezer-safe bag. They can be frozen for up to 2 months.
Reheating: To reheat, place the frozen Halloween Mini Pizzas in the oven at 350°F (175°C) for about 15 minutes. Enjoy them warm for that comforting taste!
What to Serve with Halloween Mini Pizzas
Transform your Halloween gathering into a culinary adventure with these delightful accompaniments that will tantalize all your guests!
-
Crispy Garlic Bread: This buttery, garlicky bread pairs wonderfully with the cheesy goodness of mini pizzas while adding a delightful crunch.
-
Mixed Green Salad: A refreshing salad with crisp greens, cherry tomatoes, and a tangy vinaigrette brightens up the meal and balances the flavors.
-
Pumpkin Soup: Celebrate the season with a warm, creamy pumpkin soup that complements the flavors of the pizzas while keeping the theme festive.
-
Stuffed Breadsticks: Cheesy, herb-filled breadsticks are perfect for dipping and add a satisfying texture to your Halloween spread.
-
Apple Cider: A warm or cold glass of apple cider enhances the festive spirit, balancing the savory flavors with a hint of sweetness.
-
Chocolate-Covered Pretzels: These sweet-and-salty treats make for a fun dessert that playfully contrasts the savory mini pizzas while keeping with the Halloween theme.
-
Creepy Cupcakes: Decorate cupcakes with spooky frosting designs to create a whimsical dessert that’s sure to delight guests of all ages.
-
Bowl of Candy: Set up a bowl of assorted Halloween candies for everyone to nibble on throughout the evening, keeping the festive spirit alive.
-
Spooky Fruit Platter: Arrange fruits like orange slices and grapes into scary shapes to provide a healthy but fun option that complements the indulgence of the pizzas.
-
Ghostly Marshmallow Treats: These sweet, marshmallow-based treats add a fun twist with their ghostly designs and are easy to whip up ahead of time!
Make Ahead Options
These Halloween Mini Pizzas are a fantastic option for meal prep, allowing for seamless hosting during busy festivities! You can prepare the mini pizzas up to 24 hours in advance by assembling them and then covering them tightly with plastic wrap. Store them in the refrigerator to maintain their freshness and prevent sogginess. When you're ready to serve, simply bake them directly from the fridge, adding an extra minute or two to the cooking time if needed for optimal melty cheese. This way, you'll save precious time while ensuring these creative, spooky bites taste just as delicious as when freshly made!
Expert Tips for Halloween Mini Pizzas
-
Don’t Overload Toppings: Keep toppings light to ensure even baking. Too many can make the pizza soggy and hard to enjoy.
-
Check Cheese Melting: Watch for the cheese to bubble and turn slightly golden; it’s a sign your Halloween Mini Pizzas are ready!
-
Creative Shapes: Use cookie cutters on veggies to create themed shapes. This adds a fun twist and makes decorating extra special.
-
Avoid Soggy Crusts: Pre-baking the mini crusts for a few minutes can help achieve a crispier base before adding sauce and toppings.
-
Serve Warm: Allowing pizzas to cool just 2 minutes prevents burns and keeps flavors intact—make sure to serve warm for maximum delight!
Halloween Mini Pizzas Variations & Substitutions
Feel free to explore delightful twists and turns that make your Halloween Mini Pizzas even more special!
-
Gluten-Free: Use gluten-free pizza crusts to make these festive bites accessible for everyone. A simple swap that keeps the same flavor!
-
Vegan: Substitute mozzarella with vegan cheese and use a plant-based pizza sauce. This keeps the spooky vibes without dairy.
-
Spicy Kick: Add sliced jalapeños or a drizzle of hot sauce before baking for a fiery flavor that packs a punch. Make it your own!
-
Herb Infusion: Mix in dried oregano or crushed red pepper flakes into the pizza sauce for an aromatic base. It enhances the taste wonderfully.
-
Meat Lovers: Top with diced ham or cooked sausage for a heartier version that satisfies hearty appetites. Perfect for those who love meat!
-
Sweet Surprise: Drizzle with honey or add thin slices of apple after baking for an unexpected, sweet contrast to the savory toppings. Kids will love it!
-
Cheesy Variations: Experiment with a blend of cheeses like cheddar and provolone for a richer, more complex flavor profile. Cheese lovers rejoice!
-
Nutty Crunch: Sprinkle some chopped walnuts or pine nuts over the top before serving for an appealing crunch that complements the creamy cheese beautifully.
These variations are not just fun; they elevate your Halloween Mini Pizzas into something uniquely yours. So roll up your sleeves and get creative—your kitchen is your blank canvas for culinary artistry!
Halloween Mini Pizzas Recipe FAQs
How do I choose the best mini pizza crusts?
Absolutely! Look for mini pizza crusts that are slightly golden and have a nice firmness. Ideally, they shouldn’t have dark spots or be overly soft, which could lead to soggy pizzas. My favorite are those with a bit of a crispy edge, which helps provide that satisfying crunch in each bite.
How should I store leftover Halloween Mini Pizzas?
Leftovers should be placed in an airtight container and stored in the fridge, where they will stay fresh for up to 3 days. Make sure to let them cool completely before sealing them to avoid moisture buildup. When you're ready to indulge again, simply reheat them in the oven or microwave!
Can I freeze Halloween Mini Pizzas?
Yes, you can freeze them! To do so, wrap each mini pizza tightly in plastic wrap, and then place them in a freezer-safe bag. They can be stored in the freezer for up to 2 months. When you’re ready to enjoy them, preheat your oven to 350°F (175°C) and bake for about 15 minutes until heated through and crispy. Enjoy the convenience of homemade pizza anytime!
What can I do if my pizza crusts are soggy after baking?
Don't worry, it happens! To prevent soggy crusts, try pre-baking the mini pizza crusts for about 3-4 minutes before adding sauce and toppings. This technique firms them up, allowing them to stay crisp even after adding moisture from the sauce and cheese. Make sure to monitor closely so they don’t brown too much!
Are these Halloween Mini Pizzas suitable for children with dairy allergies?
If you have children or guests with dairy allergies, simply replace the mozzarella cheese with a dairy-free cheese alternative. There are several varieties now available that melt well, so everyone can enjoy these spooky creations! Just ensure all other ingredients, like the sauce and toppings, are also dairy-free.
How long can I keep the assembled Halloween Mini Pizzas in the fridge before baking?
You can assemble your Halloween Mini Pizzas up to 24 hours in advance. After assembly, cover them tightly with plastic wrap or foil to keep them fresh. When you’re ready to bake, simply pop them in the oven as directed—perfect for preparing for a spooky party ahead of time!
Spooky Delicious Halloween Mini Pizzas for Fun Movie Nights
Equipment
- Oven
- baking sheet
- Spoon
Ingredients
For the Crust
- 12 pieces Mini Pizza Crusts Small bases for personal pizzas.
For the Sauce
- 1 to 2 tablespoons Pizza Sauce Flavorful sauce for the base.
For the Toppings
- 2 cups Mozzarella Cheese Shredded for topping.
- 1 cup Black Olives Sliced for decoration.
- 1 cup Mini Pepperoni Optional for added flavor.
- 1 cup Orange & Green Bell Peppers For jack-o’-lantern designs.
For the Decorations
- 1 cup Part-Skim String Cheese Used for mummy faces.
- 1 cup Fresh Basil For garnish.
For Baking
- 1 spray Olive Oil Spray To prevent sticking.
Instructions
Step-by-Step Instructions
- Preheat oven to 425°F (220°C) and spray baking sheet with olive oil.
- Spread 1 to 2 tablespoons of pizza sauce on each mini pizza crust.
- Sprinkle shredded mozzarella cheese on half of the mini pizzas and use string cheese for mummy faces on the other half.
- Decorate with black olives, bell peppers, and optional mini pepperoni.
- Bake for 10 to 12 minutes until crust is golden brown and cheese is bubbly.
- Cool for 2 minutes, garnish with fresh basil and serve warm.


Leave a Reply