
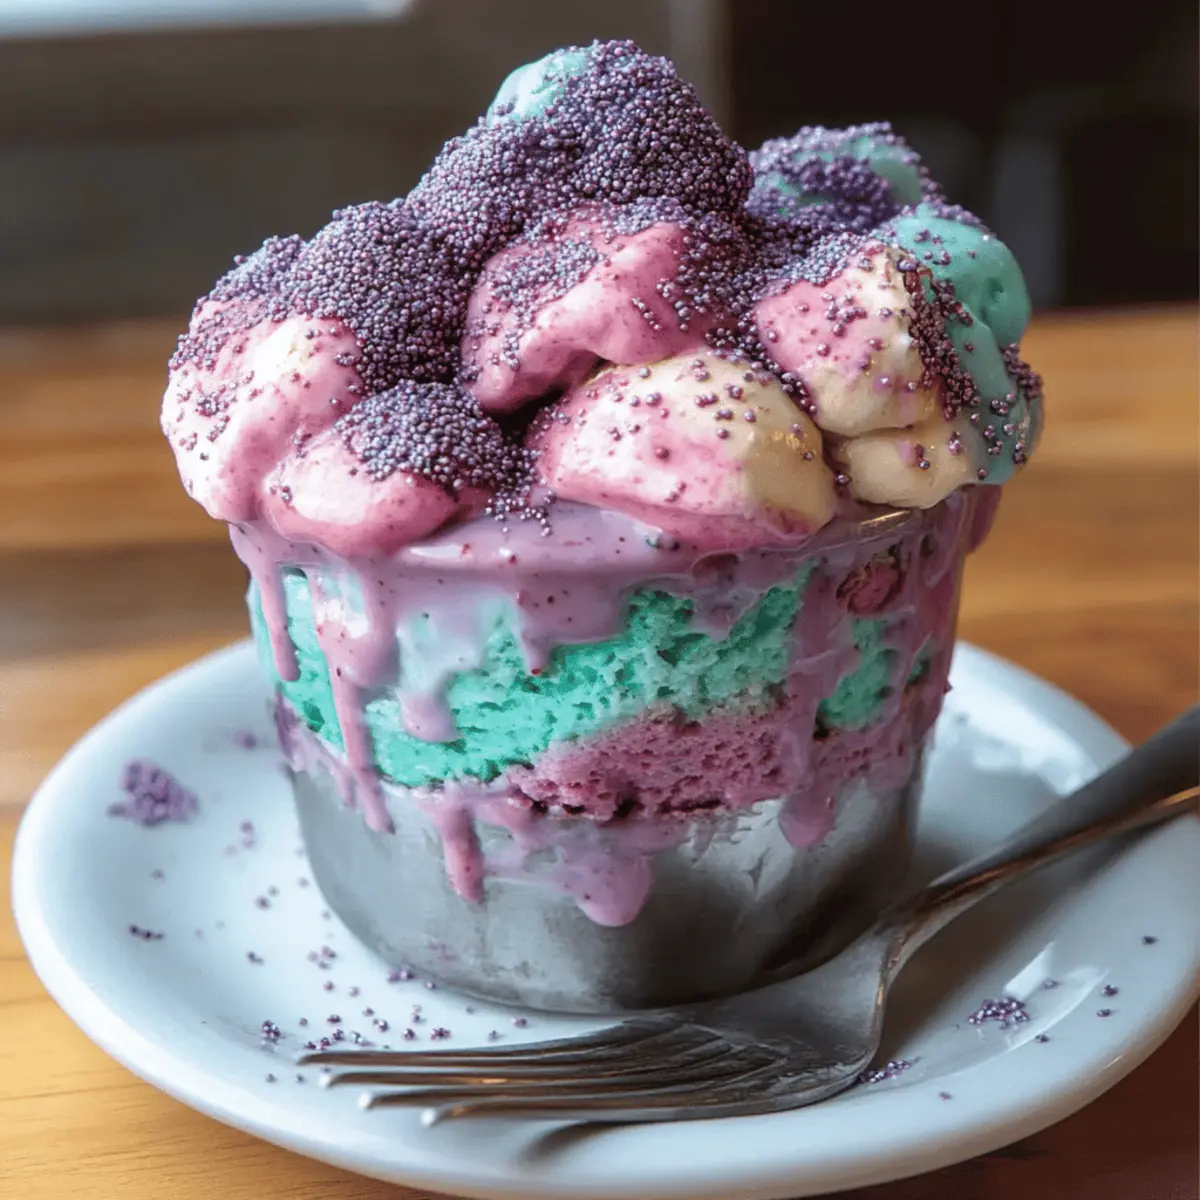
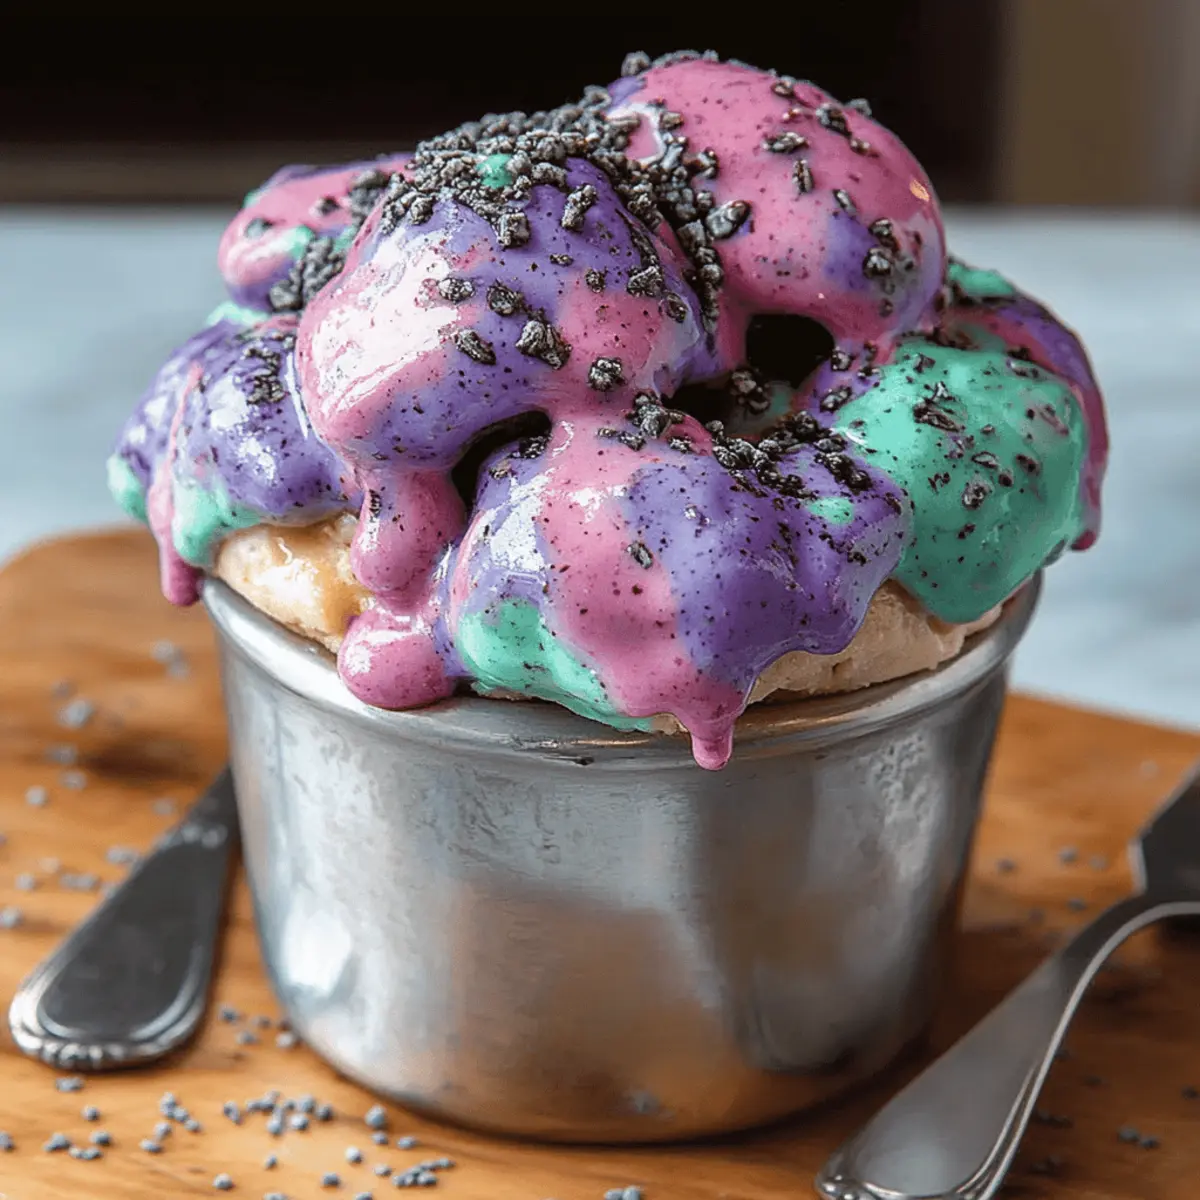
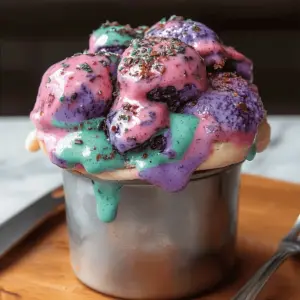
As the sun dipped below the horizon, I found myself transported to a whimsical world where vibrant colors danced in my imagination. It was here that I discovered the enchanting allure of Mermaid Ice Cream. This dreamy dessert not only brings joy to your taste buds but also captivates hearts with its playful swirls of pink, purple, and teal. With just ten minutes of prep and no cooking required, it’s the perfect treat to whip up when cravings strike and time is short. Plus, it’s a fantastic way to impress guests at summer gatherings or enjoy a family night in. Are you ready to dive into this magical creation and make some memories in the kitchen?
Why is Mermaid Ice Cream a Must-Try?
Vibrant, Eye-Catching Colors: The stunning combination of pink, purple, and teal will instantly brighten your dessert table, making it the star of any gathering.
Zero Cooking Required: This recipe is a breeze to prepare, needing only 10 minutes of your time. Perfect for busy evenings or spontaneous cravings!
Impressive Presentation: With its mesmerizing marbled effect, this ice cream is sure to wow your guests. Serve it at parties, and they’ll think you’re a culinary wizard!
Customizable Flavors: Feel free to experiment with different colors or add your favorite mix-ins like fruits or candy. The options are endless!
Child-Friendly Fun: Involve the little ones in the process for a delightful family activity that’s as enjoyable as it is tasty.
Dive deeper into creative dessert experiences with similar recipes that are just as easy to whip up like No Churn Chocolate Ice Cream or unleash your inner artist with DIY Rainbow Cupcakes!
Mermaid Ice Cream Ingredients
• Create a vibrant, dreamy dessert!
For the Base
- Heavy cream – a rich base that ensures your ice cream is wonderfully creamy.
- Sweetened condensed milk – this adds the perfect sweetness and smooth texture you want in Mermaid Ice Cream.
- Vanilla extract – enhances the flavor and adds a warm, inviting aroma to your treat.
For the Color
- Pink gel food coloring – just a few drops will infuse your ice cream with a fun, feminine touch.
- Purple gel food coloring – adds a whimsical hue to capture the magic of mermaids.
- Teal gel food coloring – reminiscent of ocean waves, it brings a refreshing pop of color.
For the Decoration
- Edible glitter or sprinkles – these whimsical touches will elevate your dessert to an enchanting masterpiece!
Step‑by‑Step Instructions for Mermaid Ice Cream
Step 1: Whip the Cream
Begin by pouring 2 cups of heavy cream into a large mixing bowl. Using an electric mixer, whip the cream on medium speed until stiff peaks form, which should take about 3-5 minutes. You’ll know it’s ready when the cream holds its shape. This creamy base is the heart of your Mermaid Ice Cream, setting the stage for its delightful texture.
Step 2: Combine Ingredients
In a separate bowl, take a 14-ounce can of sweetened condensed milk and mix it with 1 teaspoon of vanilla extract. Stir gently until fully combined, ensuring the sweetness is evenly distributed. This creamy mixture adds the perfect richness that will blend beautifully with your whipped cream, creating a silky foundation for your enchanting dessert.
Step 3: Fold in the Cream
Now it’s time to create magic! Gently fold the whipped cream into the condensed milk mixture using a spatula. Start by adding a third of the whipped cream to lighten the mixture, then gradually add the rest. Take care to maintain the airy texture; you'll see the mixture become light and fluffy, forming the dreamy base of your Mermaid Ice Cream.
Step 4: Divide and Color
Divide the creamy mixture evenly into three separate bowls. Add a few drops of pink gel food coloring to one bowl, purple to another, and teal to the last. Stir each bowl gently until the colors are vibrant and uniform. This step creates the whimsical hues that will make your Mermaid Ice Cream visually stunning and inviting!
Step 5: Layer the Colors
Grab a loaf pan and begin the artful process of layering your colors. Using a spoon, alternate dollops of pink, purple, and teal mixtures in the pan, creating a beautiful mosaic of colors. Don’t worry about perfection! Once you have the colors layered, use a knife to gently swirl through the mixtures, creating a marbled effect that mimics the ocean waves.
Step 6: Add Sparkle
To finish your Mermaid Ice Cream, sprinkle edible glitter or colorful sprinkles on top. This whimsical addition will elevate your creation, making it as enchanting to look at as it is to eat. The glitter will catch the light, adding a magical touch that will impress anyone who lays eyes on it!
Step 7: Freeze to Perfection
Finally, cover the loaf pan with plastic wrap and place it in your freezer. Allow the Mermaid Ice Cream to freeze for at least 6 hours or until it’s firm. This is the time for the flavors to meld together, and the vibrant colors to set into a delightful treat that will transport you to an underwater paradise with every scoop.
Expert Tips for Making Mermaid Ice Cream
-
Choose Quality Ingredients: Use fresh, high-quality heavy cream and sweetened condensed milk for the best flavor and texture in your Mermaid Ice Cream.
-
Whip Properly: Be sure to whip the cream until stiff peaks form; under-whipped cream can result in a less fluffy texture.
-
Gentle Folding: When combining the whipped cream and condensed milk, fold gently to keep the mixture airy. Avoid vigorous mixing to maintain that light, dreamy texture.
-
Color Mixing: Start with a small amount of gel food coloring; you can always add more if needed. This ensures that you get just the right amount of vibrant color in your Mermaid Ice Cream.
-
Swirling Technique: Don’t over-swish the colors together in the loaf pan. A few gentle swirls will achieve a beautiful marbled look without blending the colors too much.
-
Freezing Time: Patience is key! Allow the ice cream to freeze fully for at least 6 hours to achieve the perfect scoopable consistency.
Mermaid Ice Cream Variations & Substitutions
Feel free to let your creativity shine and customize this delightful treat to your heart's content!
-
Dairy-Free: Substitute heavy cream with coconut cream and use coconut condensed milk for a tropical twist.
This version adds a luscious coconut flavor, transforming your Mermaid Ice Cream into a beach-inspired delight! -
Fruit Flavors: Blend in pureed fruits like strawberries or blueberries for a natural sweetness and fruity zing.
This playful option not only adds flavor but also enhances the vibrant colors of your whimsical dessert. -
Chocolate Swirls: Fold in chocolate syrup alongside the colors for an indulgent chocolatey surprise.
Imagine scooping up dreamy colors with delicious ribbons of chocolate – pure happiness in each bite! -
Nutty Crunch: Sprinkle in crushed nuts like almonds or hazelnuts for an added crunch and nutty flavor boost.
This texture contrast will elevate your ice cream, making it even more delightful to enjoy! -
Spicy Kick: Add a pinch of cayenne pepper or chili powder to one of the colors for a surprising spicy kick.
This will create an exciting contrast, making each scoop not only colorful but also thrilling to your taste buds! -
Gourmet Extracts: Experiment with flavored extracts like almond or mint to swap in new layers of flavor.
Each variation will take your Mermaid Ice Cream on a whole new exciting taste adventure! -
Seasonal Colors: Use seasonal gel colors such as orange and green for Halloween or red and green for Christmas.
You can effortlessly adapt this recipe for festive occasion, delighting everyone with your creative flair! -
Lower Sugar: Replace sweetened condensed milk with a sugar-free version for a lighter treat.
This way, you can indulge without compromising on your health goals or sweetness cravings!
For more captivating dessert ideas, check out No Churn Chocolate Ice Cream or try your hand at making DIY Rainbow Cupcakes for more colorful fun in the kitchen!
What to Serve with Mermaid Ice Cream?
Imagine a vibrant gathering filled with laughter and delight, where your Mermaid Ice Cream takes center stage alongside other tantalizing treats.
-
Crispy Waffle Cones: A crunchy texture that complements the creaminess of the ice cream, offering a delightful contrast in every bite.
-
Fresh Berries: Juicy strawberries and blueberries add a refreshing burst of flavor, enhancing the sweetness of your frozen creation. These fruity accents not only brighten the plate but also bring a touch of summer to your dessert spread.
-
Chocolate Fudge Sauce: Drizzling warm fudge over your Mermaid Ice Cream adds a rich, indulgent touch that turns every scoop into a decadent experience. The gooey sweetness pairs beautifully with the ice cream's airy texture.
-
Mint Leaf Garnish: A simple sprig of fresh mint not only elevates the presentation but also introduces a refreshing herbal note that balances the dessert's sweetness.
-
Toasted Coconut Flakes: Crispy, toasted coconut adds a tropical flair and a chewy texture that perfectly contrasts the silky smooth ice cream.
-
Sparkling Lemonade: A fizzy, citrus drink refreshes palates between bites, cutting through the sweetness to create a well-rounded dessert experience.
-
Colorful Macarons: These delicate confections add an elegant touch and a variety of flavors that entice your guests. Their chewy texture and vibrant hues complement the whimsical theme of Mermaid Ice Cream.
-
Chocolate-dipped Fruit: Bananas and strawberries dipped in chocolate create an elegant yet simple pairing that feels indulgent when shared with your vibrant dessert.
-
Rainbow Sprinkles: For an extra fun touch, serve a side of colorful sprinkles for guests to add their own playful flair to each scoop!
How to Store and Freeze Mermaid Ice Cream
Fridge: Store any leftover Mermaid Ice Cream in an airtight container for up to 3 days to maintain its creamy texture.
Freezer: For long-term storage, keep the ice cream in an airtight container in the freezer for up to 2 weeks. After that, the quality may decline.
Reheating: If the ice cream becomes too hard, let it sit at room temperature for about 5-10 minutes before scooping to soften, making it easier to serve.
Thawing: Avoid refreezing any thawed ice cream, as it can lead to an undesirable texture. Enjoy your delightful Mermaid Ice Cream fresh!
Make Ahead Options
These Mermaid Ice Cream treats are perfect for busy home cooks looking to save time! You can whip up the base mixture and layer the colors up to 24 hours in advance. Simply follow the recipe steps until the layering stage, then cover the loaf pan tightly with plastic wrap and refrigerate; this keeps the flavors fresh and prevents freezer burn. When you’re ready to serve, add the edible glitter or sprinkles on top, then freeze for at least 6 hours until firm. This way, you can enjoy the delight of homemade Mermaid Ice Cream without the last-minute rush!

Mermaid Ice Cream Recipe FAQs
What type of cream should I use for the best Mermaid Ice Cream?
I recommend using high-quality heavy cream, as it provides the rich, creamy base that makes your Mermaid Ice Cream indulgent and delightful. Always check the expiration date to ensure freshness, and look for cream that is at least 36% fat content for optimal results.
How should I store leftover Mermaid Ice Cream?
Store any leftover Mermaid Ice Cream in an airtight container in the refrigerator for up to 3 days. If you're looking to keep it longer, transfer it to the freezer, where it should last for about 2 weeks. Just remember, the flavor is best enjoyed fresh!
Can I freeze Mermaid Ice Cream for longer?
Absolutely! For long-term storage, place the Mermaid Ice Cream in an airtight container and freeze. It can last for up to 3 months if stored correctly. To freeze properly, make sure to cover the surface with plastic wrap before sealing the container, preventing ice crystals from forming.
What if my ice cream is too hard to scoop?
If your Mermaid Ice Cream is too firm after freezing, simply let it sit at room temperature for about 5-10 minutes to soften before scooping. Alternatively, you can use a warm ice cream scoop; just run it under hot water for a few seconds to make it easier to serve.
Can I make Mermaid Ice Cream gluten-free or dairy-free?
Yes! To make a gluten-free version, ensure all your ingredients, especially the food coloring and decorations, are labeled gluten-free. For a dairy-free option, try substituting the heavy cream with coconut cream and the sweetened condensed milk with a dairy-free alternative. Just keep in mind that texture and flavor may vary slightly!
What should I do if the colors in my ice cream blend too much?
If you find your colors are blending excessively, try to be more gentle while swirling them in the loaf pan. Use a light hand to create swirls without over-mixing, as you want to maintain distinct color layers. You can also adjust the quantities of each color to achieve a more vibrant contrast.
Mermaid Ice Cream: Dive into a Whimsical Treat Adventure
Equipment
- large mixing bowl
- Electric Mixer
- spatula
- Loaf pan
Ingredients
For the Base
- 2 cups heavy cream rich base for creaminess
- 1 can (14 ounces) sweetened condensed milk adds sweetness and smooth texture
- 1 teaspoon vanilla extract enhances flavor
For the Color
- few drops pink gel food coloring adds a feminine touch
- few drops purple gel food coloring creates whimsical hue
- few drops teal gel food coloring reminds of ocean waves
For the Decoration
- as needed edible glitter or sprinkles enhances presentation
Instructions
Step-by-Step Instructions
- Begin by pouring 2 cups of heavy cream into a large mixing bowl. Using an electric mixer, whip the cream on medium speed until stiff peaks form, about 3-5 minutes.
- In a separate bowl, mix 1 can of sweetened condensed milk with 1 teaspoon of vanilla extract until fully combined.
- Gently fold the whipped cream into the condensed milk mixture using a spatula.
- Divide the mixture into three bowls and add pink, purple, and teal gel food coloring to each, stirring until vibrant.
- Layer the colors in a loaf pan, alternating dollops of each color, and swirl gently for a marbled effect.
- Sprinkle edible glitter or colorful sprinkles on top to finish.
- Cover and freeze for at least 6 hours or until firm.


Leave a Reply