
As I stood in my kitchen, surrounded by the intoxicating scent of simmering rice, I felt a wave of nostalgia wash over me. Chicken Onigiri is not just a meal; it’s a delightful reminder of the simple joys of homemade food. This easy-to-make recipe transforms everyday ingredients into something uniquely special, marrying savory chicken with perfectly seasoned sushi rice—a comforting blend that’s sure to please everyone at the table. With just 35 minutes of cook time, you’ll have a crowd-pleasing dish that’s ideal for dinner or a satisfying snack. Plus, these delightful rice balls are easily customizable! How can you resist making your own variations? Ready to roll up your sleeves and create something truly delicious?
Why is Chicken Onigiri so special?
Nostalgic flavors come alive with every bite, evoking memories of comforting meals shared with family.
Simplicity reigns in this recipe; even novice cooks can whip up a batch effortlessly.
Customizable to your heart's desire, feel free to experiment with different fillings like avocado or tuna.
Nutritious and satisfying, these onigiri are packed with protein and flavor, perfect for any meal.
Plus, crowd-pleasing appeal means everyone will love this delightful treat, making it an ideal choice for gatherings. Get inspired and check out other variations of sushi-inspired recipes for even more delicious ideas!
Chicken Onigiri Ingredients
For the Rice Mixture
- Sushi rice – this rice has the perfect sticky texture essential for molding your chicken onigiri.
- Water – ensures the rice cooks nicely and achieves the right consistency.
- Salt – enhances the flavor of the rice, bringing all the components together.
For the Filling
- Cooked chicken – shredded for easy incorporation, this is the star of your chicken onigiri!
- Soy sauce – adds a savory umami punch that pairs beautifully with the rice.
- Sesame oil – lends a nutty flavor that elevates the dish.
- Green onions – chopped to provide a fresh, crisp element to the filling.
- Sesame seeds – sprinkled on top for added texture and flavor.
Optional Wrapping
- Nori – wrapping your onigiri in nori gives a delightful contrast in flavor, enhancing your homemade creation.
Step‑by‑Step Instructions for Chicken Onigiri
Step 1: Rinse the Rice
Begin by rinsing 2 cups of sushi rice under cold water in a fine mesh strainer. Swirl the rice gently with your hands until the water runs clear, removing excess starch. This step is crucial for achieving the perfect sticky texture when making Chicken Onigiri, so take a moment to ensure the rice is properly cleaned.
Step 2: Cook the Rice
In a medium pot, combine the rinsed sushi rice and 2 ½ cups of water, adding 1 teaspoon of salt for flavor. Bring the mixture to a boil over medium heat, watching for bubbles to form. Once boiling, reduce the heat to low, cover tightly, and let it simmer for 15 minutes. The rice should absorb the water fully and become tender and fluffy.
Step 3: Prepare the Filling
While the rice cooks, prepare the delicious filling for your Chicken Onigiri. In a bowl, combine 1 cup of shredded cooked chicken with 1 tablespoon of soy sauce, 1 tablespoon of sesame oil, 2 tablespoons of chopped green onions, and 1 tablespoon of sesame seeds. Mix well until everything is evenly coated, ensuring every bite is packed with flavor.
Step 4: Cool the Rice
Once the rice has finished cooking, remove it from the heat and let it cool for about 5–10 minutes, still covered. This cooling period is important as it prevents burns when handling the rice. When cool enough to touch, wet your hands with water to keep the rice from sticking to them as you form the Chicken Onigiri.
Step 5: Mold the Onigiri
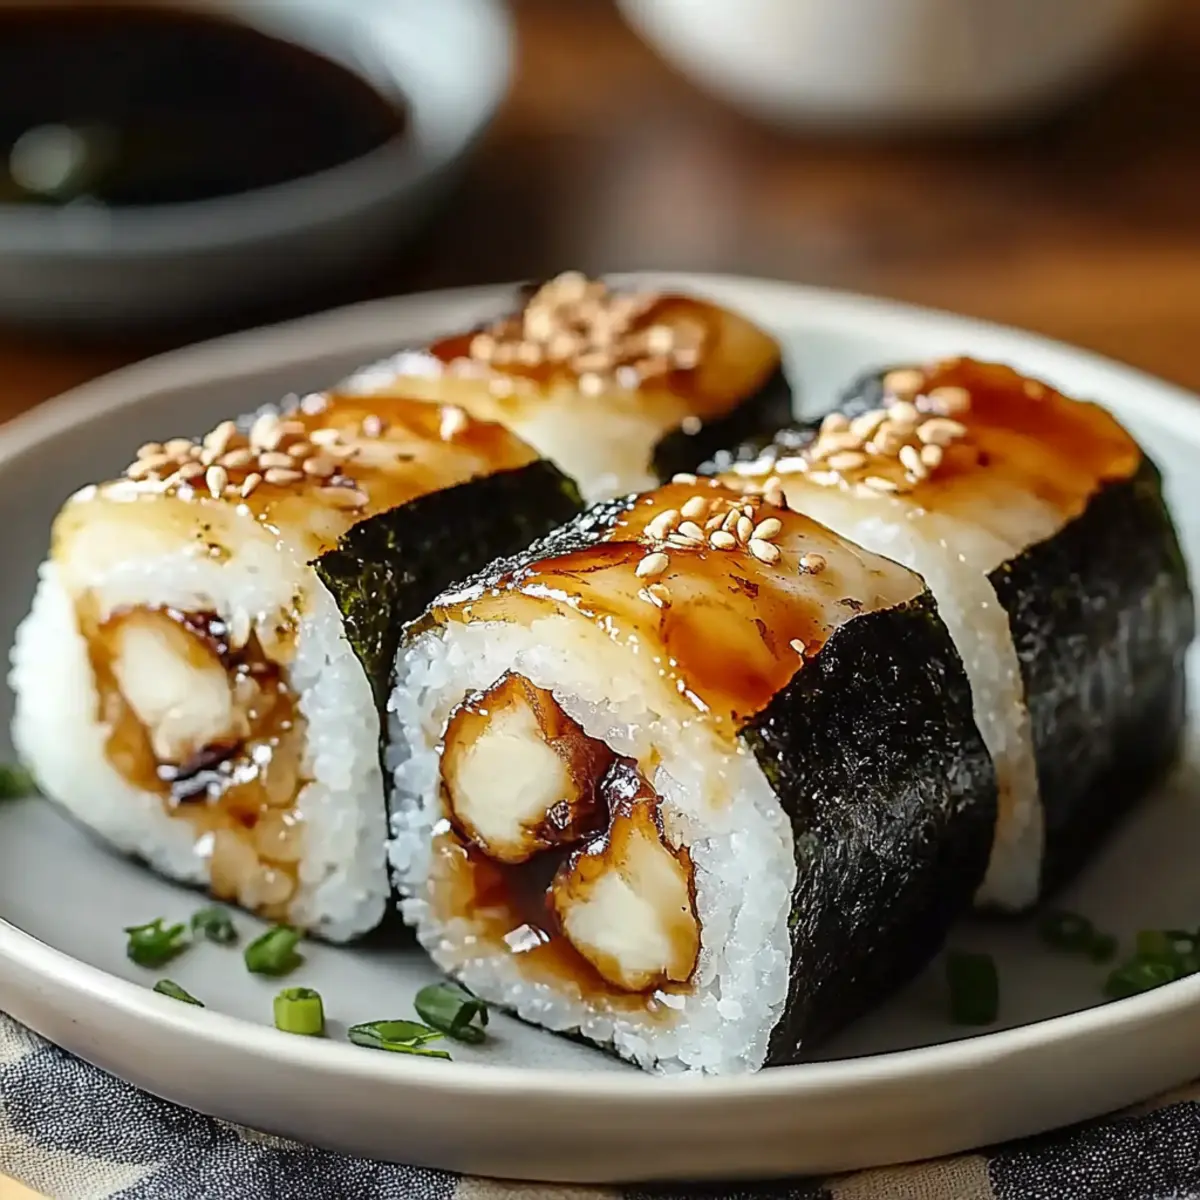
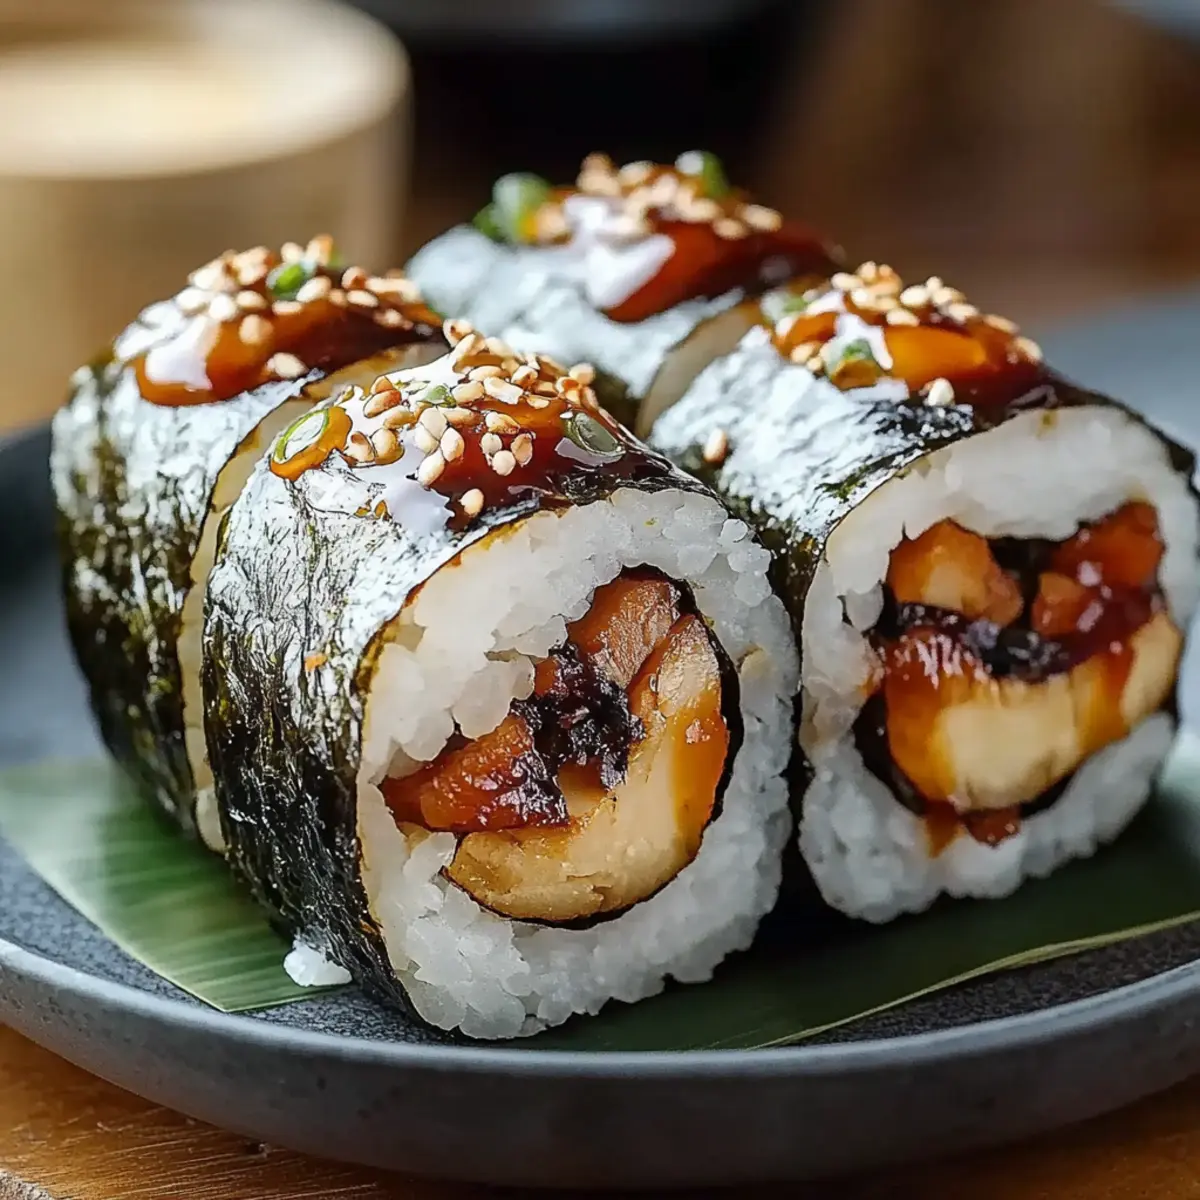
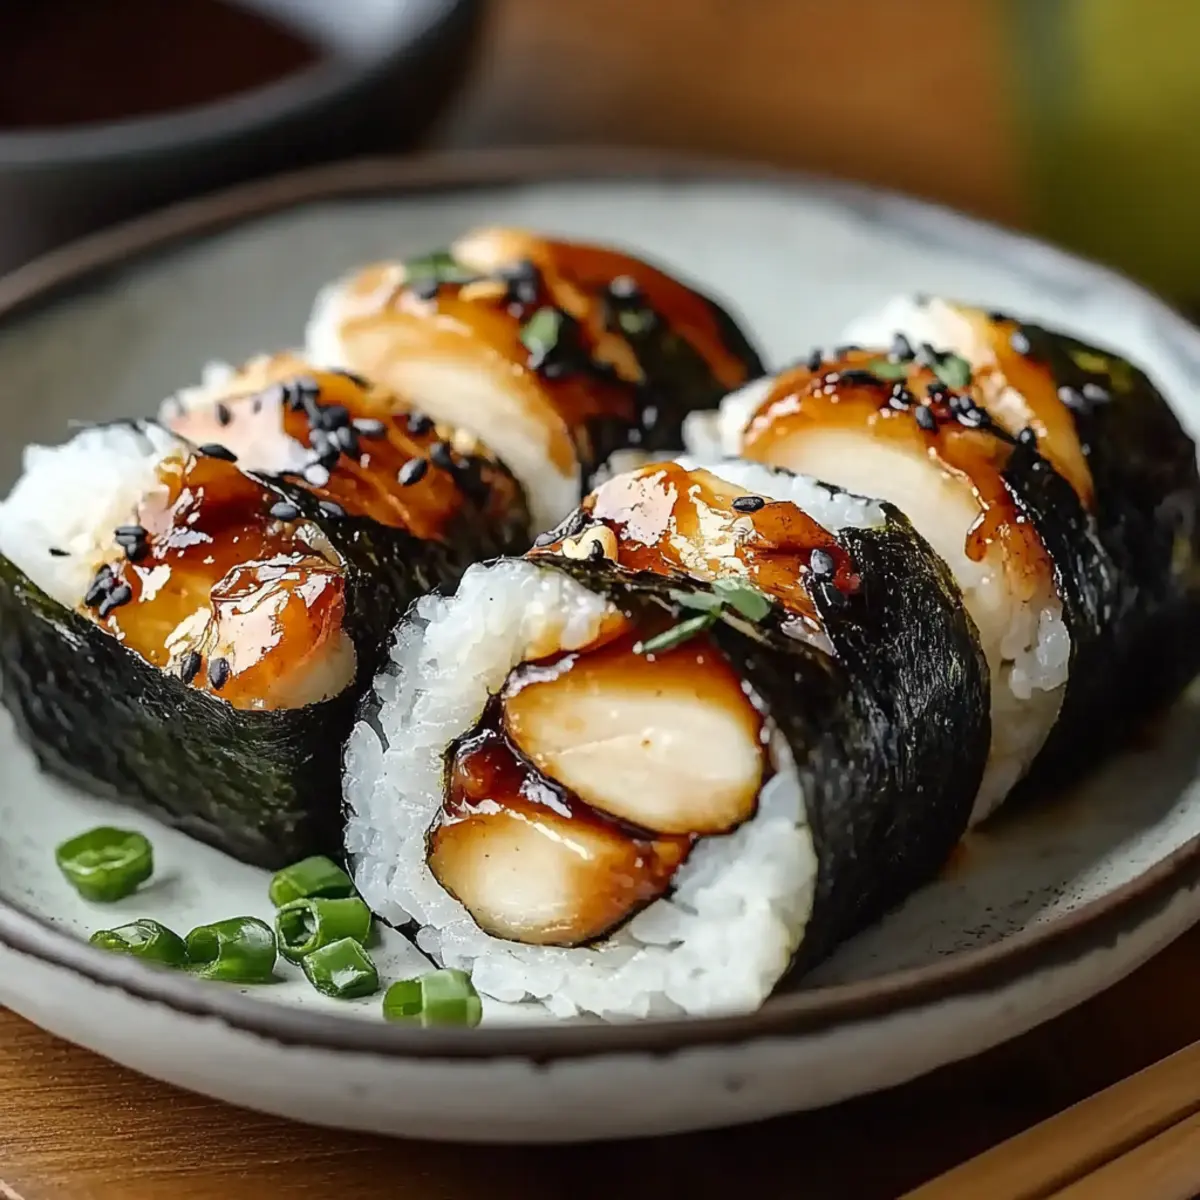
Take a small handful of the warm, slightly sticky rice and flatten it in the palm of your hand. Spoon a generous portion of the chicken filling into the center, making sure it’s compact. Carefully mold the rice around the filling, shaping it into a ball or triangle. This step requires a gentle touch to keep the onigiri nicely formed and intact.
Step 6: Add Nori (Optional)
If desired, take 4 sheets of nori and cut them into strips. Wrap a strip around each Chicken Onigiri, giving a delightful flavor contrast and a beautiful presentation. The nori adds not only taste but also a touch of elegance to your homemade snack, making each bite even more enjoyable.
Step 7: Repeat and Serve
Continue the molding process until you have used all the rice and filling, creating as many Chicken Onigiri as you desire. Arrange them on a plate, and if you choose, garnish with extra sesame seeds or chopped green onions for visual appeal. Enjoy your warm, homemade Chicken Onigiri, perfect for a cozy meal or snack!
What to Serve with Chicken Onigiri
As you savor each bite of your Chicken Onigiri, consider culinary companions that will elevate your meal to new heights.
-
Crispy Green Salad: A refreshing salad with a zesty dressing balances the rich flavors of onigiri, enhancing your dining experience. The crunch of fresh veggies will awaken your palate.
-
Miso Soup: This warm, umami-rich soup adds depth and comfort to your meal. Pairing it with Chicken Onigiri creates a harmonious blend of flavors and textures.
-
Pickled Vegetables: Bright, tangy pickles provide a delightful contrast to the savory onigiri. Their acidity cuts through the richness, creating a balanced plate.
-
Tempura Vegetables: Lightly battered and crispy tempura adds a wonderful crunch to your meal. Each bite harmonizes with the softness of onigiri, making your dining experience a textural delight.
-
Teriyaki Brussels Sprouts: Sweet and savory glazed Brussels sprouts offer a delicious twist that complements the chicken filling perfectly. The roasted notes blend beautifully with the comforting onigiri.
-
Sake or Green Tea: A glass of warm sake or green tea will enhance the flavors of your meal. The soothing beverages provide a perfect sip amidst each savory bite.
-
Mochi for Dessert: After relishing savory onigiri, treat yourself to chewy mochi for dessert. Its sweetness and unique texture create a delightful end to your meal.
Expert Tips for Chicken Onigiri
- Rice Rinsing: Rinse the sushi rice thoroughly. A clear water runoff is key to avoiding overly sticky onigiri.
- Fill It Right: Don’t overstuff the chicken filling; too much can cause your onigiri to fall apart. Aim for a balanced amount for easy molding.
- Wet Hands: Keep your hands wet while shaping the rice. This prevents sticking and allows for smoother handling of the Chicken Onigiri.
- Nori Placement: Add nori just before serving; wrapping too early can lead to sogginess. Fresh strips provide the best texture and flavor.
- Experiment: Feel free to explore different fillings like avocado or pickled vegetables; customizing your Chicken Onigiri is part of the fun!
Make Ahead Options
Chicken Onigiri is perfect for meal prep, allowing you to enjoy homemade flavors on busy days! You can prepare the sushi rice and chicken filling up to 24 hours in advance. Simply cook the rice as directed, allow it to cool completely, then refrigerate it in an airtight container. For the filling, mix the shredded chicken with soy sauce, sesame oil, green onions, and sesame seeds; store it separately in the fridge. When ready to serve, just warm the rice slightly (to prevent it from being too cold or hard), mold it around the filling, and shape your onigiri. These simple steps ensure your Chicken Onigiri remains just as delicious even when prepped ahead.
Chicken Onigiri Variations You’ll Love
Why stick to the classic when you can make Chicken Onigiri truly yours? Get ready to transform this delightful dish into various mouthwatering creations!
-
Spicy Kick: Add a teaspoon of sriracha or chili oil to your chicken mix for an exciting heat that brings the flavor to life. It’s a simple twist that packs a punch!
-
Vegetarian Delight: Swap the chicken for marinated tofu or tempeh for a vegan-friendly option that’s just as satisfying. This version offers a lovely texture and tastes divine!
-
Creamy Addition: Mix in a tablespoon of cream cheese or avocado to the filling for a richer, silkier texture. This creamy twist adds depth to every bite and turns onigiri into a luxurious treat.
-
Herb-Infused: Toss in some fresh herbs, like cilantro or basil, to the rice or filling for an aromatic flavor enhancement. Herbs bring a fresh vibrancy that can elevate your onigiri experience!
-
Tuna Twist: Trade chicken for canned tuna, mixing it with mayonnaise, scallions, and a bit of lemon juice for a delicious maritime flavor. This quick swap connects you to another beloved classic—tuna salads!
-
Sweet Potato Surprise: Use mashed sweet potato as a filling instead of chicken for a surprising sweet and savory combo. This variation not only adds sweetness but also makes your onigiri vibrantly colorful!
-
Fun Shapes: Get creative with the mold! Instead of traditional triangles, explore different shapes using cookie cutters. Make meal prep fun for the whole family, especially for kids!
-
Rice Variance: Change it up by using brown rice or quinoa instead of sushi rice, offering a different texture and a hearty dose of whole grains. It adds chewiness while maintaining the nutritional benefits.
Discover more delightful ideas like mixing in pickled vegetables or exploring exciting fusion flavors to keep your cooking journey vibrant and enjoyable.
How to Store and Freeze Chicken Onigiri
Fridge: Store any leftover Chicken Onigiri in an airtight container in the fridge for up to 2 days. This keeps them fresh and prevents them from drying out.
Freezer: To freeze, wrap each onigiri individually in plastic wrap and then place them in a freezer bag. They can be stored for up to 1 month for optimal taste and texture.
Reheating: Thaw frozen onigiri in the fridge overnight before reheating. To warm them up, microwave for about 30 seconds or until heated through, ensuring they stay moist.
Serving Tip: If desired, wrap with nori just before serving to maintain the nori's crispness. Enjoy these delightful Chicken Onigiri fresh from your kitchen!
Chicken Onigiri Recipe FAQs
How do I choose the right sushi rice?
Absolutely! Look for short-grain or medium-grain sushi rice, as it’s essential for achieving that delightful sticky texture needed for making Chicken Onigiri. The grains should be pearly white with no dark spots, indicating freshness. Brands like Nishiki or Koshihikari are popular choices that deliver great results.
How should I store leftover Chicken Onigiri?
Very! To keep your Chicken Onigiri fresh, place any uneaten pieces in an airtight container and store them in the refrigerator. They’ll remain good for about 2 days. If you’d like to enjoy them later, the freezer is also an excellent option.
Can I freeze Chicken Onigiri? How?
Of course! Freezing Chicken Onigiri is a fantastic way to preserve them. Wrap each onigiri individually in plastic wrap, ensuring no air can get in, and then place them in a freezer-safe bag. They can stay in the freezer for up to 1 month. When you’re ready to enjoy, let them thaw in the fridge overnight and reheat them in the microwave for about 30 seconds until warm.
What should I do if my rice is too sticky?
Don't worry! If your sushi rice is overly sticky, it might be due to not rinsing it thoroughly before cooking. To avoid this next time, rinse the rice until the water runs clear—this will help remove excess starch. If your onigiri is already made and too sticky, try wetting your hands more while shaping them and using less rice per onigiri as an alternate strategy.
Are Chicken Onigiri safe for pets?
While your furry friends might be curious about your Chicken Onigiri, it’s best to avoid sharing them directly. The soy sauce and sesame oil may not be suitable for pets, especially if they have allergies or sensitivity. Always check with your veterinarian if you're uncertain about specific ingredients that might not be safe for your dog or cat.
Can I use different fillings?
Absolutely! The beauty of Chicken Onigiri lies in its versatility. You can get creative with fillings such as avocado, tuna, or even veggies like pickled radishes. Feel free to mix and match ingredients to fit your family's preferences—everyone can enjoy their favorite flavors!

Delicious Chicken Onigiri for a Cozy Home-Cooked Meal
Equipment
- Medium pot
- fine mesh strainer
Ingredients
For the Rice Mixture
- 2 cups sushi rice this rice has the perfect sticky texture essential for molding your chicken onigiri.
- 2.5 cups water ensures the rice cooks nicely and achieves the right consistency.
- 1 teaspoon salt enhances the flavor of the rice.
For the Filling
- 1 cup cooked chicken shredded for easy incorporation.
- 1 tablespoon soy sauce adds a savory umami punch.
- 1 tablespoon sesame oil lends a nutty flavor.
- 2 tablespoons green onions chopped to provide a fresh element.
- 1 tablespoon sesame seeds sprinkled on top for texture.
Optional Wrapping
- 4 sheets nori wraps the onigiri for flavor contrast.
Instructions
Step-by-Step Instructions
- Rinse the sushi rice under cold water in a fine mesh strainer until the water runs clear.
- In a medium pot, combine the rinsed sushi rice and water, adding salt. Bring to a boil, then reduce heat and simmer for 15 minutes.
- In a bowl, combine the shredded cooked chicken, soy sauce, sesame oil, green onions, and sesame seeds. Mix well.
- Once the rice has finished cooking, let it cool for about 5-10 minutes.
- Take a handful of warm rice, flatten it in your palm, and spoon the filling into the center. Mold the rice around the filling.
- If desired, wrap each onigiri with nori for added flavor.
- Continue molding until all rice and filling are used, then serve and enjoy.
Leave a Reply