
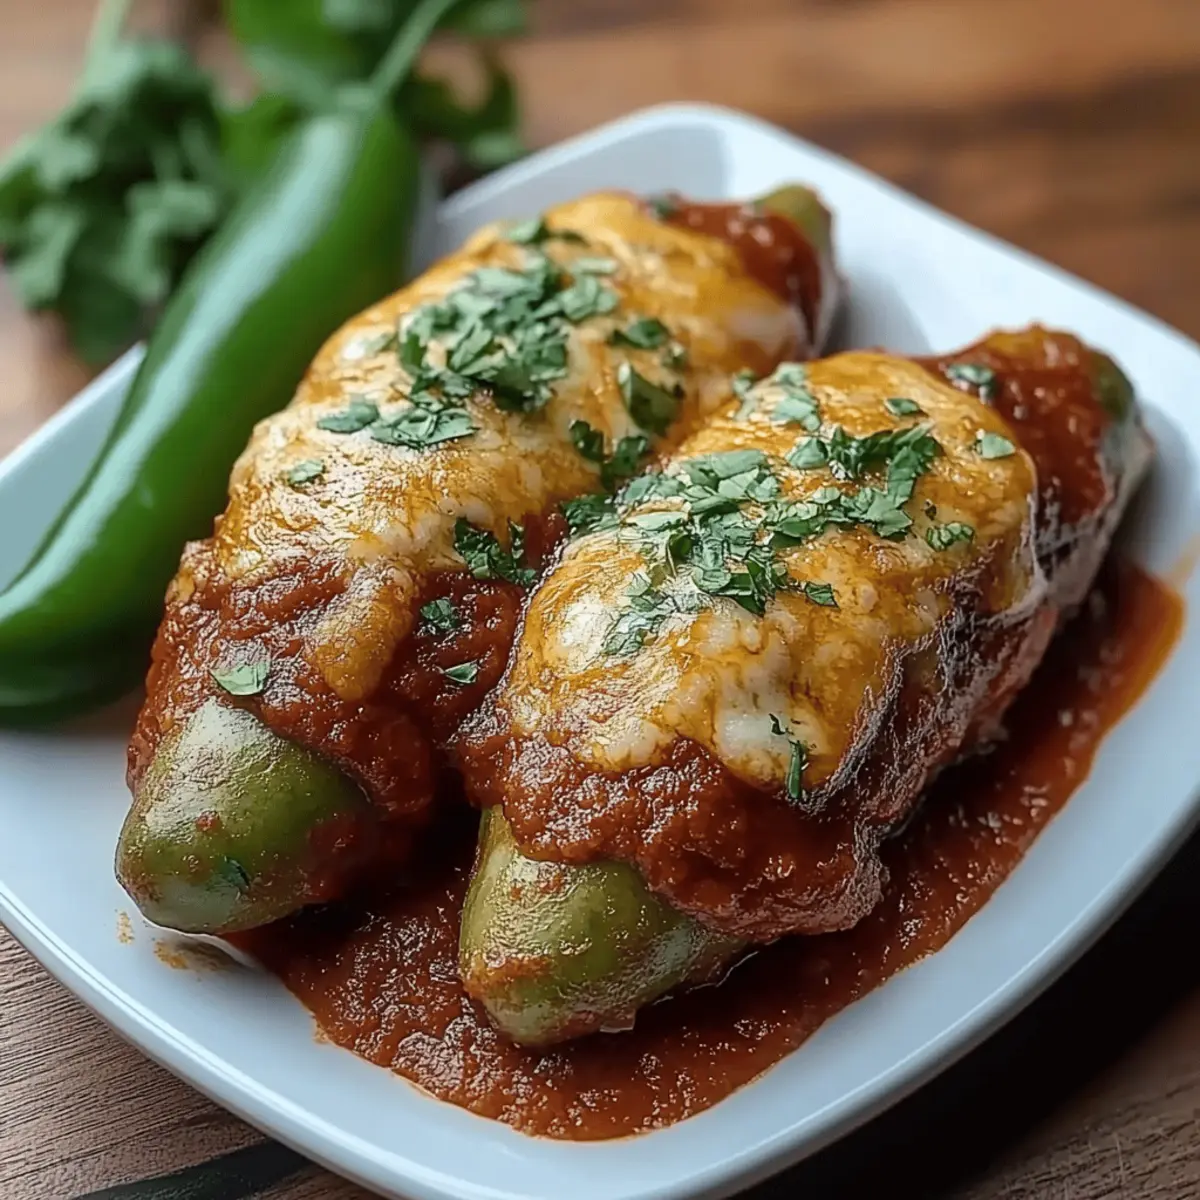
Stepping into the kitchen, I couldn’t shake the craving for something truly sensational. That’s when the idea for Cheesy Hatch Chile Rellenos came to life—an exquisite blend of flavors that transforms simple ingredients into a robust fiesta on your plate. Not only are these baked delights packed with mouthwatering Oaxaca cheese, but they also make for a delightful crowd-pleaser that’s perfect for any occasion. Plus, with a quick prep time and the ability to impress friends and family alike, you’ll find yourself making these savory treasures time and time again. Ready to indulge in the alluring aroma and vibrant flavors of these stuffed chiles? Let’s dive into this culinary adventure together!

What Makes Cheesy Hatch Chile Rellenos Special?
Irresistible Creaminess: Each bite is filled with gooey, melted Oaxaca cheese that complements the richness of the chiles.
Bold Flavor: Roasting the hatch chiles elevates their natural sweetness, creating a delightful contrast that excites your taste buds.
Simple Yet Impressive: The recipe combines everyday ingredients while showcasing your cooking skills—perfect for impressing guests at casual dinners or festive gatherings.
Versatile Serving Options: Pair them with a zesty cilantro-laden red sauce or enjoy them on their own; the choice is yours!
Whether you’re looking for a fun twist on a classic dish or craving comfort food, these Cheesy Hatch Chile Rellenos will become a staple in your kitchen!
Cheesy Hatch Chile Rellenos Ingredients
Get ready to fill your kitchen with mouthwatering aromas!
For the Chiles
• 8 hatch green chiles – these smoky chiles are the star of the dish; their mild heat makes them perfect for stuffing.
For the Cheese Filling
• 8 to 10 oz Oaxaca cheese – known for its creamy melt, this cheese adds velvety richness; you can substitute with Monterey Jack if needed.
For the Batter
• 6 large eggs, separated – using the whites creates a light, airy breading, while the yolks enrich the flavor.
• ⅔ cup all-purpose flour – essential for dredging the chiles before frying, ensuring a crispy exterior.
• 1 teaspoon salt – amplifies the flavors and balances out the richness of the cheese.
• 1 teaspoon garlic powder – adds a subtle hint of savory goodness to the batter for extra flavor.
For Frying
• Vegetable oil – the ideal oil for frying; it has a high smoke point and neutral flavor for perfect crispiness.
For the Red Sauce
• 5 medium tomatoes – fresh varieties enhance the sauce's flavor; Roma tomatoes work beautifully here.
• 1 small white onion – adds depth and sweetness to the sauce when blended.
• 5 garlic cloves – roasting enhances their flavor, creating a fragrant base for your sauce.
• 2 tablespoon chopped cilantro – fresh herbs brighten the sauce and complement the chiles wonderfully.
• 1 teaspoon salt – a must-have for seasoning and perfecting the taste.
• ¼ cup sliced jalapeños (optional) – for those who like an extra kick, these will add a delightful heat.
With these vibrant ingredients, your Cheesy Hatch Chile Rellenos will usher in a fiesta of flavors that everyone will love!
Step‑by‑Step Instructions for Cheesy Hatch Chile Rellenos
Step 1: Roast the Chiles
Preheat your broiler and line a baking sheet with foil. Place the hatch green chiles on the baking sheet and broil for 5-10 minutes, turning occasionally, until the skins are blackened and blistered. Keep an eye on them to prevent burning; the goal is a deep char that enhances their flavor.
Step 2: Steam the Chiles
After blackening, remove the chiles from the oven and transfer them to a gallon-sized ziplock bag. Seal the bag tightly and let them steam for 10-15 minutes—this step makes peeling off the skins easier. Once cool enough to handle, prepare for the next step.
Step 3: Peel and Prepare Chiles
Carefully peel off the skins from each chile, taking care not to tear the flesh. Next, cut a slit down one side of each chile to gently remove the seeds. This will give you a perfect pocket to stuff with Oaxaca cheese, making your Cheesy Hatch Chile Rellenos even more delectable.
Step 4: Stuff the Chiles
Take about 1 ounce of Oaxaca cheese (or your chosen melting cheese) and stuff each prepared chile until they’re filled but not overflowing. To keep the cheese from escaping while frying, use 1-2 toothpicks to seal the opening. Set these aside while you prepare the batter.
Step 5: Beat the Egg Whites
In a mixing bowl, separate 6 large eggs, placing the whites in one bowl and the yolks in another. Beat the egg whites on high speed until stiff peaks form; this will create a light, airy batter. Then, gently fold the beaten egg yolks into the egg whites, being careful not to deflate the mixture.
Step 6: Prepare the Dredging Station
In a shallow dish, combine ⅔ cup of all-purpose flour, 1 teaspoon of salt, and 1 teaspoon of garlic powder. This seasoned flour mixture will create a crispy coating for your Cheesy Hatch Chile Rellenos. Mix well to ensure even distribution of the seasonings.
Step 7: Heat the Oil
In a deep pan, heat vegetable oil to 350°F (175°C). You can test if the oil is ready by dropping in a small piece of bread; if it sizzles and bubbles, you’re good to go. This hot oil will fry the stuffed chiles to golden perfection, adding that irresistible crunch.
Step 8: Coat the Chiles
Dredge each stuffed chile in the flour mixture, covering them lightly and evenly. Next, dip the floured chiles into the egg batter, ensuring they are fully coated. The batter will help create a beautiful, golden crust when fried, transforming them into the heavenly Cheesy Hatch Chile Rellenos.
Step 9: Fry the Chiles
Carefully place the coated chiles into the hot oil, frying them for 2-3 minutes on each side or until they are golden brown all over. Avoid overcrowding the pan, as this can lower the oil temperature and result in soggy chiles. Use tongs to flip them gently for an even fry.
Step 10: Drain and Serve
Once fried, remove the chiles and place them on paper towels to drain excess oil. This will keep your Cheesy Hatch Chile Rellenos crispy. While they cool slightly, you can prepare the red sauce, which will bring a vibrant contrast to the cheesy richness of the chiles.
Step 11: Make the Red Sauce
In a blender, combine 5 ripe tomatoes, 1 small white onion, 5 garlic cloves, 2 tablespoons of chopped cilantro, and 1 teaspoon of salt. Blend until smooth, then transfer to a saucepan. Heat the sauce until it reaches a boil, then reduce to a simmer to let the flavors meld together beautifully.
Step 12: Plate and Enjoy
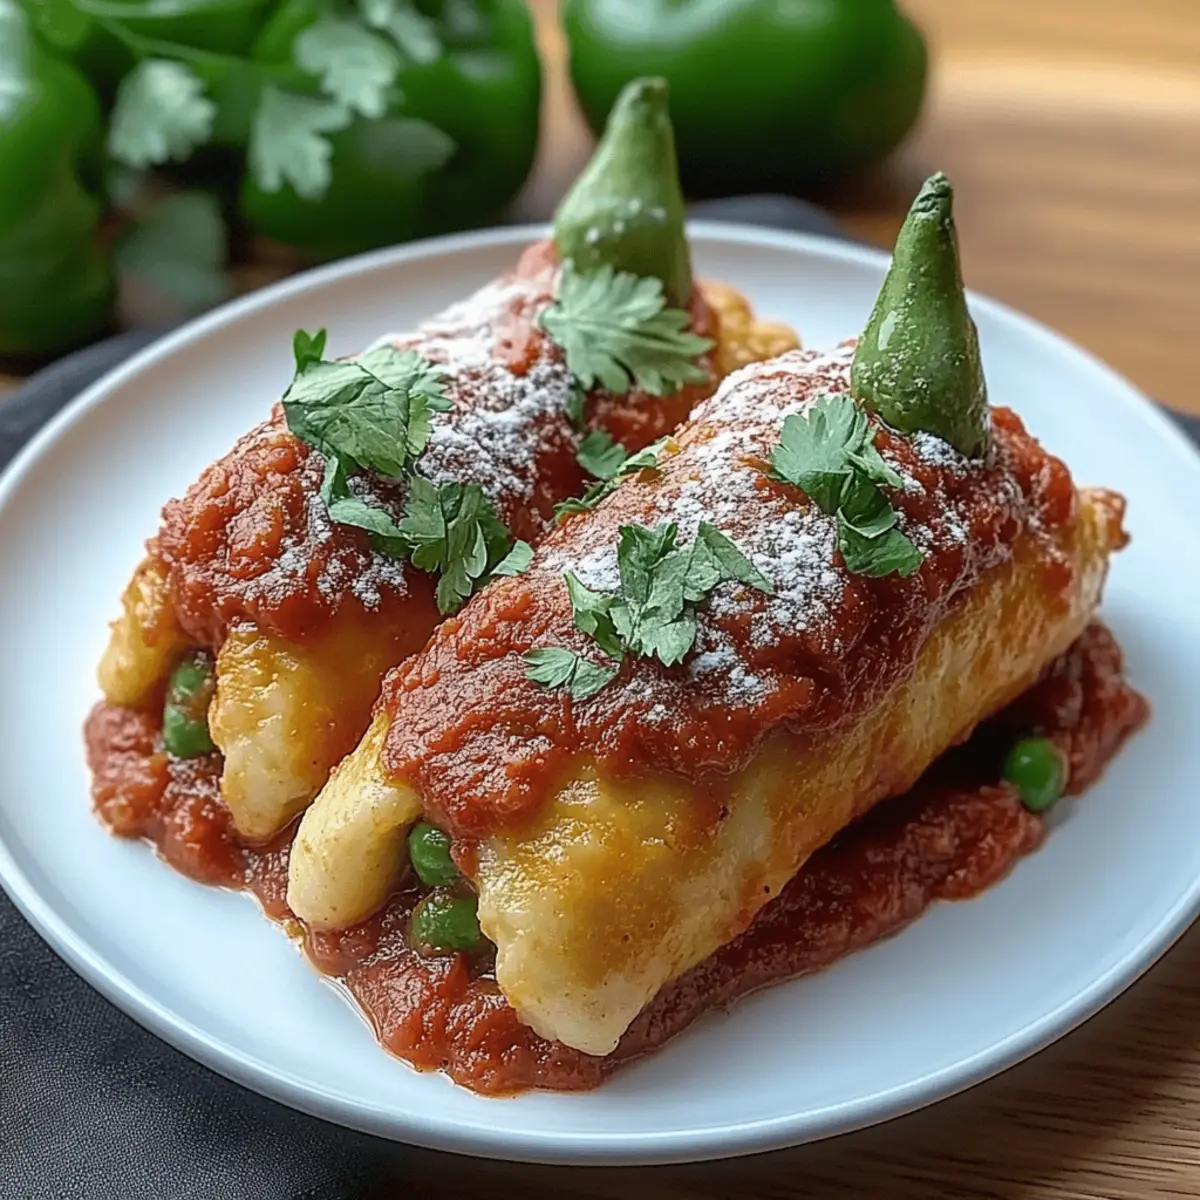
Once the sauce is heated through, plate the hot, fried Cheesy Hatch Chile Rellenos and drizzle the vibrant red sauce over the top. Serve immediately to enjoy the contrast of textures and flavors while still warm—your family and friends will be asking for seconds!
How to Store and Freeze Cheesy Hatch Chile Rellenos
Fridge: Store leftover Cheesy Hatch Chile Rellenos in an airtight container for up to 3 days. Simply reheat in the oven at 350°F (175°C) until warmed through.
Freezer: For longer storage, freeze the un-fried stuffed chiles in a single layer on a baking sheet. Once frozen solid, transfer them to a ziplock bag for up to 2 months. Fry from frozen, adding a few extra minutes to the cooking time.
Reheating: When reheating, consider using an oven rather than a microwave for better texture. Bake at 350°F (175°C) for about 15-20 minutes, or until heated evenly.
Room Temperature: If serving immediately, enjoy your Cheesy Hatch Chile Rellenos fresh and hot from the fryer! They can sit at room temperature for no longer than 2 hours before being refrigerated.
Make Ahead Options
These Cheesy Hatch Chile Rellenos are perfect for busy weeknights and thoughtful meal prep! You can roast the chiles and prepare the filling up to 24 hours in advance; simply store the peeled chiles and stuffed cheese in an airtight container in the refrigerator. Additionally, you can make the red sauce up to 3 days ahead, allowing the flavors to develop beautifully—just reheat it gently before serving. When you’re ready to fry, dip the prepared chiles in the batter and fry them fresh, ensuring they stay crispy and delicious. This method not only saves time but also ensures that your Cheesy Hatch Chile Rellenos are just as delightful as freshly made!
Expert Tips for Cheesy Hatch Chile Rellenos
Prep Ahead:
Prepare the chiles a day in advance, roast and peel them early; this makes the assembly quick and easy when you're ready to fry.
Avoid Sogginess:
Do not overcrowd the pan while frying; this keeps the oil temperature consistent, ensuring your Cheesy Hatch Chile Rellenos are crispy and golden.
Watch the Heat:
If your oil temperature drops below 350°F (175°C), the batter won't crisp up properly; use a thermometer to maintain the ideal frying temperature.
Perfect Stuffing:
Don't overstuff the chiles—fill them enough to enjoy the cheese but not so much that they burst during frying.
Sauce Variations:
Feel free to customize the red sauce with added spices or different herbs; it can elevate the flavor profile and suit various tastes.
With these tips, you’ll make Cheesy Hatch Chile Rellenos that will impress everyone at your next gathering!
What to Serve with Cheesy Hatch Chile Rellenos
Imagine a vibrant table filled with delightful dishes that enhance the joyful experience of digging into spicy, cheesy goodness.
- Cilantro Rice: Fragrant and fluffy, it pairs perfectly with the chiles, soaking up their rich flavors.
- Fresh Guacamole: Creamy and cool, this avocado dip adds a refreshing contrast to the spicy chiles, making each bite exquisite.
- Refried Beans: Silky and savory, refried beans are hearty and fill out your meal, offering a satisfying base for the chiles.
- Corn Salad: Sweet, crunchy kernels mingle with tangy lime and fresh herbs, creating a bright side that complements the richness of the chiles.
- Pico de Gallo: Fresh tomatoes, onion, and cilantro provide a zesty kick that brightens up every mouthful of the stuffed chiles.
- Mexican Street Corn (Elote): Grilled corn slathered in creamy cheese and spices adds a delightful twist, enhancing the overall fiesta experience.
- Margaritas: This classic cocktail’s citrusy zing perfectly balances the richness of the chiles while bringing a festive touch to your meal.
- Churros: Round off your fiesta with crispy, sugary churros; they offer a sweet contrast that’ll leave everyone satisfied and smiling.
Cheesy Hatch Chile Rellenos Variations
Feel free to explore these tantalizing twists on the classic Cheesy Hatch Chile Rellenos that will elevate your culinary experience!
- Dairy-Free: Substitute Oaxaca cheese with a plant-based cheese like cashew cream or vegan mozzarella for a delightful non-dairy alternative.
- Spicy Kick: Add sliced jalapeños or a sprinkle of crushed red pepper flakes to the cheese filling for an extra zesty heat that will keep your taste buds dancing.
- Smoky Flavor: Mix in some smoked paprika or chipotle powder into the egg batter for a smoky depth that enriches each bite—smoky and savory goodness combined!
- Gluten-Free: Substitute all-purpose flour with almond flour or a gluten-free flour blend to make the batter friendly for gluten sensitivities, without sacrificing taste or texture.
- Vegetarian Boost: Add cooked vegetables like spinach or mushrooms to the cheese filling for added nutrients and vibrant color—this twist will bring a garden freshness to your dish.
- Herb-Infused: Incorporate fresh chopped herbs like basil or oregano into the cheese filling for a fragrant note that perfectly enhances the flavors of the chiles.
- Crispy Topping: For extra crunch, top the filled chiles with crushed tortilla chips before frying; this added texture will bring a delightful surprise to each bite.
- Creamy Filling: Blend in a touch of cream cheese or sour cream with the Oaxaca cheese for an even richer filling that melts beautifully and coats the chiles with heavenly creaminess.
With these variations, you can make these Cheesy Hatch Chile Rellenos a unique experience every time you whip them up, ensuring endless deliciousness for your culinary adventures! Enjoy them with a side of zesty cilantro-laden red sauce for the perfect pairing!
Cheesy Hatch Chile Rellenos Recipe FAQs
What should I look for when selecting hatch green chiles?
Absolutely! When selecting hatch green chiles, look for firm, glossy skins without dark spots. The ideal chiles should feel heavy for their size, indicating moisture and freshness. If they're still pliable and vibrant green, you've got a great batch for your Cheesy Hatch Chile Rellenos!
How should I store leftover Cheesy Hatch Chile Rellenos?
You can store your leftovers in an airtight container in the fridge for up to 3 days. To reheat, place them in the oven at 350°F (175°C) for about 10-15 minutes until warmed through. This method preserves their delightful crispiness!
Can I freeze Cheesy Hatch Chile Rellenos?
Yes, you can freeze un-fried stuffed chiles! Lay them out on a baking sheet first, freeze until solid, then move them to a ziplock bag for up to 2 months. When you’re ready to enjoy them, fry them straight from frozen, adding a few minutes to your cook time for that crispy, golden finish!
What can I do if my cheese is oozing out during frying?
Very! If you find cheese oozing out, consider these tips: Ensure the chiles are properly sealed with toothpicks after stuffing and don't overfill them. Alternatively, you can try chilling your stuffed chiles for 30 minutes before frying, as this helps the cheese firm up and stay inside.
Are Cheesy Hatch Chile Rellenos safe for people with gluten allergies?
If you or someone you know has a gluten allergy, you can swap out the all-purpose flour for a gluten-free alternative, like rice flour or chickpea flour. It works just as well for dredging, ensuring everyone can enjoy these delicious Chiles Rellenos without worry.
How long can I keep Cheesy Hatch Chile Rellenos at room temperature?
For food safety, your Cheesy Hatch Chile Rellenos can sit at room temperature for no longer than 2 hours. If they go beyond that time, it's best to pop them in the fridge to keep everyone safe and sound.

Savory Cheesy Hatch Chile Rellenos for a Flavorful Fiesta
Equipment
- baking sheet
- blender
- Deep pan
- mixing bowl
- shallow dish
Ingredients
For the Chiles
- 8 pieces hatch green chiles smoky chiles
For the Cheese Filling
- 8-10 oz Oaxaca cheese can substitute with Monterey Jack
For the Batter
- 6 large eggs, separated
- ⅔ cup all-purpose flour
- 1 teaspoon salt
- 1 teaspoon garlic powder
For Frying
- vegetable oil ideal for frying
For the Red Sauce
- 5 medium tomatoes fresh varieties
- 1 small white onion
- 5 cloves garlic roasting enhances flavor
- 2 tablespoon chopped cilantro for added freshness
- 1 teaspoon salt
- ¼ cup sliced jalapeños optional for heat
Instructions
Step-by-Step Instructions
- Preheat your broiler and line a baking sheet with foil. Place the hatch green chiles on the baking sheet and broil for 5-10 minutes, turning occasionally, until the skins are blackened and blistered.
- Remove the chiles from the oven and transfer them to a ziplock bag. Seal the bag tightly and let them steam for 10-15 minutes.
- Carefully peel off the skins from each chile and cut a slit down one side of each chile to gently remove the seeds.
- Stuff each prepared chile with about 1 ounce of Oaxaca cheese and seal the opening with toothpicks.
- In a mixing bowl, separate the eggs, beat the whites until stiff peaks form, and gently fold in the yolks.
- In a shallow dish, combine flour, salt, and garlic powder for dredging.
- In a deep pan, heat vegetable oil to 350°F (175°C).
- Dredge each stuffed chile in the flour mixture, then dip into the egg batter, ensuring full coverage.
- Fry the coated chiles for 2-3 minutes on each side until golden brown.
- Once fried, place chiles on paper towels to drain excess oil.
- In a blender, combine tomatoes, onion, garlic, cilantro, and salt. Blend until smooth and heat in a saucepan.
- Plate the hot fried chiles and drizzle the red sauce over the top. Serve immediately.


Leave a Reply