
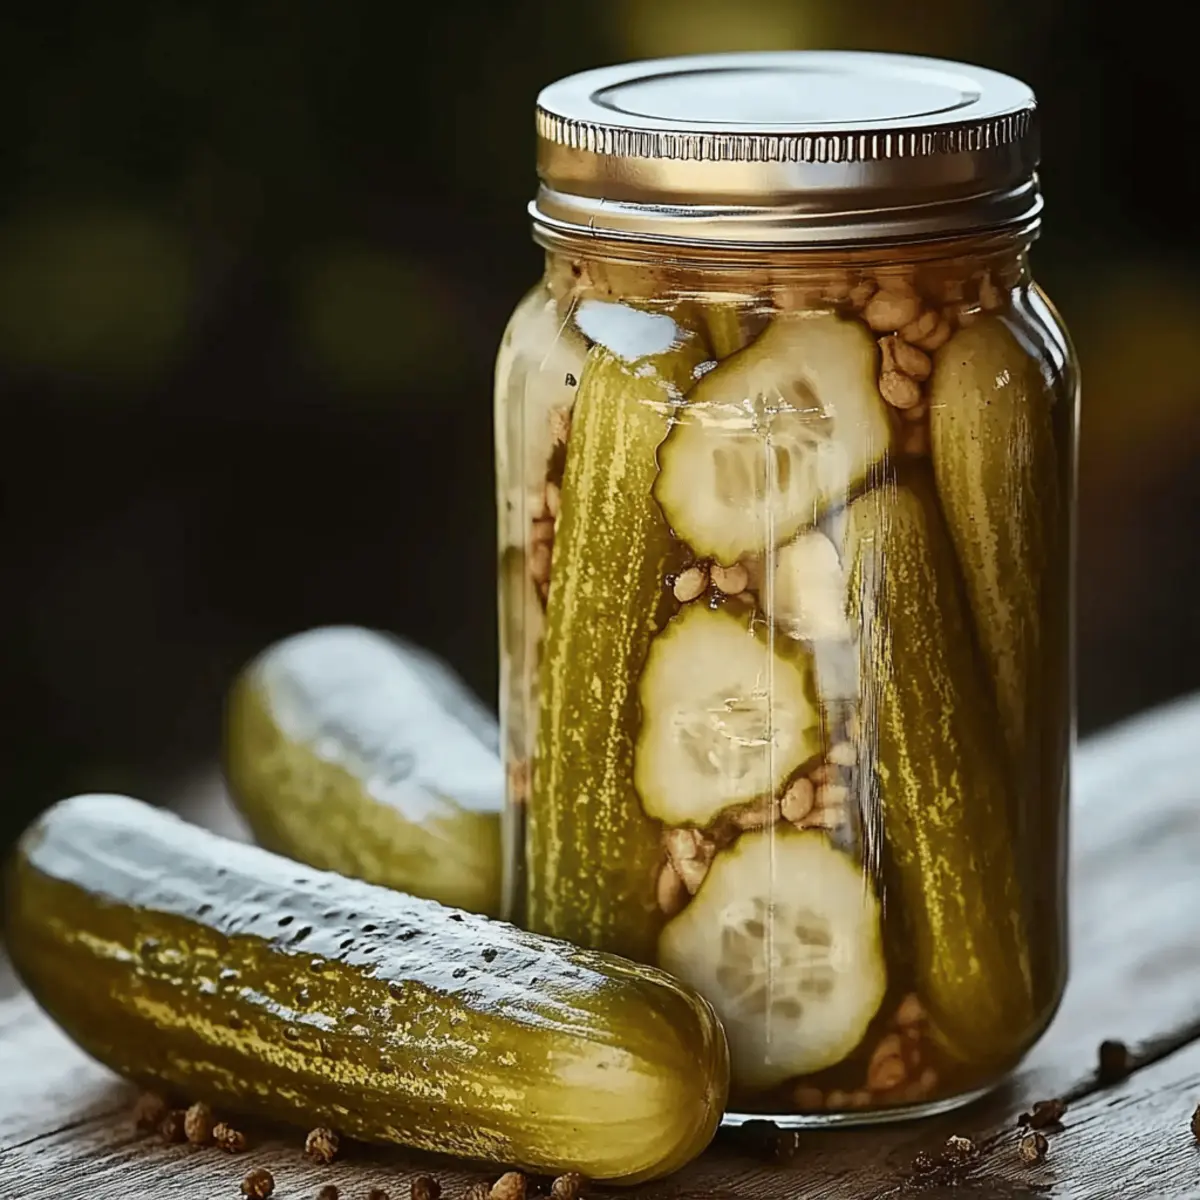
As I rummaged through my pantry, I stumbled upon a jar of crunchy, vibrant green pickles that transported me back to summer picnics and family barbecues. That moment sparked my inspiration for this Canned Dill Pickle recipe, a homemade delight that’s not only a fun project but a surefire way to elevate your meals all year round. With just a handful of ingredients, you can whip up a tangy, crunchy side that’s perfect for sandwiches or as a zesty snack. Plus, making your own pickles is a fantastic way to keep those fast food cravings at bay while embracing the joy of home cooking. Ready to learn how to create this delicious addition to your kitchen? Let’s dive in!
Why Make Your Own Canned Dill Pickles?
Flavor Explosion: Homemade canned dill pickles burst with fresh, tangy goodness that far surpasses store-bought versions.
Simplicity: This straightforward recipe requires minimal ingredients and is perfect even for beginner cooks looking to dip their toes into canning.
Versatile Treat: Whether as a crunchy snack, a zesty sandwich topper, or a delightful addition to a charcuterie board, these pickles fit into any meal or occasion.
Long-lasting Enjoyment: Once sealed, your pickles can last for up to one year, so you can savor that summer freshness even in the winter months.
Crowd-Pleasing Delight: Impress your friends and family with this delightful homemade treat – they’ll be coming back for seconds!
Canned Dill Pickle Ingredients
• Ready to create your own zesty crunch? Here’s what you’ll need:
For the Brine
- 4 cups water – This serves as the base for the brine, dissolving the seasonings beautifully.
- 1 cup white vinegar – Provides the tangy flavor that makes pickles irresistible.
- 2 tablespoons salt – Essential for flavor and preservation; don’t skip this!
- 2 tablespoons sugar – Balances the acidity of the vinegar; feel free to adjust for your taste!
For the Pickles
- 4 cucumbers (pickling variety) – Ideal for pickling due to their firm texture; avoid regular slicing cucumbers.
- 4 garlic cloves – Adds a savory depth that'll have your taste buds dancing!
- Fresh dill sprigs – Imparts that classic dill flavor, making these pickles a true delight.
Embrace the art of homemade canning with these ingredients and get ready to savor your very own Canned Dill Pickles!
Step‑by‑Step Instructions for Canned Dill Pickle
Step 1: Sterilize Your Jars
Start by sterilizing your jars and lids. Boil them in a large pot of water for about ten minutes to ensure they are free of any bacteria. This important step will help preserve your delicious canned dill pickles for months to come. As you wait, gather your cucumbers and other ingredients to speed up the process.
Step 2: Prepare the Cucumbers
Wash the cucumbers thoroughly under cold running water to remove any dirt or residue. Once clean, cut them into spears or slices based on your preference. Aim for uniform pieces to ensure even pickling. Set the cucumber cuts aside while you prepare the brine, letting their natural crunch shine through.
Step 3: Make the Brine
In a large pot, combine 4 cups of water, 1 cup of white vinegar, 2 tablespoons of salt, and 2 tablespoons of sugar. Heat this mixture over medium heat, stirring occasionally until the salt and sugar dissolve completely. Once it reaches a gentle boil, you'll see steam rising, signaling that it’s ready for the next step in making your canned dill pickles.
Step 4: Pack the Jars
Layer the cucumber spears along with 4 garlic cloves and fresh dill sprigs into each sterilized jar, leaving about half an inch of space at the top. As you pack the jars, take a moment to admire the vibrant colors and fragrant herbs. This delightful assembly will not only add flavor but also enhance the visual appeal of your homemade canned dill pickles.
Step 5: Fill with Brine
Carefully pour the hot brine over the packed cucumbers in each jar until they are fully submerged. Be cautious, as the brine is hot! Ensure that you leave a small gap at the top of each jar to allow for expansion during processing. Once filled, gently tap the jars to release any air bubbles that may be trapped inside.
Step 6: Seal and Process
Tightly secure the lids on each jar to seal in the flavors of your canned dill pickles. Then, process the jars in a boiling water bath for about ten minutes to ensure they are properly sealed. You’ll know they’re ready when the jars begin to soften in the heat and you hear the satisfying "pop" as they seal.
Step 7: Cool and Cure
After processing, carefully remove the jars from the boiling water and place them on a clean kitchen towel to cool completely. Once cool, transfer the jars to a cool, dark place where they can cure for at least one week. This crucial resting period enhances the flavor and texture of your delightful canned dill pickles, making them a must-try for any occasion!

Expert Tips for Canned Dill Pickles
Choose the Right Cucumbers: Use pickling cucumbers for optimal crunch and flavor—they're firmer than regular varieties and perfect for preserving.
Mind the Brine: Always ensure your brine is boiling before pouring it over cucumbers. This helps in proper sealing and flavor infusion in your canned dill pickles.
Space Matters: Don’t overpack your jars! Leave approximately half an inch of space at the top to allow for proper expansion during processing.
Cooling is Key: After processing, let your jars cool completely to seal properly. You should hear the satisfying 'pop' of sealed lids, a sign of success!
Patience Pays Off: Allowing your pickles to cure for at least one week—preferably two—will enhance their flavor significantly, making each bite a delight.
Make Ahead Options
These Canned Dill Pickles are perfect for busy home cooks looking to save time in the kitchen! You can wash and cut the cucumbers up to 24 hours in advance, storing them in an airtight container in the refrigerator to maintain their crunch. Additionally, the brine can be prepared ahead of time; simply mix the water, vinegar, salt, and sugar, then refrigerate it for up to 3 days until you're ready to pack the pickles. When it's time to finish the recipe, layer the cucumbers with garlic and dill in sterilized jars, pour the chilled brine over them, seal, and process as instructed. This way, your homemade canned dill pickles will be just as delicious with minimal effort on your busy weeknights!
How to Store and Freeze Canned Dill Pickle
Cool, Dark Place: Store unopened jars of canned dill pickles in a cool, dark place like a pantry, and they’ll last for up to one year.
Refrigerate After Opening: Once opened, be sure to refrigerate the jar and consume the pickles within two months for the best quality and fresh taste.
Check for Seals: Before storing, always check that the lids are sealed properly by pressing down in the center—if it pops back, the jar won’t stay sealed.
Flavor Enhancer: For the best flavor, allow the pickles to cure for at least one week before enjoying them; this extra wait time truly enhances their tangy goodness!
Canned Dill Pickle Variations
Feel free to explore these tasty variations that can liven up your canned dill pickles experience!
-
Spicy Kick: Add a few slices of fresh jalapeño or a teaspoon of red pepper flakes to the brine for a fiery flavor. This twist will give a bold kick that spice lovers will absolutely enjoy!
-
Herb-Infused: Swap fresh dill for thyme or oregano for a different herbal note. This subtle change can elevate your pickles with unique flavor profiles that dance on your palate.
-
Garlic Lovers: Increase the garlic cloves to six or eight for a robust garlic flavor. The result? A more aromatic pickle experience that will have garlic aficionados asking for your secret.
-
Sweet & Tangy: Add an extra tablespoon of sugar for a sweeter pickle. This sweet and tangy blend makes for a delightful contrast, perfect for those who crave a balanced taste!
-
Vegetable Medley: Include other veggies like carrots or cauliflower alongside the cucumbers for a colorful veggie medley. Each bite becomes a crunchy surprise of textures, adding excitement to your pickle jar!
-
Zesty Twist: Incorporate lemon slices into the jars for a zesty citrus infusion. The burst of citrus brightens the overall flavor, making your pickles feel like a refreshing summer day!
-
Smoky Flavor: Incorporate a teaspoon of smoked paprika to the brine for a hint of smokiness. This subtle shift creates a unique flavor profile reminiscent of summer barbecues!
-
Lower Sodium: Use kosher salt or sea salt in place of regular table salt for a less salty but equally tasty pickle. Enjoy guilt-free snacking while maintaining that delightful crunch!
Embark on your pickling journey with these creative twists, and let your taste buds explore new horizons! You might also want to check out our tips on How to Store and Freeze Canned Dill Pickles for perfectly preserved delights all year round.
What to Serve with Canned Dill Pickles?
Prepare to elevate your meals with these delightful pairings that enhance the zesty, crunchy joy of your homemade pickles!
-
Creamy Potato Salad: A perfect side that balances the tanginess of the pickles, making every bite harmonious and comforting.
-
Classic Cheeseburgers: Pile your canned dill pickles on a juicy burger for an irresistible crunch that amplifies the flavors of your favorite grilled meats.
-
Charcuterie Board: Serve alongside an array of cheeses, meats, and fresh bread for a visually stunning and flavorful spread that's perfect for gatherings.
-
Spicy BBQ Ribs: The bold flavors of BBQ ribs are wonderfully complemented by the sharp tang of your pickles, providing a refreshing contrast.
-
Tuna or Egg Salad: Mix chopped pickles into salads for a delightful crunch and a burst of flavor that amplifies the overall dish.
-
Homemade Sandwiches: Layer these pickles on sandwiches to bring a crisp, zesty crunch that enhances classic deli flavors.
-
Potato Chips: Pair your pickles with a bowl of salty chips for the ultimate snack combo—crunchy and addictive!
These pairings not only celebrate the freshness of your canned dill pickles but also invite a feast of flavors into your kitchen!
Canned Dill Pickle Recipe FAQs
How do I choose the best cucumbers for pickling?
Absolutely! For the ultimate crunch, always opt for pickling cucumbers. These varieties are shorter and have fewer seeds, which makes them firmer and less watery—perfect for that satisfying bite in your canned dill pickles.
How should I store my canned dill pickles?
To keep your homemade deliciousness intact, store unopened jars in a cool, dark place like a pantry or cupboard. They can last up to one year unopened. After you pop open a jar, transfer it to the refrigerator and enjoy the pickles within two months for the best taste.
Can I freeze canned dill pickles?
I wouldn’t recommend freezing them; pickles tend to lose their crunch and become mushy when frozen. Instead, focus on canning them properly so they maintain their delightful texture. If you have leftover brine, you could use it for other pickling projects or salad dressings!
What should I do if my jars don’t seal properly?
Don’t fret! If your jars don’t seal, you can simply reprocess them. Just remove the lid, check the rim for any chips or debris, then pour in fresh pickles and brine. Seal the lid tightly and process them again in boiling water for 10 minutes. If they still don’t seal, enjoy those pickles right away from the fridge.
Are homemade dill pickles safe for pets?
Very! While the cucumbers themselves are safe for most pets, be cautious with the garlic and salt in the brine—these can be harmful in large quantities. Always check with your veterinarian about your pet's specific dietary needs.
How long should I wait before I can eat my pickles?
For the best flavor experience, allow your canned dill pickles to cure for at least one week after processing. However, waiting for two weeks can enhance the taste even more! Patience is key to a truly delightful crunch!
Canned Dill Pickle: A Crunchy Classic for Your Pantry
Equipment
- large pot
- Jars with lids
- tongs
Ingredients
For the Brine
- 4 cups water This serves as the base for the brine, dissolving the seasonings beautifully.
- 1 cup white vinegar Provides the tangy flavor that makes pickles irresistible.
- 2 tablespoons salt Essential for flavor and preservation; don’t skip this!
- 2 tablespoons sugar Balances the acidity of the vinegar; feel free to adjust for your taste!
For the Pickles
- 4 pieces cucumbers (pickling variety) Ideal for pickling due to their firm texture.
- 4 cloves garlic Adds a savory depth that'll have your taste buds dancing!
- Fresh dill sprigs Imparts that classic dill flavor.
Instructions
Preparation Steps
- Sterilize your jars by boiling them in a large pot of water for about ten minutes.
- Wash the cucumbers thoroughly under cold running water and cut them into spears or slices.
- In a large pot, combine 4 cups of water, 1 cup of white vinegar, 2 tablespoons of salt, and 2 tablespoons of sugar. Heat this mixture over medium heat, stirring until dissolved.
- Layer the cucumber spears, 4 garlic cloves, and fresh dill sprigs into each sterilized jar.
- Carefully pour the hot brine over the packed cucumbers until fully submerged, leaving space at the top.
- Tightly secure the lids on each jar and process them in a boiling water bath for about ten minutes.
- After processing, cool the jars completely and store in a cool, dark place for at least one week.

Leave a Reply