
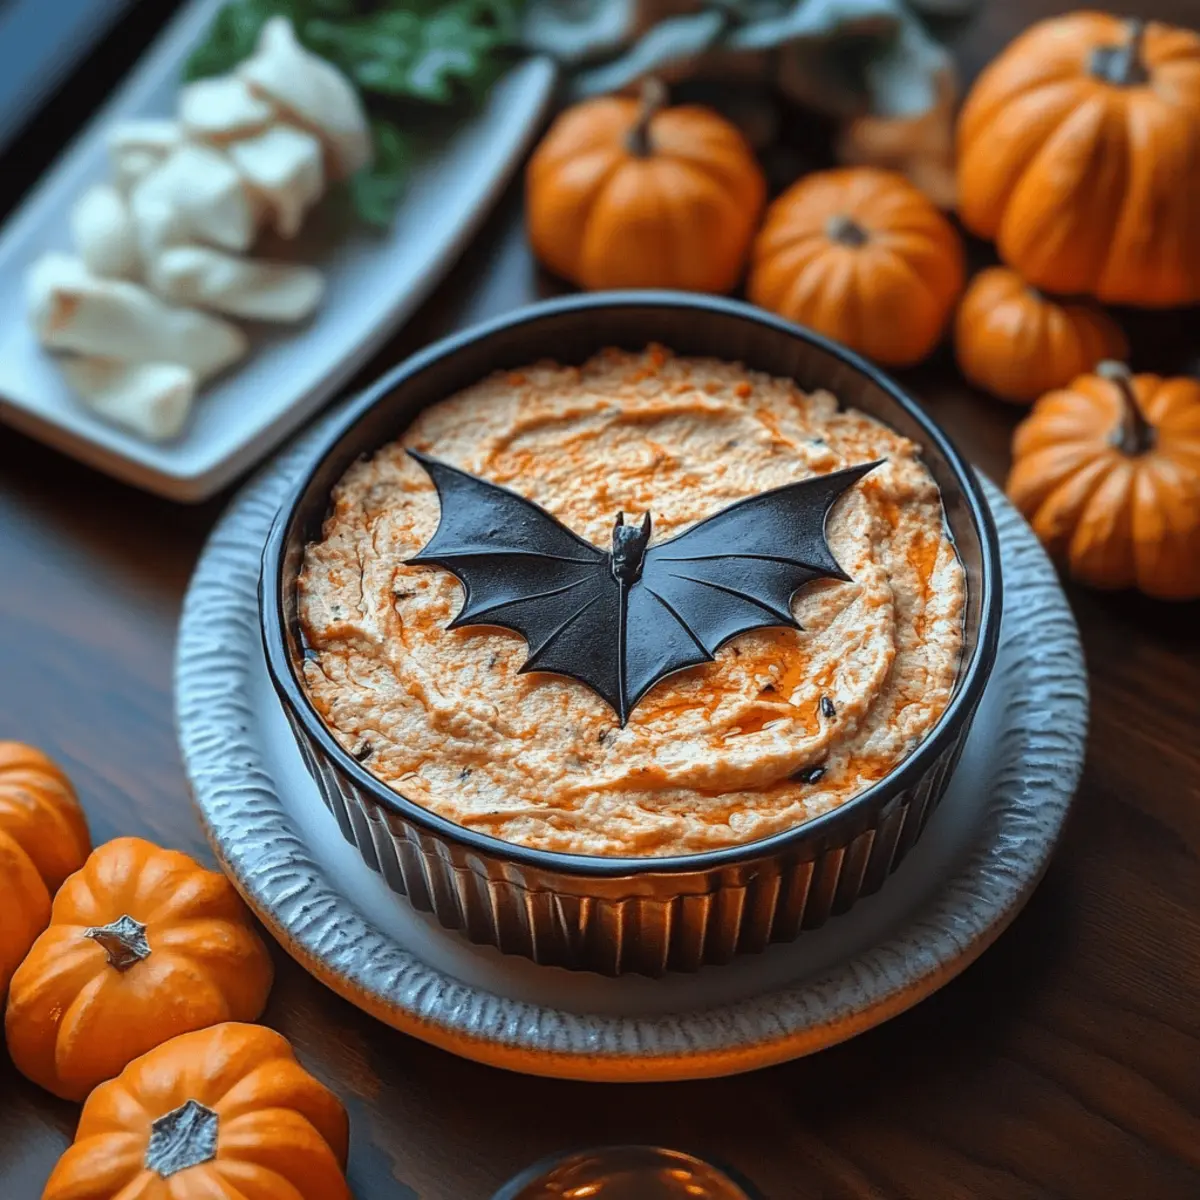
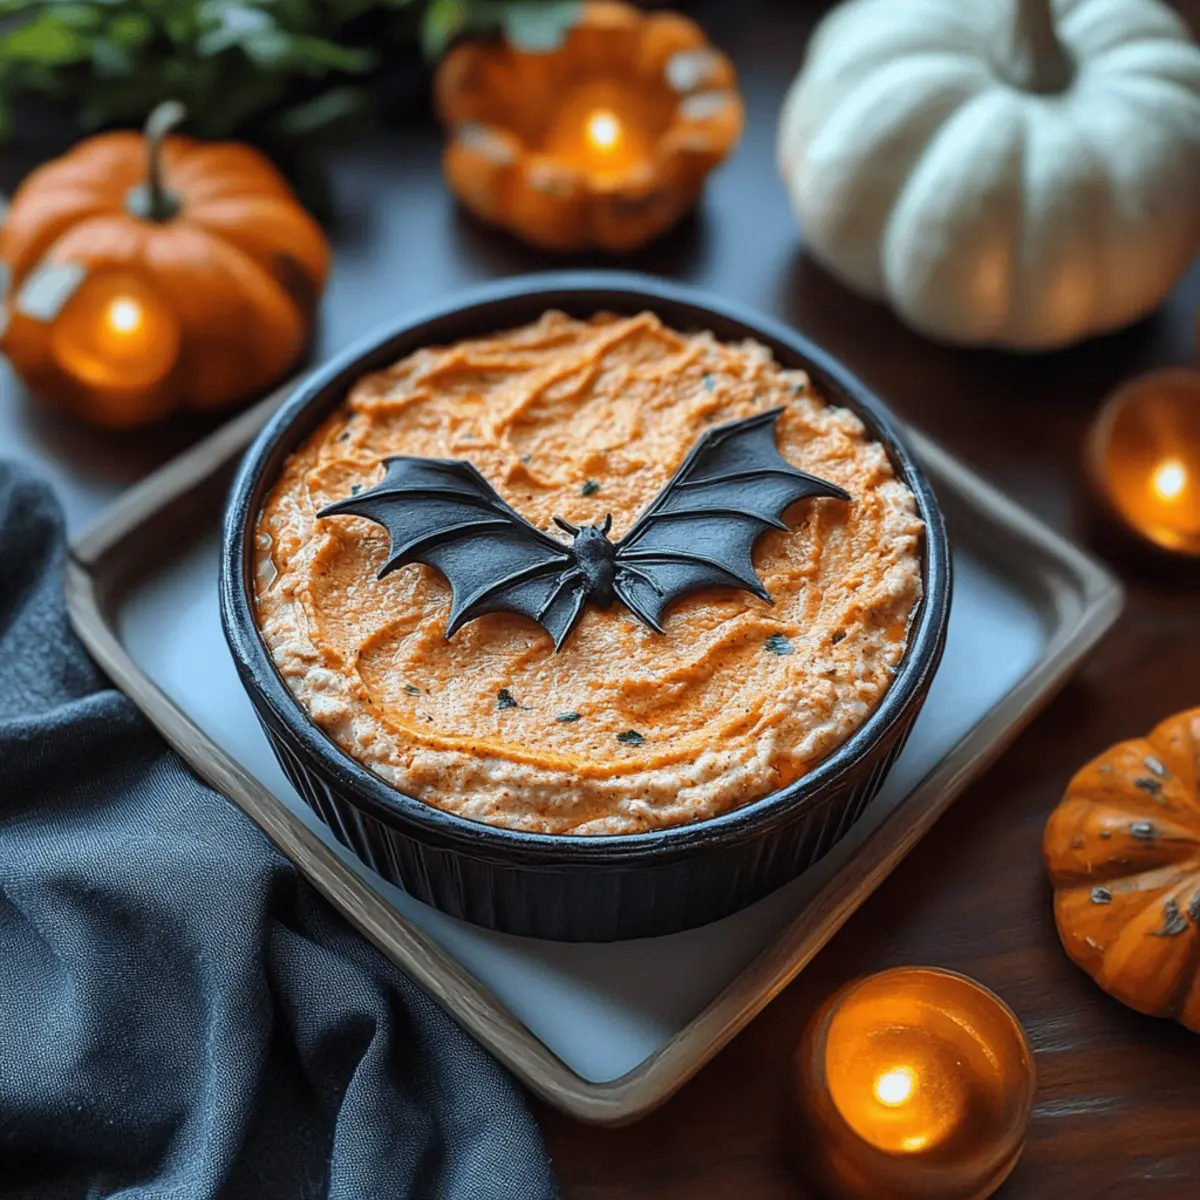
Like a kooky Halloween party gone deliciously right, this Buffalo Bat Nest Dip brings a playful twist to your snacking game. Perfect for gathering friends or family, the creamy blend of cream cheese, cheddar, buffalo sauce, and ranch dressing makes for a rich and flavorful dip that’s ready in no time. Not only does this recipe offer a festive and spooky flair with blue corn chips resembling bat wings, but it also ensures you’ll enjoy a crowd-pleaser without the hassle of complicated prep. With a little creativity and a touch of fun, your appetizer table will never look the same. Are you ready to dive into this frightfully delightful treat?

Why is Buffalo Dip a must-try?
Unforgettable Flavor: The creamy blend of cream cheese and cheddar cheese mixed with zesty buffalo sauce and cool ranch dressing creates a dip that's both bold and comforting.
Fun Presentation: Your guests will love the creative twist of blue corn chips arranged like bat wings, making this dip not only tasty but also visually appealing.
Quick and Easy: With just a few minutes of prep followed by a quick bake, you'll have a delicious appetizer ready without spending hours in the kitchen.
Crowd-Pleasing Delight: Perfect for parties or casual gatherings, this dip is bound to be the star of your snack table. It's also great paired with other favorites like Air Fryer Buffalo wings or Texas Trash Dip!
Versatile Dish: Serve it with chips, veggies, or even craft a meal around it—this dip can adapt to any occasion!
Buffalo Dip Ingredients
For the Dip Base
• Cream cheese – gives the dip a rich and creamy texture.
• Shredded cheddar cheese – adds a sharp, savory flavor that's a classic complement to buffalo sauce.
• Buffalo sauce – infuses the dip with a spicy kick that elevates your snacking experience.
• Ranch dressing – balances the heat of the buffalo sauce with its cool, herbaceous notes.
For the Presentation
• Blue corn chips – not only offer a crunchy texture but also create a whimsical look, mimicking bat wings for a fun Halloween theme!
• Plastic bat – a playful decoration that adds a festive touch to your serving presentation, making this Buffalo Dip a real showstopper at gatherings.
Step‑by‑Step Instructions for Buffalo Bat Nest Dip
Step 1: Preheat Your Oven
Begin by preheating your oven to 350°F (175°C). This initial step is crucial as it ensures your Buffalo Bat Nest Dip bakes evenly. Just think of that warm aroma that will soon fill your kitchen! Make sure your rack is positioned in the center of the oven to allow perfect heat circulation.
Step 2: Mix the Dip Ingredients
In a large mixing bowl, combine 8 oz of cream cheese, 1 cup of shredded cheddar cheese, ½ cup of buffalo sauce, and ½ cup of ranch dressing. Using a hand mixer or a sturdy spatula, blend the mixture until it’s creamy and well combined. You want a smooth consistency that reflects the irresistible richness of the dip.
Step 3: Spread the Mixture
Transfer the creamy mixture from your bowl into a baking dish and spread it evenly across the bottom. Use a spatula for smooth spreading, ensuring every corner is filled. This even layer is essential for consistent baking, as you'll want all parts of the Buffalo Bat Nest Dip to heat beautifully together.
Step 4: Arrange the Corn Chips
Take your blue corn chips and strategically arrange them around the edge of the dip, creating a whimsical wing-like appearance. This step is all about presentation, and the colorful contrast will certainly catch the eye. The playful design will set the perfect festive tone for your gathering!
Step 5: Bake the Dip
Slide the baking dish into your preheated oven and bake for 20-25 minutes. The goal is to have the dip bubble and become golden on top, creating that inviting, cheesy allure. Keep an eye on it, and once you see those delightful bubbles, you know it's time for the next step!
Step 6: Add the Finishing Touch
Once your Buffalo Bat Nest Dip is bubbling and heated through, carefully remove it from the oven. Let it sit for a minute for safety, then finish off the dish by placing a plastic bat on top for a fun decorative touch. This whimsical detail makes your dip not just tasty but also a true centerpiece for your festive table.
What to Serve with Buffalo Bat Nest Dip?
Elevate your gathering with a delightful array of accompaniments that enhance the bold flavors of this creamy, festive dip.
-
Veggie Platter: Fresh celery and carrot sticks provide a crunchy contrast that balances the dip's rich creaminess. They make for a refreshing, guilt-free add-on!
-
Mini Pretzel Bites: Soft, warm pretzels bring a delightful chewiness and saltiness. Pair them with a side of ranch dressing for another tasty dip option.
-
Spicy Chicken Wings: Hot and crispy wings tie in beautifully with the Buffalo flavor. The combination creates a perfect party platter but don’t forget the napkins!
-
Cheesy Garlic Bread: This decadent side features a crispy exterior and warm, gooey interior. Its buttery flavor complements the spicy Buffalo dip magnificently, leaving everyone wanting more.
-
Classic Salad: A light mixed greens salad with tangy vinaigrette enhances the meal’s freshness, creating a wholesome balance amid the richness of the dip.
-
Lemonade or Iced Tea: Refreshing drinks like homemade lemonade or iced tea offer a cooling contrast to the heat of the dip, keeping guests hydrated and coming back for more!
Expert Tips for the Best Buffalo Dip
• Ingredient Quality: Use fresh cream cheese and high-quality cheddar for the best flavor. Avoid low-fat options, as they can alter the creamy texture of your Buffalo Dip.
• Mix Thoroughly: Make sure to mix the cheese and sauces until completely smooth. Bumps can lead to uneven baking and less creamy bites, so take your time!
• Watch the Bake Time: Every oven is different! Start checking your dip at the 20-minute mark to ensure it doesn't overcook. You want it bubbly, but not burnt.
• Chip Selection: While blue corn chips are themed, choose any sturdy chip for dipping. Avoid flimsy chips that might break easily under the weight of the dip.
• Leftover Love: If you have leftover dip, store it in an airtight container in the fridge for up to three days. Reheat gently in the oven or microwave, and it’s ready to serve again!
How to Store and Freeze Buffalo Dip
Fridge: Store leftover Buffalo Dip in an airtight container for up to 3 days. Make sure it’s completely cooled before sealing to maintain its creamy texture.
Freezer: For long-term storage, freeze the dip in a freezer-safe container for up to 2 months. Remember to leave a little space at the top, as it will expand.
Reheating: Thaw overnight in the fridge before reheating. Warm it gently in the oven at 350°F (175°C) for about 15-20 minutes, until bubbly and heated through.
Serving: If you're serving at a gathering, feel free to make it ahead and store it! Just reheat before diving into this delicious Buffalo Dip again.
Make Ahead Options
Preparing your Buffalo Dip ahead of time is a fantastic way to save effort when hosting! You can mix the creamy dip mixture (cream cheese, cheddar, buffalo sauce, and ranch) and store it in an airtight container in the refrigerator for up to 3 days. To maintain quality, cover the mixture tightly to prevent it from drying out. On the day you plan to serve, simply spread the dip into your baking dish, arrange the blue corn chips around the edges, and bake it as directed for 20-25 minutes. This way, you’ll have a delectable and quick-to-prepare appetizer that’s just as delicious as if it were freshly made!
Buffalo Dip Variations & Substitutions
Feel free to play around with this Buffalo Dip recipe to tailor it to your taste buds and dietary preferences!
-
Dairy-Free: Substitute cream cheese and cheddar with dairy-free alternatives for a creamy and delicious dip that everyone can enjoy.
Try using cashew cream and nutritional yeast for added flavor, and you won't miss the dairy one bit! -
Spicy Kick: Amp up the heat by adding sliced jalapeños or a few dashes of hot sauce to the mix.
Your guests will appreciate the extra layer of excitement in each bite, making this dip a true flavor adventure! -
Herb Infusion: Mix in fresh herbs like chives or cilantro to brighten the dip.
The addition of these vibrant flavors brings freshness and a pop of color that elevates your appetizer experience. -
Flavor Twist: Swap ranch dressing for blue cheese dressing to enhance the traditional Buffalo flavor.
This substitution adds a tangy richness that pairs beautifully with the spiciness of the buffalo sauce. -
Texture Upgrade: Add cooked and chopped chicken or turkey for a more substantial dip.
This hearty twist makes your Buffalo Dip even more satisfying and turns it into a delicious meal option for gatherings! -
Veggie Version: For a lighter take, incorporate finely diced bell peppers or spinach into the mixture.
These vibrant veggies not only add nutrients but also enhance the texture and flavor of the dip. -
Nutty Option: Replace cheddar cheese with nutritional yeast and ground almonds for a nutty flavor and creamy consistency.
This unique twist brings a delightful richness without the cheese, making it a thoughtful option for vegan diets.
Feel free to get creative and enjoy making this dip your own! Pair it with crunchy veggies, tortilla chips, or even drizzle it over a salad for an extra kick of flavor. Happy dipping!
Buffalo Bat Nest Dip Recipe FAQs
What type of cheese should I use for the best Buffalo Dip?
Absolutely! I recommend sticking with fresh cream cheese and high-quality sharp cheddar cheese. Avoid low-fat options, as they can affect the creamy texture that makes this dip so delightful.
How long can I store leftover Buffalo Dip in the fridge?
For sure! You can store leftover Buffalo Dip in an airtight container in the fridge for up to 3 days. Just make sure it's completely cooled before sealing it up, so you maintain that rich and creamy texture for your next snacking session.
Can I freeze Buffalo Dip, and if so, how?
Yes, you can! To freeze Buffalo Dip, transfer it into a freezer-safe container, leaving a little space at the top to allow for expansion. It can be successfully frozen for up to 2 months. When you're ready to enjoy it again, thaw the dip overnight in the fridge. To reheat, warm it gently in the oven at 350°F (175°C) for about 15-20 minutes until bubbly and heated through.
What should I do if my dip is too thick?
If you find your Buffalo Dip is thicker than you'd like, worry not! Simply add a splash of milk or extra ranch dressing and mix it thoroughly. This little tweak can help achieve that creamy consistency that's just perfect for dipping!
Are there any dietary considerations I should know about?
Very! If you're preparing this dip for a gathering, keep in mind that ranch dressing and buffalo sauce can contain hidden allergens such as dairy or gluten. Always check labels if you're accommodating guests with specific allergies or dietary restrictions. Additionally, keep this dip away from pets, as the ingredients may not be safe for them to consume.
How can I make Buffalo Dip a bit milder?
If you're looking to tone down the heat, try reducing the amount of buffalo sauce and replacing it with an equal part of ranch dressing or sour cream. This way, you can still enjoy the great flavor but with a milder kick that’s accessible for everyone at your gathering.

Spicy Buffalo Dip That'll Wow Your Next Party Crowd
Equipment
- mixing bowl
- baking dish
- spatula
- Oven
- Hand mixer
Ingredients
For the Dip Base
- 8 oz cream cheese softened
- 1 cup shredded cheddar cheese sharp
- ½ cup buffalo sauce
- ½ cup ranch dressing
For the Presentation
- 1 bag blue corn chips for dipping
- 1 plastic bat for decoration
Instructions
Step‑by‑Step Instructions for Buffalo Bat Nest Dip
- Preheat your oven to 350°F (175°C).
- In a large mixing bowl, combine cream cheese, shredded cheddar cheese, buffalo sauce, and ranch dressing. Blend until creamy and well combined.
- Transfer the mixture into a baking dish and spread it evenly.
- Arrange blue corn chips around the edge of the dip to mimic bat wings.
- Bake in the preheated oven for 20-25 minutes until bubbly and golden.
- Remove from the oven and let it sit for a minute. Add a plastic bat on top for decoration.


Leave a Reply