
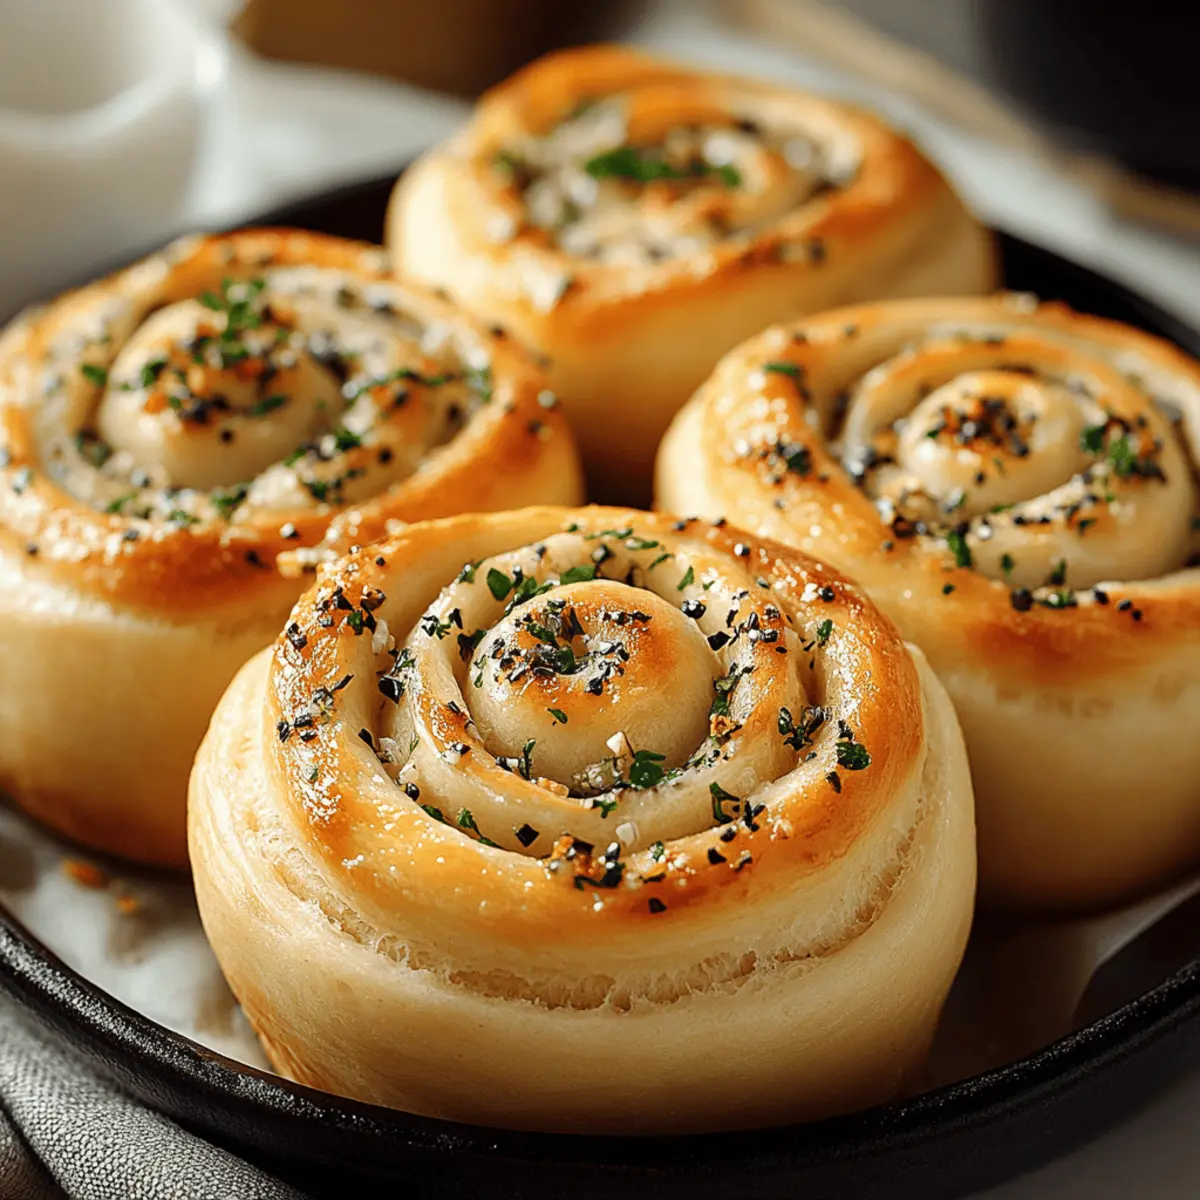
As I pulled the warm, fragrant rolls from the oven, I couldn't help but smile at the chaos of flour and dough scattered across my kitchen. These Garlic-Swirl Rolls are not just any bread – they embody the perfect blend of comfort and flavor, making them an irresistible addition to any meal or just as a snack on their own. With their quick prep time and delightful aroma, they promise to enchant everyone at the dinner table and spark joy even in the busiest of weeks. You'll adore how easily this recipe transforms simple ingredients into a loved family staple. Are you ready to find out how to create these mouthwatering rolls that will surely impress your friends and keep you away from fast food?
Why are Garlic-Swirl Rolls So Irresistible?
Flavor-packed with roasted garlic and buttery goodness, these rolls elevate any meal to a whole new level. Effortless preparation means you can whip them up without any complicated steps. Versatile serving options allow you to pair them with soups, salads, or even enjoy them solo with a drizzle of olive oil or marinara. Plus, they create a delightful aroma that beckons everyone to the dinner table. Looking for more ways to indulge in homemade bread? Check out my Bread Cinnamon Rolls that will also leave you craving seconds!
Garlic-Swirl Rolls Ingredients
• Discover what makes these rolls irresistible!
For the Dough
- All-purpose flour – a versatile base that provides the perfect structure for soft, fluffy rolls.
- Active dry yeast – this ingredient helps the dough rise beautifully while adding a subtle tang.
- Warm water – helps to activate the yeast; make sure it's not too hot or too cold.
- Sugar – a touch of sweetness to feed the yeast and enhance the dough's flavor.
- Salt – essential for enhancing the overall taste and controlling yeast activity.
- Unsalted butter – adds richness and tenderness to the dough; melted for easier incorporation.
- Egg – enriches the dough, giving it a lovely color and adding to the roll's texture.
For the Filling
- Roasted garlic – this key ingredient imparts a deep, savory flavor that will make your Garlic-Swirl Rolls unforgettable.
- Parsley – fresh herbs brighten the flavor profile and add a lovely pop of color to the filling.
- Grated cheese – like mozzarella or Parmesan, it melts beautifully, adding a gooey texture to each bite.
- Olive oil – lubricates the filling and enhances the taste, bringing a richness to every swirl.
For Serving (Optional)
- Extra olive oil – drizzle on warm rolls for added flavor and moisture.
- Chili flakes – sprinkle for a spicy kick that elevates every bite.
- Marinara sauce – perfect for dipping; adds a robust flavor that complements the rolls beautifully.
- Garlic butter – a luscious topping that enhances the garlic flavor, making the rolls even more delicious.
Step‑by‑Step Instructions for Garlic‑Swirl Rolls
Step 1: Prepare the Dough
Start by mixing warm water, sugar, and active dry yeast in a large bowl. Let it sit for about 5-10 minutes until frothy. Then, add melted unsalted butter, an egg, and salt. Gradually incorporate all-purpose flour, mixing until a soft dough forms. Knead on a floured surface for about 8-10 minutes until smooth and elastic. Place the dough in a greased bowl, cover with a cloth, and let it rise in a warm area for about 1 hour or until doubled in size.
Step 2: Prepare the Filling
While the dough rises, roast your garlic until golden and fragrant, then mash it into a paste. In a small bowl, mix the mashed garlic with olive oil, freshly chopped parsley, and your choice of grated cheese. Ensure the mixture is well-combined, as this will be the flavorful filling for your Garlic-Swirl Rolls. Set this aside for easy assembly once the dough has completed its rise.
Step 3: Shape the Rolls
Once the dough has doubled, punch it down gently to release the air. Roll the dough out into a rectangle on a floured surface, aiming for about ¼ inch thick. Evenly spread your garlic filling across the surface of the dough, ensuring every inch is coated. Carefully roll the dough into a log, tucking the filling inside, and slice it into equal pieces—about 1 to 1.5 inches thick for perfect swirls.
Step 4: Allow to Rise a Second Time
Place the cut rolls into a greased baking dish, leaving a small space between each for expansion. Cover the dish with a clean towel and let the rolls rise for another 30-40 minutes in a warm spot until they puff up and touch each other. This second rise is essential for achieving fluffy Garlic-Swirl Rolls, so be patient as the dough transforms.
Step 5: Bake the Rolls
Preheat your oven to 375°F (190°C). Once the rolls have risen, uncover them and bake for about 20-25 minutes, or until they turn a beautiful golden brown on top. You’ll know they’re ready when they smell heavenly and sound hollow when tapped on the bottom. Let them cool slightly before serving, savoring the delicious aroma wafting through your kitchen.
Garlic-Swirl Rolls: Creative Twists
Embrace your culinary spirit and let your imagination run wild by customizing these delicious rolls to suit your taste and pantry.
- Dairy-Free: Replace the butter with coconut oil and use a dairy-free cheese alternative for a plant-based version.
- Herb-Infused: Add a teaspoon of dried oregano or thyme to the dough for an extra layer of flavor in every swirl.
- Cheesy Delight: Mix in a blend of sharp Cheddar and cream cheese in your filling for a richer taste that will melt in your mouth.
- Spicy Kick: Sprinkle crushed red pepper flakes into the garlic filling for those who love a little heat in their rolls. You'll be amazed by the flavor explosion!
- Whole Wheat: Swap out half of the all-purpose flour for whole wheat flour for added nutrition and a nuttier taste.
- Savory Add-ins: Fold in finely chopped sun-dried tomatoes or olives into the filling for a Mediterranean twist that will transport your taste buds.
- Sweet Swirl: For a fun dessert variation, try a sweet filling of brown sugar, cinnamon, and butter instead of garlic, topped with a cream cheese glaze.
- Vegan Friendly: Use flaxseed meal mixed with water instead of the egg, and replace butter with avocado oil for a completely vegan treat.
These variations not only showcase the versatility of Garlic-Swirl Rolls but also provide delightful options for every palate. Whether you choose to keep it classic or explore bold flavors, these rolls will surely become a favorite at your table. If you’re in the mood for more deliciousness, don’t miss out on making homemade Brioche Rolls – they’re just as enchanting!
How to Store and Freeze Garlic-Swirl Rolls
Room Temperature: Keep the Garlic-Swirl Rolls in an airtight container for up to 2 days; ensure they cool completely before sealing to maintain softness.
Fridge: For longer freshness, store them in the fridge in an airtight container for up to 5 days; reheating in the oven will revive their delightful texture.
Freezer: If you're looking to save some for later, wrap individual rolls tightly in plastic wrap and place them in a freezer-safe bag for up to 3 months. Thaw overnight in the fridge, then reheat to enjoy!
Reheating: To warm up your rolls, pop them in a preheated oven at 350°F (175°C) for about 10 minutes, or until heated through, to enjoy that fresh-from-the-oven taste again.
What to Serve with Garlic-Swirl Rolls
Imagine sharing a cozy meal with loved ones, where fluffy garlic rolls add a comforting touch to the table.
-
Creamy Tomato Soup: The rich, tangy flavors of tomato soup marry perfectly with the savory garlic rolls, creating a warm and inviting experience. Dip and savor the combination—it’s pure bliss!
-
Caesar Salad: Crisp romaine and tangy dressing contrast nicely with the soft, buttery rolls, making for a delightful mix of textures on your plate. The addition of garlic rolls takes the classic salad to a new level.
-
Pasta Primavera: Light, colorful vegetables tossed with pasta pair well with the indulgent garlic flavors. The rolls help soak up any lingering sauce, ensuring none goes to waste.
-
Roasted Vegetables: A medley of seasoned roasted veggies offers a hearty complement, enhancing the overall meal with sweetness and crunch. The contrast between the warm rolls and vibrant veggies is simply irresistible.
-
Garlic Butter: For the ultimate indulgence, serve your rolls with a side of garlic butter. Spreading it on warm, fluffy roll gives a serious flavor boost—perfect for garlic lovers!
-
Marinara Sauce: This classic Italian sauce makes a wonderful dipping companion, amplifying the savory garlic in the rolls. It's a perfect way to elevate your eating experience.
-
Herb-Infused Olive Oil: A small dish of olive oil infused with herbs provides a light, aromatic dip. This pairing highlights the garlic and adds freshness, making every bite memorable.
-
White Wine: A chilled glass of Sauvignon Blanc or Pinot Grigio harmonizes with the flavors of the rolls. The crispness of the wine cuts through the richness, bringing balance to your meal.
-
Chocolate Chip Cookies: End your meal on a sweet note with a classic dessert. Their contrasting sweetness complements the savory rolls and adds a delightful finish to your dining experience.
Expert Tips for Garlic-Swirl Rolls
-
Yeast Activation: Ensure your warm water is around 110°F (43°C) to properly activate the yeast for fluffy Garlic-Swirl Rolls. Too hot or too cold can hinder the rising.
-
Kneading Technique: Knead until the dough is smooth and elastic; this helps develop gluten, ensuring your rolls have the right texture. Don't rush this step!
-
Second Rise Importance: Allowing the rolls to rise a second time is critical. This step enhances their fluffiness, so don’t skip it, even if you’re short on time.
-
Even Filling Distribution: Spread the garlic filling evenly to ensure every bite is flavor-packed. Uneven filling can leave some rolls bland and others overwhelmingly garlicky.
-
Bake to Perfection: Keep an eye on the rolls towards the end of baking. Ovens can vary, and you want that lovely golden brown without burning!
-
Serving While Warm: Serve your Garlic-Swirl Rolls warm for the best flavor and texture. They are delightful with olive oil, chili flakes, or marinara for dipping.
Make Ahead Options
These Garlic-Swirl Rolls are perfect for busy home cooks looking to save time without sacrificing flavor! You can prepare the dough and filling up to 24 hours in advance—just complete the first rise and then refrigerate the rolled dough, wrapped tightly in plastic wrap to maintain its freshness. Alternatively, shape the rolls and place them in the greased baking dish, covering them with a damp cloth before refrigerating overnight. When you're ready to bake, allow the rolls to come to room temperature for about 30 minutes and let them rise again until puffy. This way, you’ll have delicious, warm rolls with minimal effort on hectic weeknights!
Garlic-Swirl Rolls Recipe FAQs
What type of garlic should I use for the filling?
Absolutely! Roasted garlic is the star of the show in these Garlic-Swirl Rolls. It's sweeter and milder than raw garlic, offering a deep, savory flavor. If you can't find roasted garlic, you can easily roast your own by wrapping whole cloves in foil with a drizzle of olive oil and baking them at 400°F (204°C) for about 30-35 minutes until golden and soft.
How should I store my Garlic-Swirl Rolls?
Let your rolls cool completely, then store them in an airtight container at room temperature for up to 2 days. If you'd like them to last longer, keep them in the fridge for up to 5 days. When you're ready to enjoy, simply warm them in the oven to revive their delightful freshness!
Can I freeze Garlic-Swirl Rolls?
Absolutely! To freeze, wrap each Garlic-Swirl Roll tightly in plastic wrap, then place them in a freezer-safe bag. They can be stored for up to 3 months. To enjoy, thaw them overnight in the fridge and then warm them in the oven at 350°F (175°C) for about 10 minutes.
What should I do if my dough doesn’t rise?
Oh no, that can be frustrating! If your dough hasn’t risen, check that your yeast is fresh and that the water you used was warm enough (110°F or 43°C is ideal). Ensure your dough is in a warm, draft-free environment. If the yeast wasn’t activated properly, you might consider starting over. A little patience goes a long way!
Are Garlic-Swirl Rolls suitable for certain diets?
Yes, these rolls can be made accommodating! To make them dairy-free, substitute unsalted butter with a plant-based alternative and use a dairy-free cheese option. If you have gluten allergies, try using a gluten-free flour blend, but keep in mind the texture may vary. Always double-check the ingredients to ensure they fit your dietary needs!
How do I know if my rolls are baked perfectly?
Great question! You'll know your Garlic-Swirl Rolls are ready when they’re golden brown on top and sound hollow when tapped on the bottom. This usually takes about 20-25 minutes at 375°F (190°C). Trust your senses; the lovely aroma should also be a good indicator that they’re done!

Garlic-Swirl Rolls That Make Any Meal Irresistible
Equipment
- Large bowl
- Floured Surface
- Greased baking dish
- Oven
Ingredients
For the Dough
- 4 cups all-purpose flour
- 2 teaspoons active dry yeast
- 1.5 cups warm water 110°F (43°C)
- 2 tablespoons sugar
- 1 teaspoon salt
- 0.5 cups unsalted butter melted
- 1 large egg
For the Filling
- 1 cup roasted garlic mashed into a paste
- 0.5 cups parsley fresh, chopped
- 1 cup grated cheese mozzarella or Parmesan
- 3 tablespoons olive oil
For Serving (Optional)
- ... extra olive oil for drizzling
- 1 teaspoon chili flakes for a spicy kick
- 1 cup marinara sauce for dipping
- 0.5 cups garlic butter for topping
Instructions
Step-by-Step Instructions
- Mix warm water, sugar, and active dry yeast in a large bowl. Let sit for 5-10 minutes until frothy. Add melted butter, egg, and salt. Gradually incorporate flour, mixing until soft dough forms. Knead on a floured surface for 8-10 minutes until smooth. Let rise in a greased bowl for 1 hour until doubled.
- Roast garlic until golden and fragrant, then mash into a paste. Mix with olive oil, parsley, and grated cheese in a small bowl to create the filling.
- Once dough has doubled, punch down gently. Roll out into a rectangle about ¼ inch thick. Spread garlic filling evenly, then roll into a log and slice into pieces about 1-1.5 inches thick.
- Place cut rolls in a greased baking dish with space between each. Cover with a towel and let rise for another 30-40 minutes until puffed up.
- Preheat oven to 375°F (190°C). Bake rolls for 20-25 minutes until golden brown. Let cool slightly before serving.


Leave a Reply