
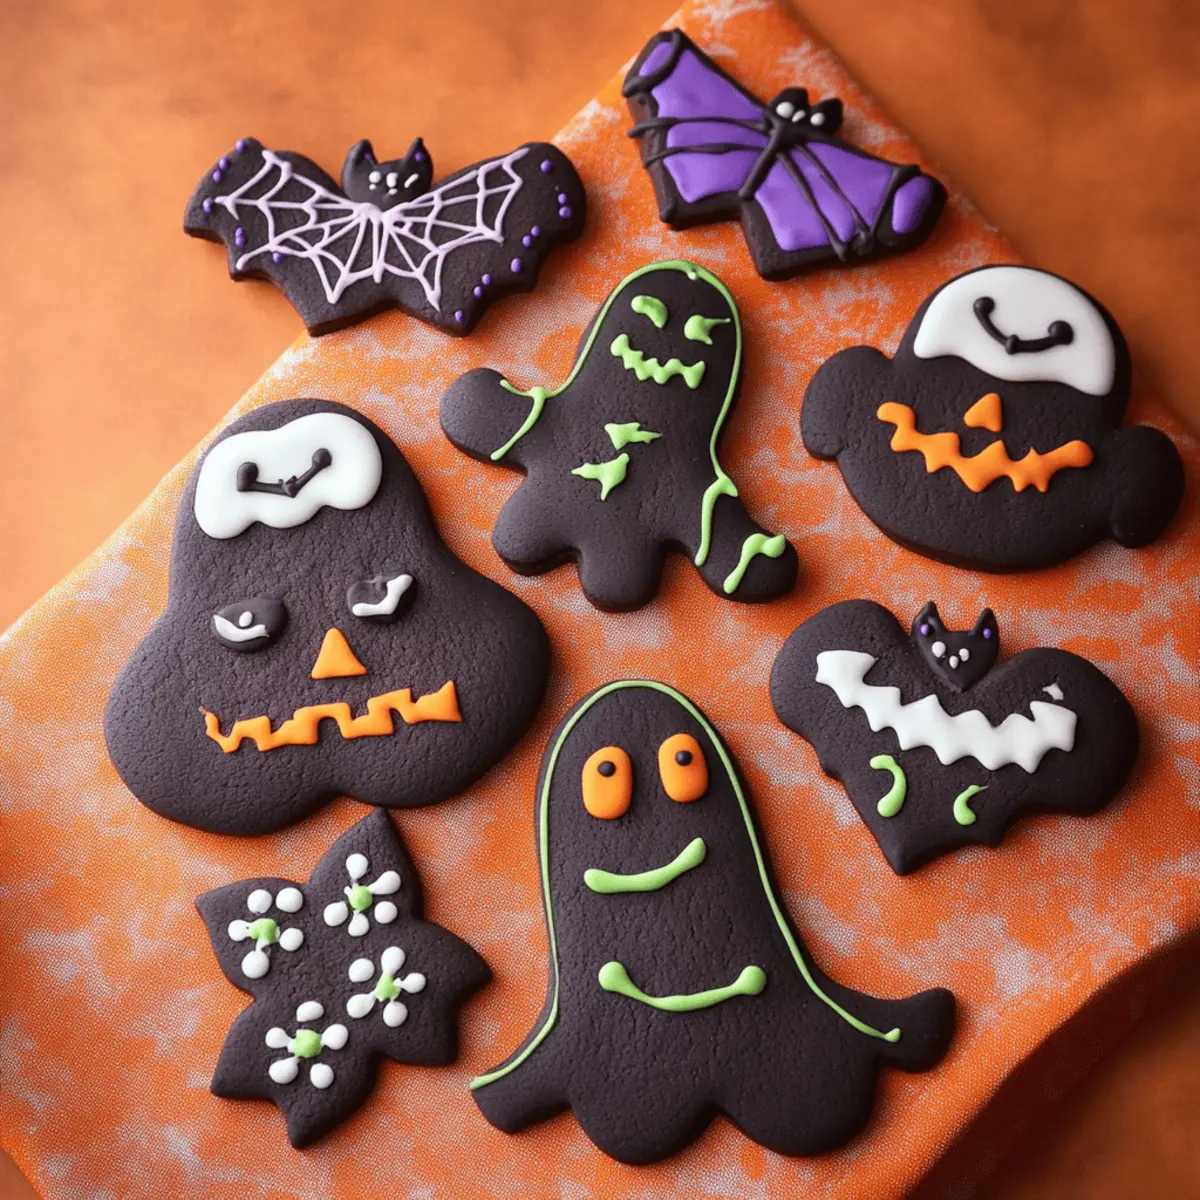
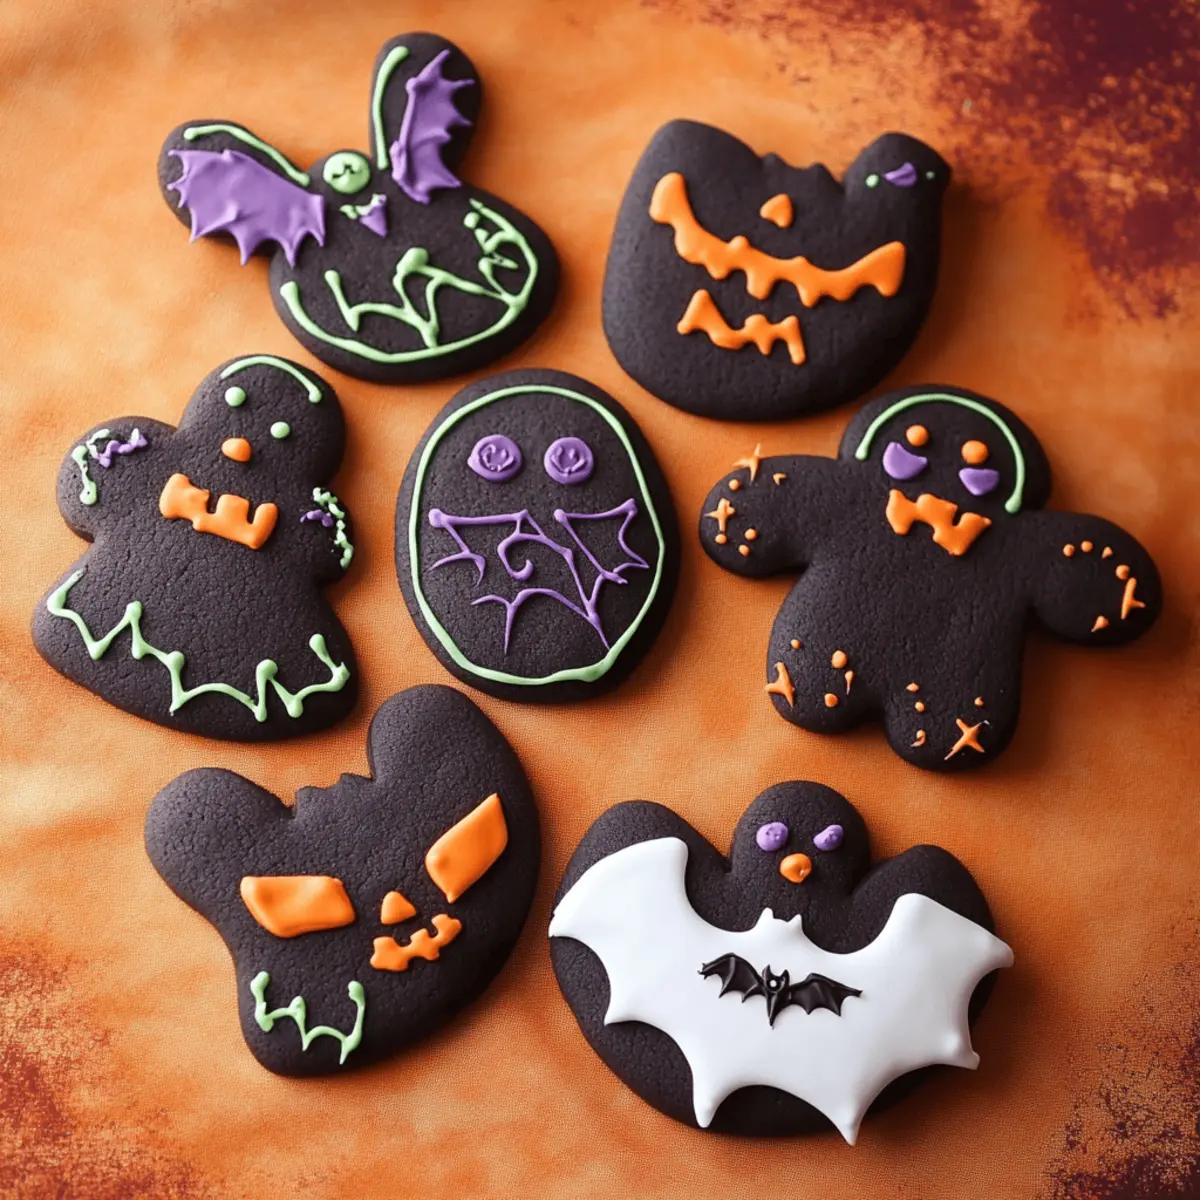
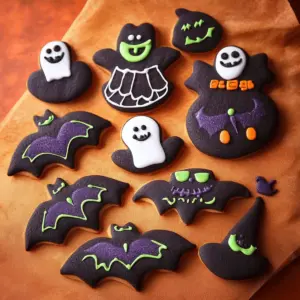
As I opened the door to the crisp autumn air, the scent of warm spices and sweet cocoa from my kitchen danced around me, promising a cozy afternoon ahead. There’s something truly magical about Halloween, especially when it involves baking festive treats like these delightful Halloween Decorated Cookies. This recipe not only brings out the inner artist in you with its fun decorating potential, but it’s also incredibly convenient for those who want to whip up something special without spending all day in the kitchen. Imagine your loved ones gathering, enchanted by not just the spooky designs but also the rich chocolatey flavor that these cookies deliver. Ready to discover the perfect way to celebrate the season? Let’s dive into the joyous world of cookie decorating!

Why Are These Cookies a Must-Bake?
Festive Fun: These Halloween Decorated Cookies aren't just treats; they’re a way to unleash your creativity and bring some spooky charm to your gatherings.
Rich Chocolate Flavor: The blend of black and Dutch cocoa powders provides a deep, indulgent taste that will have everyone asking for seconds.
Easy to Customize: Whether you prefer creepy or cute designs, these cookies can be decorated to suit any Halloween theme, making them perfect for parties!
Kid-Friendly Activity: Involve the little ones in the decorating process for a fun family bonding experience that they’ll remember for years to come.
Looking for more delightful cookie inspiration? Check out our scrumptious Pistachio Cream Cookies or the delicious Butter Toffee Cookies to keep the baking spirit alive!
Halloween Decorated Cookies Ingredients
• Get ready to bake some spooky delights!
For the Cookie Dough
- Butter – 1 cup, softened; this is the base for a rich and creamy cookie.
- Powdered Sugar – 3 cups; helps achieve that sweet, melt-in-your-mouth texture.
- Egg – 1 large; binds the ingredients together for perfect dough consistency.
- All-Purpose Flour – 3 ½ cups; provides structure to your Halloween decorated cookies.
- Black Cocoa Powder – ½ cup; gives a dark color and delightful chocolate flavor.
- Dutch Process Cocoa Powder – ½ cup; adds richness and balances the sweetness.
- Salt – ½ teaspoon; enhances flavors and balances the sweetness of the cookies.
Happy baking, and may your kitchen be filled with spooky sweetness!
Step‑by‑Step Instructions for Halloween Decorated Cookies
Step 1: Cream the Butter
In the bowl of a stand mixer fitted with the paddle attachment, cream 1 cup of softened butter on medium speed for about 2-3 minutes until it becomes creamy and light. The texture should be smooth and pale in color. This base is crucial for your Halloween Decorated Cookies to have that rich flavor and soft texture.
Step 2: Add the Sugar
Gradually add 3 cups of powdered sugar to the creamed butter, beating on low speed until fully incorporated. Once combined, increase the speed to medium and beat for an additional 2-3 minutes until the mixture is fluffy and airy, creating the perfect sweet foundation for your cookies.
Step 3: Incorporate the Egg
Add 1 large egg to the mixture, mixing well on medium speed until it is fully combined. The dough should be smooth, with a slightly glossy appearance at this stage. This step is essential to bind all the ingredients together, ensuring your Halloween Decorated Cookies hold their shape when baked.
Step 4: Mix the Dry Ingredients
In a separate bowl, sift together 3 ½ cups all-purpose flour, ½ cup black cocoa powder, ½ cup Dutch process cocoa powder, and ½ teaspoon salt. Whisk these ingredients until evenly combined. This ensures that the flavors are well distributed and that the dry mixture blends smoothly with the wet ingredients, leading to a perfect cookie dough.
Step 5: Combine Wet and Dry Mixtures
Gradually add the sifted dry mixture to the butter mixture on low speed, mixing until just incorporated. The dough will be slightly crumbly but should come together when pressed. Avoid overmixing, as this could lead to tough cookies instead of the soft, chewy texture you desire for your Halloween Decorated Cookies.
Step 6: Shape the Dough
Turn the dough out onto a clean surface and use your hands to bring it together into a ball. Knead lightly until smooth, then flatten the dough into a 1-inch thick disc. This shape will help it chill evenly and is essential for easy rolling later on.
Step 7: Chill the Dough
Wrap the formed disc tightly in plastic wrap and chill it in the refrigerator for at least 30-45 minutes or up to 2 days. Chilling helps firm up the dough, making it easier to roll out and cut without losing its shape during baking, ensuring your Halloween Decorated Cookies come out beautifully.
Step 8: Roll the Dough
Once chilled, roll the dough between two sheets of parchment paper to a thickness of about 4 mm. If the dough has been in the refrigerator for over 45 minutes, let it sit at room temperature for 10 minutes before rolling. This step ensures a uniform thickness and prevents cracking, allowing your cookies to bake evenly.
Step 9: Cut Out Cookies
Use your favorite cookie cutters to cut out shapes from the rolled dough. Place the cut cookies on a lined baking tray, spacing them about an inch apart. The fun shapes will set the stage for the delightful Halloween Decorated Cookies that will be the highlight of your festivities!
Step 10: Chill Cut Cookies
Place the baking tray with the cut cookies in the refrigerator to chill for 1 hour or overnight. This step is crucial as it helps the cookies maintain their shape while baking, preventing them from spreading too much in the oven, and ensuring your spooky designs stay intact.
Step 11: Preheat the Oven
While your cookies chill, preheat your oven to 160°C (320°F) with the fan on. Preheating ensures an even baking temperature, which is essential for achieving the perfect texture in your Halloween Decorated Cookies as they bake.
Step 12: Bake the Cookies
Bake the chilled cookies in the preheated oven for about 10 minutes. They will look soft when you remove them, but they will firm up as they cool. Be careful not to overbake, as this will affect the final texture and might lead to dry cookies.
Step 13: Cool the Cookies
Once baked, allow the cookies to cool on the baking sheets for 5 minutes. After that, carefully transfer them to a cooling rack to cool completely. This cooling step is vital before decorating, as warm cookies can cause frosting to melt, ruining your Halloween Decorated Cookies' spooky appearance.
Step 14: Decorate the Cookies
Once your cookies are completely cool, it’s time to unleash your creativity and decorate them! Gather your favorite icing and candies to create fun and festive designs that celebrate Halloween. From spooky ghosts to cheerful pumpkins, the decorating possibilities are endless!
Halloween Decorated Cookies Variations
Feel free to let your imagination run wild and customize these cookies to suit your taste and dietary preferences!
-
Gluten-Free: Substitute all-purpose flour with a gluten-free blend for deliciously inclusive cookies everyone can enjoy. Just be sure to add a bit of xanthan gum if your blend doesn't contain it, for the right texture that holds up to decorating!
-
Vegan Twist: Replace the egg with a flaxseed meal (1 tablespoon flaxseed meal mixed with 2.5 tablespoons water). This rich alternative keeps your cookies moist while making them vegan-friendly.
-
Minty Surprise: Add a teaspoon of peppermint extract to the dough for a refreshing minty flavor that perfectly complements the cocoa. It’s like a crisp autumn breeze with every bite!
-
Spicy Kick: Mix in a pinch of cayenne pepper or a dash of cinnamon to the dry ingredients for a warm spice that contrasts thrillingly with the sweetness of the cookies. Your taste buds will appreciate this adventurous twist!
-
Nutty Crunch: Fold in ½ cup of finely chopped walnuts or pecans to add an extra crunch and a delightful nutty flavor. This will give your Halloween Decorated Cookies an exciting texture that everyone will love!
-
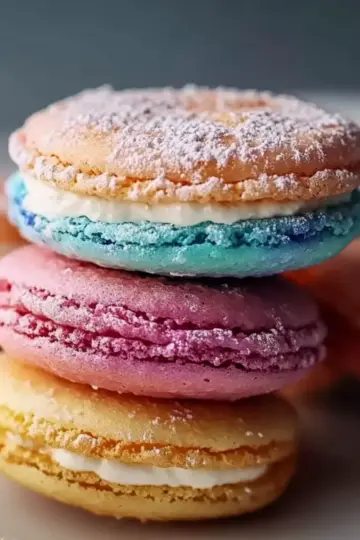
Colorful Icing: Experiment with colored icing to create vibrant designs. Use food coloring to turn your icing into shades of green, orange, or purple for that striking Halloween look!
For more creative baking ideas, be sure to check out our delightful Matcha Crinkle Cookies or the tempting Salted Chocolate Cookies to add some variety to your cookie adventures. Happy baking!
How to Store and Freeze Halloween Decorated Cookies
Room Temperature: Keep your Halloween Decorated Cookies in an airtight container at room temperature for up to 5 days. This preserves their soft texture and delicious flavors.
Fridge: For longer freshness, store cookies in the refrigerator in a sealed container for up to 1 week. Be sure to separate layers with parchment paper to prevent sticking.
Freezer: Freeze undecorated cookies in a single layer on a baking sheet before transferring to a zip-lock bag. They can last up to 3 months, allowing for festive baking anytime!
Reheating: To refresh cookies, gently warm them in the microwave for 5-10 seconds or in the oven at low heat for a few minutes before decorating or enjoying.
What to Serve With Halloween Decorated Cookies
Imagine a delightful gathering of friends and family, where the air is filled with laughter and the tantalizing scent of chocolate treats ready to be savored.
-
Warm Spiced Cider: Perfect for a chilly evening, this aromatic drink complements the cookies' rich chocolate flavor with hints of cinnamon and cloves.
-
Pumpkin Pie: A classic fall favorite, its creamy texture and warm spices create a luscious contrast to the cookies' crunchy decoration and chocolate notes.
-
Caramel Sauce: Drizzling this smooth, sweet sauce over your cookies adds an indulgent touch, elevating each bite to a new level of decadence.
-
Gingersnap Cookies: The spicy crunch of gingersnap cookies offers a delightful textural contrast, making it a fun treat to nibble alongside your decorative creations.
-
Halloween Fruit Salad: A vibrant mix of seasonal fruits, like oranges, grapes, and berries, refreshes the palate while adding a pop of color—and it’s perfectly spooky!
-
Dark Roast Coffee: Rich and bold, a strong cup of coffee balances the sweetness of the cookies beautifully, making for a cozy after-dinner treat.
-
Chocolate Milkshake: Indulging in a creamy milkshake will satisfy chocolate cravings while keeping the party atmosphere fun and playful!
Consider these delicious suggestions as you prepare for a Halloween gathering featuring your enchanting Halloween Decorated Cookies!
Make Ahead Options
These Halloween Decorated Cookies are perfect for meal prep, allowing busy home cooks to enjoy festive baking without the last-minute rush! You can prepare the cookie dough up to 3 days in advance; just wrap it tightly in plastic wrap and refrigerate until you're ready to roll it out. Cut cookies can also be chilled in the refrigerator for up to 24 hours before baking, ensuring they maintain their spooky shapes. When you’re ready to finish, simply preheat your oven and bake the chilled cookies for 10 minutes. With these make-ahead tips, your Halloween Decorated Cookies will be just as delicious and beautifully formed, saving you time and stress on the big day!
Tips for the Best Halloween Decorated Cookies
Chill the Dough: Properly chilling the dough not only makes it easier to handle but also prevents the cookies from spreading too much while baking, ensuring your Halloween Decorated Cookies hold their shape.
Avoid Overmixing: When combining the wet and dry ingredients, mix just until incorporated. Overmixing can lead to tough cookies, so keep it gentle for a tender bite.
Use Quality Cocoa: For the best chocolate flavor in your Halloween Decorated Cookies, use high-quality cocoa powders. This will enhance the deep taste and richness of your cookies.
Don’t Skip the Cool: Allow the cookies to cool fully on racks before decorating. This prevents melted icing and keeps your spooky designs intact.
Experiment with Decorations: Get creative! Use colorful icing and fun candies to bring your Halloween Decorated Cookies to life—don't be afraid to blend styles from spooky to sweet!
Halloween Decorated Cookies Recipe FAQs
What is the best way to select the right cocoa powder for my cookies?
Absolutely! For the rich flavor and color you want in your Halloween Decorated Cookies, go for high-quality black cocoa powder and Dutch process cocoa powder. Look for brands that have a deep, dark color and aroma. Both should have no added sugar, providing that perfect balance of richness to your cookies.
How should I store my Halloween Decorated Cookies?
You can store your Halloween Decorated Cookies in an airtight container at room temperature for up to 5 days. If you’d like them to keep a little longer, refrigerating them in a sealed container will maintain freshness for up to a week. Remember to separate layers with parchment paper to prevent them from sticking together!
Can I freeze my Halloween Decorated Cookies, and if so, how?
Yes, you certainly can! To freeze cookies, chill them completely, then place them in a single layer on a baking sheet. Freeze for 1-2 hours until solid, then transfer to a zip-lock bag or an airtight container. They’ll stay fresh for up to 3 months! Just thaw them at room temperature when you're ready to enjoy or decorate.
What should I do if my cookie dough is too crumbly?
If you find your Halloween Decorated Cookies dough is crumbly, don’t worry! Simply add a teaspoon of milk or water at a time while mixing until the dough comes together. It's crucial to handle it gently, so avoid overworking the dough, which can cause tough cookies.
Are these cookies suitable for anyone with dietary restrictions?
While this recipe contains butter and eggs, you can make it dairy-free by using a plant-based butter substitute. For egg-free cookies, consider using a flaxseed “egg” (1 tablespoon ground flaxseed mixed with 2.5 tablespoons of water) for every egg. Make sure to check the cocoa powders for potential allergens if you’re catering to specific dietary needs.
Spooktacular Halloween Decorated Cookies to Delight Your Guests
Equipment
- stand mixer
- baking sheet
- parchment paper
- cookie cutters
Ingredients
For the Cookie Dough
- 1 cup butter, softened base for a rich and creamy cookie
- 3 cups powdered sugar achieves sweet, melt-in-your-mouth texture
- 1 large egg binds the ingredients together
- 3.5 cups all-purpose flour provides structure to cookies
- 0.5 cup black cocoa powder gives dark color and delightful flavor
- 0.5 cup Dutch process cocoa powder adds richness
- 0.5 teaspoon salt enhances flavors
Instructions
Step-by-Step Instructions
- Cream the butter on medium speed until creamy and light.
- Gradually add powdered sugar to the creamed butter, beating until fluffy.
- Incorporate the egg, mixing until fully combined.
- Sift together flour, black cocoa, Dutch cocoa, and salt.
- Combine wet and dry mixtures, mixing until just incorporated.
- Shape the dough into a ball and flatten into a disc.
- Chill the dough in plastic wrap for 30-45 minutes.
- Roll out the dough to 4 mm thickness between parchment paper.
- Cut out cookies with cookie cutters and place them on a baking tray.
- Chill cut cookies for 1 hour or overnight.
- Preheat the oven to 160°C (320°F) with the fan on.
- Bake cookies for about 10 minutes.
- Cool the cookies on sheets for 5 minutes, then transfer to a cooling rack.
- Once cooled, decorate the cookies with icing and candies.

Leave a Reply