
At our recent Halloween gathering, I overheard a friend exclaim, “Where did you find these delightfully eerie cookies?” As laughter filled the air, I couldn’t help but smile, knowing I had conjured up a batch of Creepy Witch Finger Cookies that stole the show. These spine-tingling treats not only look frighteningly fun but are also surprisingly easy to whip up, making them a perfect choice for a festive get-together or a delightful baking session with the kids. Plus, with the addition of colorful, edible ingredients, every cookie becomes a unique masterpiece. Imagine the excitement on everyone’s faces when they realize they can munch on something both creepy and delicious! Are you ready to bake some sinister sweets that will have your guests howling for more?
Why Are These Cookies So Unique?
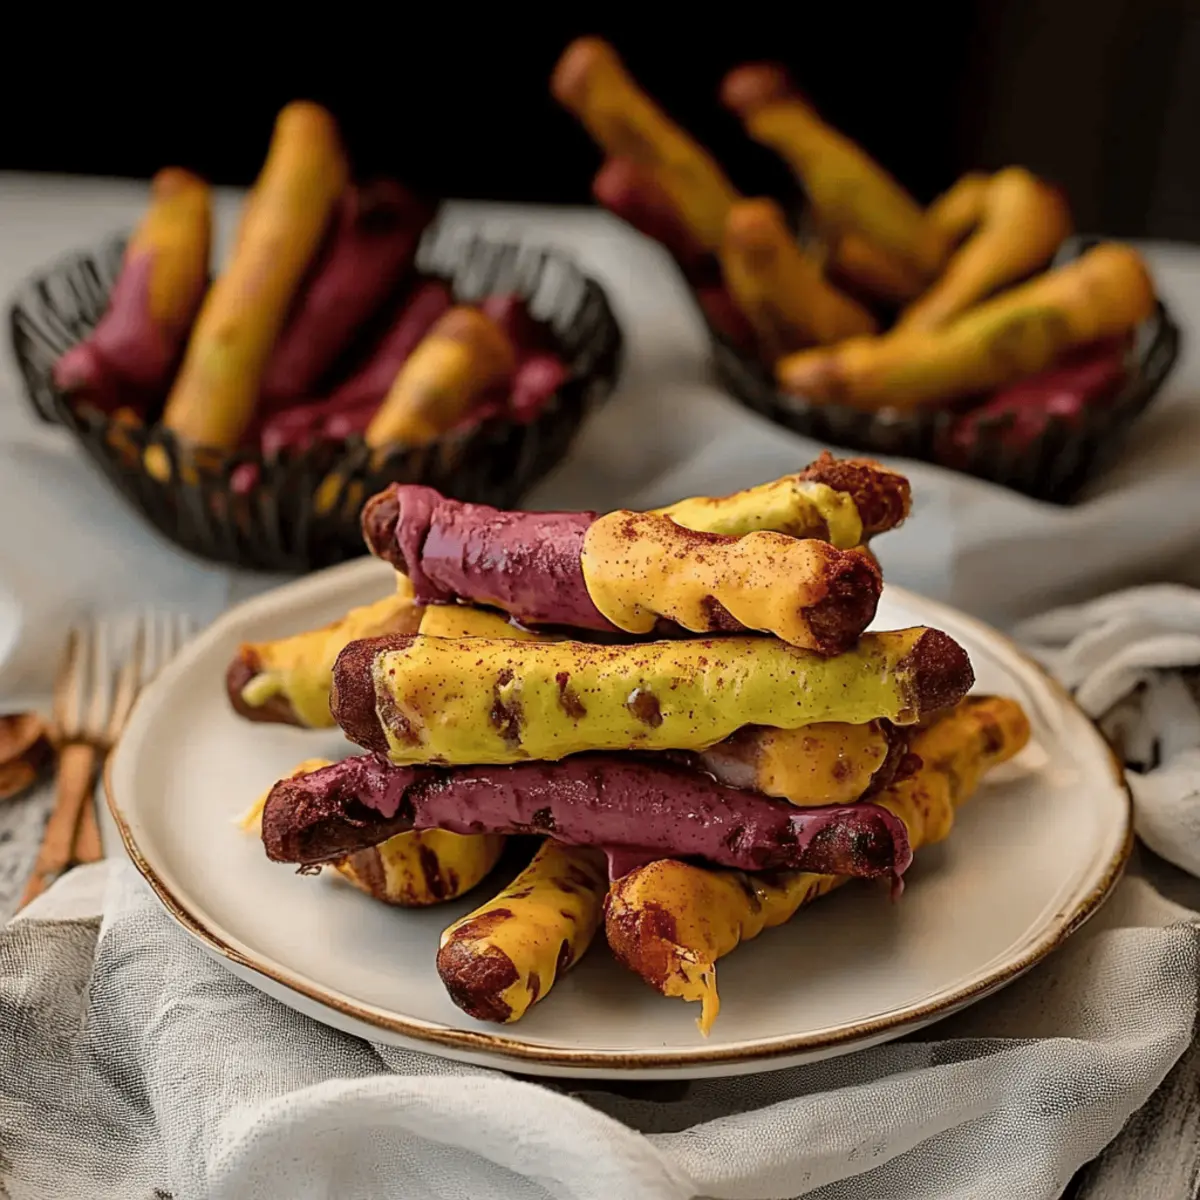
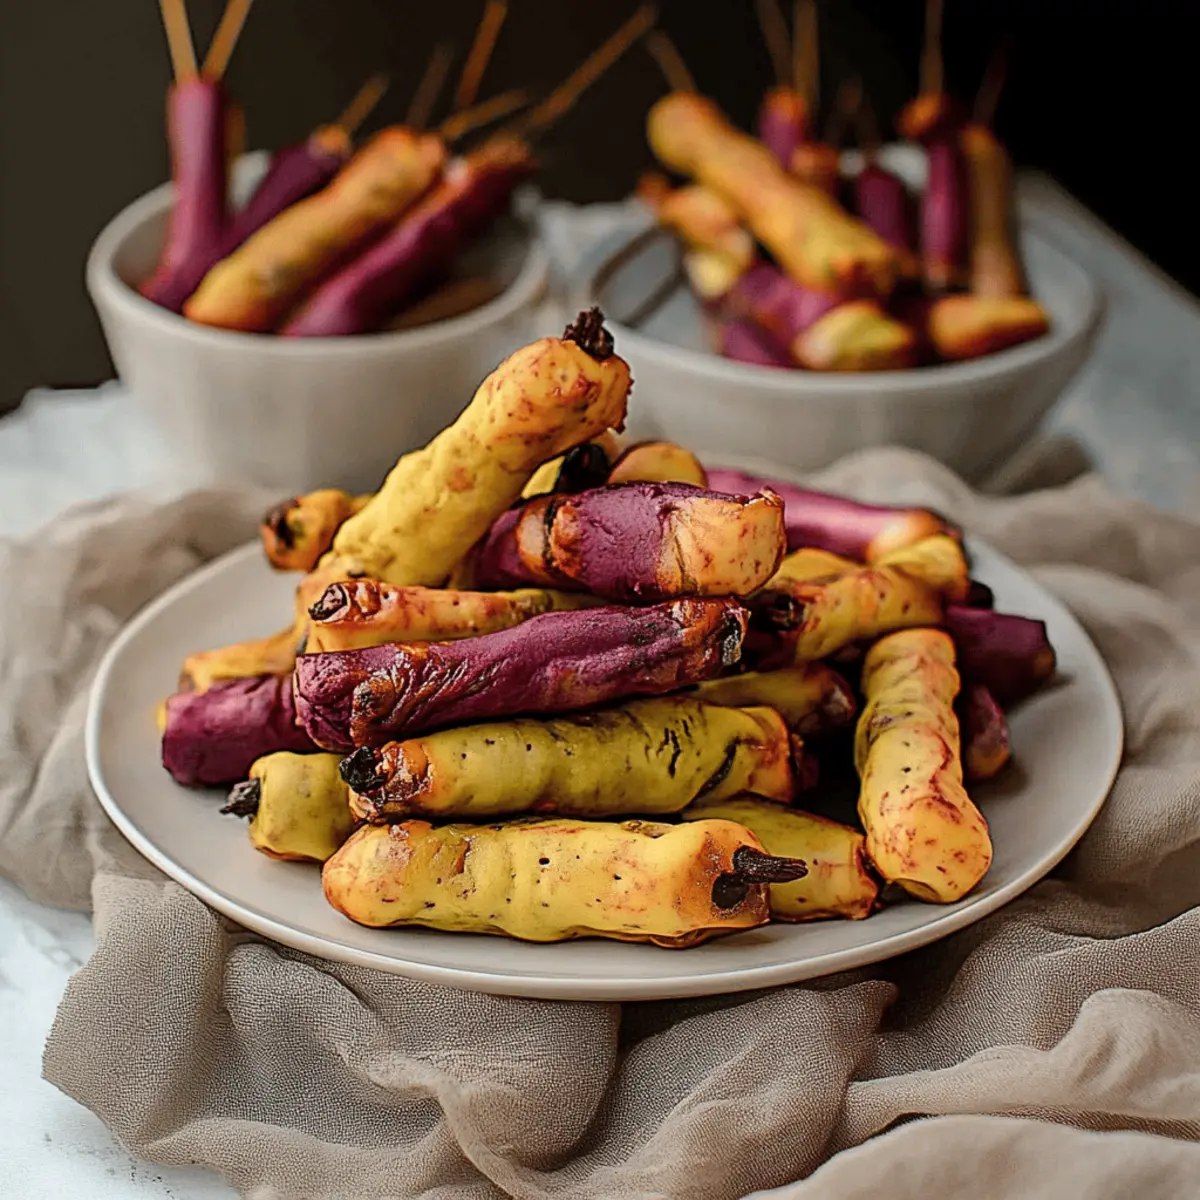
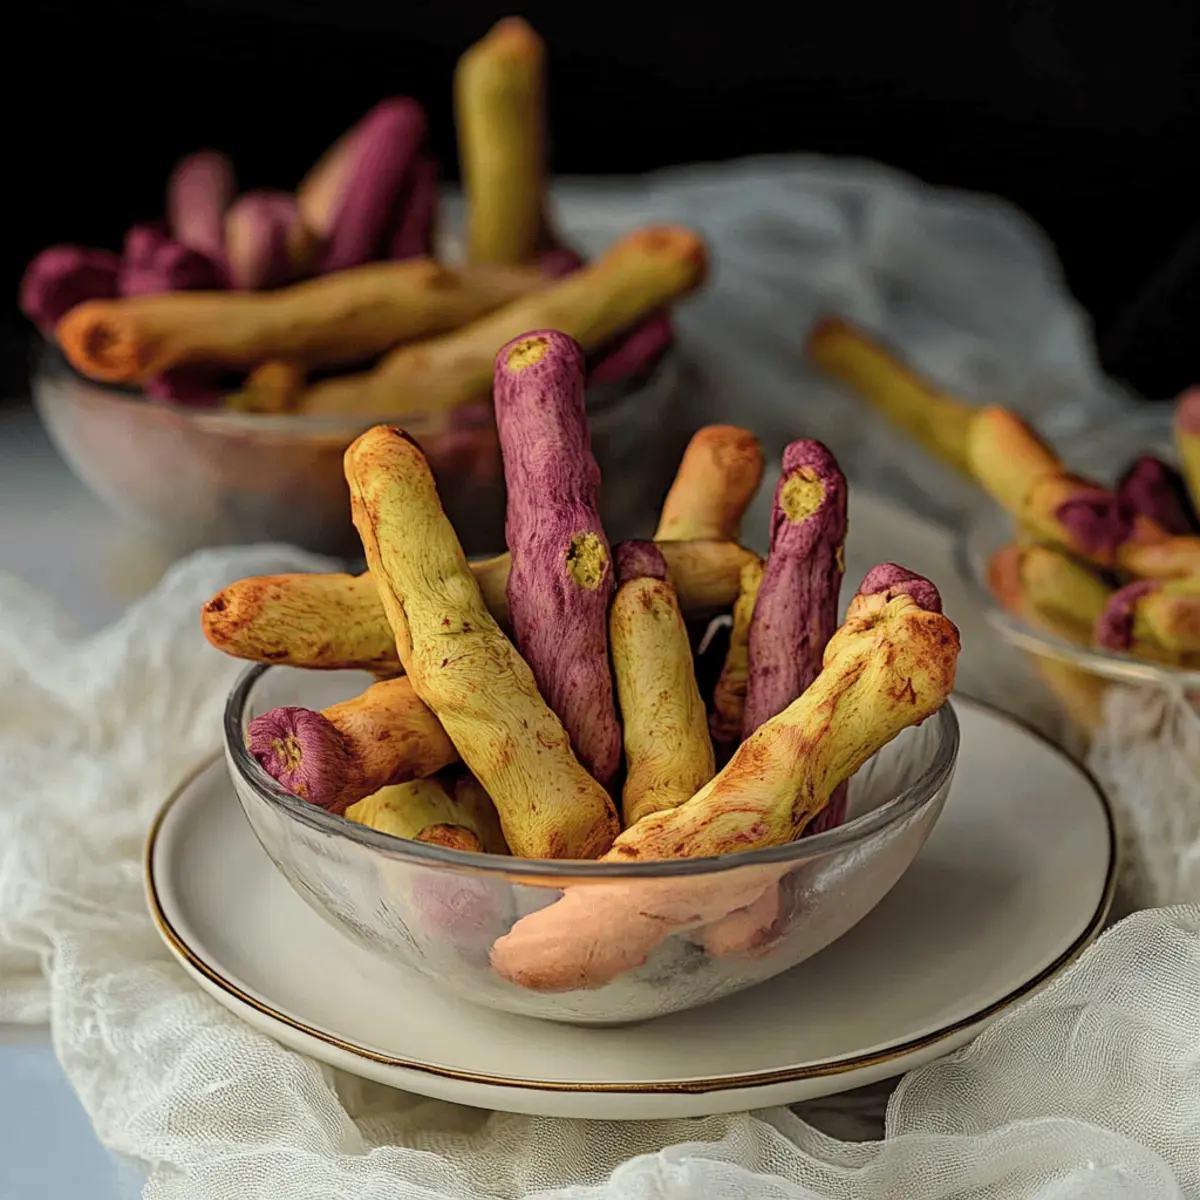
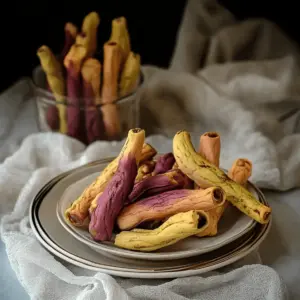
Eerie Appearance: These Creepy Witch Finger Cookies are irresistibly spooky with their ghastly look, perfect for Halloween parties or themed gatherings.
Colorful Variety: With options for vibrant matcha, purple sweet potato, and rich cocoa, you can customize your cookies to be as creepy or colorful as your imagination allows!
Family Fun: Involving your kids in the decorating process makes baking a joyous activity, turning your kitchen into a spellbinding workshop!
Deliciously Simple: The straightforward process means you don’t have to be a master chef to impress your guests. Check out more of our easy Halloween-inspired treats.
Perfect for Entertaining: These cookies are a guaranteed conversation starter that will have everyone laughing and sharing stories—what more could you ask for at your next gathering?
Get ready to impress with a delightful mix of fun and flavor!
Creepy Witch Finger Cookies Ingredients
For the Dough
- Unsalted butter – 226 g, softened for a creamy base that binds the cookies well.
- Confectioner's sugar – 140 g, adds sweetness and a light texture for the perfect cookie.
- Sea salt – 1 tsp, enhances the flavors and balances the sweetness.
- Egg yolks – 4 large, providing richness and moisture for deliciously soft cookies.
- Vanilla extract – 5 mL, infuses a warm flavor that complements the spooky appearance.
- All-purpose flour – 454 g, forming the main body of the cookies for the ideal texture.
- Baking powder – ¼ tsp, helps the cookies rise slightly for a tender bite.
For the Decorations
- Whole blanched almonds – 50 pieces, used as creepy "nails" to enhance the witchy appearance.
- Matcha powder – 4-6 g, offers a vibrant green color for those spooky fingers.
- Purple sweet potato powder – 20-30 g, adds a striking hue, making your cookies more enchanting.
- Cocoa powder – 5-15 g, provides a dark, delicious option for a ghastly touch.
- Cocoa powder for dusting – use as a dusting to mimic dirt for an extra eerie effect.
- Strawberry or raspberry jam – for creating a “bloody” filling at the nail bed.
- Red cake writing gel or red food color & corn syrup – mixed together to create a gory finishing touch.
- Melted white chocolate or candy wafers – for drizzling or dipping, adding sweetness and decoration.
Get ready to craft these Creepy Witch Finger Cookies that are not only fun to bake but also captivatingly spooky for your Halloween festivities!
Step‑by‑Step Instructions for Creepy Witch Finger Cookies
Step 1: Prepare the Dough
In a large mixing bowl, beat together the softened unsalted butter, confectioner's sugar, and sea salt until the mixture is creamy and light, about 3-5 minutes. Make sure it’s fluffy and pale before moving on. This is the base for your Creepy Witch Finger Cookies, so take your time to get it just right!
Step 2: Incorporate Wet Ingredients
Add the egg yolks and vanilla extract to the butter mixture, mixing until everything is well combined and smooth. This should take another 2-3 minutes; you want a uniform consistency. The egg yolks give richness to your cookies, enhancing their flavor and texture, which will keep your guests coming back for more.
Step 3: Optional Colorful Twist
If you like, divide the dough into various portions to mix in your choice of matcha, purple sweet potato, or cocoa powders, creating different colorful batches. Use 4-6 g matcha for green, 20-30 g purple sweet potato for that haunting hue, and 5-15 g cocoa for a dark twist. Each color adds a unique flair to your Creepy Witch Finger Cookies!
Step 4: Mix Dry Ingredients
In a separate bowl, whisk together the all-purpose flour and baking powder until evenly combined. This mixture should be light and airy, giving you a perfect cookie structure. Gradually add it to the wet mixture, folding gently with a spatula to form a soft, cohesive dough without overmixing.
Step 5: Chill the Dough
Wrap the dough in plastic wrap and refrigerate for 20-30 minutes. This chilling step is crucial as it helps the dough firm up, making it easier to shape your Creepy Witch Finger Cookies while preventing them from spreading during baking. Use this time to preheat your oven to 325°F (163°C).
Step 6: Shape the Cookies
Once chilled, remove the dough from the refrigerator and scoop out small portions, about 17-20 g each. Roll them into finger shapes, approximately 4-6 inches long. Squeeze the dough slightly in the middle to create "knuckles" and use a knife to create lines for added detail, making them look eerily realistic.
Step 7: Add the "Nails"
Press a whole blanched almond firmly onto the tip of each finger to serve as the spooky "nail." This simple addition enhances the witchy aesthetic of your Creepy Witch Finger Cookies. Make sure the almonds stay secure as they will bake with the cookies, enhancing the creepy factor.
Step 8: Chill Again
Place your shaped cookies on a baking sheet lined with parchment paper and freeze for 40-60 minutes. Freezing helps retain the shape of the fingers and ensures they bake perfectly, so don’t skip this step if you want them to look hauntingly amazing!
Step 9: Bake the Cookies
Bake the cookies from frozen in your preheated oven for 20-25 minutes until the bottoms are lightly browned. Keep an eye on them toward the end, as you want them to maintain a light, ghostly appearance while still having a firm texture. The aroma wafting from the oven will be simply irresistible!
Step 10: Add the Jam
Once cooled, gently remove the almonds and spoon a small amount of strawberry or raspberry jam into the nail bed cavity before reattaching each almond. This delightful secret will give your Creepy Witch Finger Cookies a gory touch that will surprise your guests and make them giggle!
Step 11: Final Touches
Optionally, dust the cookies with cocoa powder for a dirty look or decorate with red cake writing gel to mimic blood for a truly creepy effect. Drizzle some melted white chocolate on top for an added touch of sweetness. These finishing touches will elevate your Creepy Witch Finger Cookies to a whole new level of spookiness!
What to Serve with Creepy Witch Finger Cookies
These eerily delightful cookies are perfect for sprucing up your spooky gatherings and creating a full, festive spread.
- Witch's Brew Punch: A concoction of fruity flavors and bubbling carbonation that adds a fun, magical touch to your dessert table.
- Spooky Cheese Platter: A selection of creamy cheeses and black olives arranged as “eyeballs” will complement the sweetness of the cookies perfectly.
- Ghoulish Fruit Salad: Combine berries and kiwi for a shocking color contrast; the freshness balances the sweetness and serves as a bright surprise.
- Mummy Hot Dogs: Wrap sliced hot dogs in crescent dough strips to create adorable mummy shapes, offering a salty counterpart to sugary treats.
- Pumpkin Spice Latte: This warm, cozy drink brings seasonal flavors and spices that complement the spooky vibes of the cookies beautifully.
- Haunted Brownie Bites: Dense chocolate brownies dusted with powdered sugar can enhance the chocolate aspects of your cookies while adding a rich texture.
- Creepy Cupcakes: Decorate with green icing and gummy worms for a dessert theme that aligns perfectly with the bewitching cookie presentation.
- Pumpkin Ale: This fall-inspired beer offers a hint of spice that can enhance the flavors of your Creepy Witch Finger Cookies with each sip.
Create an unforgettable Halloween feast that will enchant your guests!
Creepy Witch Finger Cookies Variations
Feel free to put your own spin on these eerie delights and surprise your guests with delicious twists!
- Gluten-Free: Swap the all-purpose flour for a gluten-free blend to keep all your friends and family happy.
- Nut-Free: Replace blanched almonds with pumpkin seeds or use chocolate chips for a fun, safe alternative for nut allergies.
- Flavored Dough: Add spices like cinnamon or nutmeg into the dough for a warm, inviting aroma that complements the spooky look!
- Color Combinations: Mix and match food powders for creative color combos; think orange and purple for a vibrant Halloween theme.
- Sweet Treats: Use mini marshmallows instead of almonds for an ultra-soft, sweet “finger” that kids will adore.
- Chocolate Dipped: Drizzle melted dark chocolate over the cookies for an extra layer of deliciousness that pairs perfectly with the sweetness.
- Spiced Jam: Make your jam extra spooky by infusing it with a splash of cinnamon or ghost pepper for a hint of heat and a delightful surprise.
- Savory Twist: Incorporate a pinch of cheese and herbs into the dough for a unique, savory cookie option that will astonish your guests.
Get creative with these variations, and turn your Creepy Witch Finger Cookies into a one-of-a-kind treat that’ll be talked about long after your Halloween party ends! Be sure to check out our other easy Halloween-inspired treats like Mummy Hot Dogs or Pumpkin Spice Cupcakes for an entire spooky feast that everyone will enjoy!
Expert Tips for Creepy Witch Finger Cookies
Perfectly Shaped Fingers: Ensure you freeze the shaped cookies for 40-60 minutes before baking; this keeps their eerie finger shape intact during the bake.
Avoid Overmixing: When combining the flour with the butter mixture, gently fold until just incorporated. Overmixing can make your Creepy Witch Finger Cookies tough!
Flexible Coloring: Use food powders to create vibrant hues; don't hesitate to mix colors for unique combinations—green and purple can be particularly fun for festive displays.
Secure the "Nails": Press the blanched almonds firmly into the dough; this prevents them from falling off after baking, ensuring the cookies maintain their creepy character.
Creepy Realism: For a gruesome effect, use jam generously in the "nail bed" and add drizzles of melted white chocolate for a truly spooky finish to your cookies.
Cookie Storage: Once cooled, store cookies in an airtight container to keep them fresh, but they are best enjoyed within a few days for maximum flavor and texture.
How to Store and Freeze Creepy Witch Finger Cookies
Room Temperature: Keep unfrosted cookies in an airtight container at room temperature for up to 3 days. This preserves their soft texture, making them an ideal treat for immediate enjoyment.
Fridge: If you prefer your cookies to last longer, store them in the refrigerator in an airtight container for up to 1 week. The chilling helps maintain freshness, and you can enjoy them slightly cool.
Freezer: For long-term storage, freeze the baked cookies in a single layer on a baking sheet, then transfer to a zip-top bag once frozen. They can last up to 3 months! Just thaw them before serving.
Reheating: To enjoy them warm, pop frozen cookies in the oven at 350°F (177°C) for about 5-7 minutes until just warmed through. This method revitalizes their fresh, tasty goodness—perfect for a spooky gathering!
Make Ahead Options
These Creepy Witch Finger Cookies are perfect for those busy days leading up to Halloween! You can prepare the dough and shape the cookies up to 3 days in advance. Simply follow the initial steps to mix and chill the dough (step 5), then shape the cookies (steps 6-8), and place them on a lined baking sheet before freezing them. For optimal freshness, store the shaped cookies in an airtight container in the freezer. When you’re ready to bake, pull them out and bake from frozen for 20-25 minutes. This way, you’ll have deliciously spooky cookies with minimal effort on the day of your event!
Creepy Witch Finger Cookies Recipe FAQs
What kind of butter should I use for the dough?
Absolutely use unsalted butter for this recipe. It allows you to control the salt content, ensuring your Creepy Witch Finger Cookies will have that perfect sweet and creamy base without being overly salty.
How should I store the cookies after baking?
Store your baked Creepy Witch Finger Cookies in an airtight container at room temperature for up to 3 days. If you want them to last longer, you can refrigerate them for up to 1 week—I often prefer them chilled for a refreshing taste!
Can I freeze these cookies, and how?
Yes, you can freeze these cookies! After baking, place them in a single layer on a baking sheet to freeze completely. Once frozen, transfer them to a zip-top bag and they’ll remain fresh for up to 3 months. To reheat, pop them in a 350°F (177°C) oven for 5-7 minutes, which brings back their fresh-from-the-oven taste!
What if my dough is too sticky?
If you find your dough is too sticky to shape, don't worry! Simply sprinkle a little extra flour on your work surface while shaping the cookies. You can also chill the dough for an additional 10-15 minutes, which should make it more manageable to roll into those creepy finger shapes!
Can I adjust the colors used in the dough?
Very much so! Feel free to mix and match the color powders like matcha, purple sweet potato, and cocoa to suit your tastes or theme. Get creative—perhaps using a blend for unique colors! Just ensure you don’t add too much wetness to the dough, as you still need it to hold its shape.
Are there any allergy considerations for this recipe?
Absolutely! Since this recipe includes egg yolks and almonds, consider any egg or nut allergies when serving. If you're making these for a group, you might opt for a nut-free alternative by omitting the almond "nails" and using a piece of candy or simply dusting them with cocoa to keep the creepy appearance.
Creepy Witch Finger Cookies for a Spooktacular Treat!
Equipment
- mixing bowl
- spatula
- baking sheet
- parchment paper
- plastic wrap
- Freezer
Ingredients
For the Dough
- 226 g Unsalted butter softened
- 140 g Confectioner's sugar
- 1 teaspoon Sea salt
- 4 large Egg yolks
- 5 mL Vanilla extract
- 454 g All-purpose flour
- 0.25 teaspoon Baking powder
For the Decorations
- 50 pieces Whole blanched almonds for 'nails'
- 4-6 g Matcha powder
- 20-30 g Purple sweet potato powder
- 5-15 g Cocoa powder
- Cocoa powder for dusting to mimic dirt
- Strawberry or raspberry jam for filling
- Red cake writing gel or red food color & corn syrup for decoration
- Melted white chocolate or candy wafers for drizzling
Instructions
Step‑by‑Step Instructions
- In a large mixing bowl, beat together the softened unsalted butter, confectioner's sugar, and sea salt until creamy and light, about 3-5 minutes.
- Add the egg yolks and vanilla extract to the butter mixture, mixing until well combined and smooth for another 2-3 minutes.
- Optionally, divide the dough into portions to mix in matcha, purple sweet potato, or cocoa powders for colorful batches.
- In a separate bowl, whisk together the all-purpose flour and baking powder, then add it to the wet mixture, folding gently.
- Wrap the dough in plastic wrap and refrigerate for 20-30 minutes to firm it up.
- Remove dough from refrigerator, scoop small portions, roll them into finger shapes and create 'knuckles'.
- Press a whole blanched almond firmly onto the tip of each finger.
- Place shaped cookies on a baking sheet and freeze for 40-60 minutes.
- Bake the cookies from frozen in a preheated oven for 20-25 minutes until the bottoms are lightly browned.
- Once cooled, gently remove the almonds and spoon jam into the nail bed before reattaching the almonds.
- Optionally, dust with cocoa powder, decorate with gel, and drizzle with melted white chocolate.


Leave a Reply