
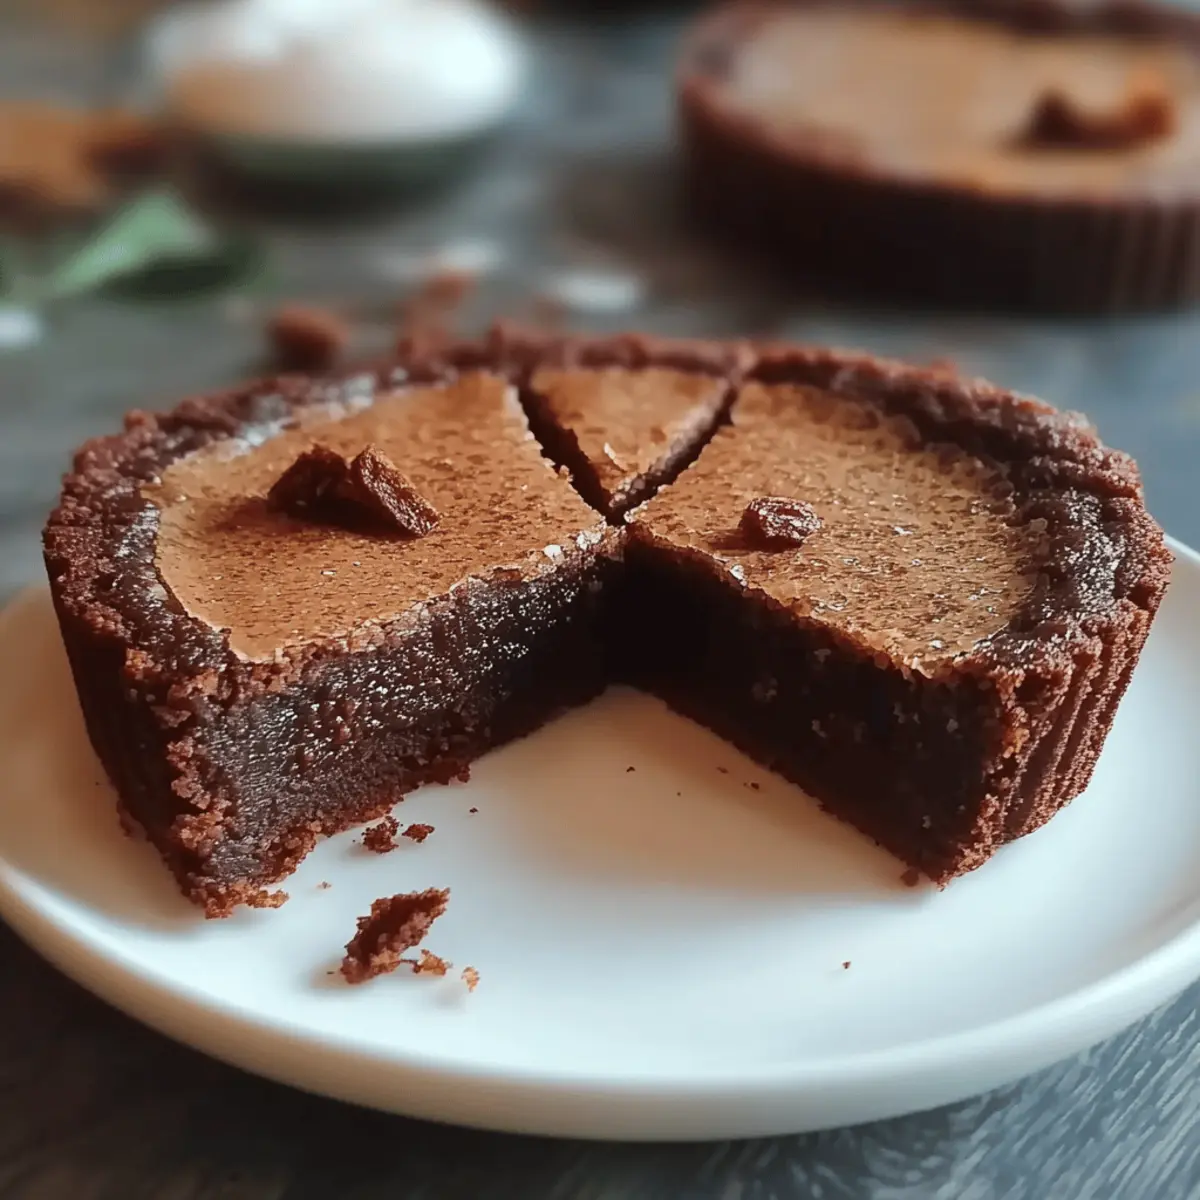
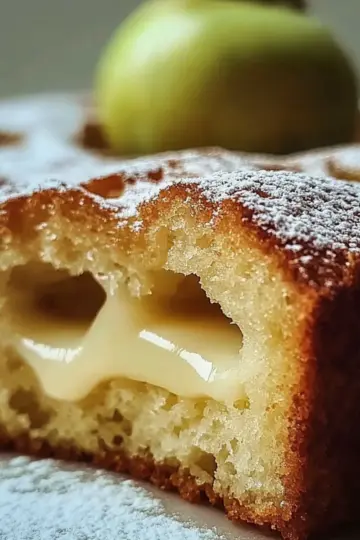
There’s something magical about the way chocolate can transform an ordinary day into a delightful occasion. As I savored a slice of the Italian Chocolate Tart (Crostata al Cioccolato) one rainy afternoon, I realized this treat does more than please the palate; it also warms the heart. With its rich dark chocolate filling nestled in a crisp, buttery crust, this recipe is a true crowd-pleaser that impresses without demanding hours in the kitchen. It combines the joy of indulgent dessert with the beauty of homemade confectionery, making it the perfect choice for both casual gatherings and elegant dinners alike. Plus, it’s a fantastic make-ahead option, allowing you to focus on your guests while still serving something extraordinary. Curious about how to whip up this Italian dessert wonder in your own kitchen? Let’s dive in!
Why is this tart a must-try?
Decadence: This Italian Chocolate Tart is an indulgent treat that will satisfy even the most serious chocoholics. Its rich dark chocolate filling combined with a buttery crust creates an unforgettable dessert experience.
Simplicity: Despite its elegant appearance, this dish is surprisingly easy to make. With just a few basic ingredients and straightforward steps, you can impress your friends and family without spending all day in the kitchen.
Versatility: Perfect for any occasion, this tart can be dressed up with fresh berries or served simply with whipped cream. It’s a dessert that fits in beautifully at both casual gatherings and upscale dinners.
Make-Ahead: Enjoy the convenience of preparing this dessert in advance. Simply chill and serve when ready, freeing you up to enjoy your event without stress.
Crowd-Pleaser: Once you share a slice, your friends will be asking for the recipe! This tart has all the makings of a beloved classic that will resonate well with anyone looking for a delicious homemade dessert.
Italian Chocolate Tart Ingredients
• Discover the essentials to whip up a delicious Italian chocolate tart!
For the Dough
- 200 g flour – This forms the base of your tart, creating a lovely, flaky crust.
- 100 g granulated sugar – Adds just the right amount of sweetness to your crust.
- 40 g cocoa powder – Infuses a rich chocolate flavor right into the crust.
- ¼ teaspoon salt – Enhances the sweetness and balances flavors.
- 120 g cold butter – Ensure it’s cold for a crumbly, tender dough.
- 1 egg – Acts as a binder and adds richness to the dough.
- 1 egg yolk – Enhances the crust’s flavor and helps with its texture.
For the Filling
- 400 ml milk – Provides a creamy base that makes the filling luscious.
- 4 egg yolks – Contributes to the richness and color of the chocolate filling.
- 80 g granulated sugar – Sweetens the filling to complement the dark chocolate.
- 40 g flour – Helps to thicken the filling, giving it a smooth consistency.
- 120 g dark chocolate – The star of the show that delivers a decadent chocolate experience.
Feel free to get creative with toppings or mix-ins to suit your taste; this Italian Chocolate Tart is here to satisfy your sweet cravings!
Step‑by‑Step Instructions for Italian Chocolate Tart
Step 1: Prepare the Dough
In a large mixing bowl, whisk together 200 g of flour, 100 g of granulated sugar, 40 g of cocoa powder, and ¼ teaspoon of salt until well combined. Next, cut in 120 g of cold butter using a pastry cutter or your fingertips until the mixture resembles coarse crumbs, about 5 minutes.
Step 2: Form the Dough
Add 1 egg and 1 egg yolk to the flour mixture and mix until a cohesive dough forms. It may appear slightly crumbly at first, but it will come together with a bit of kneading. Once mixed, wrap the dough in plastic wrap and refrigerate for at least 30 minutes to firm up.
Step 3: Roll Out the Dough
Preheat your oven to 180°C (350°F). On a lightly floured surface, remove the chilled dough from the refrigerator and roll it out to fit a 9-inch tart pan. Aim for a thickness of about ¼ inch. Once rolled, carefully transfer the dough to the tart pan, pressing it gently into the corners.
Step 4: Trim and Prick the Dough
Trim any excess dough hanging over the edges of the tart pan for a neat finish. Use a fork to prick the bottom of the dough, which will prevent bubbles from forming during baking. This is an important step to ensure your Italian Chocolate Tart has a beautifully flat base.
Step 5: Bake the Crust
Place the prepared tart shell into the preheated oven and bake for 15-20 minutes or until the edges are lightly golden. Keep an eye on it! The crust should look set and fragrant. Remove the tart shell from the oven and allow it to cool completely before filling.
Step 6: Prepare the Filling
In a saucepan, heat 400 ml of milk over medium heat until it's just below boiling—look for small bubbles forming around the edges. Meanwhile, in a separate bowl, whisk together 4 egg yolks, 80 g of granulated sugar, and 40 g of flour until the mixture is smooth and creamy. This will be the base of your filling.
Step 7: Combine the Egg Mixture with Milk
Slowly pour the hot milk into the bowl with the egg mixture while whisking constantly to temper the eggs. This step is crucial to prevent curdling. After you've added all the milk, transfer the mixture back to the saucepan over medium heat, stirring continuously until it thickens, around 5 minutes.
Step 8: Melt the Chocolate
Once thickened, remove the saucepan from the heat and add 120 g of dark chocolate, stirring until completely melted and smooth. You’ll know it's done when the chocolate is fully incorporated, giving you a glossy filling. This decadent mixture is what makes your Italian Chocolate Tart truly irresistible.
Step 9: Fill the Tart Shell
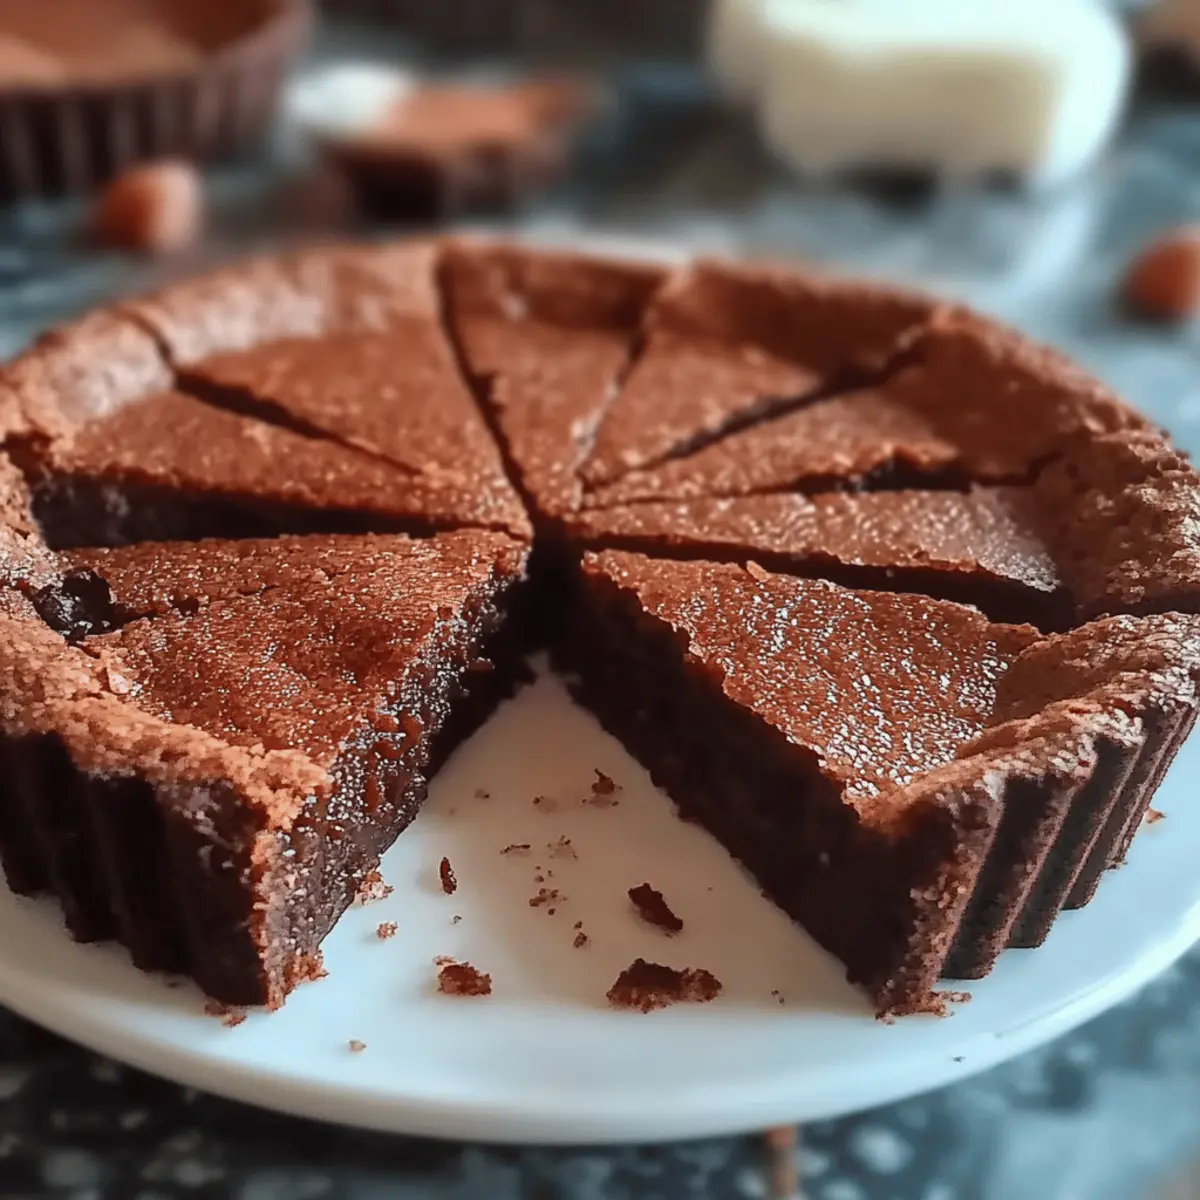
Pour the rich chocolate filling into the cooled tart shell, spreading it evenly with a spatula. This layer of velvety chocolate is the heart of the Italian Chocolate Tart, ensuring every bite is indulgent and delicious. Allow the tart to cool slightly before chilling.
Step 10: Chill Before Serving
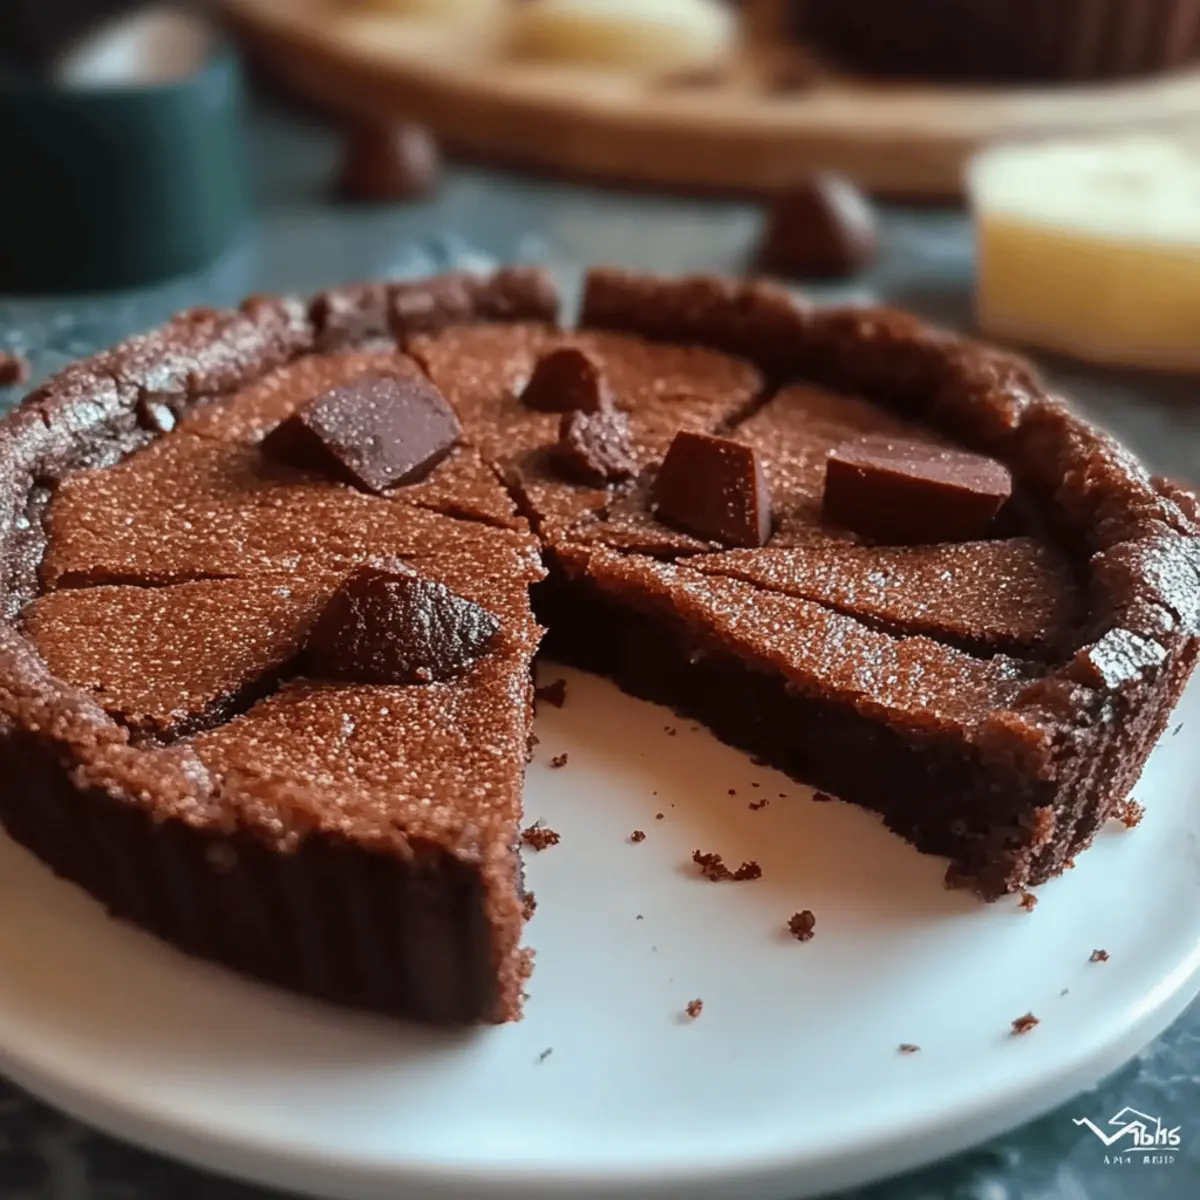
Refrigerate the filled tart for at least 30 minutes to set the filling and enhance the flavors. This chilling time not only solidifies the filling but also allows the chocolate to develop its rich taste. Once ready, feel free to garnish with chocolate shavings or nuts for added visual appeal.
Step 11: Slice and Serve
Carefully slice your beautifully set Italian Chocolate Tart with a sharp knife, and serve it chilled. This dessert is best paired with whipped cream or fresh berries, elevating it to an unforgettable experience. With every bite, you'll savor the love and effort you've put into making this classic treat!
Italian Chocolate Tart Variations
Feel free to customize this delightful tart to make it truly your own!
-
Gluten-Free: Substitute all-purpose flour with a gluten-free blend for a deliciously inclusive dessert. Your friends won’t even notice the difference!
-
Dairy-Free: Swap out milk for almond or coconut milk and use dairy-free butter for a plant-based twist. This is perfect for those embracing a dairy-free lifestyle.
-
Nutty Crunch: Add finely chopped nuts like hazelnuts or almonds to the crust for an extra layer of texture and flavor. Imagine the delightful crunch with every bite!
-
Fruit Fusion: Top the tart with your favorite fruits, such as raspberries or strawberries, for a refreshing contrast to the rich chocolate. They brighten up the dish and add a seasonal flair.
-
Spicy Kick: Introduce a dash of cayenne pepper or a sprinkle of cinnamon in the filling to give your tart an unexpected kick of flavor. It's a simple way to impress adventurous palates!
-
Decadent Swirls: Swirl in some peanut butter or Nutella into the chocolate filling before pouring it into the crust. Mixing flavors creates a delightful surprise with each slice.
-
Minty Fresh: Add a few drops of mint extract to the filling for a refreshing mint chocolate tart that leaves you feeling invigorated. It's a perfect refreshment for hot days!
-
Coffee Lovers: Infuse the milk with a shot of espresso or strongly brewed coffee for a mocha-flavored twist. This variation is sure to awaken your senses while indulging your sweet tooth!
For garnish, don’t hesitate to explore options like chocolate shavings, whipped cream, or a sprinkle of sea salt to heighten the experience. Each variation brings its own charm, making your Italian Chocolate Tart an exquisite centerpiece for any gathering. Enjoy creating your masterpiece!
Storage Tips for Italian Chocolate Tart
Room Temperature: Keep the tart at room temperature for up to 2 hours before serving. Beyond that, refrigerate to maintain freshness.
Fridge: Store the Italian Chocolate Tart in an airtight container for up to 3 days. This keeps the crust from becoming soggy and preserves the chocolate filling’s texture.
Freezer: For longer storage, wrap the tart tightly in plastic wrap and aluminum foil. It can last in the freezer for up to 2 months. Thaw in the refrigerator before serving.
Reheating: If desired, reheating can be done in the microwave for a few seconds or gently in the oven at low heat to enjoy a warm slice with whipped cream.
Make Ahead Options
These delightful Italian Chocolate Tart (Crostata al Cioccolato) are perfect for meal prep enthusiasts! You can prepare the tart crust and filling up to 24 hours in advance. First, make the dough, wrap it tightly in plastic wrap, and refrigerate it. The filling can also be made and stored in an airtight container. Just make sure to refrigerate it promptly to maintain the chocolate's texture. When you’re ready to serve, roll out and bake the tart crust, allow it to cool, and then pour in the chilled filling. Pop it back in the fridge for about 30 minutes to set, and you’ll have a luxurious dessert ready to impress with minimal last-minute effort!
What to Serve with Italian Chocolate Tart
Imagine a dessert that not only delights your sweet tooth but also creates a warm and inviting atmosphere at your table.
-
Whipped Cream: Serve a generous dollop of light whipped cream, which adds a creamy contrast to the rich chocolate tart. The sweetness beautifully complements the dessert’s deep flavors.
-
Fresh Berries: Brighten up the plate with a handful of fresh raspberries or strawberries. Their tartness cuts through the sweetness, making each bite feel balanced and refreshing.
-
Vanilla Ice Cream: A smooth scoop of vanilla ice cream brings a delightful creaminess that pairs perfectly with the indulgent chocolate filling. It’s a classic combination that never disappoints.
-
Espresso or Coffee: Brew a strong cup of espresso or coffee to serve alongside. The bold flavors enhance the chocolate and create a heavenly dessert experience.
-
Chocolate Ganache: Drizzling extra chocolate ganache on top creates an even richer chocolate experience. For true chocolate lovers, this addition is pure bliss.
-
Pistachio Crumble: Sprinkle some chopped pistachios for a crunchy texture contrast. Their nutty flavor complements the chocolate and adds a lovely pop of color.
Indulging in an Italian Chocolate Tart is simply divine, and these pairings elevate your dessert experience, making every bite a celebration.
Expert Tips for Italian Chocolate Tart
Chill the Dough: Always refrigerate your dough for at least 30 minutes. This prevents shrinkage during baking and ensures a flaky crust.
Perfect Pricking: Don’t skip pricking the bottom of your tart shell! This crucial step avoids bubbling and helps achieve a flat base for your Italian Chocolate Tart.
Slowly Add Milk: When combining hot milk with the egg mixture, pour slowly while whisking constantly. This helps prevent curdling and results in a smooth filling.
Mix Well: Ensure the chocolate is fully melted and incorporated into the filling for a glossy finish. A grumpy chocolate filling will detract from the tart's indulgence!
Make-Ahead Possibility: Embrace the beauty of prep! You can prepare the tart one day in advance, which allows flavors to meld beautifully. It’s always a win for social gatherings!
Italian Chocolate Tart Recipe FAQs
What type of dark chocolate is best for the filling?
I recommend using a high-quality dark chocolate with at least 70% cocoa content. This provides a rich flavor that complements the creamy filling beautifully. Look for chocolate that’s smooth and melts well, ensuring a luscious consistency in your tart.
How do I know if my tart is baked properly?
After baking for 15-20 minutes, the tart shell should have a light golden edge and feel firm to the touch. You can gently press the center; it should not feel wet or gooey. If you see dark spots or areas that seem too soft, give it a couple more minutes to bake.
What is the best way to store leftover tart?
To keep your Italian Chocolate Tart fresh, store it in an airtight container in the refrigerator. It will remain delicious for up to 3 days! If storing longer, you can wrap it tightly in plastic wrap and aluminum foil and freeze it for up to 2 months. Just remember to let it thaw in the refrigerator before you indulge in it again!
Can I use different toppings for the tart?
Absolutely! While chocolate shavings or nuts are fantastic, feel free to get creative. Fresh berries, a drizzle of caramel, or even a dusting of powdered sugar can add a beautiful touch and enhance flavors. Personalize your tart to suit your taste and occasions—your friends and family will love the variety!
Is this recipe suitable for kids or those with allergies?
This Italian Chocolate Tart contains eggs and dairy, making it unsuitable for those with egg or lactose allergies. If you're cooking for children, always check for allergies first. You could potentially use egg substitutes and dairy alternatives to tailor the recipe for dietary needs. Always mark it clearly, so everyone knows what they’re enjoying.
How can I prevent the tart from getting soggy?
To prevent a soggy crust, make sure to fully cool the baked tart shell before adding the filling. Additionally, pricking the bottom of the raw dough helps steam escape during baking, maintaining a nice crisp texture. You can also bake it a little longer if you find the edges are still too soft after the recommended time.
Decadent Italian Chocolate Tart for Your Sweet Cravings
Equipment
- mixing bowl
- pastry cutter
- 9-inch tart pan
- saucepan
- whisk
- spatula
Ingredients
For the Dough
- 200 g flour This forms the base of your tart, creating a lovely, flaky crust.
- 100 g granulated sugar Adds just the right amount of sweetness to your crust.
- 40 g cocoa powder Infuses a rich chocolate flavor right into the crust.
- 0.25 teaspoon salt Enhances the sweetness and balances flavors.
- 120 g cold butter Ensure it’s cold for a crumbly, tender dough.
- 1 whole egg Acts as a binder and adds richness to the dough.
- 1 yolk egg yolk Enhances the crust’s flavor and helps with its texture.
For the Filling
- 400 ml milk Provides a creamy base that makes the filling luscious.
- 4 yolks egg yolks Contributes to the richness and color of the chocolate filling.
- 80 g granulated sugar Sweetens the filling to complement the dark chocolate.
- 40 g flour Helps to thicken the filling, giving it a smooth consistency.
- 120 g dark chocolate The star of the show that delivers a decadent chocolate experience.
Instructions
Dough Preparation
- In a large mixing bowl, whisk together 200 g of flour, 100 g of granulated sugar, 40 g of cocoa powder, and ¼ teaspoon of salt until well combined. Next, cut in 120 g of cold butter using a pastry cutter or your fingertips until the mixture resembles coarse crumbs, about 5 minutes.
- Add 1 egg and 1 egg yolk to the flour mixture and mix until a cohesive dough forms. Wrap the dough in plastic wrap and refrigerate for at least 30 minutes to firm up.
Assembling Tart
- Preheat your oven to 180°C (350°F). On a lightly floured surface, remove the chilled dough and roll it out to fit a 9-inch tart pan.
- Trim any excess dough and prick the bottom of the dough to prevent bubbles during baking.
- Bake for 15-20 minutes until edges are lightly golden. Allow it to cool completely.
Filling Preparation
- In a saucepan, heat 400 ml of milk over medium heat until just below boiling.
- In a separate bowl, whisk together 4 egg yolks, 80 g of granulated sugar, and 40 g of flour until smooth.
- Slowly pour the hot milk into the bowl with the egg mixture while whisking to temper the eggs. Return the mixture to the saucepan and stir until it thickens, about 5 minutes.
- Remove from heat and add 120 g of dark chocolate, stirring until melted and smooth.
- Pour the rich chocolate filling into the cooled tart shell, spreading it evenly. Chill for at least 30 minutes before serving.
Serving
- Slice the tart with a sharp knife and serve chilled. Pair with whipped cream or fresh berries for an unforgettable experience.


Leave a Reply