
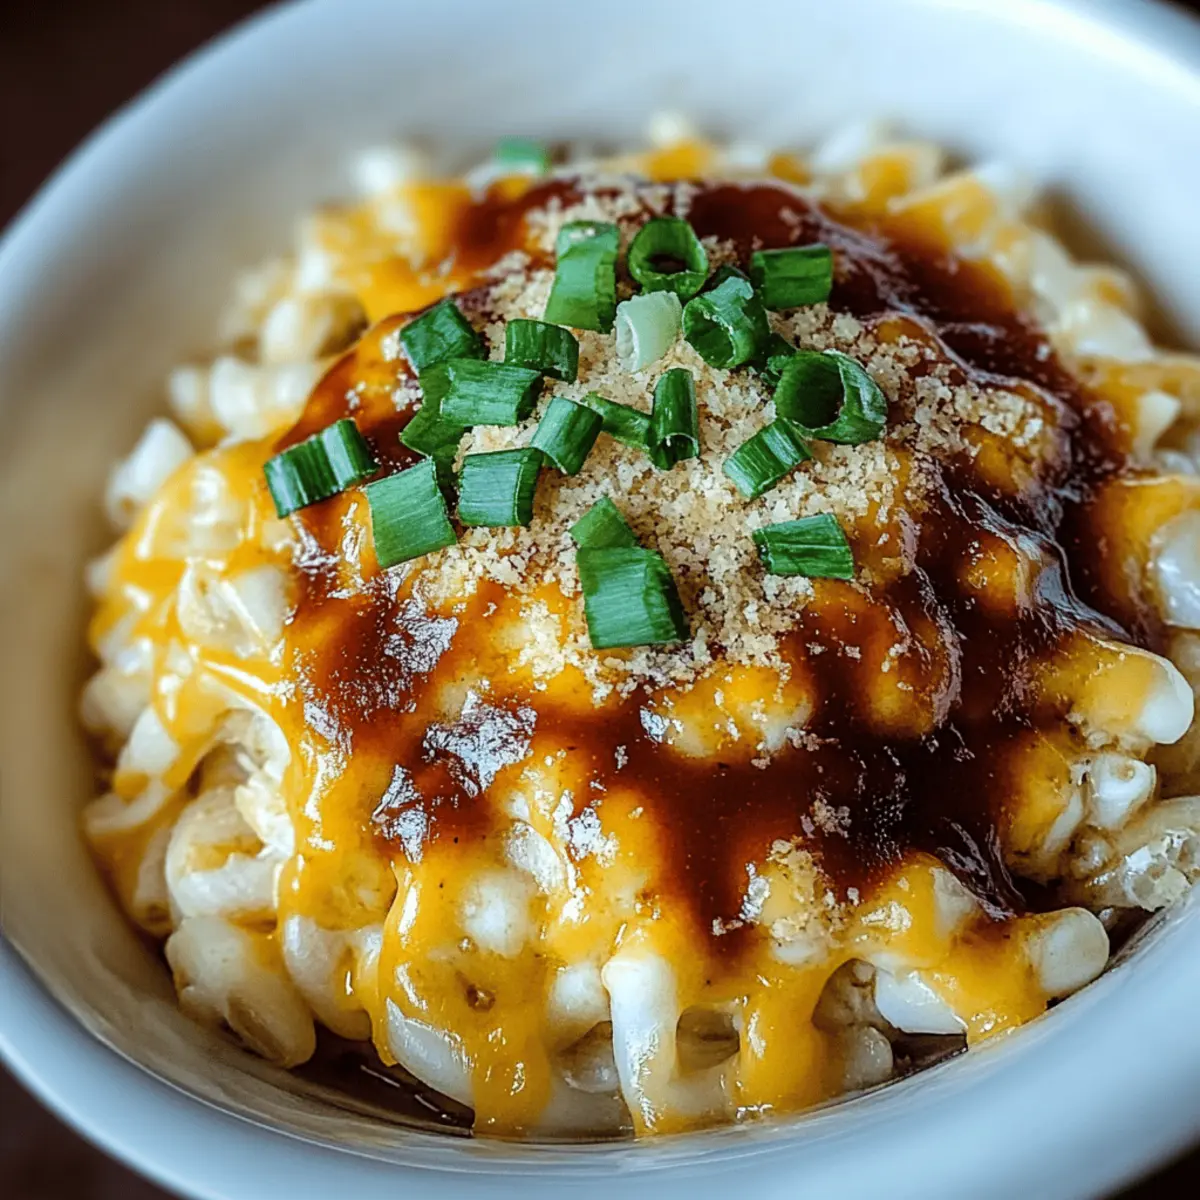
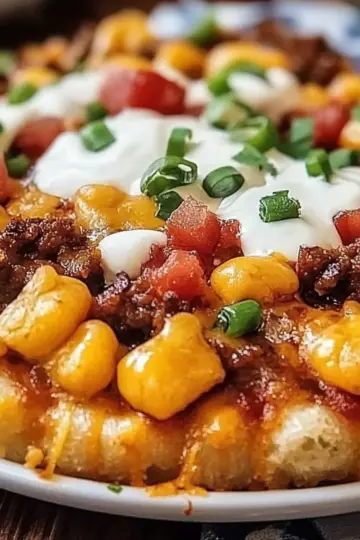
“Can you believe it?” my friend exclaimed while savoring the creamy goodness of my BBQ Chicken Mac and Cheese. In a world where quick meals often dominate our dinner tables, this dish brings a sense of nostalgia and comfort that’s hard to resist. Not only does it combine the richness of cheeses with tender pieces of chicken and a tangy BBQ sauce, but it also takes just over an hour to whip up. Perfect for a cozy weeknight dinner or a gathering with friends, this recipe is sure to become a crowd-pleaser. Plus, it's easy to customize—you can even add veggies or a crunchy topping if you like! What’s your twist on this classic comfort food?
Why is BBQ Chicken Mac and Cheese special?
Comforting and delicious, this BBQ Chicken Mac and Cheese is a meal that wraps you in warmth with every bite. Quick preparation with just over an hour needed means you can enjoy this dish without a lengthy wait. Customizable to your taste, try adding veggies or adjusting the level of BBQ sauce! Creamy and cheesy, it’s a flavor explosion that will please every palate at your table. This dish is the ultimate comfort food that everyone loves; you'll want to keep it in your recipe rotation!
Ingredients for BBQ Chicken Mac and Cheese
• Discover the key ingredients for a delicious BBQ Chicken Mac and Cheese.
For the Pasta
- Elbow macaroni – This shape holds the cheesy sauce perfectly, ensuring every bite is filled with flavor.
For the Cheese Sauce
- Unsalted butter – Adding richness to your sauce; feel free to substitute with olive oil if needed.
- All-purpose flour – Essential for thickening your cheese sauce, creating that creamy consistency we all crave.
- Milk – Whole milk works best for a rich texture; non-dairy milk can be used for lactose-free options.
- Shredded cheddar cheese – A must for its sharp flavor; opt for a blend for depth of taste.
- Shredded mozzarella cheese – Offers a stretchy, gooey quality that elevates this BBQ Chicken Mac and Cheese.
- Garlic powder – Boosts flavor; fresh garlic can be minced for a more intense taste.
- Onion powder – Adds a subtle sweetness; you can substitute it with finely chopped onions if you prefer.
- Salt and pepper – Essential for seasoning; adjust to taste for ultimate enjoyment.
For the Chicken
- Cooked and shredded chicken breast – Use leftover rotisserie chicken for a hassle-free and flavorful addition!
- BBQ sauce – Choose a favorite brand or homemade version to infuse that tangy sweetness into your dish.
Toppings (Optional)
- Sliced green onions – Adds a fresh crunch and a pop of color to your finished dish.
- Chopped fresh parsley – Adds a touch of freshness; it's optional, but it makes a lovely garnish.
- Breadcrumbs – For a crunchy top layer; you can even toast them before sprinkling for extra flavor.
With these ingredients, you're on your way to creating a BBQ Chicken Mac and Cheese that will warm hearts and fill bellies! Enjoy the process of crafting this comforting meal.
Step‑by‑Step Instructions for BBQ Chicken Mac and Cheese
Step 1: Preheat and Cook Pasta
Begin by preheating your oven to 350°F (175°C). Meanwhile, bring a large pot of salted water to a boil and add 1 pound of elbow macaroni. Cook the pasta according to package instructions until al dente, which usually takes about 7-8 minutes. Once finished, drain the pasta in a colander and set it aside to cool slightly.
Step 2: Make the Roux
In a large saucepan over medium heat, melt 4 tablespoons of unsalted butter until it’s bubbly and begins to foam. Gradually stir in ¼ cup of all-purpose flour, mixing continuously for about 1 minute until it turns a light golden color and forms a paste. This roux is essential for the creamy base of your BBQ Chicken Mac and Cheese.
Step 3: Create the Cheese Sauce
Slowly whisk in 3 cups of milk into the roux, ensuring there are no lumps as you mix. Continue cooking while stirring frequently until the mixture comes to a gentle simmer and thickens slightly, about 3-5 minutes. The goal is a smooth sauce that coats the back of a spoon, so keep an eye on it as you stir.
Step 4: Add Cheeses and Season
Reduce the heat to low and fold in 2 cups of shredded cheddar cheese and 1 cup of shredded mozzarella cheese. Stir continuously until the cheeses are fully melted and the sauce is smooth. Season with 1 teaspoon of garlic powder, 1 teaspoon of onion powder, salt, and pepper to taste; this will enhance the flavors of your BBQ Chicken Mac and Cheese.
Step 5: Combine Pasta and Cheese Sauce
Once the cheese sauce is velvety, add the cooked elbow macaroni directly into the saucepan. Using a large spoon, gently stir until every piece of pasta is evenly coated with the creamy cheese mixture. This step is crucial for ensuring that each bite of your BBQ Chicken Mac and Cheese is rich and flavorful.
Step 6: Mix in the BBQ Chicken
In a separate bowl, combine 2 cups of cooked and shredded chicken breast with 1 cup of BBQ sauce, mixing well to coat the chicken. Gently fold this BBQ chicken mixture into the macaroni and cheese, ensuring everything is combined thoroughly. The tangy BBQ chicken adds a delightful twist to this comforting dish.
Step 7: Transfer to Baking Dish
Prepare a greased 9x13 inch baking dish by lightly greasing the bottom and sides. Carefully transfer the BBQ Chicken Mac and Cheese mixture into the baking dish, spreading it out evenly with a spatula. This step will prepare it for baking, helping to bring out those delicious flavors.
Step 8: Optional Crunchy Topping
If you’d like a crunchy texture, sprinkle ½ cup of breadcrumbs evenly across the top of the macaroni and cheese. This optional step adds a delightful crunch to the dish, contrasting with the creamy interior of your BBQ Chicken Mac and Cheese.
Step 9: Bake
Place the baking dish in the preheated oven and bake for 20-25 minutes until the top is golden brown and bubbling. Make sure to keep an eye on it during the last few minutes for that perfect color. The aroma as it bakes will have your family eagerly waiting at the table.
Step 10: Cool and Garnish
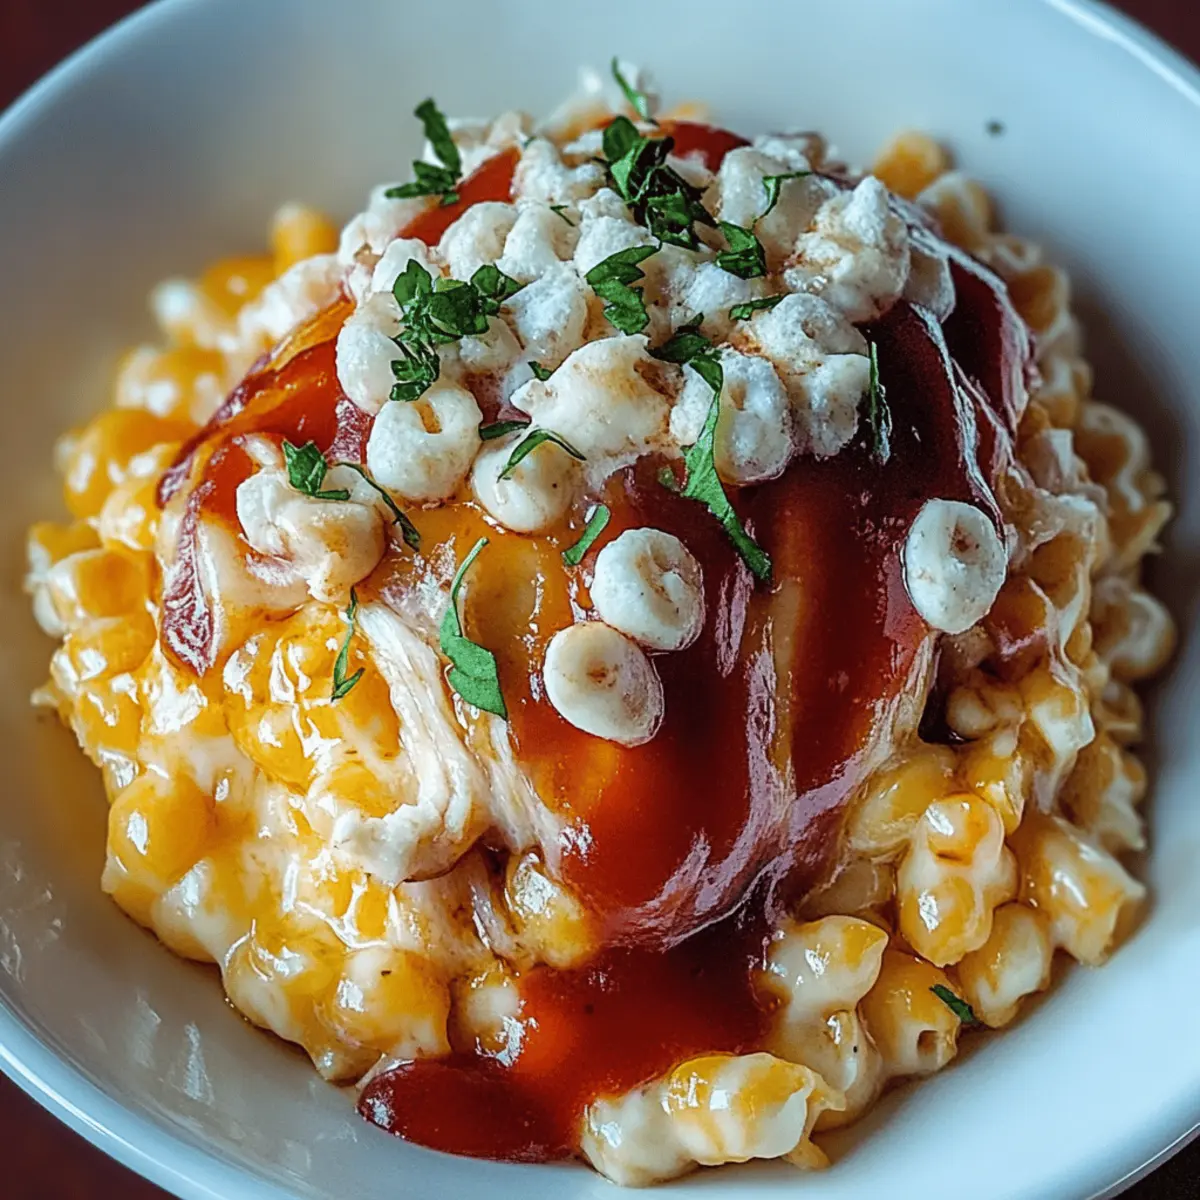
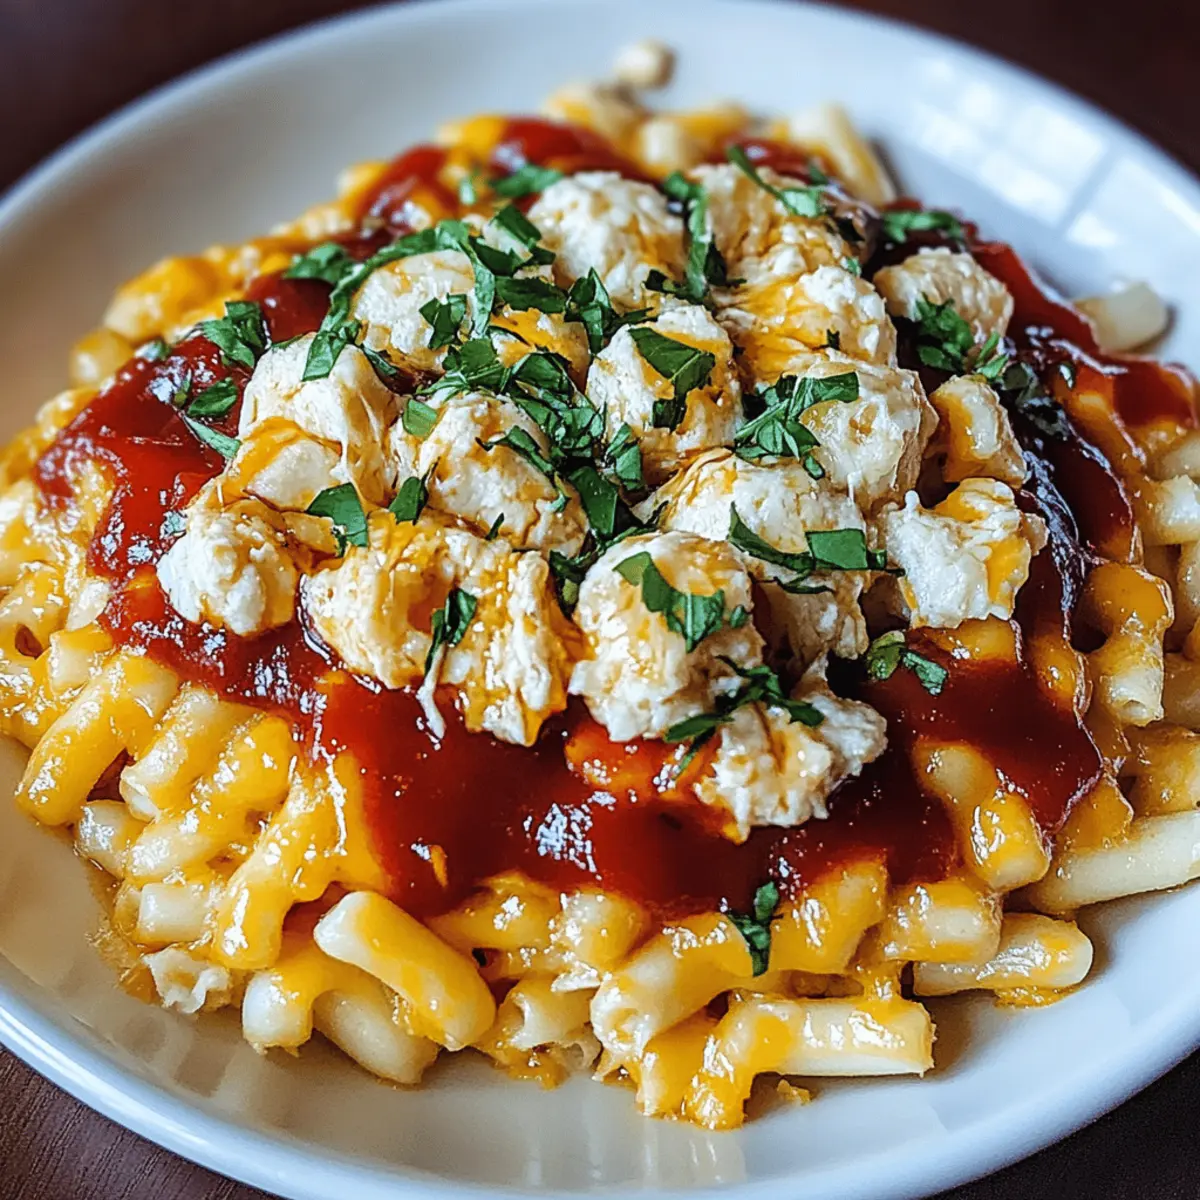
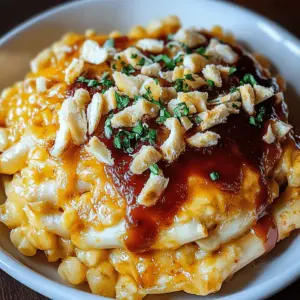
Once out of the oven, allow the BBQ Chicken Mac and Cheese to cool slightly for about 10 minutes. Drizzle additional BBQ sauce over the top and garnish with sliced green onions and chopped fresh parsley if desired. This will not only enhance the presentation but also add a fresh burst of flavor.
How to Store and Freeze BBQ Chicken Mac and Cheese
-
Room Temperature: Let the BBQ Chicken Mac and Cheese cool completely, then it can sit at room temperature for up to 2 hours if you’re planning to serve leftovers soon.
-
Fridge: Store leftovers in an airtight container in the fridge for up to 3 days. Reheat in the microwave or oven until warmed through, adding a splash of milk if it seems dry.
-
Freezer: To freeze, portion out servings in airtight containers or freezer bags, making sure to remove excess air. It can be kept frozen for up to 3 months!
-
Reheating: Thaw overnight in the fridge before reheating. Bake in a preheated oven at 350°F (175°C) until heated through, or microwave individual portions. Enjoy the comforting flavors that last!
What to Serve with BBQ Chicken Mac and Cheese
Imagine curling up with a hearty meal that brings warmth and joy to your dining table.
-
Garlic Bread: A crunchy, buttery side that complements the creamy textures of the mac and cheese, perfect for soaking up every last bit of sauce.
-
Coleslaw: The crisp, tangy crunch adds a refreshing contrast, balancing the richness of the dish beautifully, making every bite a new experience.
-
Grilled Vegetable Skewers: Colorful and full of flavor, these add earthy notes and a touch of sweetness that brightens up the meal.
-
Corn on the Cob: Sweet and juicy, fresh corn enhances the comfort food vibe while providing a delightful burst of flavor.
-
Caesar Salad: This classic salad introduces crisp romaine and tangy dressing, offering a refreshing palate cleanser to the cheesy richness.
-
Sweet Tea: A refreshing, slightly sweet beverage that pairs perfectly with the flavors of BBQ and enhances the overall dining experience.
-
Brownies: Finish with a warm, fudgy brownie for dessert. The chocolatey richness is a comforting end that keeps the cozy theme going.
Expert Tips for BBQ Chicken Mac and Cheese
-
Creamy Consistency: Ensure you whisk the milk slowly into the roux. This prevents lumps and achieves that luscious, creamy sauce you desire in your BBQ Chicken Mac and Cheese.
-
Cheese Selection: Choose high-quality cheeses for better melting properties. Mixing sharp cheddar with mild mozzarella enhances flavor and creates an irresistible gooey texture.
-
Don’t Overcook Pasta: Cooking the elbow macaroni al dente is crucial. It will continue to cook in the oven, preventing mushiness and keeping your BBQ Chicken Mac and Cheese well-structured.
-
BBQ Sauce Balance: Taste your BBQ sauce first. Depending on its sweetness or tanginess, adjust the amount you add to the chicken. You want a harmonious flavor without overwhelming the dish.
-
Crunchy Top: If you opt for breadcrumbs, consider toasting them in a skillet with a bit of butter before sprinkling on top. This elevates the crunch factor in your BBQ Chicken Mac and Cheese.
-
Personalize It: Feel free to add your favorite roasted vegetables or spices to the mac and cheese mixture before baking to make this delicious dish even more unique!
Make Ahead Options
These BBQ Chicken Mac and Cheese are perfect for meal prep enthusiasts! You can prepare the macaroni and cheese mixture (steps 1-6) up to 24 hours in advance by refrigerating it in an airtight container. Additionally, the BBQ chicken can be mixed with the sauce (step 8) and stored separately to maintain freshness. When you're ready to enjoy this comforting dish, simply assemble it in the baking dish, top with breadcrumbs if desired, and bake it straight from the fridge for about 25-30 minutes, allowing for an extra few minutes if chilled. This way, you’ll have a delicious, hassle-free meal that’s just as creamy and flavorful as when freshly made!
BBQ Chicken Mac and Cheese Twists
Feel free to let your creativity shine as you make this BBQ Chicken Mac and Cheese your own with these delightful variations!
-
Vegetarian: Swap shredded chicken for roasted veggies, like bell peppers and zucchini, for a vibrant and colorful twist. It adds freshness while keeping the dish hearty.
-
Spicy Kick: Add diced jalapeños or a splash of hot sauce to the BBQ chicken mixture for a zesty kick! This little addition can elevate your mac and cheese to a whole new level.
-
Smoky Flavor: Incorporate smoked gouda cheese along with the cheddar for a deep, rich smokiness that complements the BBQ sauce perfectly.
-
Gluten-Free: Substitute regular elbow macaroni with gluten-free pasta for a dish that everyone can enjoy. Just be sure to adjust the cooking time as gluten-free pasta can vary.
-
Creamy Addition: For extra creaminess, mix in a dollop of cream cheese or sour cream into the cheese sauce before combining with the pasta. This creates an even more luscious texture.
-
Herbal Infusion: Toss in fresh herbs like thyme or basil into the cheese sauce for an aromatic twist that brightens up the entire dish! Delicious and herbaceous flavors combine beautifully.
-
Change Up the Cheese: Experiment with a blend of cheeses such as pepper jack for heat or a sharp white cheddar to add another layer of flavor depth. Cheese lovers will rejoice!
-
Make it Buffalo: Replace BBQ sauce with buffalo sauce for a fiery version that’s perfect for spice enthusiasts. Serve with celery sticks on the side for a classic touch!
These variations not only enhance the flavor profile of your BBQ Chicken Mac and Cheese but also cater to different taste preferences—making it a versatile choice for any gathering!
BBQ Chicken Mac and Cheese Recipe FAQs
How do I choose the right BBQ sauce for my recipe?
When selecting a BBQ sauce, consider the flavor profile that suits your taste. Sweet, tangy, or smoky sauces can all work beautifully with this BBQ Chicken Mac and Cheese. If you prefer something homemade, a combination of ketchup, apple cider vinegar, brown sugar, and your choice of spices can create a delicious base. Taste the sauce before adding it to your chicken to ensure you can achieve the right balance!
What should I do if my cheese sauce is clumpy?
Absolutely! If your cheese sauce appears clumpy, it could be that the cheeses were added too quickly or the heat was too high. To salvage it, remove the saucepan from the heat and vigorously whisk in a splash of warm milk until the clumps dissolve. If the sauce remains lumpy, you can blend it in a blender for a smooth consistency before returning it to low heat.
How long can I store leftovers?
Store any leftover BBQ Chicken Mac and Cheese in an airtight container in the fridge for up to 3 days. I often find that it tastes even better the next day! Just reheat it in the microwave or bake at 350°F (175°C) until warmed through. For best results, you may want to add a couple of splashes of milk to keep it moist.
Can I freeze BBQ Chicken Mac and Cheese?
Yes, you can freeze BBQ Chicken Mac and Cheese! To do this, let the dish cool completely, then portion it into airtight containers or freezer bags. It can be stored in the freezer for up to 3 months. When you’re ready to enjoy it, simply thaw overnight in the fridge, and reheat in the oven at 350°F (175°C) until warmed through for a cozy meal that's ready to go!
How can I make this dish healthier?
Of course! To make BBQ Chicken Mac and Cheese healthier, consider incorporating whole grain elbow macaroni and reducing the amount of cheese by using a lower-fat cheese option. You can also sneak in some veggies, like steamed broccoli or spinach, which will add fiber and nutrients without compromising flavor. Keep the BBQ sauce portion in check to limit added sugars, or opt for a homemade, lighter version.
Can pets eat BBQ Chicken Mac and Cheese?
It's best to avoid sharing BBQ Chicken Mac and Cheese with your pets, as cheese can be hard on their digestion, and BBQ sauces often contain ingredients like onions and garlic that are toxic to pets. If you want to treat your furry friend, consider setting aside some plain, shredded chicken without any seasoning as a special snack!
Creamy BBQ Chicken Mac and Cheese for Cozy Nights
Equipment
- large pot
- saucepan
- baking dish
- spatula
- whisk
Ingredients
For the Pasta
- 1 pound elbow macaroni
For the Cheese Sauce
- 4 tablespoons unsalted butter or substitute with olive oil
- ¼ cup all-purpose flour
- 3 cups milk whole milk recommended
- 2 cups shredded cheddar cheese sharp flavor
- 1 cup shredded mozzarella cheese for a stretchy texture
- 1 teaspoon garlic powder or minced fresh garlic
- 1 teaspoon onion powder or substitute with finely chopped onions
- to taste salt
- to taste pepper
For the Chicken
- 2 cups cooked and shredded chicken breast leftover rotisserie chicken works great
- 1 cup BBQ sauce choose your favorite brand or homemade
Toppings (Optional)
- ½ cup breadcrumbs for a crunchy topping
- to taste sliced green onions for garnish
- to taste chopped fresh parsley for garnish
Instructions
Cooking Steps
- Preheat your oven to 350°F (175°C). Bring a large pot of salted water to a boil and cook 1 pound of elbow macaroni according to package instructions until al dente, about 7-8 minutes. Drain and set aside.
- In a large saucepan over medium heat, melt 4 tablespoons of unsalted butter. Gradually stir in ¼ cup of flour, cooking for about 1 minute until golden and forming a roux.
- Slowly whisk in 3 cups of milk into the roux until smooth. Continue cooking, stirring frequently, until it thickens slightly, about 3-5 minutes.
- Reduce heat to low and fold in 2 cups of shredded cheddar cheese and 1 cup of mozzarella cheese, stirring until melted. Season with garlic powder, onion powder, salt, and pepper.
- Add the cooked macaroni to the cheese sauce, stirring until fully coated.
- In a separate bowl, mix 2 cups of chicken with 1 cup of BBQ sauce. Fold this mixture into the macaroni and cheese.
- Transfer the mixture to a greased 9x13 inch baking dish and spread evenly.
- For a crunchy topping, sprinkle ½ cup of breadcrumbs over the top if desired.
- Bake in the preheated oven for 20-25 minutes until golden and bubbling. Keep an eye on it for the perfect color.
- Cool for about 10 minutes, then garnish with green onions and parsley before serving.


Leave a Reply