
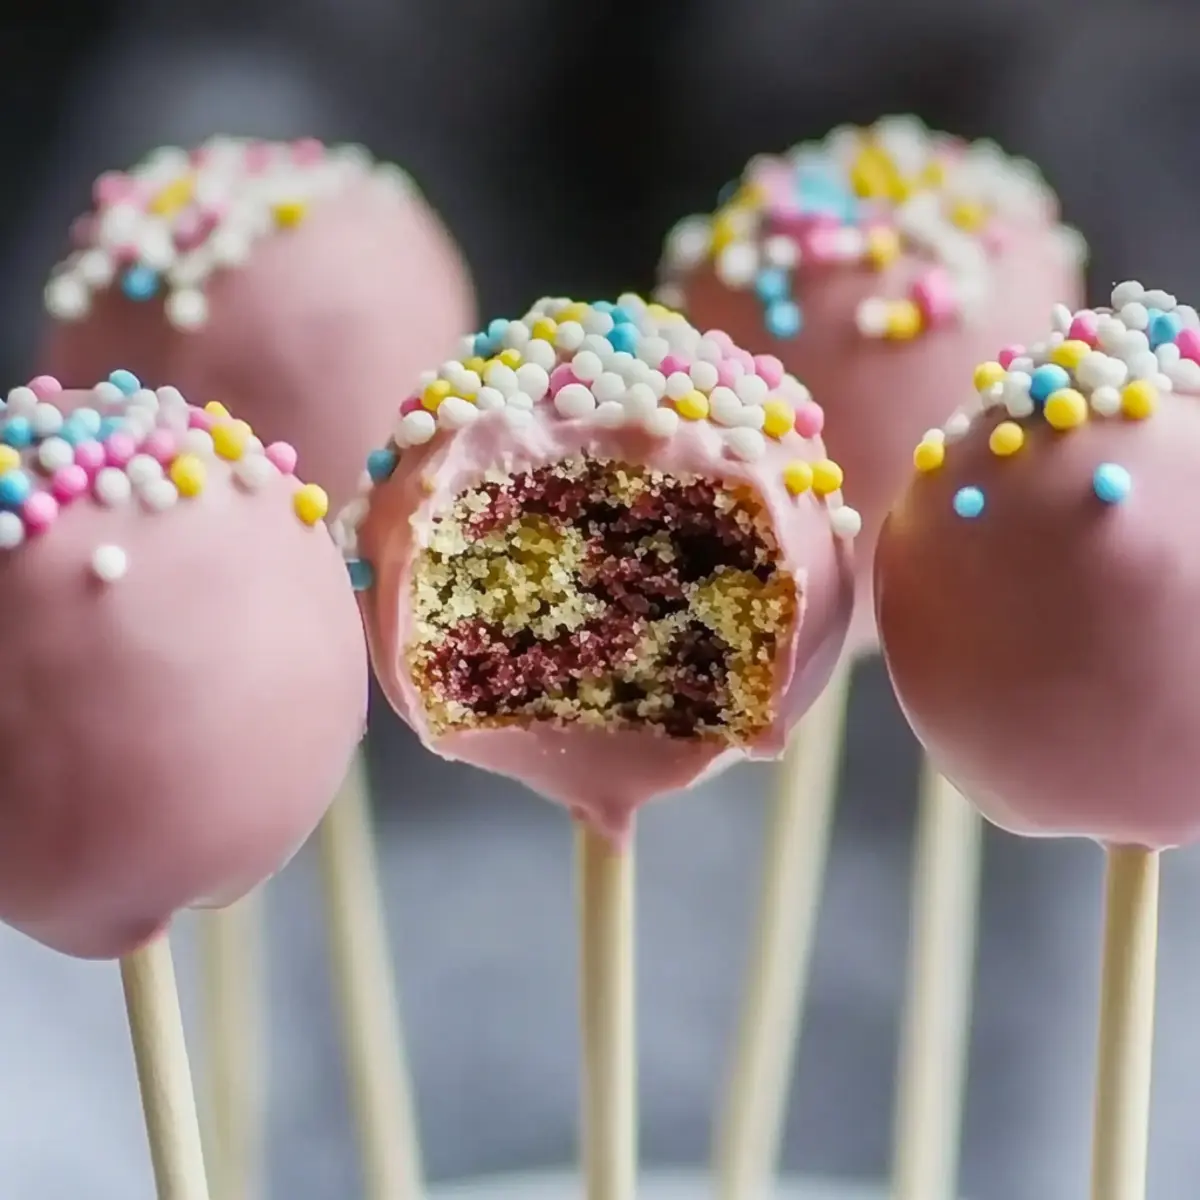
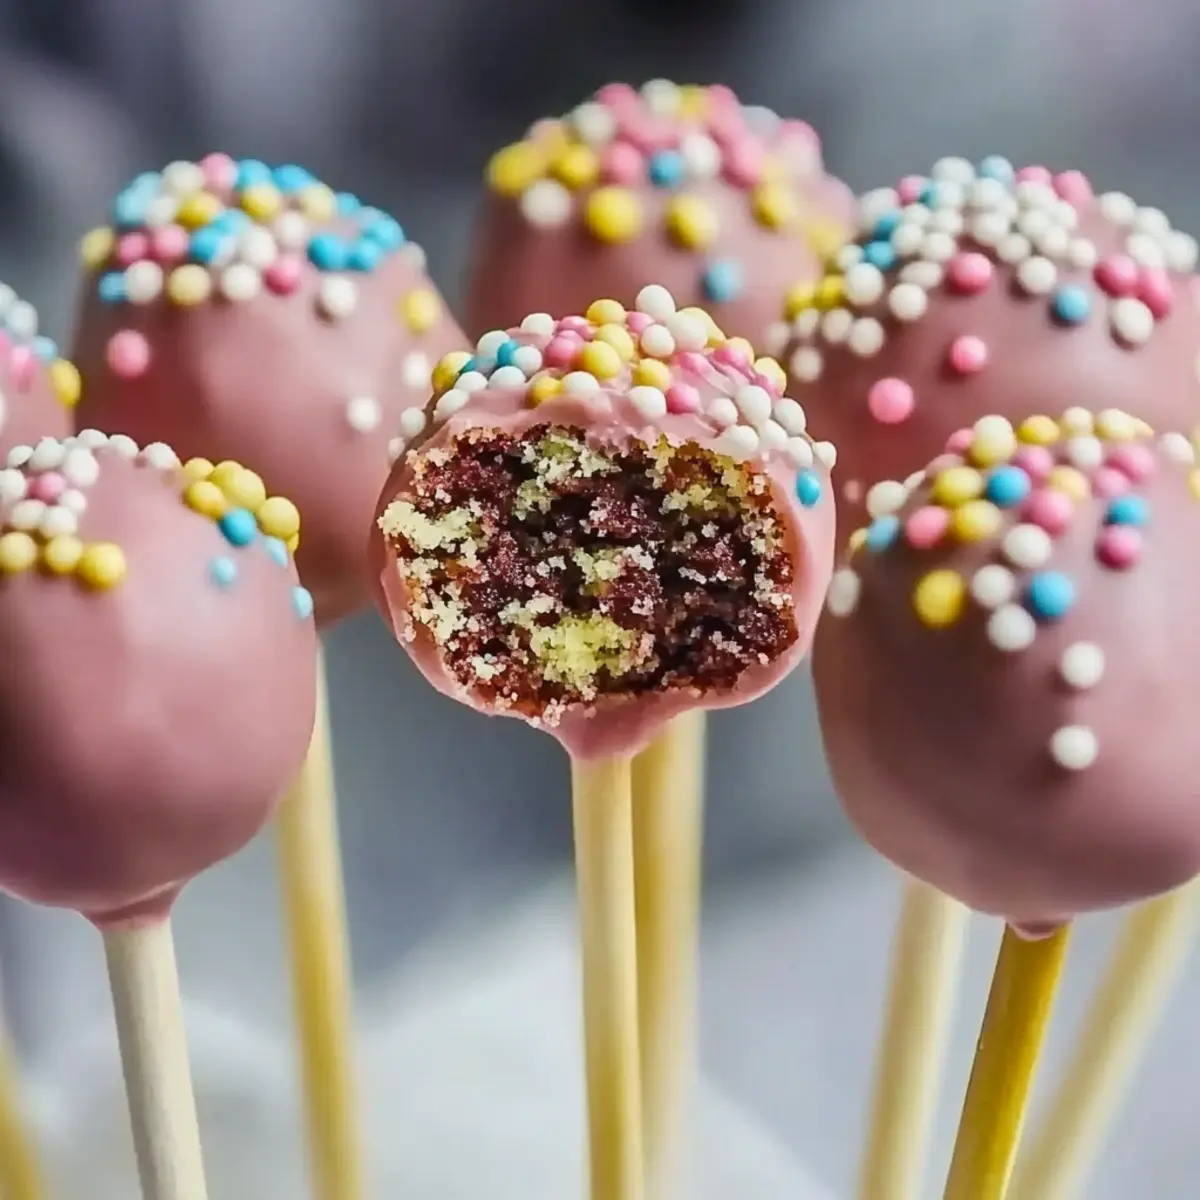
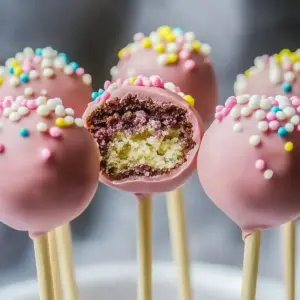
As I rummaged through my pantry one rainy afternoon, a lightbulb moment struck me: what if I could recreate the joy of those delightful little treats from my favorite coffee shop? Yes, I'm talking about cake pops! This Starbucks Cake Pop Recipe captures all that whimsy in a simple, homemade way. The thrill of creating these charming bites is matched only by the fact that they are a huge crowd-pleaser and a fantastic way to use up leftover cake scraps. With just a handful of ingredients and minimal time invested, you’ll be able to impress friends and family alike with your confectionery skills. Who’s ready to indulge in some sweet nostalgia? Let’s dive into the world of cake pops together!

Why Are Cake Pops So Irresistible?
Delightful Variety: Cake pops allow you to experiment with different flavors and decorations, making them perfect for any occasion.
Quick and Easy: With just 15 minutes of prep and straightforward steps, you’ll have delightful treats ready in no time.
Perfect for Leftovers: Wondering what to do with leftover cake? This recipe transforms those scraps into delicious cake pops, minimizing waste.
Crowd-Pleasing Treats: These creations are not just visually appealing but also a hit at parties, potlucks, and cozy get-togethers. Pair them with a delightful drink like a Strawberry Champagne Cake for an unforgettable experience!
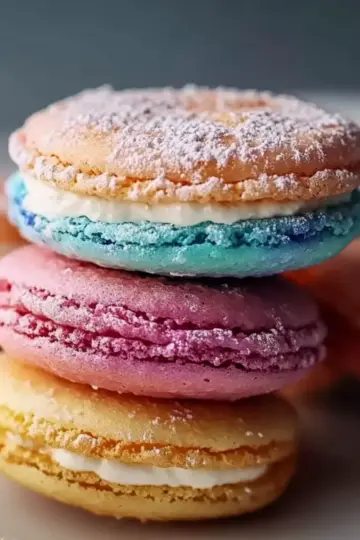
Customizable Fun: Decorate using your favorite toppings—think colorful sprinkles, nuts, or drizzle to personalize each bite. Your guests will love the attention to detail!
Get ready to impress with these homemade cake pops that remind us of our favorite cafe indulgences!
Cake Pops Ingredients
• Create the magic of cake pops with these simple yet essential ingredients!
For the Cake Mixture
- Cake crumbs – 1 cup of leftover cake works perfectly to kickstart your cake pop adventure.
- Frosting – ½ cup helps bind the cake crumbs, resulting in a wonderfully moist and flavorful interior.
For Assembly
- Lollipop sticks – 20 sticks to transform your cake balls into fun pops to share and enjoy.
- Chocolate or candy melts – Perfect for coating; this adds a delicious outer layer that brings your cake pops to life.
With these ingredients, you're all set to recreate that irresistible café experience right in your kitchen!
Step‑by‑Step Instructions for Cake Pops
Step 1: Combine Cake Crumbs and Frosting
In a large mixing bowl, combine 1 cup of cake crumbs with ½ cup of frosting. Using your hands or a spatula, mix until the ingredients form a cohesive dough. The mixture should feel moist and hold together without crumbling. This stage sets the foundation for your delicious cake pops!
Step 2: Form into Balls
Take small portions of the cake mixture and roll them into uniform balls, each about the size of a golf ball. Place the formed balls on a lined baking sheet, leaving some space between them. This ensures they don’t stick together as they chill. They should look smooth and round, ready for the next step!
Step 3: Chill the Cake Balls
Refrigerate the cake balls for about 30 minutes. Chilling will help them firm up, making it easier to insert the lollipop sticks without breaking. After 30 minutes, check that they are firm to the touch; they should hold their shape well when you gently press them.
Step 4: Melt the Chocolate
While the cake balls chill, melt your chocolate or candy melts according to the package instructions, typically over a double boiler or in the microwave at 30-second intervals. Stir until the coating is completely smooth and glossy. This melted chocolate is what gives your cake pops the delicious outer layer.
Step 5: Insert Lollipop Sticks
Take a lollipop stick and dip its end into the melted chocolate, coating it lightly. Insert the stick about halfway into each chilled cake ball; this helps the stick secure as the chocolate firms up. Repeat this process until all the cake balls are ready, ensuring the sticks are centered.
Step 6: Dip the Cake Pops
Carefully dip each cake ball into the melted chocolate, covering it completely. Allow the excess coating to drip back into the bowl, twisting gently to shake off any extra. The cake pops should be fully coated and glistening, making them irresistibly tempting!
Step 7: Set the Cake Pops
Stand the dipped cake pops upright in a styrofoam block or a cardboard box with holes. This helps them maintain their shape as the chocolate hardens. Look for a stable surface and ensure the pops don’t touch each other—this will keep them looking beautiful without smudges.
Step 8: Decorate Your Pops
Once the coating has set slightly but is still tacky, sprinkle colorful decorations or additional melted chocolate on top of the cake pops. Get creative with designs; this is your chance to personalize each treat! Let your imagination run wild while showcasing your artistic flair.
Step 9: Let Them Hardern
Allow the cake pops to sit at room temperature or in the refrigerator until the coating hardens completely, which usually takes about 15 minutes. Once set, they’re perfect for serving! Admire your beautifully crafted cake pops—your family and friends will be delighted to enjoy them.
How to Store and Freeze Cake Pops
Room Temperature: Store cake pops in a cool, dry area for up to 3 days. Ensure they’re in an airtight container to maintain freshness and prevent them from drying out.
Fridge: To extend freshness, keep your cake pops in the refrigerator for up to 1 week in an airtight container. This also helps retain their delicious flavor and moistness.
Freezer: For longer storage, wrap each cake pop individually in plastic wrap and place them in a freezer-safe bag. They can be frozen for up to 3 months without losing their taste.
Reheating: Thaw frozen cake pops in the fridge overnight before serving. Avoid microwaving, as this can affect their texture and coating, but they can still be enjoyed cool!
Make Ahead Options
These delightful cake pops are perfect for busy home cooks who want to save time without sacrificing flavor! You can prepare the cake mixture (cake crumbs and frosting) up to 24 hours in advance; just store it in an airtight container in the refrigerator to keep it fresh and moist. When you're ready to continue, form the mixture into balls and chill for about 30 minutes, as instructed. The dipped cake pops can also be made in advance; simply coat them, decorate as desired, and refrigerate for up to 3 days. This way, you can serve these sweet treats with ease, ensuring they remain just as delicious as when freshly made!
What to Serve with Starbucks Cake Pops
Creating the perfect spread around these delightful treats can elevate your dessert experience to a whole new level.
- Rich Hot Chocolate: A warm cup of hot chocolate perfectly complements the sweetness of cake pops, providing a comforting balance.
- Vanilla Ice Cream: Creamy vanilla ice cream offers a delightful contrast to the moist cake pops, enhancing their flavor and texture.
- Fresh Berries: Juicy strawberries or raspberries add a fresh, tart element that cuts through the sweetness of the cake pops, making each bite more exciting.
- Coffee or Espresso: Enjoying cake pops with a cup of coffee or espresso maximizes the indulgence, creating a sweet and bittersweet pairing that coffee lovers will adore.
- Fruit-Infused Sparkling Water: Refreshing and light, a fruit-infused sparkling water brings a bubbly zest that complements the sweetness of the cake pops without overwhelming the palate.
- Chocolate Dipped Fruit: For those who adore chocolate, serving chocolate-dipped strawberries alongside your cake pops enhances the dessert experience, adding layers of flavor.
Whatever you choose, these pairings will not only look amazing on your table but will also make enjoying your cake pops an even more delightful journey!
Cake Pops Variations & Substitutions
Feel free to get creative with these variations that can elevate your homemade cake pops!
-
Dairy-Free: Substitute frosting with a dairy-free alternative and use dairy-free chocolate melts to keep it allergy-friendly.
You can still enjoy a delightful treat without compromising on flavor! -
Flavor Packed: Use flavored cake crumbs like lemon or chocolate to add a new twist to your cake pops.
This simple switch can transport your taste buds to a whole new delicious dimension! -
Nutty Crunch: Add chopped nuts to the cake mixture for a delightful crunch in every bite.
Almonds, walnuts, or pecans can be mixed in for added texture and flavor! -
Fruity Finesse: Incorporate a fruit puree into the frosting for a tangy surprise—think raspberry or strawberry!
It adds a delightful hint of freshness that pairs perfectly with the sweet chocolate coating. -
Spicy Kick: Add a pinch of cinnamon or cayenne pepper to the cake mixture for a surprising warmth.
This unexpected flavor can take your cake pops to a whole new level, enticing adventurous palates! -
Colorful Coatings: Use colored candy melts for vibrant, themed cake pops suitable for any celebration.
Imagine pink for a birthdaybash or festive green and red for the holidays; the options are nearly endless! -
Chocolate Drizzle: Create a beautiful drizzle of white or dark chocolate on top after the coating hardens for a gourmet finish.
Not only does this enhance the visual appeal, but it also adds another layer of deliciousness!
For even more cake adventures, check out our delicious Strawberry Roll Cake or decadent Cherry Poke Cake recipes, perfect for those sweet cravings!
Expert Tips for Cake Pops
-
Perfectly Mixed: Ensure your cake crumbs and frosting are combined thoroughly to avoid dry spots. The mixture should feel moist for delicious cake pops.
-
Chill Time Matters: Don’t skip the chilling step! It’s crucial for maintaining shape and making it easy to insert the lollipop sticks without crumbling the balls.
-
Smooth Coating: Make sure your chocolate is smooth and not too thick; this helps achieve a glossy finish on your cake pops. Thinned chocolate will coat better and look more appealing.
-
Decorate Wisely: Add toppings while the coating is still slightly tacky. This ensures sprinkles or drizzles adhere perfectly, making for beautifully decorated cake pops.
-
Storage Tips: Keep your finished cake pops in a cool, dry place to maintain their shape and taste. Airtight containers work wonders for freshness!
With these tips, you’ll be well on your way to creating stunning, crowd-pleasing cake pops!
Starbucks Cake Pop Recipe FAQs
How do I select the best cake crumbs for my cake pops?
Absolutely! The best cake crumbs for your cake pops come from freshly baked cakes that are moist rather than dry. Look for cakes that have had a little time to cool, as very warm cake might crumble too much during mixing. You can use any flavor you love; chocolate, vanilla, or red velvet all work beautifully!
What is the best way to store leftover cake pops?
Very simple! For room temperature storage, keep your cake pops in an airtight container for up to 3 days. If you want to extend their life, move them to the refrigerator, where they’ll stay fresh for up to 1 week. Just make sure they’re sealed to avoid drying out—they taste best when soft and delicious!
Can I freeze cake pops, and if so, how?
Definitely! To freeze your cake pops, wrap each one individually in plastic wrap. Place the wrapped cake pops in a freezer-safe bag or container, and they’ll keep well for up to 3 months. When you're ready to enjoy them, thaw them in the refrigerator overnight instead of the microwave to prevent sogginess. This way, you preserve the delightful texture!
What should I do if my cake pops are falling off the stick?
No worries! If your cake pops are not holding onto the stick, this could be due to not chilling them long enough before insertion, or the cake mixture may be too crumbly. To fix this, ensure that your cake balls are firm after chilling for at least 30 minutes. If they still fall off, try to keep the chocolate coating slightly cooler and thicker, as this can help improve stick retention.
Are there any dietary considerations for making cake pops?
Absolutely! If you're considering dietary restrictions, you can easily modify this recipe. For gluten-free options, use a gluten-free cake mix, or for dairy-free, substitute the frosting with a vegan alternative. Just be sure to check the labels on any chocolate or candy melts for allergens, especially if your guests have nut sensitivities. Always a good idea to tailor your treats to everyone's needs!
How can I make my cake pops more colorful and festive?
So fun! When decorating your cake pops, use vibrant colorful sprinkles, edible glitter, or drizzle melted candy melts in different colors over the chocolate coating while it’s still tacky. Use a piping bag for more intricate designs or let your kids help for a delightful creative session. The more, the merrier when it comes to decorating!
Deliciously Easy Cake Pops You'll Love to Make at Home
Equipment
- mixing bowl
- baking sheet
- double boiler
- Styrofoam block or cardboard box
Ingredients
For the Cake Mixture
- 1 cup cake crumbs leftover cake works perfectly
- ½ cup frosting helps bind the cake crumbs
For Assembly
- 20 sticks lollipop sticks
- 1 pack Chocolate or candy melts for coating
Instructions
Step-by-Step Instructions for Cake Pops
- Combine 1 cup of cake crumbs with ½ cup of frosting in a large mixing bowl. Mix until the ingredients form a cohesive dough.
- Roll small portions of the cake mixture into uniform balls, each about the size of a golf ball. Place them on a lined baking sheet.
- Refrigerate the cake balls for about 30 minutes to firm them up.
- Melt chocolate or candy melts as per package instructions until completely smooth.
- Dip the end of each lollipop stick in melted chocolate and insert it halfway into each chilled cake ball.
- Dip each cake ball into the melted chocolate, ensuring they are fully coated.
- Stand the dipped cake pops in a styrofoam block or a cardboard box to harden.
- Once the chocolate coating is slightly set, decorate with colorful toppings.
- Allow the cake pops to sit until the coating hardens completely, usually about 15 minutes.

Leave a Reply