
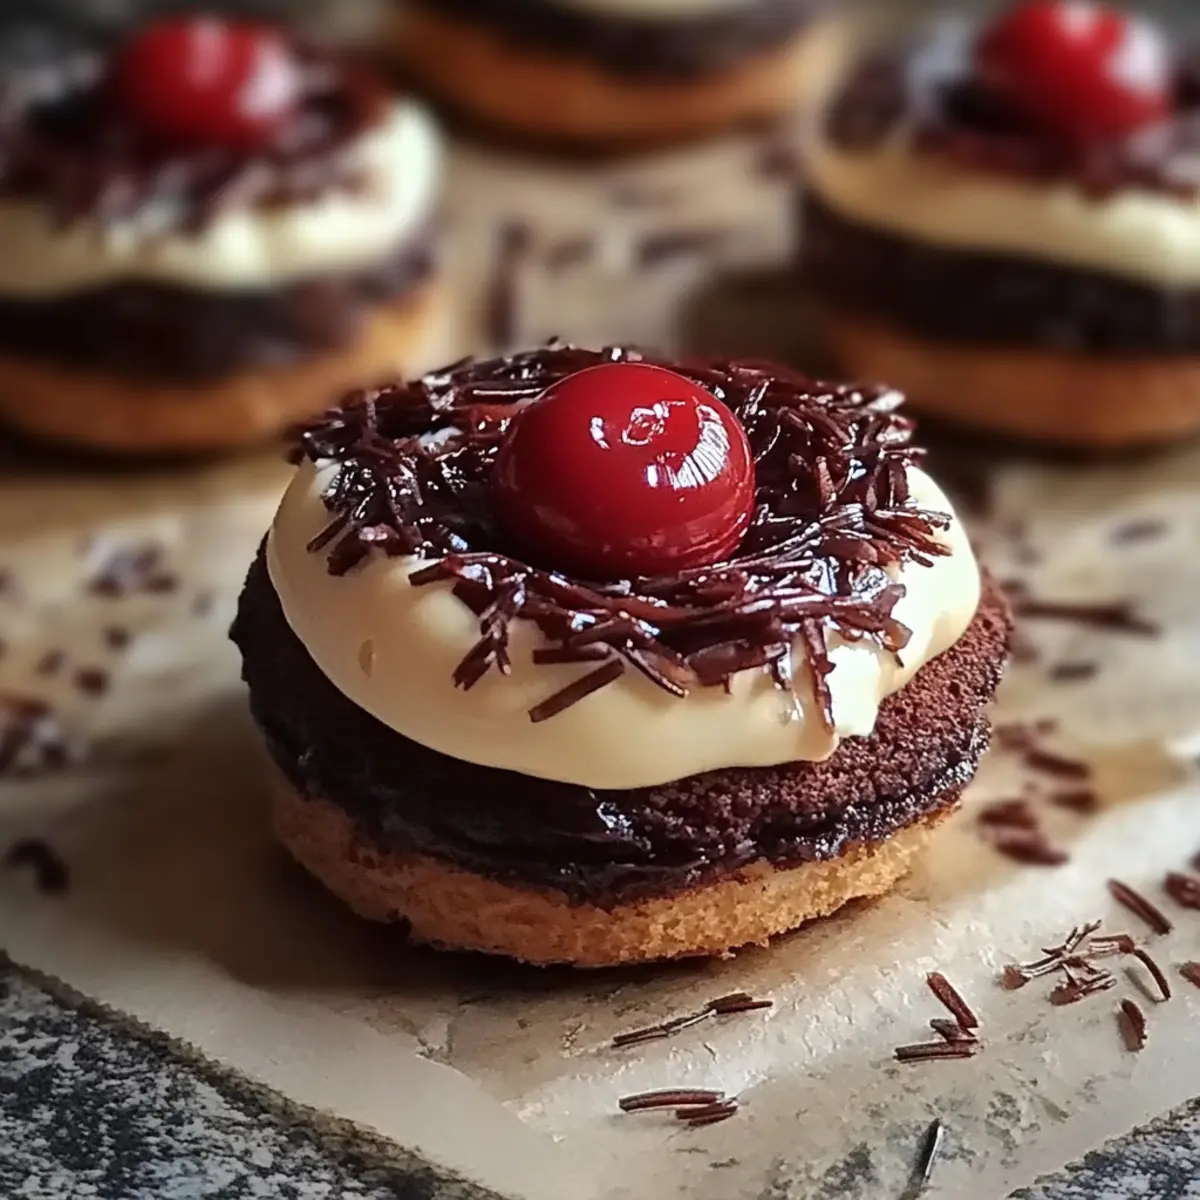
As the holiday season approaches, my kitchen transforms into a delightful land of festive aromas and cheerful laughter. This year, I’m bringing a touch of magic to the table with my Black Forest Christmas Cookies. These little treasures are not only a nod to the classic cake but also a quick and easy way to spread joy among friends and family. You’ll love how they combine rich chocolate with a sweet cherry preserves surprise, topped with a heavenly whipped cream that elevates every bite. Perfect for cookie exchanges or simply indulging yourself while cozied up by the fire, these cookies are bound to be your new holiday tradition. Curious to know just how easily you can make these delicious treats? Let’s dive into the recipe!

Why will you adore these cookies?
Simplicity: You’ll be amazed at how easy it is to whip up these Black Forest Christmas Cookies. With just a few straightforward steps, even novice bakers can create impressive results.
Rich Experience: The decadent cocoa blend paired with cherry preserves creates a symphony of flavors that will bring a cozy warmth to your holiday gatherings.
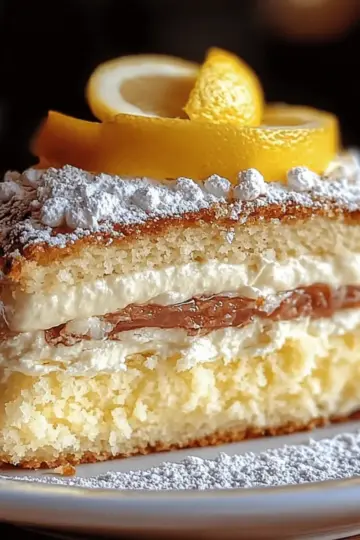
Beautifully Festive: Topped with whipped cream and dark chocolate shavings, these cookies not only taste divine but look stunning as well—perfect for impressing your guests!
Versatile Delight: Enjoy them during festive parties or as a delightful treat while relaxing at home. They’re sure to disappear faster than you can bake them!
Make Ahead: With a simple chilling time, you can prep the dough for these cookies in advance. Just roll, bake, and decorate when you're ready!
These mouthwatering treats will surely become a favorite in your holiday baking lineup. For more delightful holiday ideas, check out my tips on storing baked goods and learn about perfect baking techniques for cookies!
Black Forest Christmas Cookie Ingredients
Dive into the scrumptious details of these delightful cookies!
For the Cookie Dough
• 1 cup butter, softened – The base of richness; ensure it's at room temperature for easy mixing.
• 1 ½ cups granulated sugar – This sweetener adds the perfect level of sweetness to your delectable cookies.
• 2 large eggs – Eggs help bind the ingredients and create a tender texture.
• 1 teaspoon vanilla extract – Adds warmth and depth to your cookie flavor.
• 2 cups all-purpose flour – The backbone of the dough, providing structure to the cookie.
• ¾ cup cocoa powder – This is what makes these Black Forest Christmas Cookies wonderfully chocolatey!
• 1 teaspoon baking powder – Gives your cookies the perfect rise, ensuring they're fluffy rather than dense.
• ½ teaspoon baking soda – Helps with the leavening process and adds a bit of chewiness.
• ¼ teaspoon salt – A pinch of salt enhances the flavors of the other ingredients and balances the sweetness.
For the Topping
• 1 cup heavy cream – Whipped to fluffy perfection, this will crown your cookies with a dreamy layer.
• ½ cup powdered sugar – Sweetens the whipped cream and adds stability, ensuring those peaks hold.
• Cherry preserves – These provide a sweet, fruity surprise that complements the chocolate beautifully.
• Dark chocolate shavings – For a final decorative touch, enhancing both flavor and visual appeal!
With these ingredients ready, you're well on your way to creating delightful Black Forest Christmas Cookies that will delight friends and family alike!
Step‑by‑Step Instructions for Black Forest Christmas Cookies
Step 1: Cream the Butter and Sugar
In a large mixing bowl, combine 1 cup of softened butter with 1 ½ cups of granulated sugar. Using an electric mixer, beat on medium speed until the mixture is light and fluffy, which should take about 3-5 minutes. This step is crucial for creating the perfect texture in your Black Forest Christmas Cookies, as it incorporates air for a lighter cookie.
Step 2: Add the Eggs and Vanilla
Next, mix in 2 large eggs one at a time, ensuring each egg is well incorporated before adding the next. Follow this by stirring in 1 teaspoon of vanilla extract. The incorporation of these wet ingredients should make the mix smoother, resulting in a rich and creamy batter that promises deliciously sweet Black Forest Christmas Cookies.
Step 3: Combine the Dry Ingredients
In a separate bowl, sift together 2 cups of all-purpose flour, ¾ cup of cocoa powder, 1 teaspoon of baking powder, ½ teaspoon of baking soda, and ¼ teaspoon of salt. Gradually add this dry mixture to the wet ingredients, mixing just until combined. The dough should be soft and slightly sticky, a sign that you’re on your way to scrumptious cookies.
Step 4: Chill the Cookie Dough
Once the dough is formed, cover the bowl tightly with plastic wrap and refrigerate for at least 1 hour. Chilling the dough helps it firm up, making it easier to scoop and shape. This step not only deepens the flavors but ensures your Black Forest Christmas Cookies maintain their lovely shape while baking.
Step 5: Preheat and Prepare
Preheat your oven to 350°F (175°C). Meanwhile, line a baking sheet with parchment paper to prevent sticking. This ensures even baking and easy cleanup. Your well-prepared baking surface will be ready for the delightful cookies that are about to come from the oven!
Step 6: Shape the Cookies
After chilling, scoop tablespoon-sized portions of dough and roll them into smooth balls. Place these cookie balls on the lined baking sheet, spacing them about 2 inches apart. As they bake, they’ll spread slightly, resulting in perfectly formed Black Forest Christmas Cookies that are delightfully chewy in the center and slightly crisp on the edges.
Step 7: Bake the Cookies
Slide the baking sheet into your preheated oven and bake for 10-12 minutes. You’ll know they’re ready when the edges are set, and the tops appear slightly cracked. Remove them from the oven, allowing the cookies to cool on the baking sheet for 5 minutes before transferring them to a wire rack to cool completely.
Step 8: Whip the Cream
While the cookies cool, in a clean mixing bowl, whip together 1 cup of heavy cream and ½ cup of powdered sugar. Beat on high speed until stiff peaks form, which should take about 3-5 minutes. This delectable whipped cream will crown your Black Forest Christmas Cookies, adding a creamy touch that everyone will love.
Step 9: Assemble and Decorate
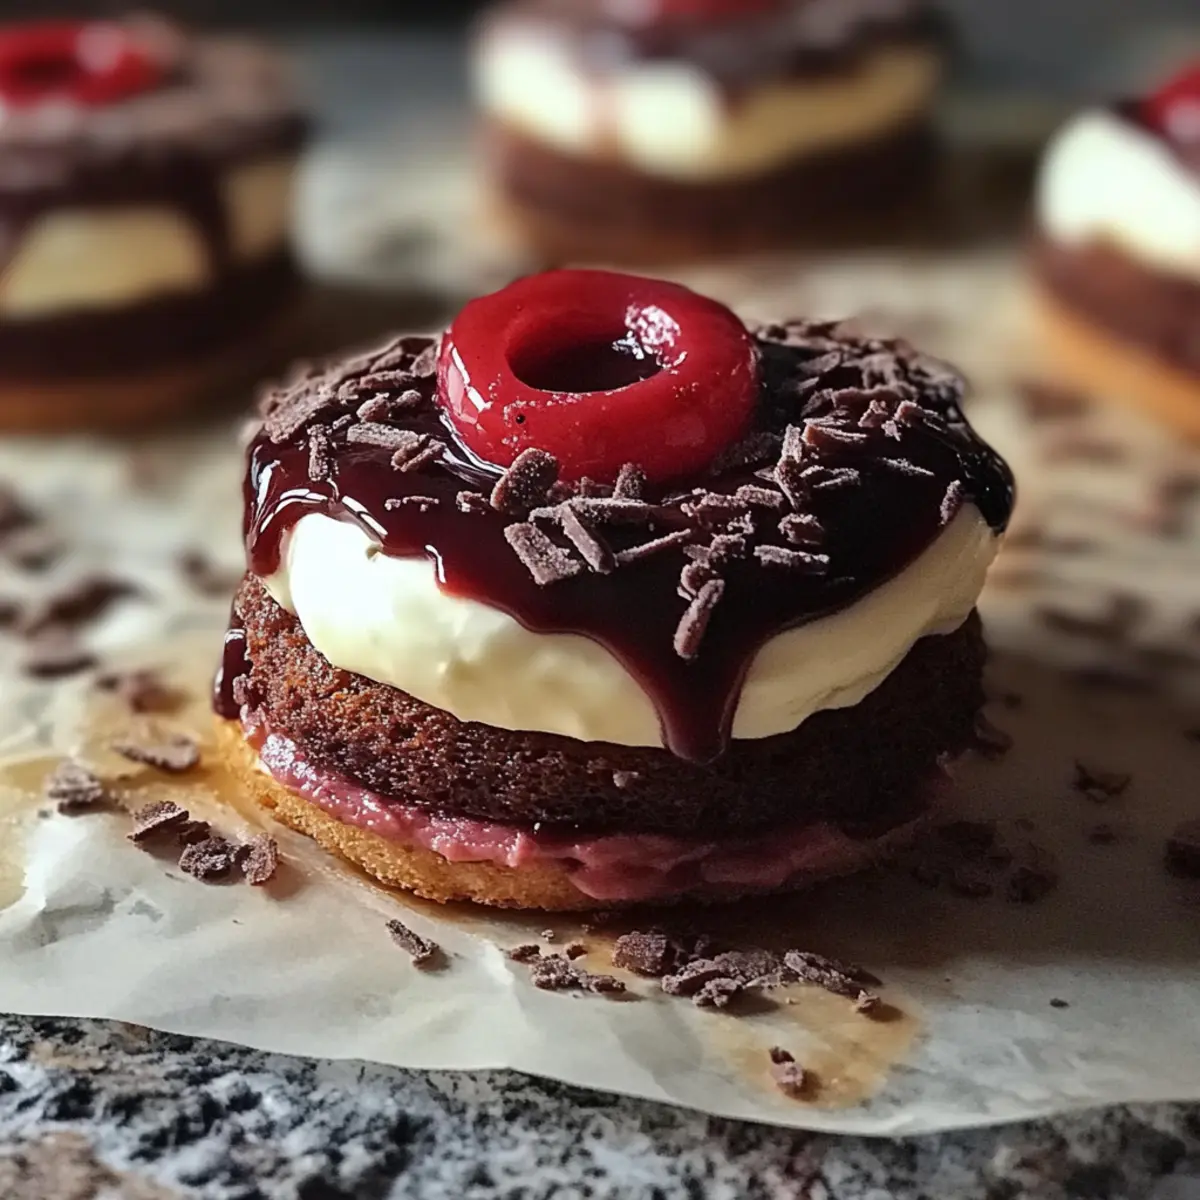
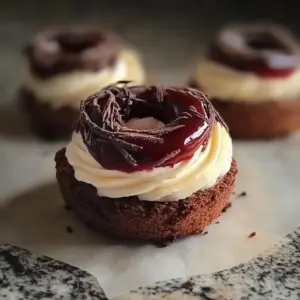
Once the cookies have cooled, spread a generous tablespoon of cherry preserves on top of each cookie. Then, pipe or dollop the whipped cream over the preserves, followed by a sprinkle of dark chocolate shavings. This finishing touch elevates your cookies into a festive delight, perfect for sharing during the holiday season!
Black Forest Christmas Cookies Variations
Feel free to explore these scrumptious variations and make this recipe your own!
-
Gluten-Free: Substitute all-purpose flour with a 1:1 gluten-free baking blend. You won’t miss the traditional flour!
-
Boozy Delight: Add a splash of cherry liqueur or Amaretto to the dough for an adult twist; this will infuse each bite with warmth.
-
Nutty Addition: Fold in ½ cup of chopped walnuts or pecans for extra crunch. The nutty flavor complements the chocolate perfectly!
-
Lower Sugar: Use a sugar substitute like stevia or coconut sugar to cut down the sweetness while still enjoying delicious cookies.
-
Peppermint Surprise: Incorporate ½ teaspoon of peppermint extract into the whipped cream for a festive and minty finish; it pairs beautifully with chocolate.
-
Vegan Option: Swap the eggs for flaxseed meal and use coconut cream in place of heavy cream. These cookies will still bring joy to your table!
-
Dried Fruit: Consider adding chopped dried cherries or cranberries to the dough to introduce another layer of fruity flavor.
-
Cinnamon Kick: Sprinkle a bit of cinnamon into the dough for a warm, spiced flavor that echoes the holiday season.
Each variation opens a new door to creativity in your holiday baking. And while you're at it, don’t forget to check out my tips on storing baked goods and baking techniques that will help you master the art of cookie making!
What to Serve with Black Forest Christmas Cookies
Cozy up and indulge in a delicious holiday meal that pairs perfectly with these festive treats.
-
Rich Hot Chocolate: A warm, creamy hot chocolate will amplify the cocoa richness in the cookies and create a lovely pairing of flavors.
-
Roasted Chestnuts: The earthy crunch of roasted chestnuts provides a delightful textural contrast to the soft, flavorful cookies, making for a nostalgic holiday snack.
-
Spiced Eggnog: The vibrant flavors of spiced eggnog wonderfully complement the chocolate and cherry, creating a merry contrast that enhances your festive experience.
-
Classic Vanilla Ice Cream: A scoop of vanilla ice cream melts beautifully on top of warm cookies, offering a luscious creaminess that balances sweetness and texture perfectly.
-
Christmas Fruitcake: The fruity and festive elements of a traditional fruitcake create a delightful symphony of flavors and textures when enjoyed alongside the decadent cookies.
-
Minty Green Tea: This refreshingly herbal beverage cuts through the richness of the cookies, offering a soothing balance for your palate as you savor your festive treats.
Embrace these pairings to transform your cookie experience into a truly enchanting holiday celebration!
Storage Tips for Black Forest Christmas Cookies
Room Temperature: Store these cookies in an airtight container at room temperature for up to 3 days. This keeps them deliciously soft and helps maintain their irresistible texture.
Fridge: If you prefer to keep them a bit longer, these Black Forest Christmas Cookies can be stored in the refrigerator for up to 5 days in an airtight container. Just let them come to room temperature before serving.
Freezer: For longer storage, freeze the cookies in a single layer on a baking sheet until firm, then transfer them to a freezer-safe container. They can last up to 3 months, ready for a sweet treat anytime!
Reheating: When you’re ready to enjoy frozen cookies, simply let them thaw at room temperature or warm them briefly in the microwave for 10-15 seconds. Enjoy the freshness!
Expert Tips for Black Forest Christmas Cookies
-
Perfect Dough Consistency: The dough should be slightly sticky but manageable. If it's too wet after chilling, dust with a touch more flour before shaping.
-
Chill Properly: Let the dough chill for at least one hour, as this firms it up and helps the cookies retain their shape while baking.
-
Don’t Overbake: Keep an eye on your cookies; they should be set around the edges but still slightly soft in the center. Overbaking can lead to a dry texture.
-
Customize Your Toppings: Feel free to swap cherry preserves for raspberry or strawberry, depending on your taste preferences. The key is to keep that delightful combination with the whipped cream.
-
Storage Savvy: Store these delectable Black Forest Christmas Cookies in an airtight container to maintain their freshness. Enjoy them within five days, or freeze for longer enjoyment!
Make Ahead Options
Preparing your Black Forest Christmas Cookies ahead of time is a fantastic way to save precious minutes during the busy holiday season! You can make the cookie dough up to 24 hours in advance; just cover it tightly with plastic wrap and refrigerate. This chilling not only deepens the flavors but also ensures the dough stays workable. If you want to save even more time, you can bake the cookies and store them in an airtight container for up to 5 days at room temperature. When you're ready to serve, simply add the cherry preserves and whipped cream topping, then sprinkle with dark chocolate shavings for that delightful finish—this way, your cookies will be just as delicious and festive as if made fresh!
Black Forest Christmas Cookies Recipe FAQs
What kind of cocoa powder should I use for the cookies?
I recommend using high-quality unsweetened cocoa powder for the best flavor in your Black Forest Christmas Cookies. Look for brands that are labeled "natural" or "Dutch-process" as they provide a rich, deep chocolate taste that complements the cherry preserves beautifully.
How should I store the cookies, and how long will they last?
When stored properly in an airtight container, these cookies will last up to 5 days in the refrigerator or up to 3 months in the freezer. If you opt for refrigeration, let the cookies come to room temperature before serving to revive their delightful softness.
Can I freeze the cookie dough for later use?
Absolutely! You can freeze the unbaked cookie dough. After shaping the dough into balls, place them on a baking sheet lined with parchment paper and freeze until firm. Once solid, transfer them to a freezer-safe bag or container for up to 3 months. When you're ready to bake, there’s no need to thaw; just bake the frozen cookie balls for an extra minute or two.
What if the cookies spread too much while baking?
If your cookies spread too much, it might be due to the butter being too soft or not enough chilling time before baking. To prevent this, ensure your butter is softened to room temperature but not melted, and let the dough firm up in the fridge for at least 1 hour before scooping.
Are there any dietary considerations I should be aware of?
Yes, these cookies contain common allergens such as eggs, dairy (butter and heavy cream), and gluten (flour). If you're baking for someone with allergies, consider using egg substitutes (like flax eggs) and gluten-free flour alternatives. For non-dairy options, try coconut cream instead of heavy cream and dairy-free butter in the dough.
How can I ensure the whipped cream holds its shape?
To achieve perfectly stable whipped cream for your Black Forest Christmas Cookies, make sure to use cold heavy cream and a chilled mixing bowl. Beat the mixture on high speed until stiff peaks form, which usually takes about 3-5 minutes. Adding powdered sugar helps stabilize it as well, so your beautiful dollops of cream won't droop!
Deliciously Decadent Black Forest Christmas Cookies to Savor
Equipment
- mixing bowl
- Electric Mixer
- baking sheet
- parchment paper
Ingredients
For the Cookie Dough
- 1 cup butter, softened ensure it's at room temperature for easy mixing
- 1.5 cups granulated sugar adds the perfect sweetness
- 2 large eggs helps bind the ingredients
- 1 teaspoon vanilla extract adds flavor depth
- 2 cups all-purpose flour provides structure
- 0.75 cups cocoa powder makes the cookies chocolatey
- 1 teaspoon baking powder ensures fluffy cookies
- 0.5 teaspoon baking soda adds chewiness
- 0.25 teaspoon salt enhances flavors
For the Topping
- 1 cup heavy cream whipped to fluffiness
- 0.5 cups powdered sugar sweetens and stabilizes the whipped cream
- cherry preserves sweet, fruity surprise
- dark chocolate shavings for decoration
Instructions
Step-by-Step Instructions
- Cream the butter and sugar until light and fluffy, about 3-5 minutes.
- Add the eggs one at a time, followed by the vanilla extract.
- In another bowl, sift the dry ingredients together and gradually mix into the wet ingredients.
- Cover and chill the dough for at least 1 hour.
- Preheat the oven to 350°F (175°C) and line a baking sheet with parchment paper.
- Shape the chilled dough into tablespoon-sized balls and place on the baking sheet.
- Bake for 10-12 minutes until edges are set.
- Cool the cookies on the baking sheet for 5 minutes before transferring them to a rack.
- Whip the cream with powdered sugar until stiff peaks form.
- Spread cherry preserves on each cookie and top with whipped cream and chocolate shavings.


Leave a Reply