
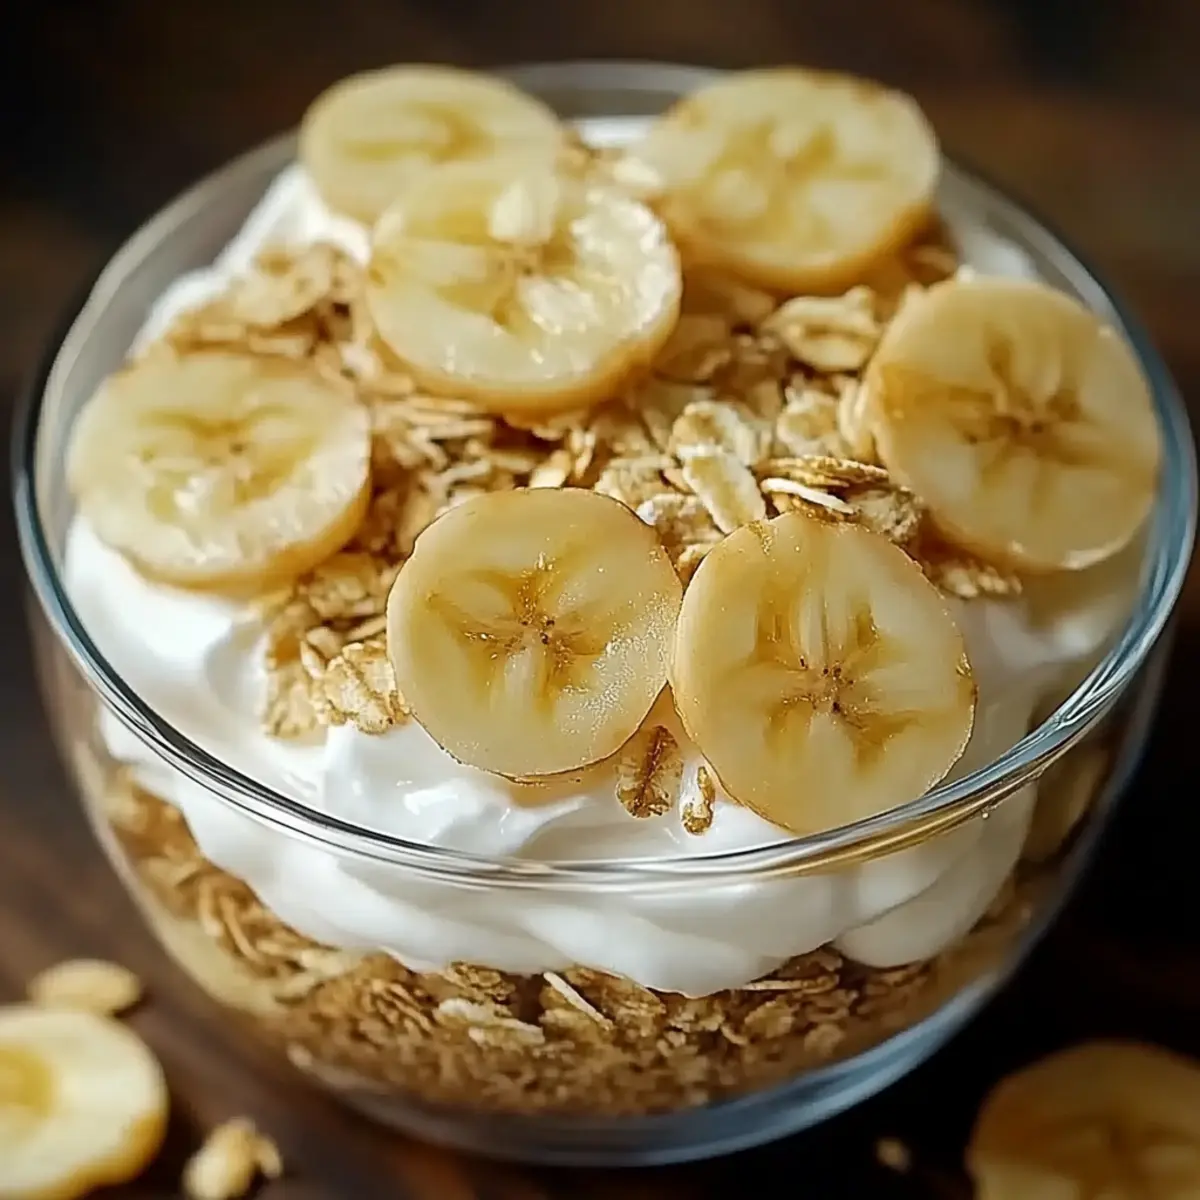
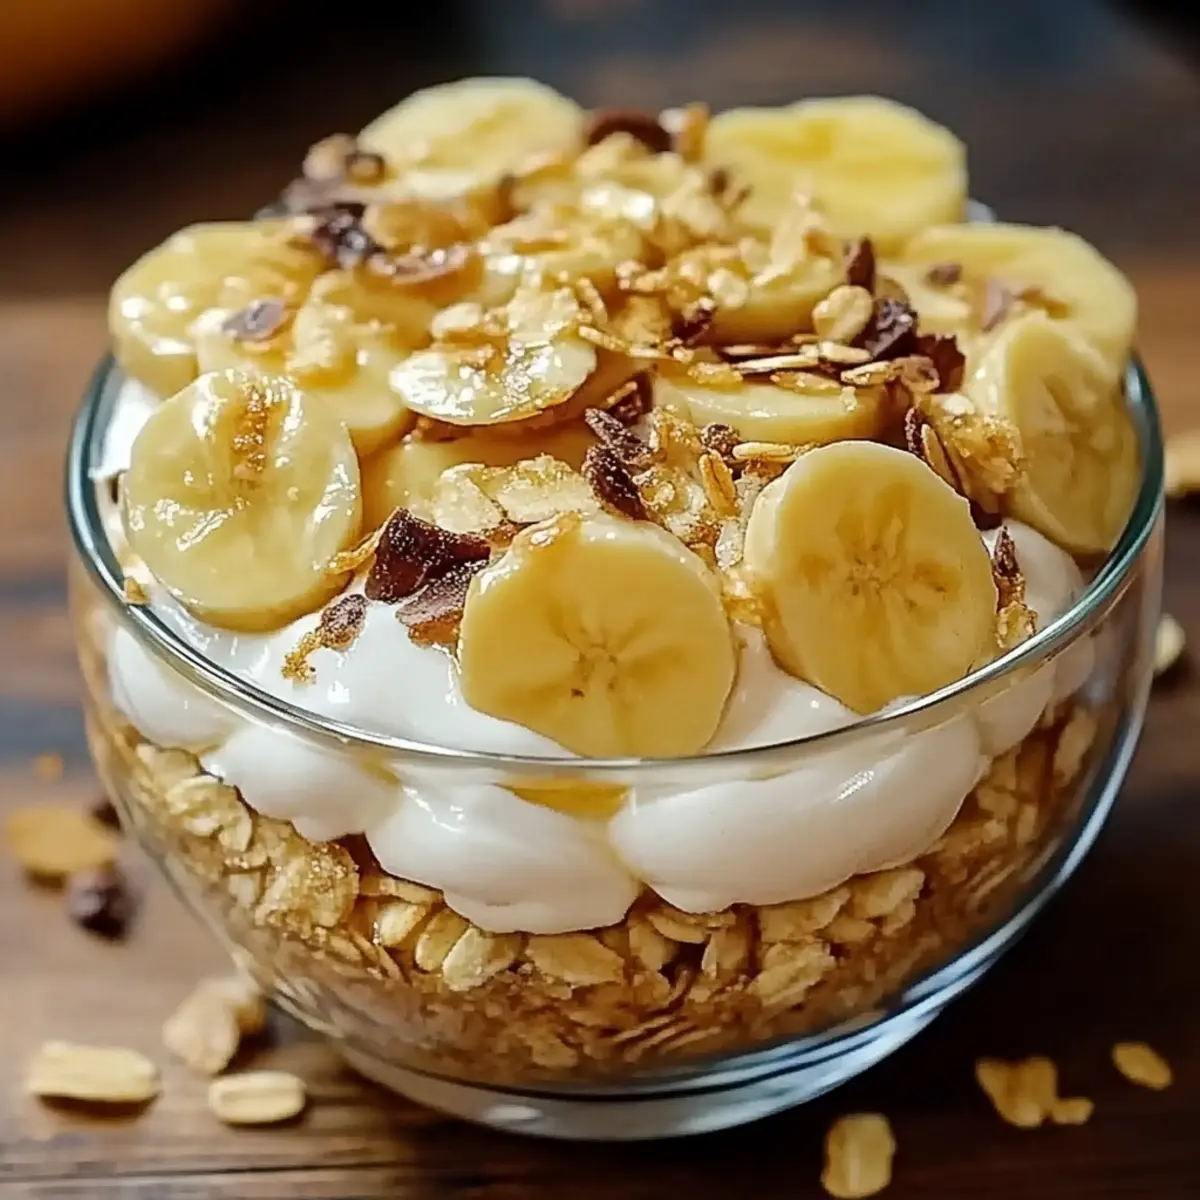
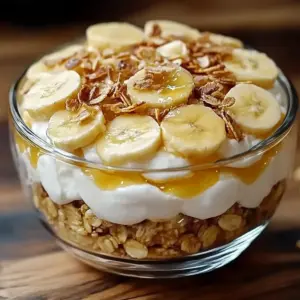
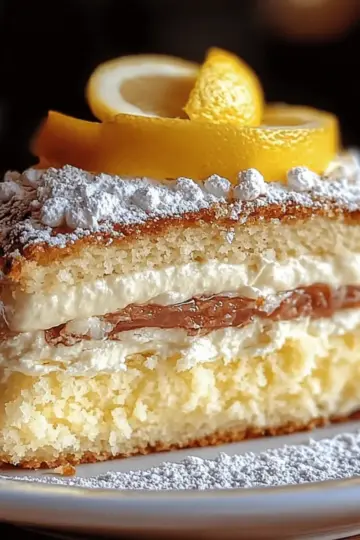
As I carefully peeled open the ripe bananas on my kitchen counter, a wave of nostalgia washed over me, transporting me back to family gatherings filled with laughter and love. It was during these moments that I discovered the charm of homemade Banana Pudding, a dessert that never failed to bring smiles to everyone’s faces. Not only is this old-fashioned recipe quick to whip up, but it also allows you to savor the delightful layers of creamy goodness, sweet bananas, and crunchy vanilla wafers. With just a handful of ingredients and a little patience while it chills, you’ll create a crowd-pleaser that echoes those cherished memories. Ready to elevate your dessert game and impress friends and family? Let’s dive into the world of Banana Pudding and uncover the secret to making this classic delight!
Why is this Banana Pudding special?
Nostalgic flavors come together in this traditional treat, evoking memories of grandma's kitchen. Easy to make, with just a handful of ingredients, this recipe welcomes even the busiest of cooks. Layered perfection showcases the delightful contrast between smooth pudding, sweet bananas, and crunchy vanilla wafers. Plus, it’s perfect for gatherings, making it a true crowd-pleaser. For those who adore comforting desserts, this homemade Banana Pudding is sure to satisfy every craving. Try it alongside our classic vanilla wafer recipe for an unforgettable dessert experience!
Banana Pudding Ingredients
Get ready to whip up a classic dessert that will warm your heart!
For the Pudding
- Milk – 2 cups of whole milk will yield the richest flavor and creaminess in your Banana Pudding.
- Granulated sugar – ½ cup adds just the right amount of sweetness; feel free to adjust to your taste!
- Cornstarch – ⅓ cup acts as a thickening agent for that perfect pudding consistency.
- Salt – ¼ teaspoon balances the sweetness, enhancing the overall flavor profile.
- Large eggs – 3 eggs give your pudding a luxurious, velvety texture; be sure to whisk them well!
- Unsalted butter – 2 tablespoons enrich the pudding, adding a delightful depth of flavor.
- Vanilla extract – 1 tablespoon for a warm aroma that elevates your Banana Pudding to the next level.
For the Layers
- Ripe bananas – 3 ripe bananas lend natural sweetness and that fresh, fruity flavor we crave.
- Vanilla wafers – 12 ounces of these crunchy delights provide a wonderful texture contrast to the creamy pudding.
With this simple array of ingredients, you're one step closer to creating an unforgettable Banana Pudding that takes you right back to days spent in Grandma's loving kitchen!
Step‑by‑Step Instructions for Banana Pudding
Step 1: Combine the Dry Ingredients
In a medium saucepan, combine 2 cups of milk, ½ cup of granulated sugar, ⅓ cup of cornstarch, and ¼ teaspoon of salt. Use a whisk to blend these ingredients together until the mixture is smooth and free of lumps. Place the saucepan over medium heat and continuously stir for about 3–4 minutes until it starts to heat up, making sure not to let it boil.
Step 2: Temper the Eggs
In a separate bowl, beat 3 large eggs until smooth. Gradually whisk in about a cup of the hot milk mixture from the saucepan to temper the eggs; this step is crucial to prevent curdling. Once mixed, pour the egg mixture back into the saucepan, stirring gently to combine everything.
Step 3: Cook the Pudding
Return the saucepan to the stove over medium heat, stirring continuously. Cook the mixture for about 8–10 minutes until it thickens and begins to bubble gently, which indicates it's ready. You'll know the Banana Pudding is done when it coats the back of a spoon beautifully and has a silky texture.
Step 4: Stir in Butter and Vanilla
Remove the saucepan from the heat once the pudding has thickened. Stir in 2 tablespoons of unsalted butter and 1 tablespoon of vanilla extract until fully incorporated, creating a rich and aromatic base for your Banana Pudding. The butter will melt nicely into the warm pudding, adding a luxurious finish.
Step 5: Layer the Ingredients
In a serving dish or individual cups, start layering your Banana Pudding by placing a layer of vanilla wafers at the bottom. Add a few slices of 3 ripe bananas on top, followed by a generous layer of the creamy pudding. Repeat these layers until you’ve used all ingredients, finishing with pudding on top for a beautiful presentation.
Step 6: Cover and Chill
To prevent a skin from forming on the surface, cover the assembled Banana Pudding with plastic wrap, pressing it directly onto the pudding. This ensures a smooth top layer. Place the dish in the refrigerator and chill for at least 4 hours, or overnight if time allows, allowing the flavors to meld beautifully.
Step 7: Serve and Enjoy
After chilling, your delicious Banana Pudding is ready to be served! Scoop out portions into bowls or cups and take a moment to savor the layers of creamy pudding, banana slices, and crunchy wafers. Each bite is a delightful taste of nostalgia that’s perfect for sharing with family and friends.

Make Ahead Options
These Creamy Banana Pudding cups are perfect for busy home cooks looking to save time! You can prepare the pudding mixture (steps 1-4) up to 24 hours in advance; just be sure to cover the pudding with plastic wrap pressed directly onto the surface to maintain its smooth texture. Additionally, you can layer the vanilla wafers and bananas (steps 5-6) a few hours before serving, but for optimal freshness, it's best to layer them no more than 3 hours ahead to prevent sogginess. When you're ready to serve, simply finish chilling the assembled pudding in the refrigerator for at least 4 hours, and you'll have a delightful dessert that calls to mind those warm, nostalgic family gatherings!
How to Store and Freeze Banana Pudding
Fridge: Keep your homemade Banana Pudding in the refrigerator for up to 3 days. Cover it tightly with plastic wrap to prevent any skin from forming and to maintain that creamy texture.
Freezer: While Banana Pudding is best enjoyed fresh, you can freeze it for up to 2 months. Layer the pudding in an airtight container, but note that the texture may change after thawing.
Thawing: When ready to enjoy, thaw the frozen Banana Pudding in the fridge overnight. Stir gently before serving to help restore its creamy consistency.
Reheating: Avoid reheating Banana Pudding as it’s meant to be enjoyed chilled. If it thickens too much after freezing, whisk in a bit of milk for a smoother texture.
Expert Tips for Perfect Banana Pudding
• Ingredient Quality: Use the freshest ripe bananas for the best flavor; overripe bananas can lead to an overly sweet pudding.
• Avoid Lumps: Whisk the dry ingredients thoroughly in the saucepan to prevent lumps in your Banana Pudding, ensuring a silky texture.
• Egg Tempering: Always temper the eggs slowly with hot milk to prevent curdling; this step is key for a smooth pudding consistency.
• Chill Time: Allow your Banana Pudding to chill for at least 4 hours to meld the flavors; overnight chilling enhances the taste and texture even more.
• Layering Technique: Start with a layer of wafers followed by bananas and pudding; repeat to create beautiful layers that showcase the dessert's appeal.
• Preventing Skin: Cover the pudding with plastic wrap directly on the surface before chilling; this simple tip will keep your Banana Pudding smooth and creamy.
What to Serve with Old-Fashioned Homemade Banana Pudding
Nothing rounds out a comforting dessert quite like the perfect pairings that enhance those delightful flavors.
- Fresh Berries: A mix of strawberries and blueberries brings a burst of freshness to balance the sweetness of the pudding.
- Whipped Cream: Light and fluffy, a dollop of whipped cream adds an airy texture that complements the creamy layers wonderfully.
- Caramel Sauce: Drizzling warm caramel sauce over the pudding adds a rich sweetness and an appealing contrast in flavors.
For a light and palate-cleansing experience, serve with tangy lemon sorbet; its tartness harmonizes beautifully with the sweet banana pudding. And don’t forget to pair it with a nice cup of coffee or tea to enhance the dessert experience. Each element works together to transform your Banana Pudding into a feast of flavors perfect for any gathering.
Banana Pudding Variations & Substitutions
Feel free to get creative and make this Banana Pudding your own with these delightful twists!
-
Dairy-Free: Substitute almond or coconut milk and use dairy-free butter for a creamy base that’s free from dairy.
-
Sugar-Free: Swap granulated sugar with a sugar alternative like stevia or monk fruit to create a guilt-free indulgence.
-
Banana Boost: Use flavored banana extract or add a layer of caramelized bananas for an extra sweet, rich flavor.
-
Texture Twist: For a crunchier texture, toss in some toasted nuts, like pecans or walnuts, between the layers for a delightful surprise.
-
Chocolate Lover's Delight: Drizzle chocolate sauce between layers or mix in cocoa powder to the pudding for a decadent chocolate banana pudding.
-
Tropical Vibes: Add diced pineapples and shredded coconut between layers to transform your dessert into a tropical paradise.
-
Spice It Up: Incorporate a dash of cinnamon or nutmeg to the pudding mix for a warm, aromatic flavor that elevates your classic dish.
-
Spicy Kick: For those who love heat, sprinkle in a small amount of cayenne pepper or chili powder to give your pudding a surprising kick of flavor.
With these variations, you’ll delight friends and family while bringing a personal touch to this cherished recipe! Looking for more great ideas? Consider trying it alongside our classic vanilla wafer recipe to complement your dessert with a homemade touch.
Old-Fashioned Homemade Banana Pudding Recipe FAQs
What kind of bananas should I use for Banana Pudding?
Absolutely! The best bananas for your Banana Pudding are ripe ones with a few brown spots on the peel, indicating they’re at their peak sweetness. Overripe bananas can be too mushy, resulting in a cloyingly sweet pudding, while underripe bananas might not offer the flavor you want. Aim for that perfect ripe stage for the best results!
How long can I store Banana Pudding in the fridge?
You can keep your homemade Banana Pudding in the refrigerator for up to 3 days. Just be sure to cover it tightly with plastic wrap to prevent any skin from forming or drying out. It’s always best enjoyed fresh, but it will still bring joy for those few days!
Can I freeze Banana Pudding? If so, how?
Indeed! While Banana Pudding is best served fresh, you can freeze it for up to 2 months. To freeze, layer the pudding in an airtight container, separating layers with parchment paper if necessary. When you’re ready to enjoy, simply thaw it in the refrigerator overnight. Remember, the texture may change after freezing, so give it a gentle stir to help restore creaminess before serving!
What should I do if my pudding is lumpy?
If you find lumps in your Banana Pudding, don’t worry! Simply mash the lumps with the back of a spoon or use a sieve to strain them out. If you think you might run into this issue, whisk the dry ingredients thoroughly when combining them with the milk to ensure a silky smooth texture right from the start.
Is Banana Pudding safe for people with allergies?
When making Banana Pudding, it contains ingredients like milk and eggs that can trigger allergies. For a safe alternative, consider using dairy-free milk and egg substitutes like silken tofu or a commercial egg replacer. Always check the ingredients in store-bought vanilla wafers as they can also contain allergens. As always, it’s best to consult with your doctor if you have concerns about food allergies.
How do I prevent a skin from forming on the Banana Pudding?
To prevent that undesirable skin from forming on your Banana Pudding, cover it with plastic wrap directly touching the surface before chilling. This creates a barrier that keeps the steam in, ensuring your pudding stays smooth and creamy. A little extra care here will save you from those pesky bits later on!
Creamy Banana Pudding That Will Take You Back to Grandma's Kitchen
Equipment
- Medium saucepan
- whisk
- mixing bowl
Ingredients
For the Pudding
- 2 cups whole milk for richest flavor and creaminess
- ½ cup granulated sugar adjust to taste
- ⅓ cup cornstarch for thickening
- ¼ teaspoon salt balances sweetness
- 3 large eggs whisk well
- 2 tablespoons unsalted butter for richness
- 1 tablespoon vanilla extract for aroma
For the Layers
- 3 ripe bananas for natural sweetness
- 12 ounces vanilla wafers for texture contrast
Instructions
Step-by-Step Instructions
- Combine the dry ingredients: In a medium saucepan, combine milk, sugar, cornstarch, and salt. Whisk until smooth.
- Temper the eggs: In a bowl, beat the eggs and gradually whisk in hot milk mixture. Pour back into saucepan.
- Cook the pudding: Stir over medium heat until thickened and bubbling gently, about 8-10 minutes.
- Stir in butter and vanilla: Remove from heat, stir in butter and vanilla until well blended.
- Layer the ingredients: In a dish, layer wafers, banana slices, and pudding. Repeat until ingredients are used.
- Cover and chill: Press plastic wrap onto the surface and chill for at least 4 hours.
- Serve and enjoy: Scoop portions and savor the delightful layers of flavor.


Leave a Reply